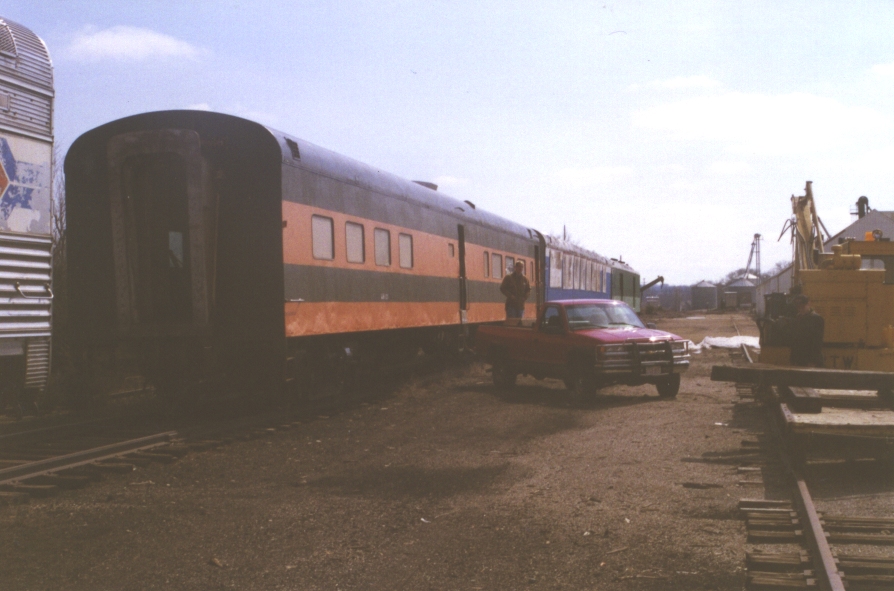
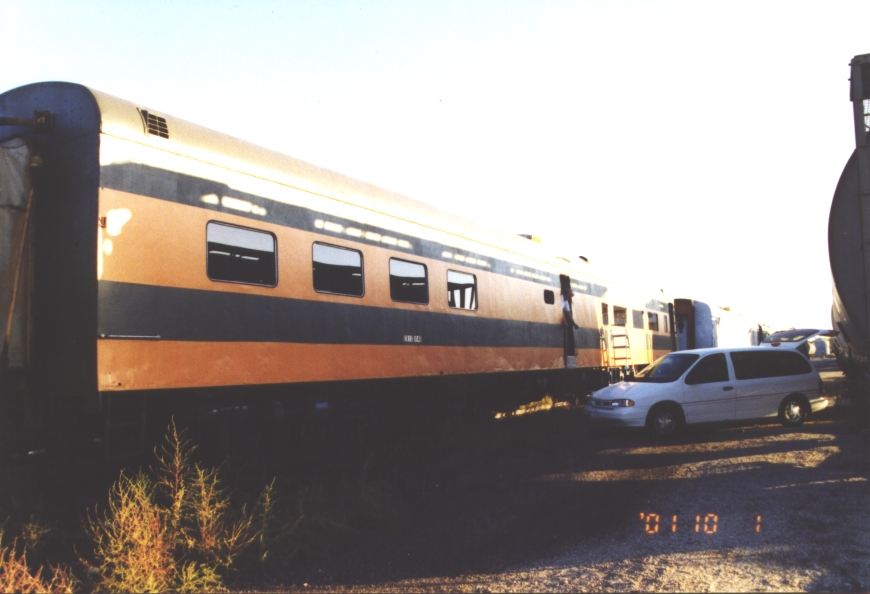
In my thinking about acquiring 1146, obviously I fell in love with the idea long before I actually looked at the car. (One piece of advice to any prospective car owner: Do your homework before you jump in. An important task is doing a detailed inspection. Inside, outside, underneath. These things are old, worn out if they haven't been maintained, and subject to the natural law that any ordered system descends into chaos.) So, I took a trip to Randolph to look at 1146. These are the pictures I brought back.
|
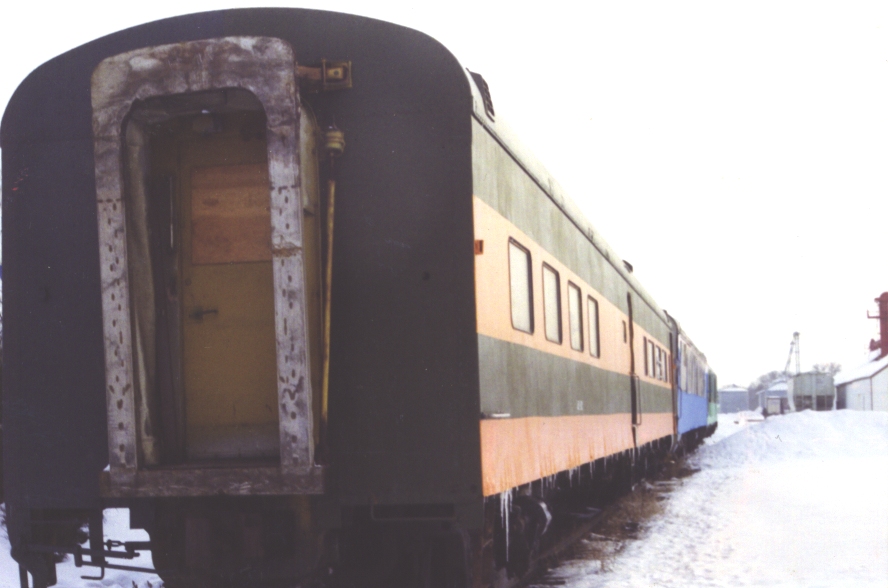
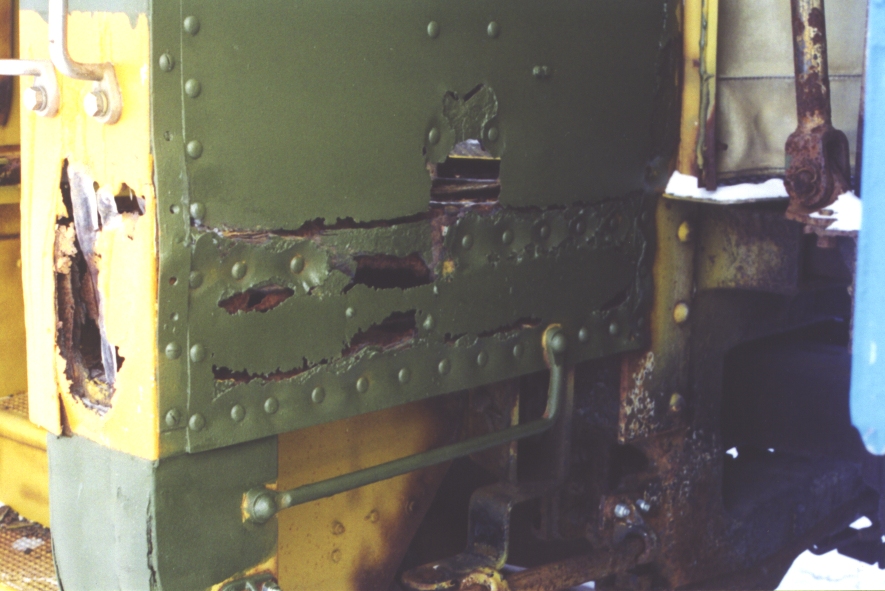
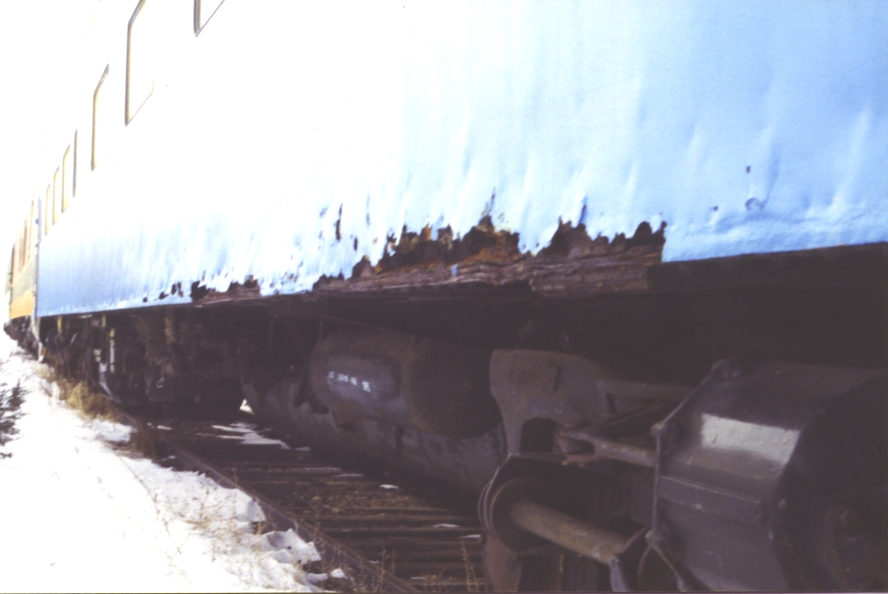
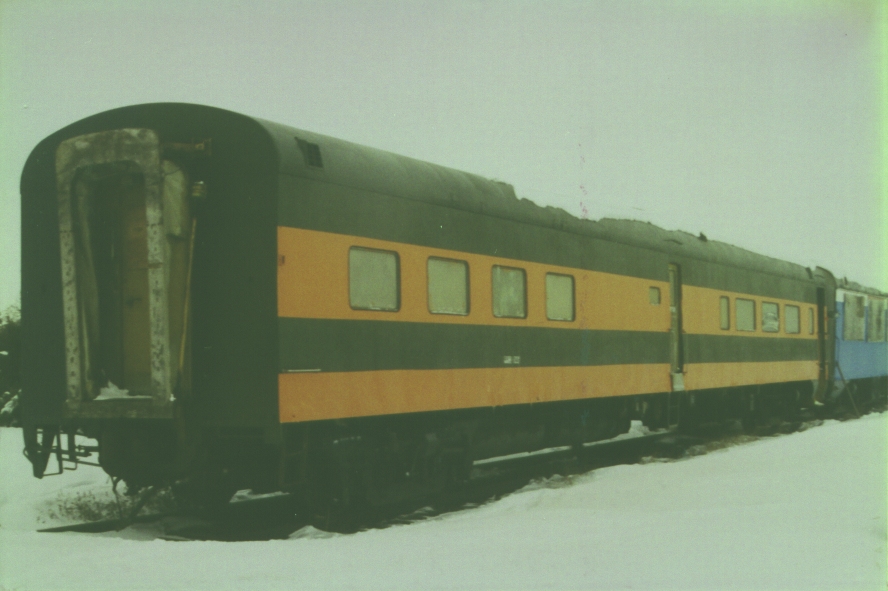
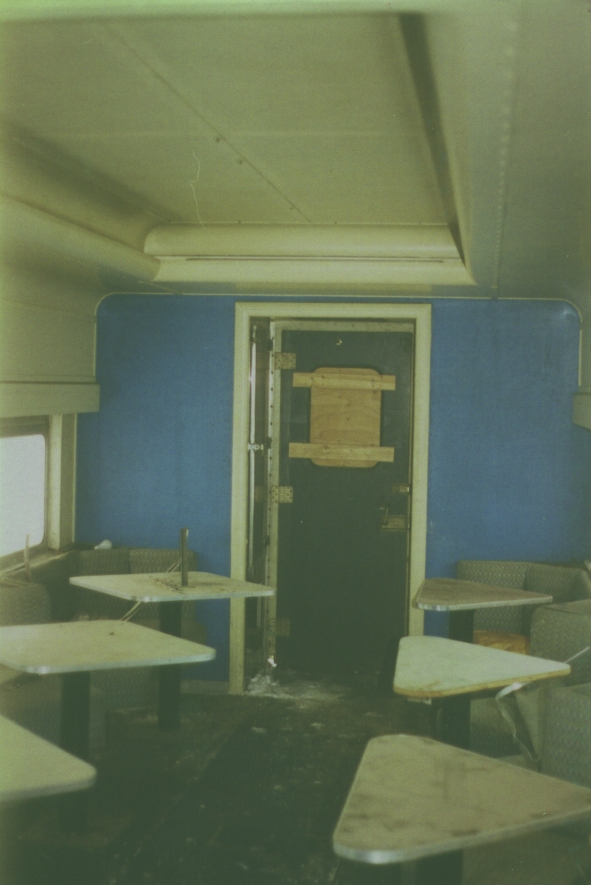
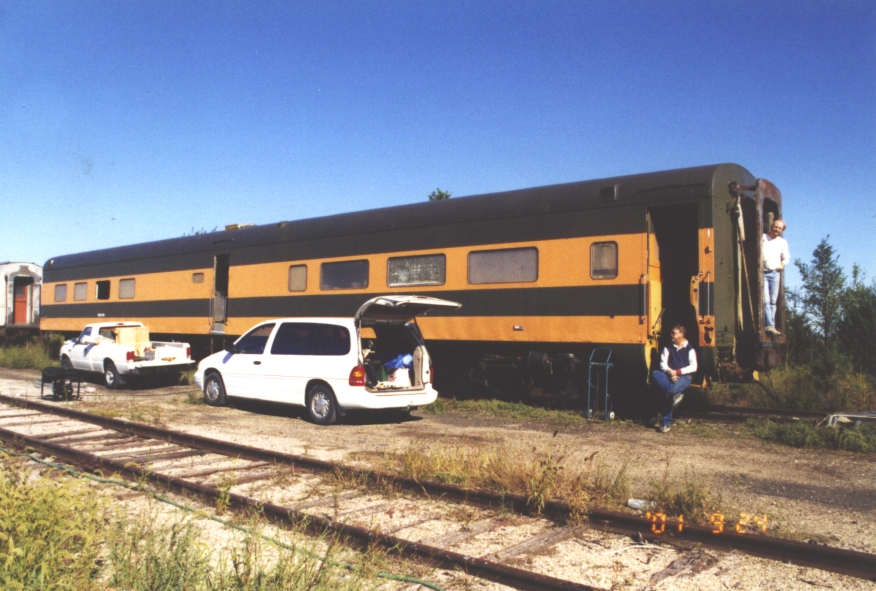
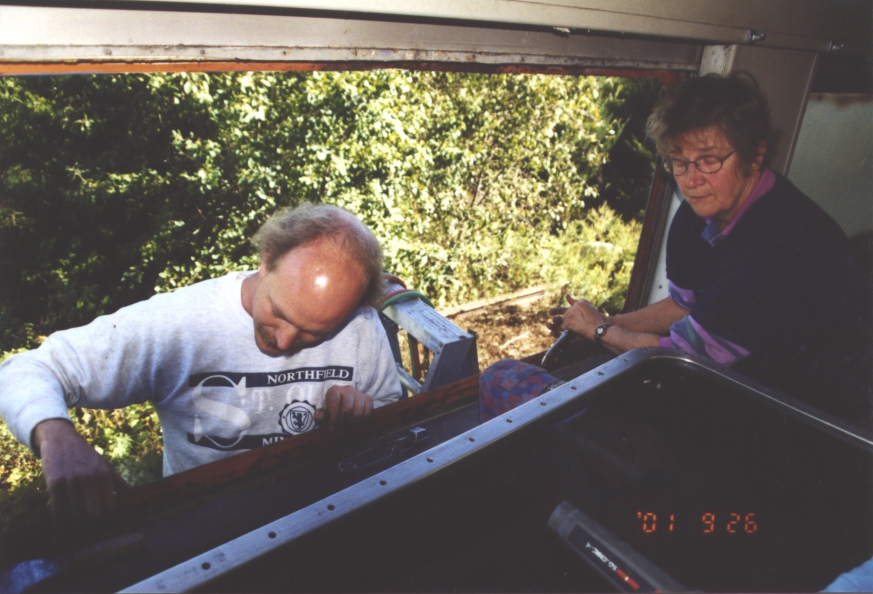
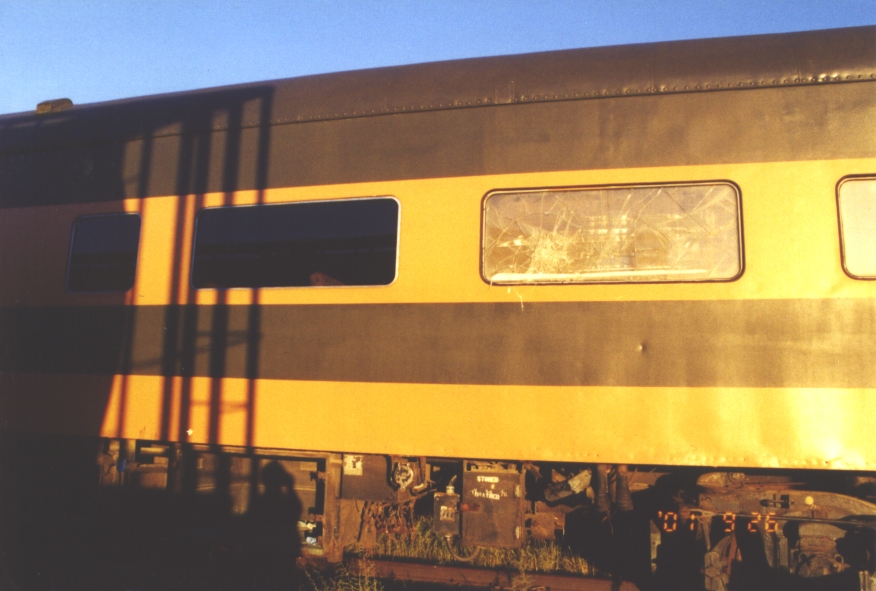
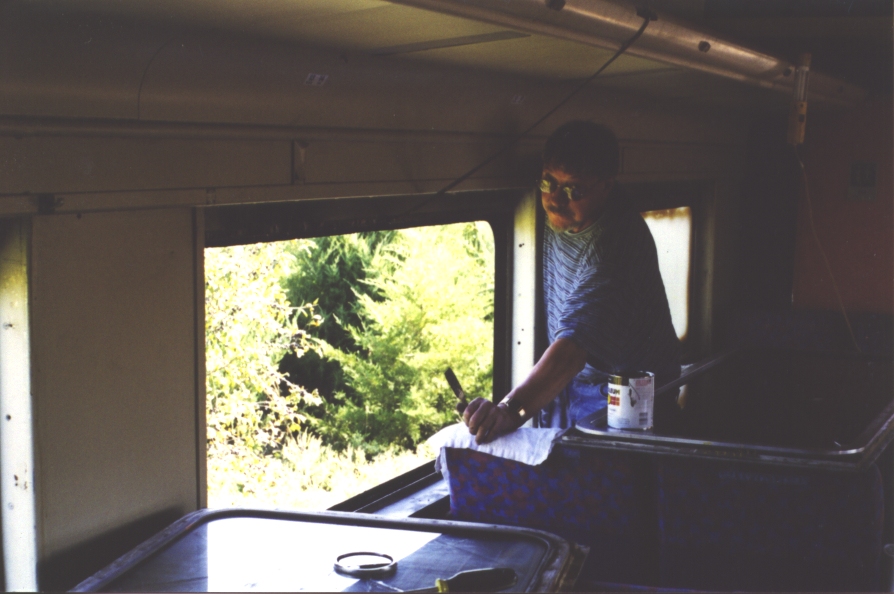
1146's AL corner. One marker light socket is missing. It's steel horse-shoe and canvas diaphragm is complete, but the left buffer spring is collapsed. Amtrak applied a stainless face over the mild steel - there is some rust bulging. One 32vdc trainline connector and part of a diaphragm light fixture are still there. The end door window is missing, as are the tail gate and diaphragm curtain equipment. There is some rust bulging at the bottom of the end sheet. The type-H titelock coupler, with its suspension and uncoupling lever, appear intact. The side windows are 1970's vintage plexiglas. They've gone opaque from UV exposure, been scratched, and hit with sandblasting and primer overspray. A few are glass, and they're broken. Bob painted the car with a roller and applied some tin and caulk patches to rust perforations along the eaves. All the legally required safety appliances (grab irons and steps) are there. The carbody has a slight lean to its right - compare to the car behind it. This could be missing weight, truck problems, or uneven track. |
|
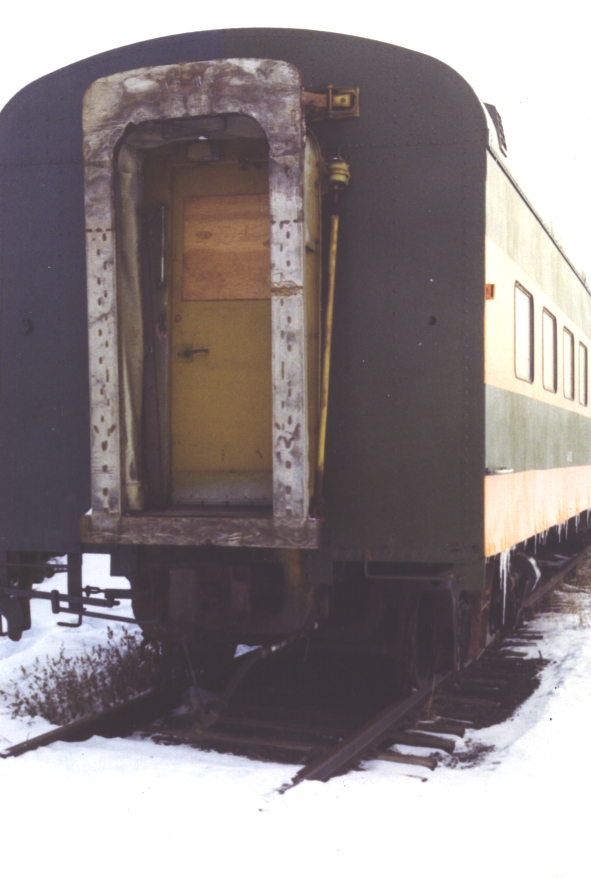
Same view, but in portrait to capture end detail. Something not really visible, but important, is that the steam heat trainline is still there, although the car-to-car coupling has been taken off the end. Very few outfits still use steam heat. Most either run in summer only, convert it to a hot water/antifreeze loop, or chop it out and convert to electric heat. The piping is almost certainly wrapped in asbestos insulation, which can be expensive to remove and dispose of properly. Also notice there are no electrical connectors left or right of the coupler. This car has never been converted to head-end power. Another place to look carefully - especially on ends without vestibule steps - is the bottom of the door frame. There are thick steel I-beams on either side of the door, called the collision posts. They were riveted to the frame before any other superstructure. If there are rust perforations in the door frame, there may be extensive rust damage to the collision posts as well, right at floor level. This compromises their ability to prevent cars from telescoping in a wreck, and should be fixed. |
|
1146's AR corner. That side sill rust damage really jumps out - be sure to look at that in greater detail. (Side sills are very repairable, but it can take a couple hundred hours in the welding shop.) One thing I like: These cars were usually built with camber - the frame has a slight arch, just like a bridge. Sighting down the side sill I cannot see any negative camber - sagging - on either side. The other thing which jumps out is that underbody equipment is missing or looks pretty beat up. These are important first impressions to check out later. Looking closely, the window gasket is new. Bob's been working on it. |
|
A closeup of the rust damage around the vestibule steps on the BR corner. 1146 has a really bad case, or it simply hasn't been maintained, but this is actually very common. Water and snow kicked up by an adjacent car, water and snow from people's shoes, the salt used to remove ice, and several inside corners where snow can pile up all cause this to be a rust-prone area. To repair this, I will have remove everything back to the center sill and collision posts, and build new using the old as a pattern. A question will be how much to back-date it. When new, it had uncoupling levers on both sides, full-width diaphragms, roll-up vestibule steps, and full skirts. The GN removed all of those prior to the mid sixties. Hmmm. I notice the second grab-iron in doesn't match the others. Obviously found and made to fit to make 1146 legal to move. |
|
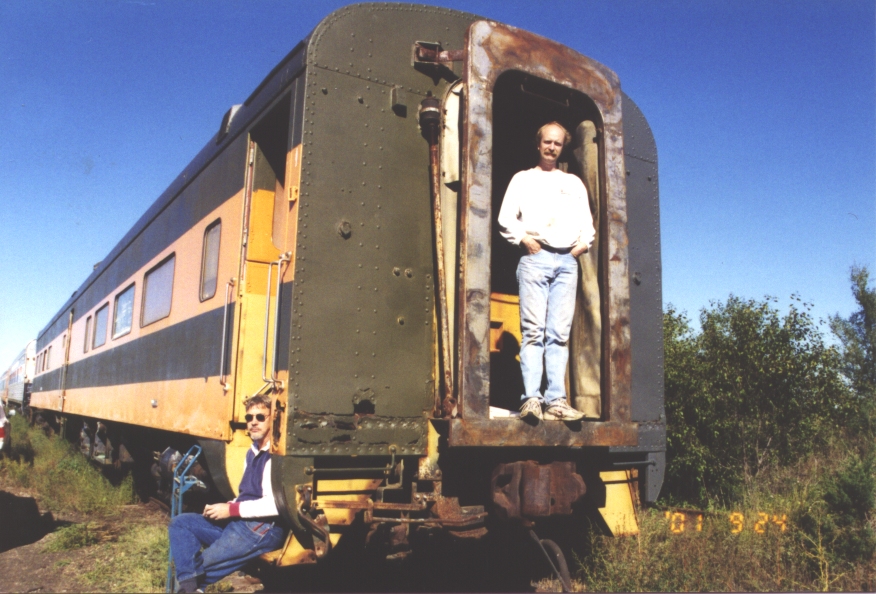
Closeup of BL vestibule corner. Same rust problems. Happily, important stuff like the grab irons, hand brake chain sheave, collision post, and uncoupling lever seem to be in good shape. Even the diaphragm and buffer plate are intact. (Diaphragms and buffer plates are often missing, especially if the car has been in work train service. They're not physically compatible with the end-of-train devices which replaced cabooses, or the top shelf couplers which are required by law on tank cars. They can also tangle with a fixed end walkway on a locomotive on odd curves.) Interestingly, this photo shows some evidence of the original full-width diaphragms. Notice the end sheet was applied by riveting, except that the strip on the corner where the diaphram rubber sheet attached is screwed in. |
|
Studying the vestibule, Amtrak must have welded that stainless diamond-tread floor in. There must be a lot of rust underneath, judging by the way it is bulged up and crunches underfoot. Fortunately, those are some heavy end castings underneath. Important things to look at: Collision posts, handbrake, grab irons, and step securement. The collision posts are the big vertical I-beams at right. They're usually fine except where they pierce the floor. 1146's have some really deep pitting, and you can even see through one of the flanges. Their purpose is to protect passengers in a wreck, so these won't have to be repaired until I get into the steel work. The handbrake must be good if the car is to be moved at all. It must be securely fastened, operate correctly, and be accessible to crews. 1146 has a Peacock 800 lever-operated, quick release handbrake, by Ellcon National. This handbrake is still made, and used on many locomotives. A common problem occurs as they wear. The quick-release dog and the teeth on the ratchet wear, so that under high load the ratchet spits the dog out and releases. It is also possible for parts to break inside. Make sure there are no mechanical problems (like chain links in awkward places) that could cause it to jam during normal use. Also make sure the hand brake chain sheaves (pulley wheels) are securly fastened. Something else to check in vestibules: Rust can break the grab irons and vestibule trap hinges loose. The grab irons are required by law to be secure for the crew's safety. The vestibule trap can be removed if its flopping loose. |
|
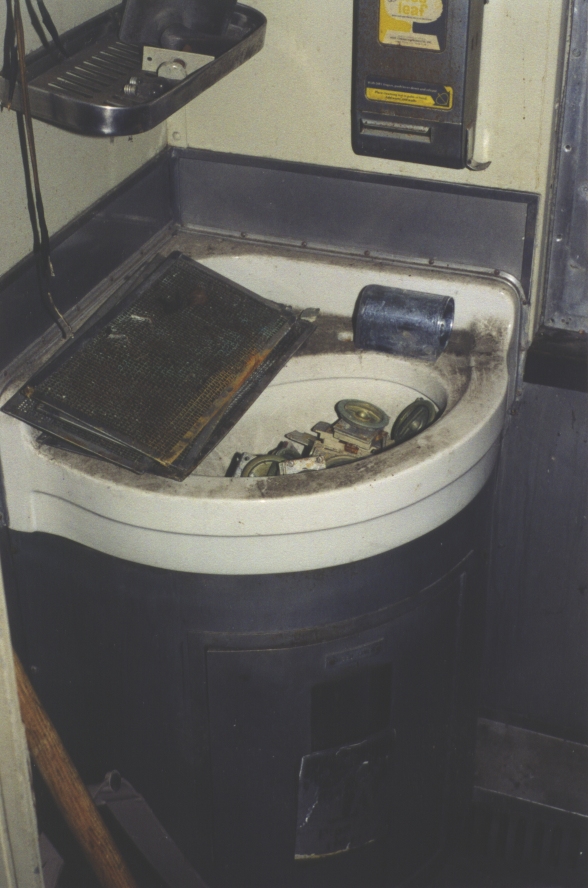
The ladie's restroom sink. Good news: Mostly all there, and the porcelain is intact. Bad news: The faucet portions that were easily removed are missing, along with the soap dispenser. Under the sink, the hard copper plumbing is in deplorable condition. Water freeze damage has been repaired several times, the system drains and a water-hammer arrestors are missing, and the sink drain was forcibly ripped out. The loose parts are for other cars Bob owns. Look closely at the window frame. To replace gaskets, Bob had to remove the curtains and trim (stored safely inside the car) and break off most of the rusted-in screws. A handful of screws came out nicely, so when the window when back in only those screw holes could be used. Most of the broken screws are at the bottom, so we can't be sure the new gasket was compressed enough to get a good seal. The window sills are built up from thick particle board with formica laminate. The board wasn't intended for exposure to water, so almost every window sill in the car is literally crumbling. |
|
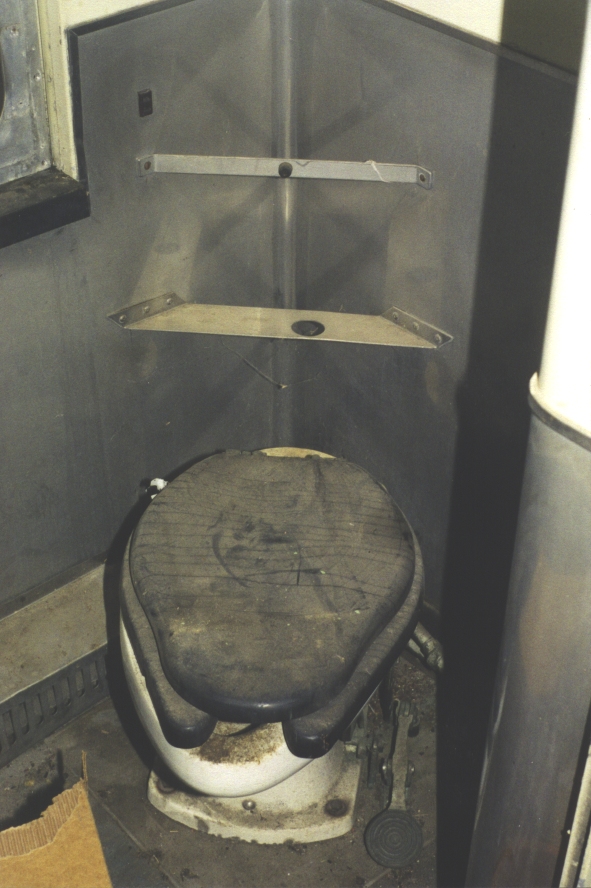
The ladie's toilet. This is the original, drop-on-tracks model. Cute that it's still here - the men's is gone - but I'll have no use for it. |
|
The ladie's mirror. The glass is fine, but someone has run off with the light fixtures on each side. |
|
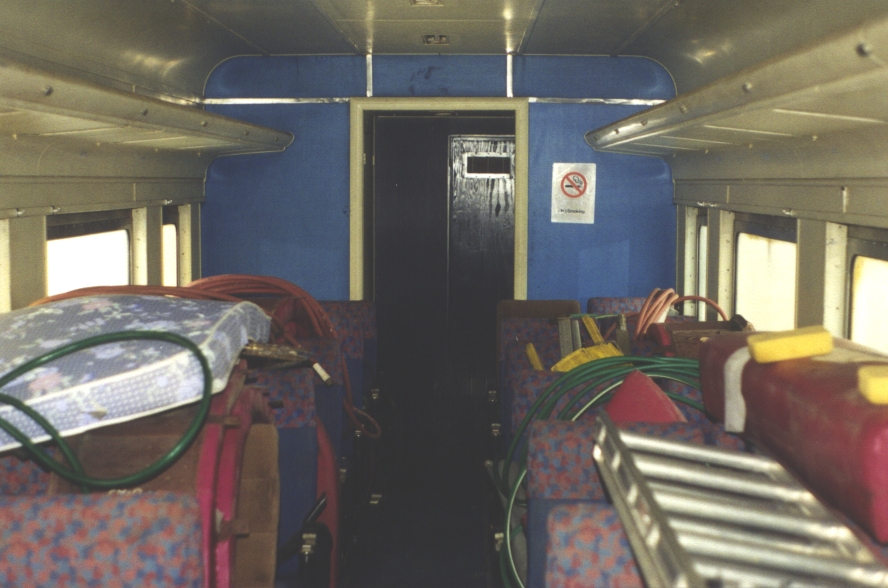
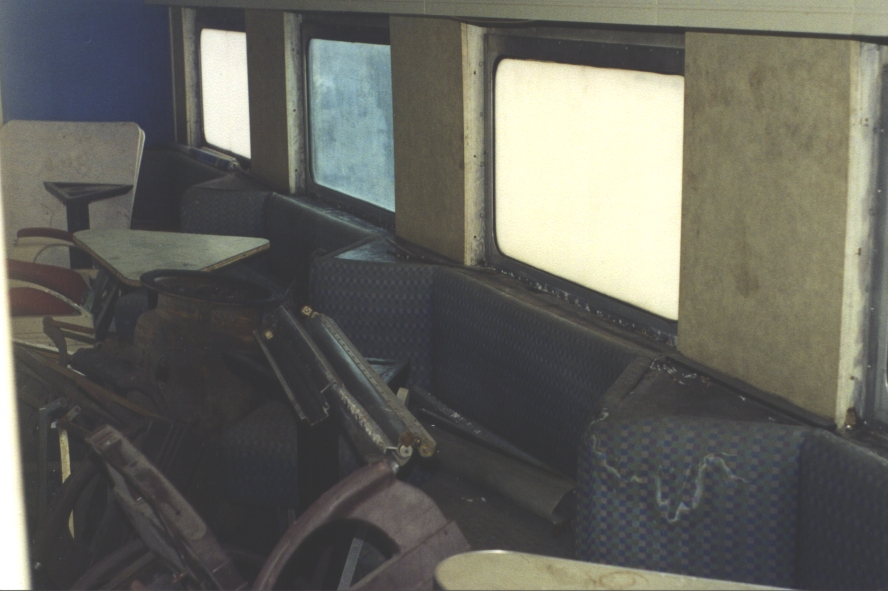
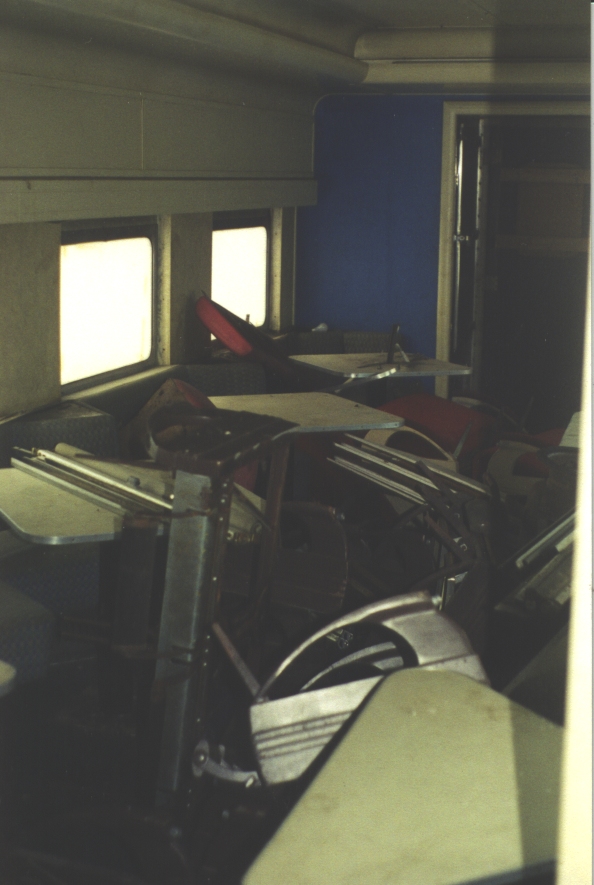
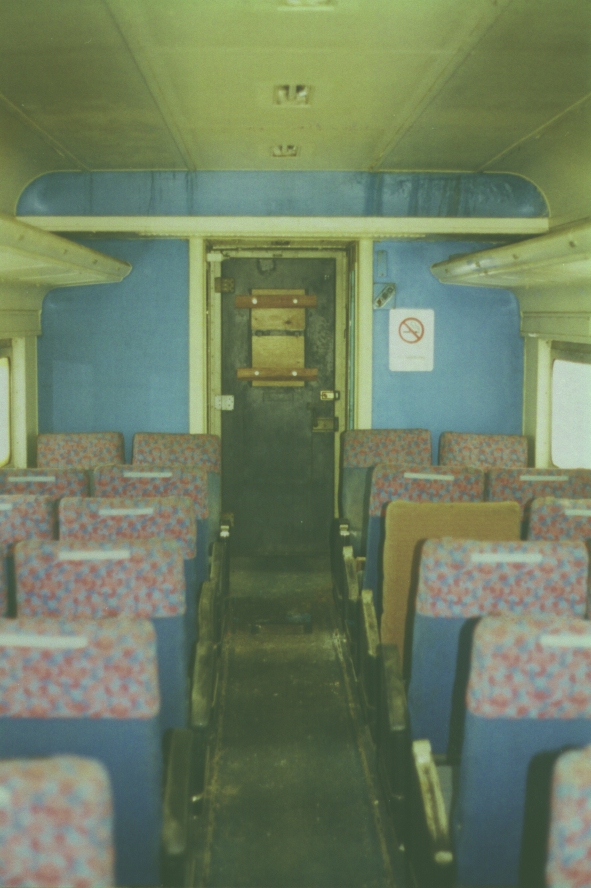
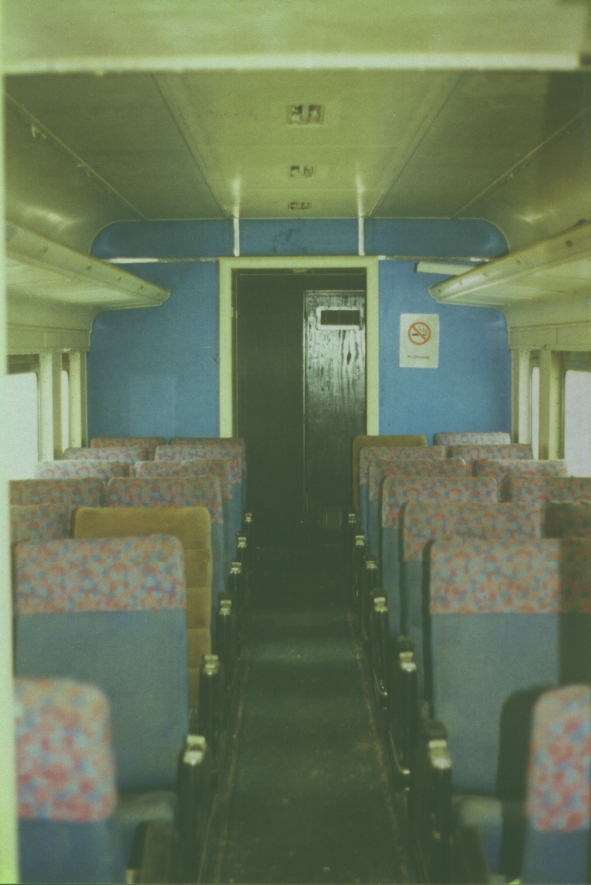
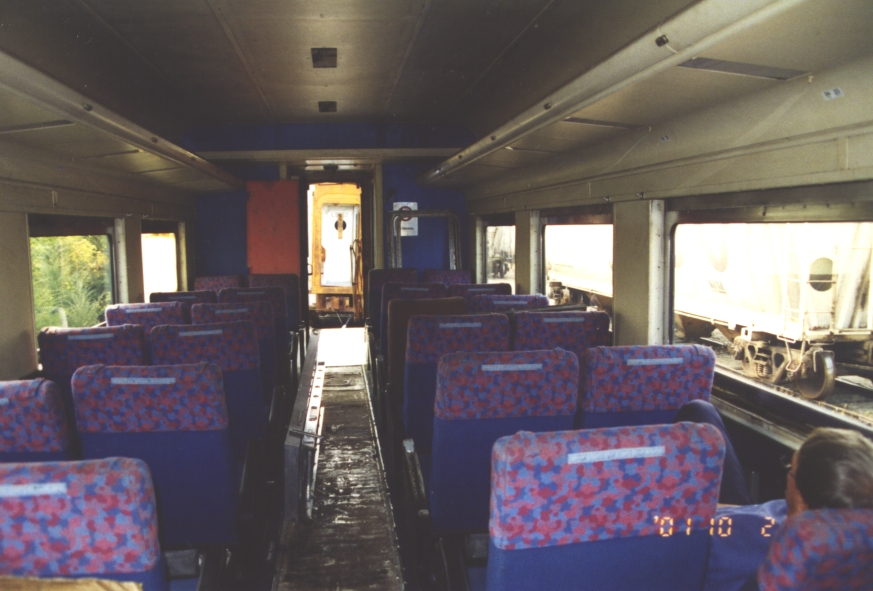
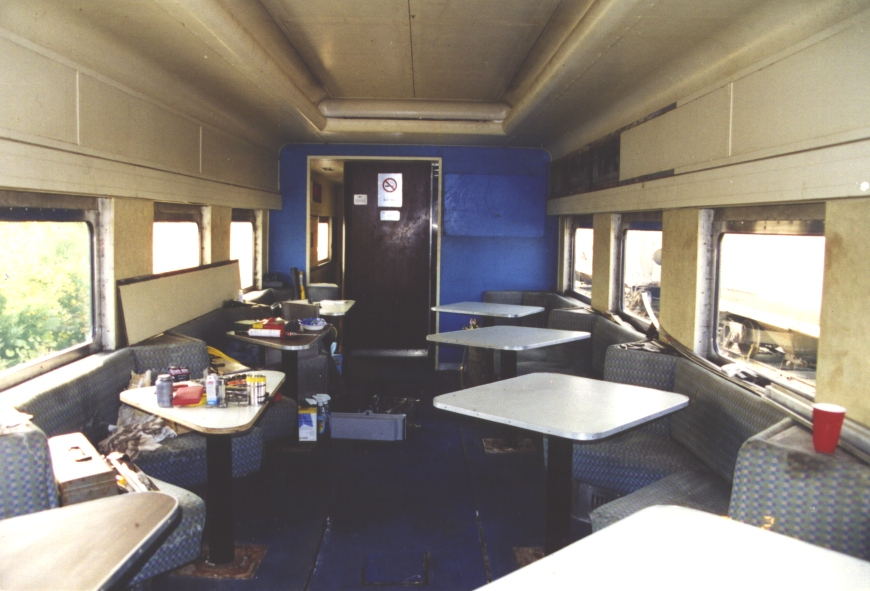
This is the coach section, looking towards the center of the car. Never mind the loose stuff stored in here, I'm encouraged by what I see. The interior hasn't been stripped. The seats, luggage racks, and light fixtures are all still here. That's more to work with and less that must be found. Hmm - that plywood closet door obviously isn't original. The carpet in here is badly water stained, the floor sorta crunchy and soft in spots, and the walls below the windows water stained and wavey. She's taken on a lot of water over the years. |
|
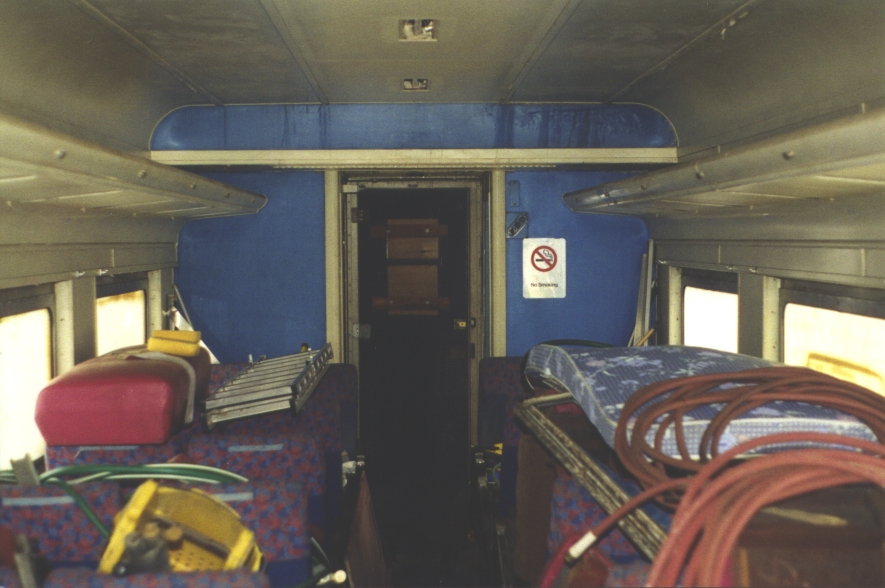
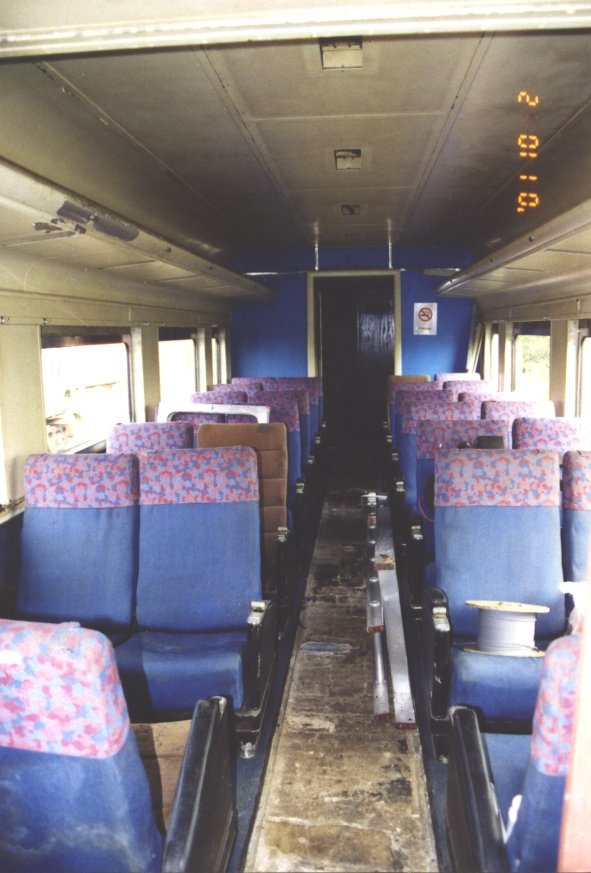
Looking the other direction in the coach section. Look closely at the upper bulkhead, near the ceiling, right side. The wall paper is bubling off. This is aluminum-faced plywood, and iron-laden water from somewhere has delaminated the plywood and electrolysis has attacked the aluminum facing. The water could be from a leak in the restroom water plumbing, from a leaking rooftop vent, or from the air conditioner's condensate drip pan. There are also some door hardware items missing. |
|
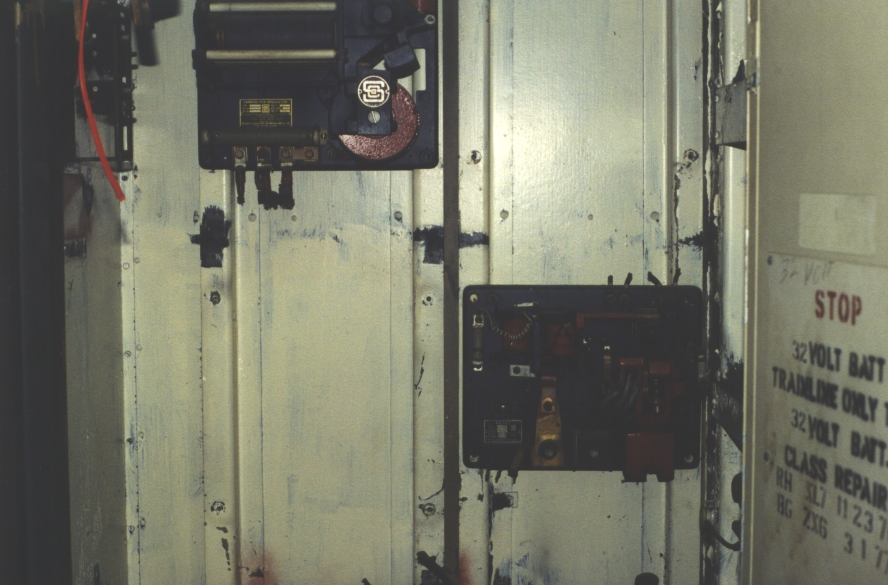
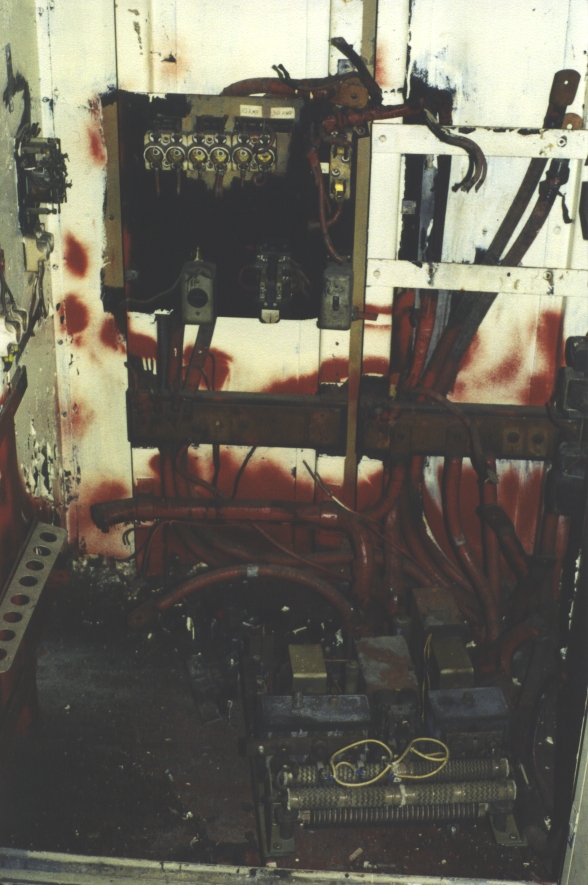
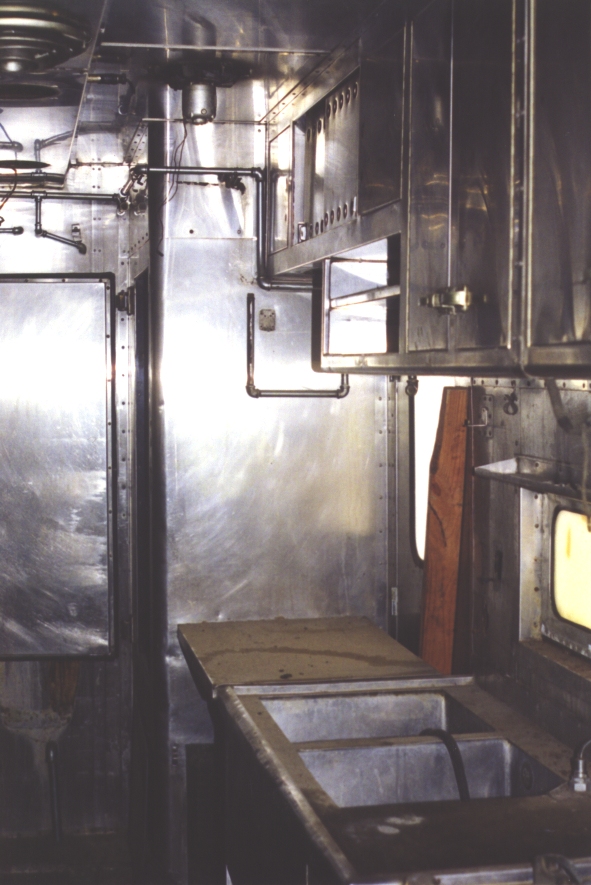
This is not what I like to see in an electrical cabinet. Most people don't have much use for 32vdc equipment anymore, but I'd rather have the option of using it or taking it out. Looks like someone's already done a lot of taking out. For the parts identification hounds, at upper left is a Safety type S-1050-E lamp regulator, and at lower right is a Safety type S-31-EADRT reverse current relay. The lamp regulator is designed to regulate the voltage to the lights, so they don't change in intensity as other lights are turned on and off. The reverse current relay is designed to prevent the batteries from discharging through the generator. (Today a high-current diode would be used.) |
|
Floor of the electrical cabinet. Several of the big conductors are intact, but so much has been cut. That's a minor fuse panel on the wall, and a Vapor air conditioning control panel on the floor. The two copper terminal blocks on the wall are the main negative and positive bus bars. These pictures don't show it, but throughout the car someone has opened every junction box and cut the wires back to the conduit. Now that was dumb of them. Also the door latch has been removed. |
|
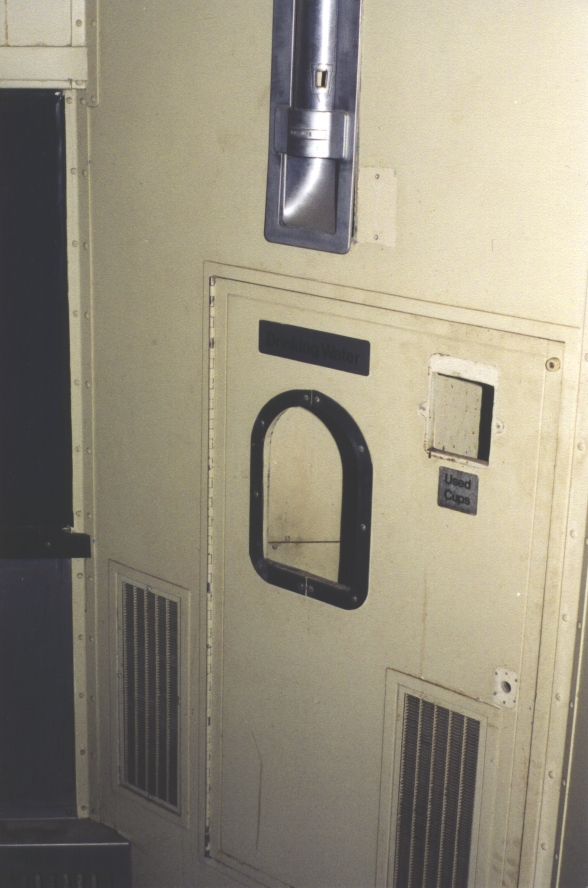
Water cooler enclosure. The cooler itself is missing, as is the waste cups trim and the door latch. |
|
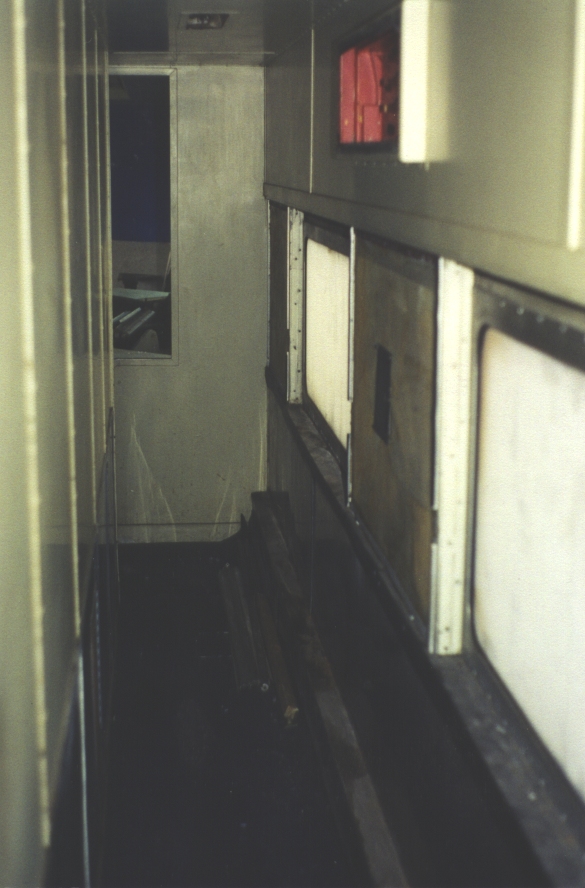
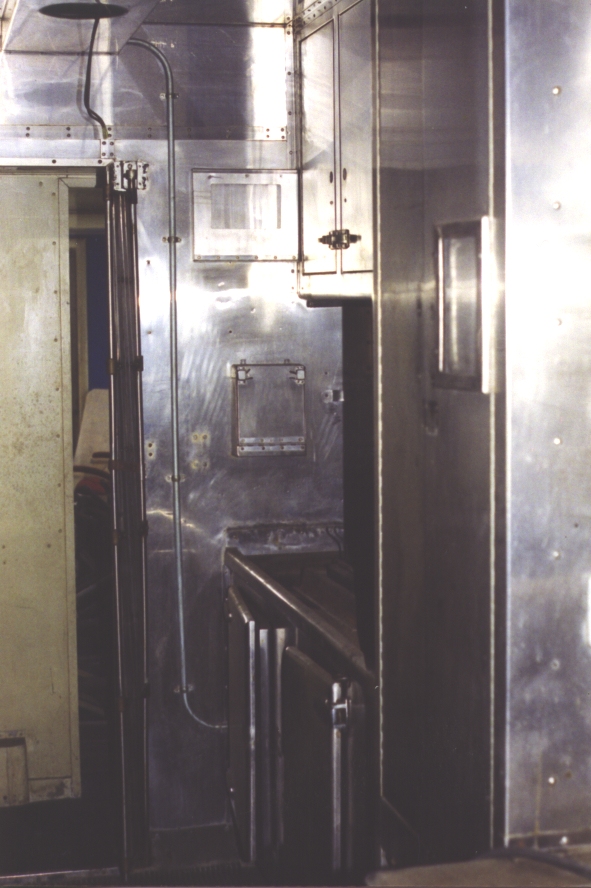
The hallway along the kitchen, looking towards the dining room. Everything is pretty much intact. The window trim is stored from when Bob did the window gaskets, and Amtrak's wall carpet has been removed. The emergency tools box above is empty - I've only met one car that actually still had the tools. Seems everyone thinks a saw and a small hatchet would be handy at home. |
|
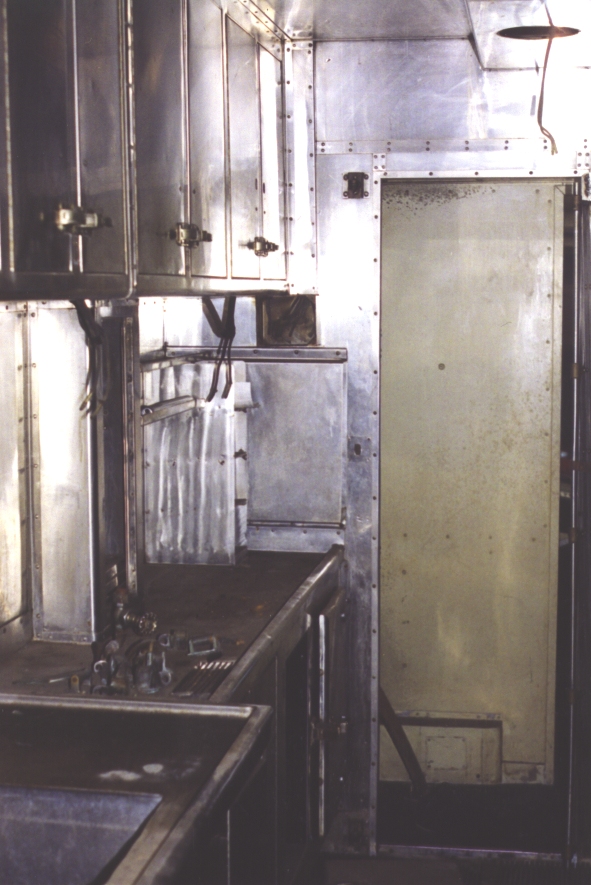
Kitchen left side, looking towards dining room. We see mostly warming cabinets for cups and plates, the site where the coffee pot was, and the sanitizing sink. Every single light fixture, and several cabinet hinges and latches are gone. Someone's been parts hunting. Happily the basic fabric of the kitchen is intact. |
|
Kitchen left side, looking away from dining room. From lower right we have the sanitizing sink, open-top dishwasher, comissary door and fold-up counter, and refrigerator. Notice the fridge door latch is missing, the plumbing is half-removed, and the missing light fixtures. That ceiling fan won't turn either. The original floor mats are missing, and the stainless drain pan underneath crunch a little. It's great that the refrigerator machinery is there, though. |
|
Kitchen right side, looking toward dining room. We're looking at the freezer, with chilled water spigot and ice cube trays, ice cream well, pie cabinets, and supply cabinet. There is an accordion gate on the door for locking the kitchen. Originally it also had old west saloon-style doors. |
|
Kitchen right side, looking away from dining room. From lower left, we have the supply cabinet, steam table, and charcole stove. It originally had a propane stove, but Amtrak replaced it with a charcole stove - possibly because propane was not allowed in the tunnels into New York? Notice, on the wall behind the refrigerator door, the outline of the fold-down lavatory where the kitchen crew could wash their hands. I think this kitchen is one of the car's best features. So many cars have been gutted down to the framing. I like having an intact interior to start with. |
|
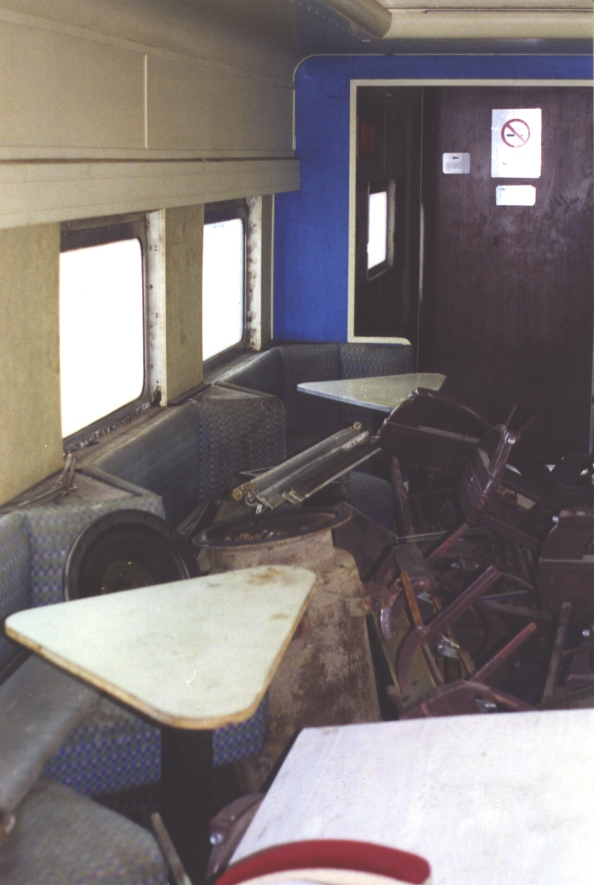
Dining room right side, taken from just outside the kitchen door. The white windows are plexiglass, gone opaque from UV exposure. The blue windows is glass - and its not much better off. Notice the water stained seat fabric, and the window sill damage. But - very important to me - the original furniture is all here. This side of the dining room had triangle-shaped tables for two. The other side had diamond-shaped tables for four. ACF referred to the bench along the wall as a "serpentine" bench. GN also used it in the 1951 Empire Builder 1240-series ranch cars and Gopher/Badger square-end obs cars. The Empire Builder 1150- and 1250-series dining cars had the more common rectangular tables. |
|
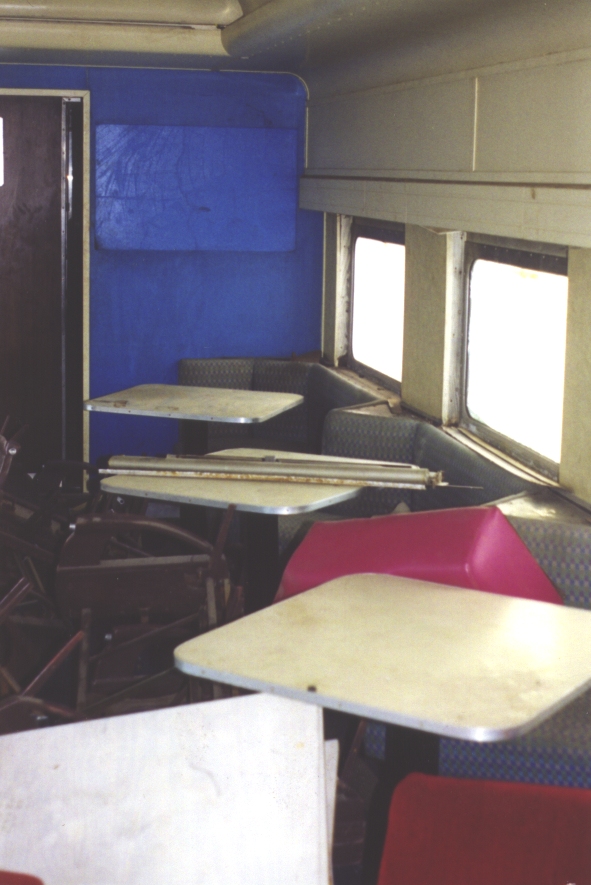
Dining room left side, taken from just outside the kitchen. I thought the lighting was neat. Indirect cove lighting in the ceiling, and strip fixtures above the windows. 1146 has 100% florescent lighting, except in the kitchen. At the far end is yet another refrigerator. The end walls and the piers between the windows appear to be covered with wallpaper of some sort. |
|
Dining room right side, from the A-end door. I think its cool how the wall is notched out where the hallway leads into the dining room. Notice the left-most window, how the bottom of the wooden side has rotted away. |
|
The last corner of the dining room. The kitchen door is barely visible. I'm a big believer in taking lots of pictures when inspecting a car. I poke the lens everywhere. Why? Because later it's hard to remember exactly what I saw. |
|
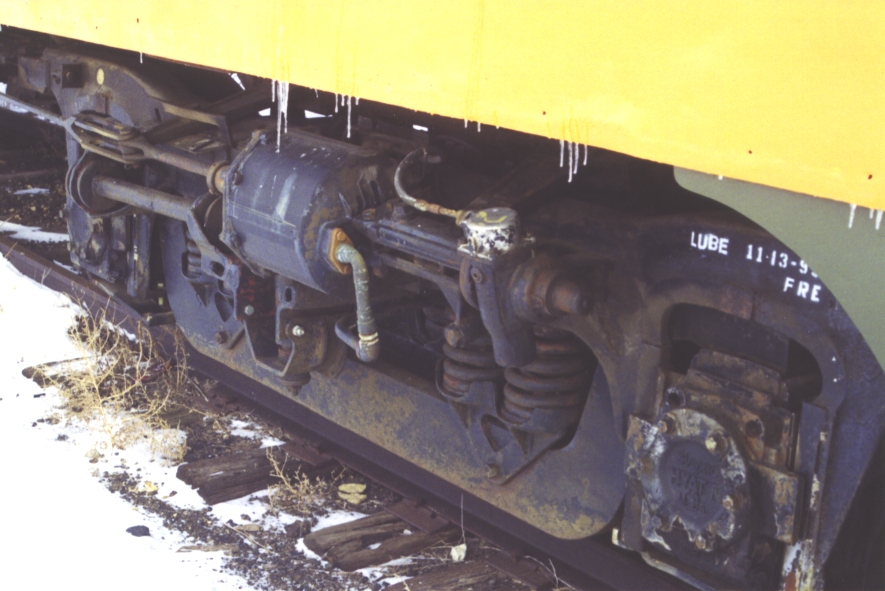
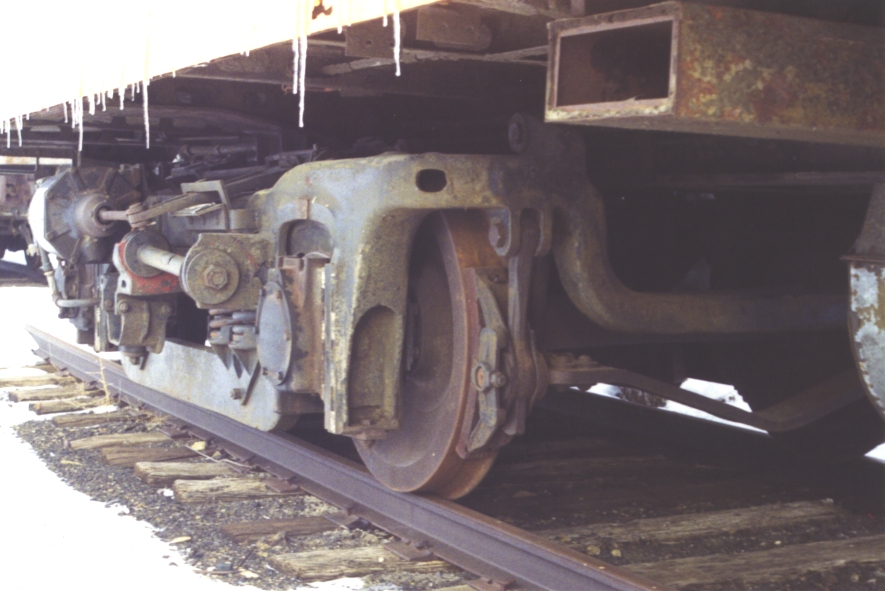
The B-end truck, left side. A common 8' 6" wheelbase, inside swing hanger, drop-equalized light weight passenger car truck. Nothing really jumps out as being "wrong". All the expected pieces are there, looking straight at the side everything looks level and balanced, no obviously broken springs or wear liners, no bright orange rust from parts rubbing that shouldn't. Oh, wait. The pedestal binder is hanging loose on one side, below the journal bearing box on the far axle. Easily fixed. Bob tells me that, while the car was in Hooper, Nebraska, he had the wheels exchanged on this truck. These came from an ex-CNW 400 coach that had been in work train service. Comment: A lot of people believe outside swing hanger trucks are better than inside swing hanger - and they're probably right. Their geometry is slightly different, so in curves or on non-level track the carbody leans less. If heard they give a better ride, too. Some day I'd like to do a side-by-side comparison of a Budd with outside swing hangers, and a Pullman with inside swing hangers. I've ridden the later at 60 mph, and can tell you they're smooth as baby carriages. |
|
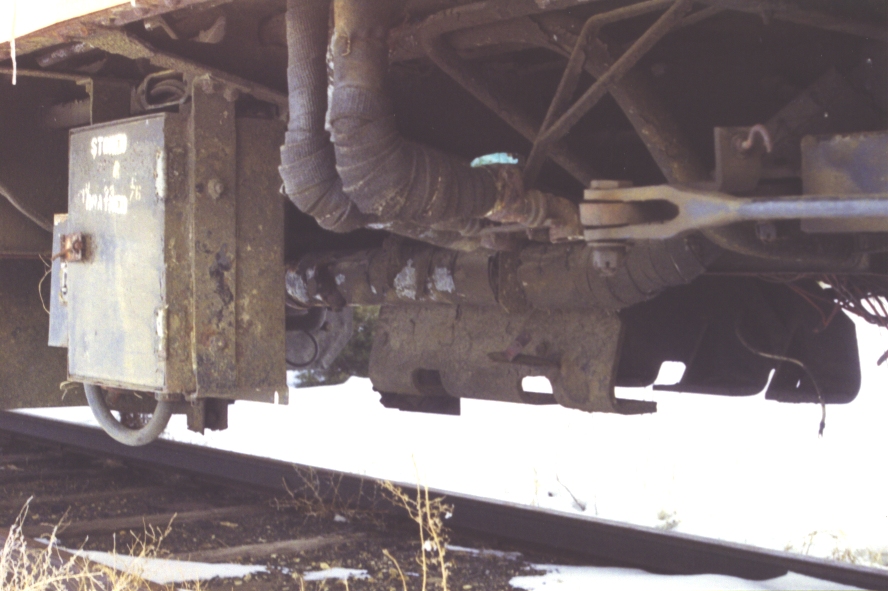
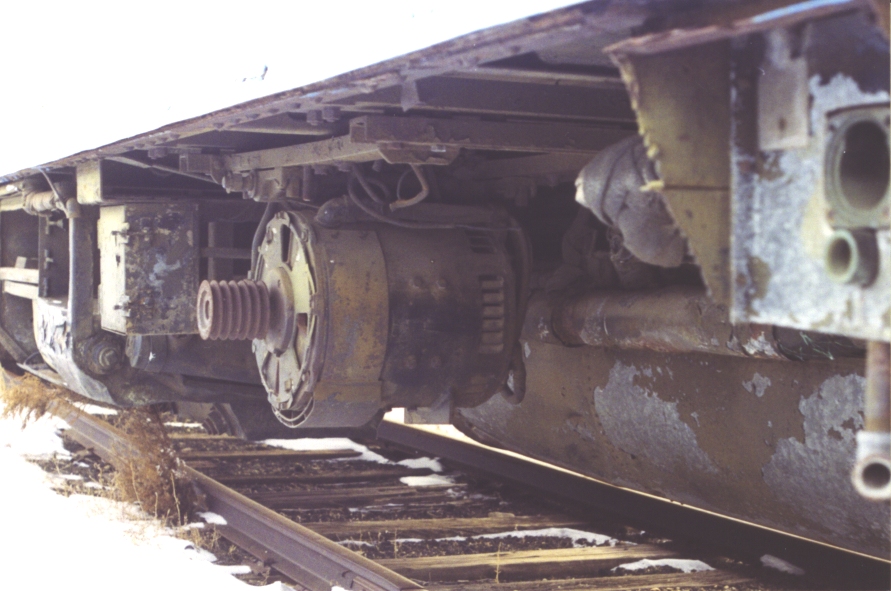
A sealed-window passenger car like 1146 relies on lots of mechanical systems to make it comfortable. So its important to look closely underneath. Also, to move safely by rail it must be structurally sound and the brakes and suspension must be in good working order. Usually I spend more time underneath that I did this day. It was cold and I forgot my Carharts. I should have, for example, photographed the coupler carriers, draft gear, each end of each truck, and to sight down the center sill and each side sill. In this picture we see the left side, just inside the B-end truck. The fragments of side sill, cross-member, center sill, and splash pan which are visible look straight & true, without rust or mechanical damage. (Although there are piles of dirt in every corner, which could have trapped moisture and be causing pitting of the steel structure.) That big bracket under the center sill held the Safety 20kw genemotor, which was connected to the nearest axle by a drive shaft and Spicer gearbox. All that's left is the mounting and some wires. Those cloth-wrapped pipes are for steam. The box on the left housed the starting contactor for running the genemotor off 3-phase shore power - parts of it are in there. |
|
Moving down the left side, after the 3-phase contactor box is the shore power plug (Pyle-National 60-amp Quelarc,) an electrical junction box which is open and all wires cut, a battery box whose front cover is missing and copper-covered wooden floor has definite rot issues, a water fill for the A/C wet subcooler (submerged condensor coils,) another battery box, another open junction box with cut wires, and brake stuff further down. The side sill looks good - no broken rivets in view. (The visible side sill is a Z-channel that is part of the floor framing. The side of the car was fabricated as a unit, then lifted onto the frame and riveted to the Z-channel. When window gaskets leak, the water pools in the bottom of the wall. Rust between the Z-channel and the bottom L-channel of the wall can force them apart, breaking the heads off the rivets.) However, the sheet metal skin, which was spot-welded to the wall framing, has obvious rust issues. See how wavy it is, and how all the spot welds have been broken along the bottom edge. |
|
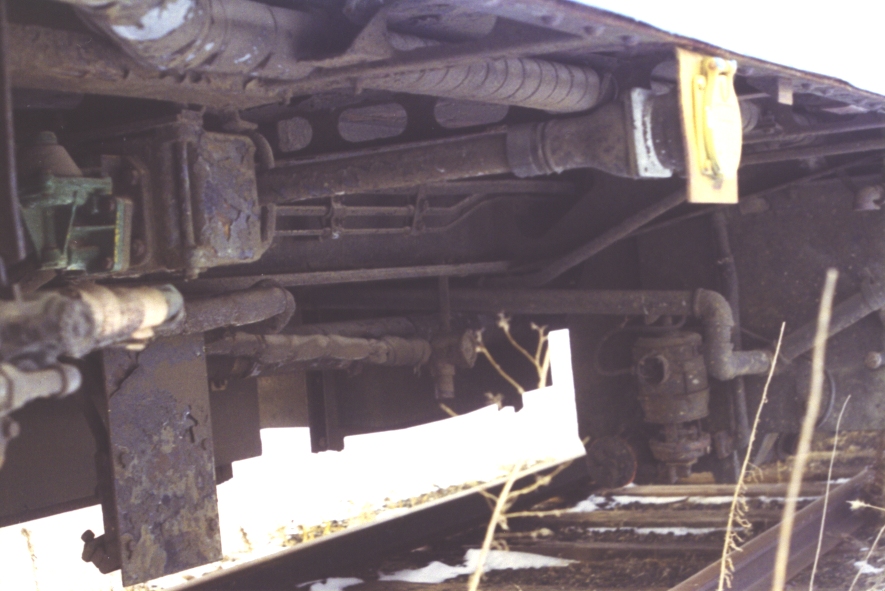
Still moving left, after that last junction box is a heavy bracket with grounding cable for mounting something. (Turned out later to have been the rotary convertor which made 110vac for the florescent lights.) Next are the D-22 brake valves. Right to left, the combined reservoir, service portion and emergency portion, and the relay valve. D-22 was standard equipment from the late 30's through the late 50's. At the far left is the water fill, and there is a huge water reservoir hanging under the center sill. (Twin 200-gallon tanks, I learned later.) That sheet metal under the kitchen commissary door sure invites a closer look. |
|
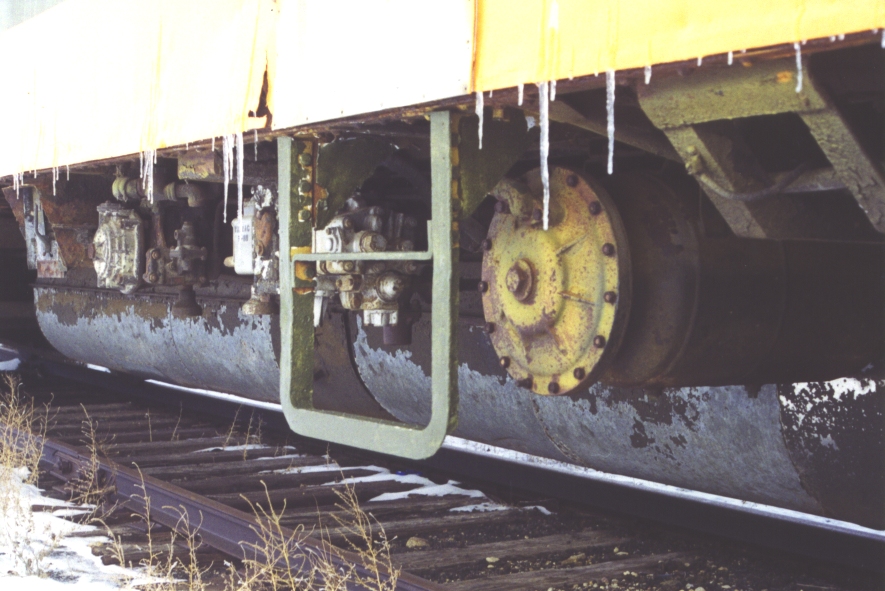
Between the water fill and the A-end truck, there is nothing under the car. Kinda weird. Just this tool box and unused mounting bracket. Let's examine the truck. The wheel tread looks to be about two inches thick - about half through its service life. It's hard to see the flange profile from this angle, but the tread profile looks good, with no dip in the middle, spalling, gouging, chipped edge, false flange, or other evils. The brake shoe is centered nicely on the tread. This end has one axle with Timken tapered roller bearings in grease, and the other other axle has Hyatt cylindrical roller bearings in oil. The other truck has all Hyatt bearings. Also, this end has the half pedestal binders Amtrak favors. Otherwise, nothing jumps out immediately as being wrong. |
|
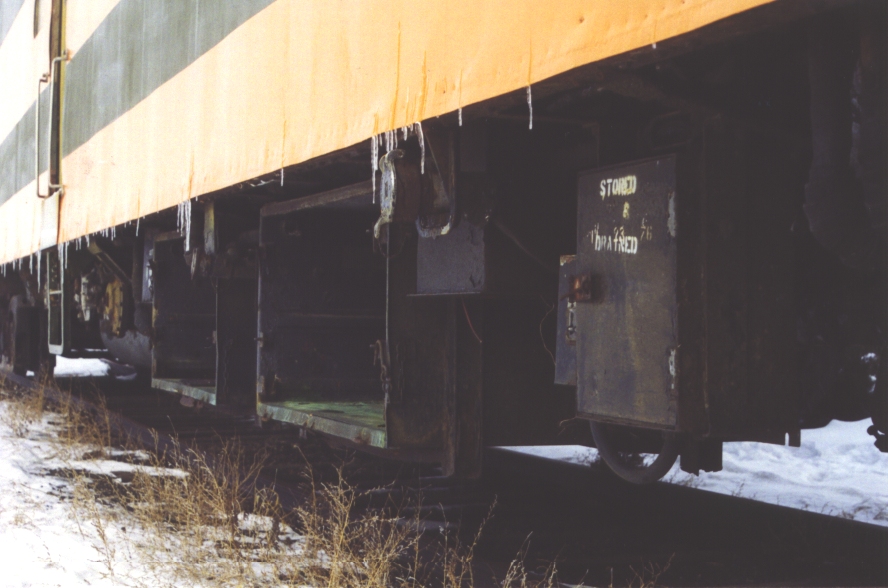
This looks pretty ugly. Although, I am assured that it was inspected by a good inspector in New Orleans, travelled without incident to Hooper, Nebraska, was inspected by another good inspector, and travelled without incident to this site in Randolph, Minnesota. Still, it will need many, many hours in the welding shop. Notice there is only one air reservoir underneath. D-22 always has a pair. |
|
Right side of the car, under the hallway. Right to left, we have the water fill (missing pieces), remnants of the A/C compressor, a box that held the A/C refrigerant charging points, a refrigerant receiver, and one very dilapidated-looking wet subcooler. |
|
I'll admit this space puzzled me at first. Obviously there are pipes to nowhere, and a big empty hole. Well, at far right is the wet subcooler, with piping to a water fill on each side of the car. The big empty hole later turned out to be where two 100-lb propane bottles for the kitchen stove had hung. At left we see a steam trap, an A2 quick service brake valve, and a terminal board for the genemotor. We can also see three brake trainline pipes running along the center sill. Top to bottom are the brake pipe (1 1/4" schedule K hard copper), the signal pipe - which no one uses now that we have hand-held radios, and a compressed air pipe - unused evidence that 1146 once had the "HSC" electrically controlled braking overlay on top of the D-22 brakes. It was a neat idea, very promising, which didn't last long in actual service. |
I probably would have spent longer poking into corners, but I think we all got cold. What did I learn by inspecting the car? On the good side, it's got a neat interior configuration that has never been altered, just redecorated; the trucks, draft gear, safety appliances and brakes are in working order; and the body structure is straight and true. On the other hand, it's been canibalized for parts, the electrical system is a complete loss, the A/C and water systems need major reconstruction, and there is some advanced water damage which will take a lot of welding to correct.
During the few weeks after the inspection trip, I did a lot of hard thinking. Did I want to do this? Mostly, I was alternating between "This will be really cool if I can manage to pull it off!" and "Yikes! What a huge amount of work!". Ultimately, though, I guess it attracted me as a labor of love. It would be a larger project than anything I'd ever attempted, and the challenge itself was motivating. 1146 is a pretty neat car, and seemed a worthy subject for my labors.
So, did I do any comparison shopping? Did I look around at any other cars? Most sane people would approach car ownership like house ownership. First, "I need a house." Then the touring open houses to find out what features are desirable. Then the serious search to find something that fits the criteria at a reasonable price. And honestly, this is how I plan to approach my next car. (After I finish this one!) 1146 worked the other way around. I fell in love with railroads, then with GN streamlined passenger cars. When a neat one became available, I fell in love with it. The only question was "shall I do this?"
Bob had been telling me (for a couple years, at least) about the Railroad Passenger Car Alliance - how their annual conferences were a great way to network, how all the good technical people in the business were RPCA members, about their insurance program for members, and so on. I looked into it, and found that a year's membership was only $35. Heck, that's a good deal for me as a museum volunteer even. On January 29th I paid up and became a member.
The asking price for 1146 was $18,000. My retention bonus from American Standard was slightly less than double that. So I wasn't getting myself into debt. (I hate debt.) With my income and being single, and the left-over from the bonus, I figured I could handle it financially.
Therefore, Bob drew up a Bill of Sale and an Affidavit of Title, I sold some stock, and on February 18th, 2001, I became the proud new owner of a derelict railroad car - and a dream to restore it to glory.
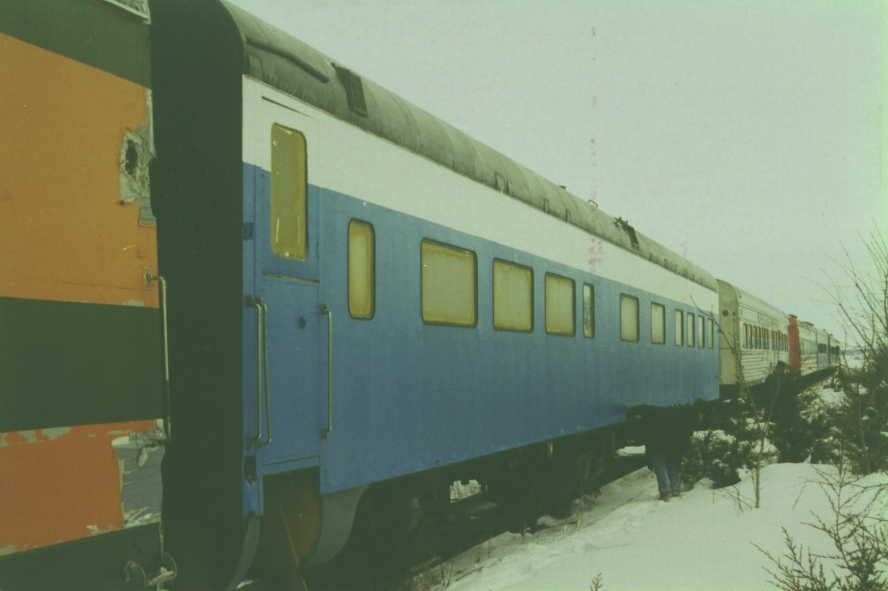
The first two jobs were helping Bob move his stored stuff out of 1146 and into his other cars, and buying my own locks to put on the car. I also had to assume the track space lease with the Union Pacific, and get insurace. Then the serious project planning would begin. The following pictures were taken just after we cleaned it out:
 |
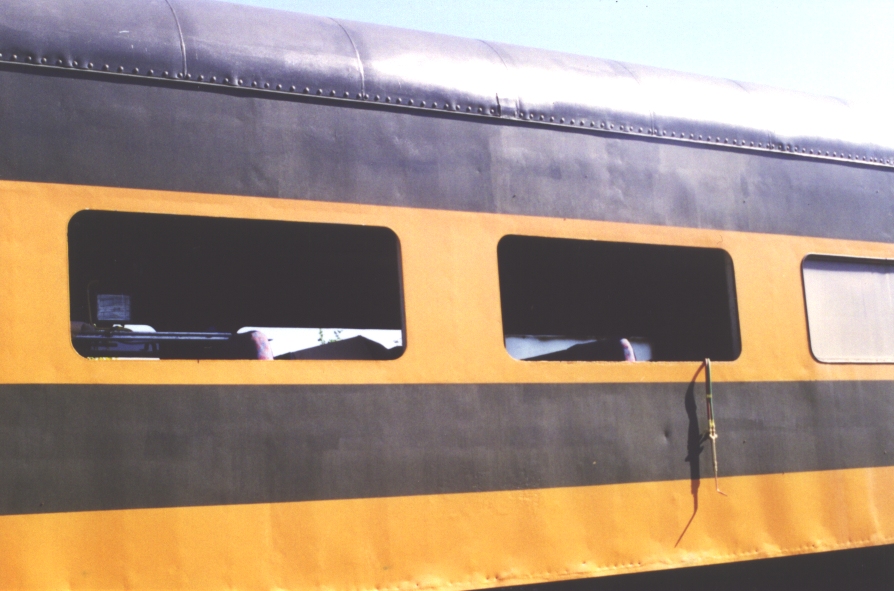
It was a real Minnesota winter we were working in! Notice that one broken window in the coach section. Sure looks ugly. |
 |
I seem to love those 3/4 view roster shots. |
 |
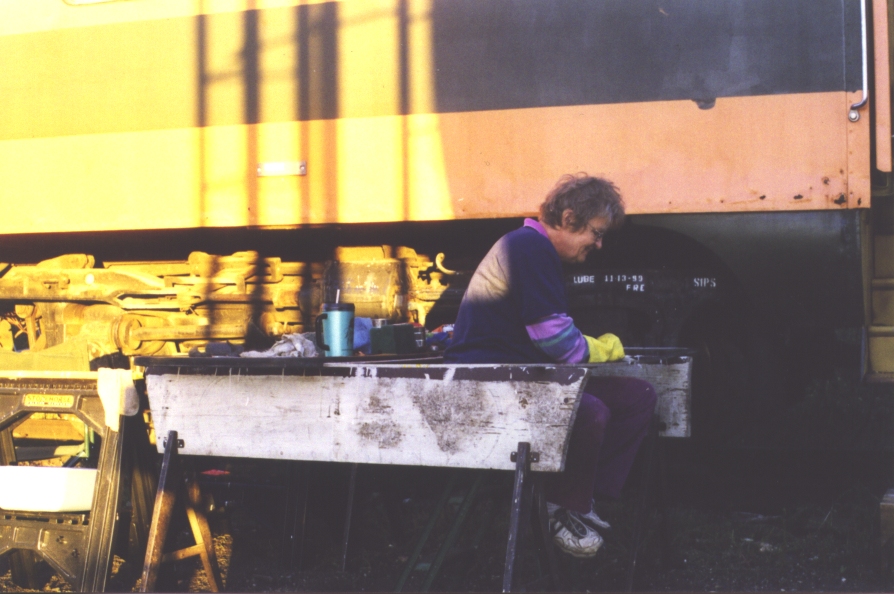
That's Richard Kasseth from MTM inspecting under the car. Richard is one of MTM's most important volunteers - he knows where everything is stored. He paid us a surprise visit while we were working. |
 |
...and here's the fourth quarter. |
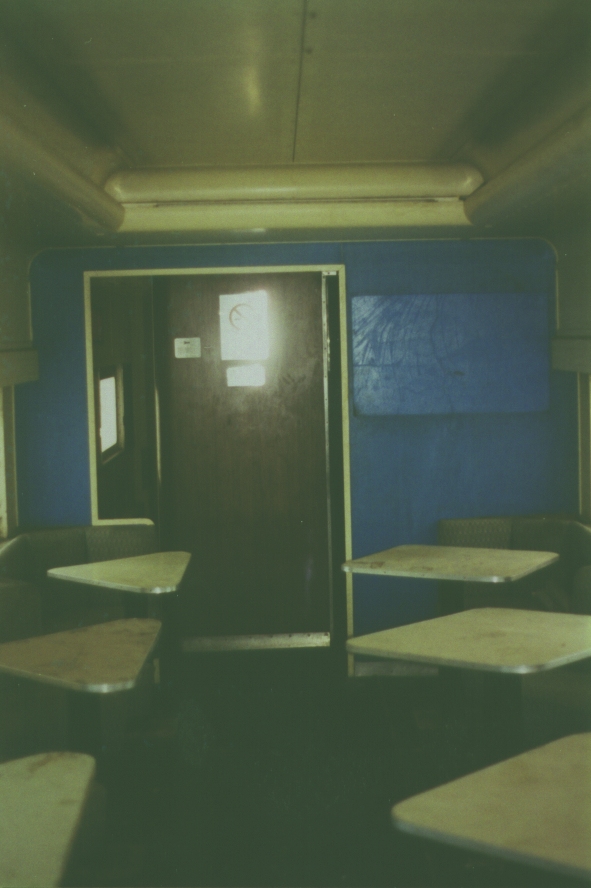 |
The dining room, looking towards the kitchen. |
 |
Dining room, looking towards the A-end. When new, running in the "International" as designed, this end door lead to the last car in the train, the round-end observation/lounge/bedroom/customs office "Port" series car. |
 |
Coach section, looking toward the B-end. Notice one seat has different upholstery. Actually, the Amtrak fabric is all slip covers, and the original brown fabric still exists underneath. The "oddball" is just missing its slip covers. |
 |
Coach, looking towards middle of car. |
For insurance, my first thought was to go to my American Family insurance agent, who handles my home owner's and automobile insurance. After all, I already have a business relationship, and get a discount for insuring both with them. I quickly learned that railroad insurance is a niche market. "You want to insure a what??? I'm pretty sure we don't do that..." I also talked to MTM's insurance company. Don't remember now why that didn't go far. I'd also heard about RPCA's insurance program for members. Their agent, Bob McCarthy, said it was for January 21st to January 21st, and that this was a good time of year to buy in because they didn't pro-rate the fees. I got the paperwork, found it was reasonably priced, and signed aboard on February 12th.
Where to start? While I was thinking about that, I decided to clean the interior. There were screws everywhere, and loose odds and ends. The coach window trim and blinds found safe, out of the way homes in the luggage racks, and the same from the dining room ended up in the A-end refrigerator. I got some plastic screw organizers, picked up all the loose screws, and got them somewhat sorted by type. I don't usually save old screws, but because they presumably came from this car...
Should I start in on the steel work first? That's difficult in the field when one doesn't have any portable equipment. Buttoning up the job site each evening is also a problem.
Should I do electrical work? It would be nice to have the lights working, so that I could see what I'm doing.
Should I start working on mechanicals underneath? Hmm. That's real heavy stuff I don't have equipment to handle. Also I'm not sure yet how much I will keep. I prefer to leave it there - leave my options open - until I either fix it, replace it, or need room to mount something else. Besides, leaving it keeps the car's weight more "normal".
Should I start scrounging to replace missing interior hardware. Sounds good - as budget permits.
Should I work to stop the water from getting in? Absolutely! I don't want any more water damage that has already occurred. Working at the museum, I've discovered several sources for water:
I've decided to work on electrical and keeping water out, and hardware scrounging on the side.
Electrically, I decide there's no hope for the 32vdc system. It will be replaced by 120vac lighting. While Amtrak-compatibility is nice, its expensive. But I'll try to work towards that ideal. Work begins with a summary execution of everything remaining in the electrical cabinet, except the 32vdc trainline. The parts I donated to MTM.
For electrical wire, I decide to use locomotive-grade Exane with a 2kv jacket. It is finely stranded, so it is flexible and will withstand lots of vibration. The jacket is an irradiated cross-linked polyolefin, which is abrasion-resistant and has good combustion/smoke characteristics. Why 2kv instead of 600v? I figure the thicker jacket will be more forgiving of abuse. This stuff is not usually available at a home-improvement store. MTM buys it from Electro-Wire, Inc. I call and order a 1000' spool of 14awg on my credit card. (Figuring 15 amp lighting circuits make sense.)
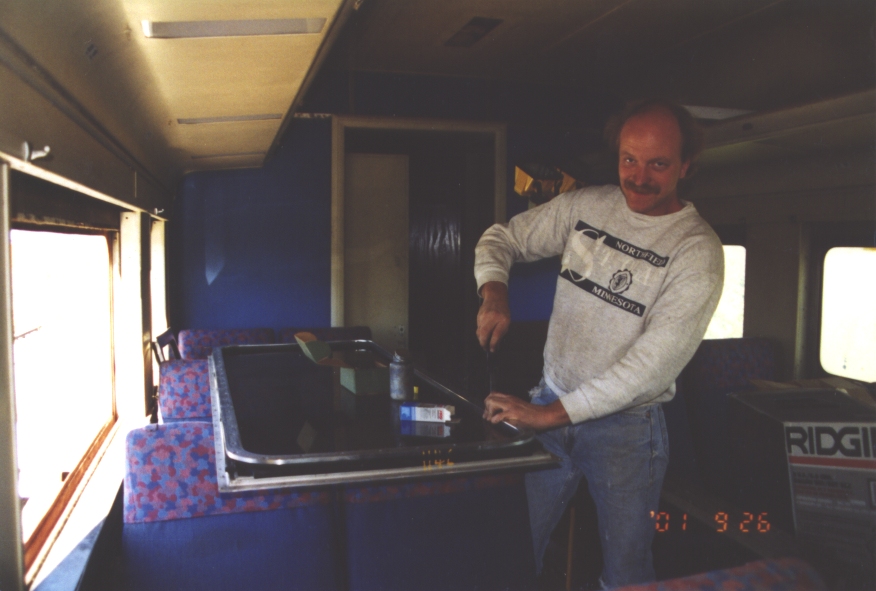
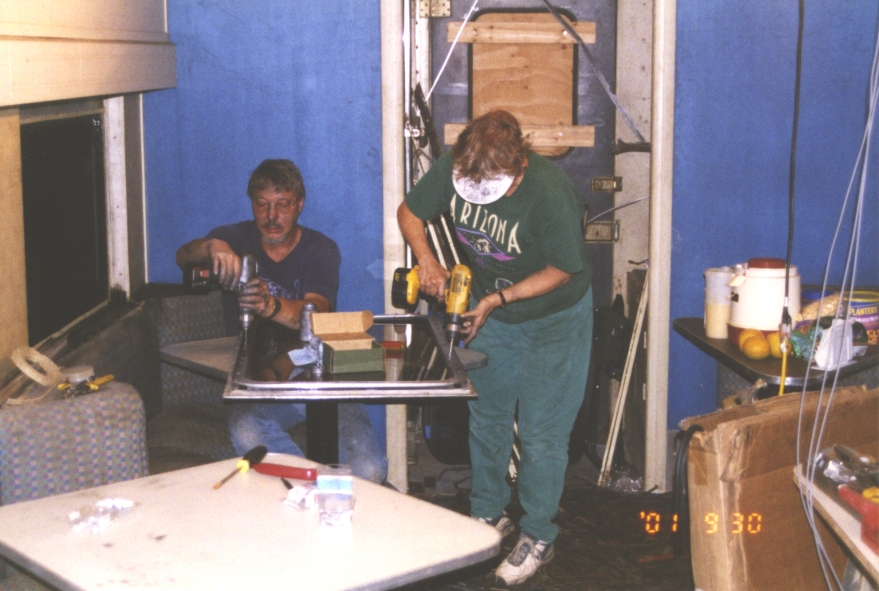
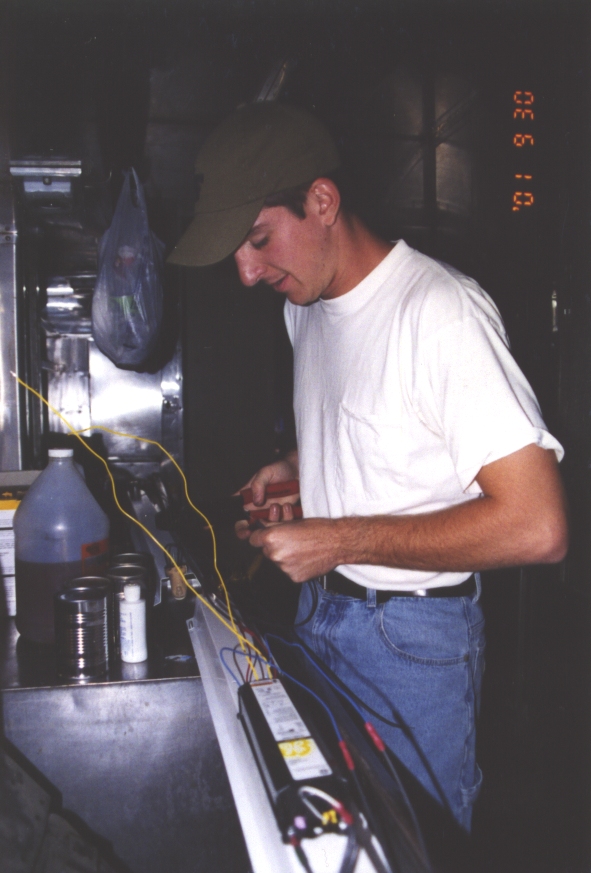
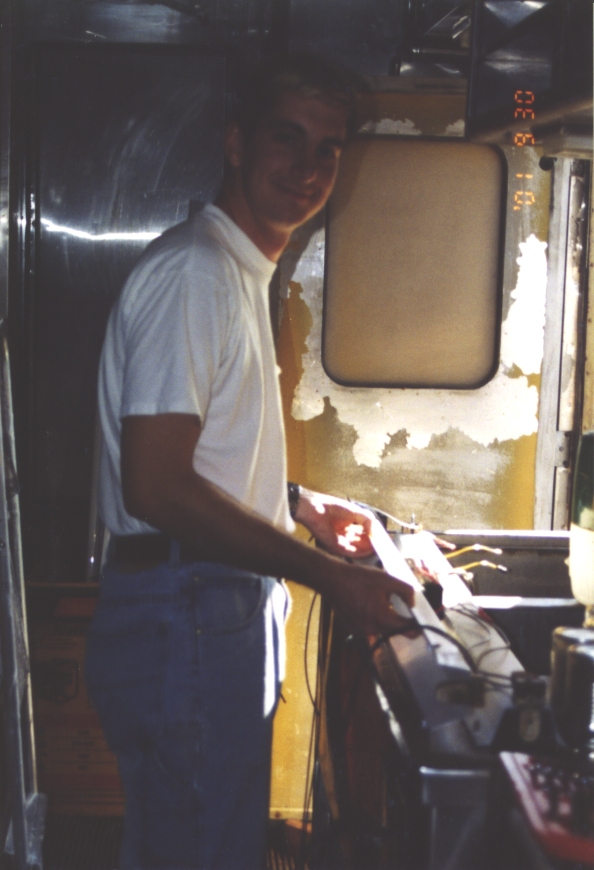
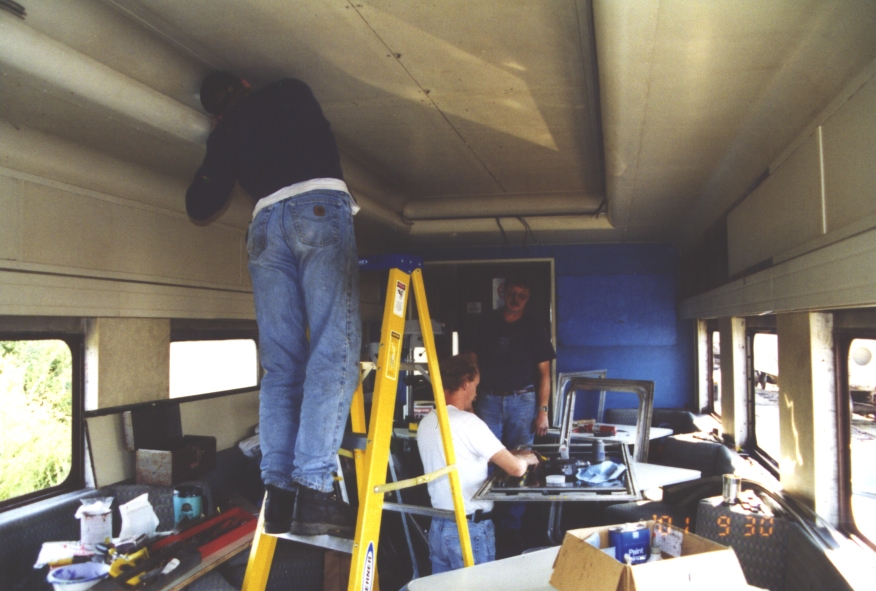
My friends Phil Wellman and Eric Wagner help me several Sundays. We start by pulling new wiring into the kitchen. (It's a big dark hole.) Bob Moen had scrounged some light fixtures for 1146, and I clean and install them. Guessing, I put 50-watt bulbs overhead and 25-watt bulbs over the coutertops. Phil is a recent college grad, but has been messing around with railroad signalling, EMD locomotive maintenance, and general electrical stuff for the better part of a decade. He helps me navigate some of the electrical "how to's". Eric specializes in diesel truck maintenance and welding.
 |
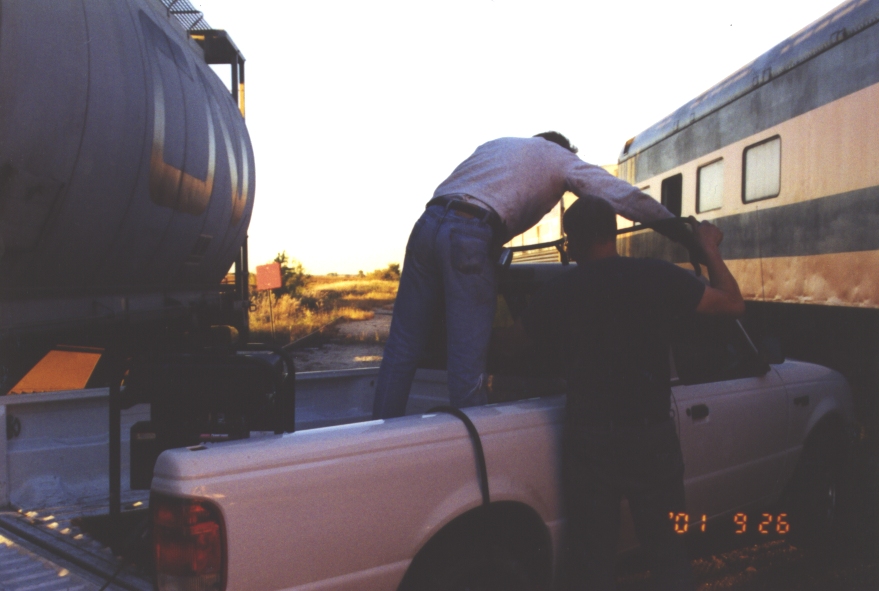
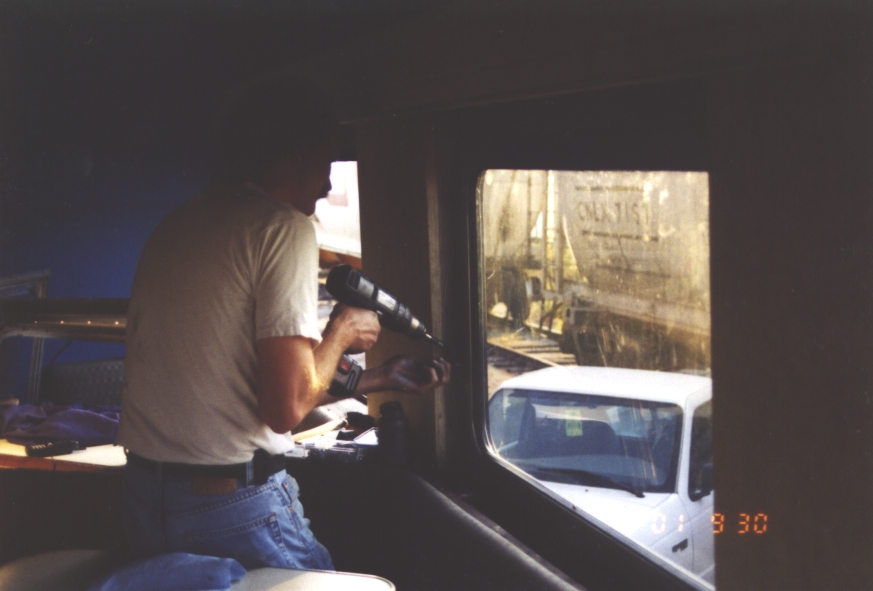
Wagner's truck backed up to the commissary door. We're in the kitchen, probably pulling new wire. |
One Sunday when we arrived to work on the car, it had been raining during the week. We noticed a strong mildew smell, and discovered the carpet in the coach section was soaked anywhere within eighteen inches of the wall. Totally not cool. My initial reaction was "that carpet is trash anyway - let's ditch it so that it isn't holding water and mildewing." We ripped it out of the aisle (easiest) and started under the seats, which was difficult because the seats are bolted down through the carpet. We pulled up about one dumpster load.
Thinking about the problem later, I realized the new window gasket hadn't sealed, and that the water would keep pouring in until the window gaskets were sealed. I came up with several reasons for doing the complete window job:
Spring flooding along the Mississippi created an interesting opportunity. Because of the high water level, Amtrak's eastbound Empire Builder, which arrives in early morning, had to lay over in St. Paul until departing westbound late at night. I was mulling over how to do 1146's electrical when it hit me - I have live samples just sitting there in the Midway depot. Luckily John Goodman, the Station Master, was a friend. I grabbed my camera, stopped by his office, and the train was mine to explore.
I looked at the Genesis units and the Superliners briefly, but it was the head-end car that really interested me. It was a 17000-series baggage which had been converted from a fifty year old Budd stainless coach. It had the head-end power conversion, the new air conditioning equipment, the tubular rubber diaphragms, 26-C brakes, electronic decelostats - all the upgrades. I spent a couple hours poking around its innards, to see how they'd done it.
I've decided to do the full window job. The museum has given the OK to buy some of their custom window gasket, so I'm using their method. Instead of two panes of 1/4" glass (original) or 1/4" Margard (common today), they use a single 3/8" piece of plastic-laminate safety glass. It's custom manufactured by Globe Amerada Architectural Glass, and has the "FRA Type-II" stamp in the corner. On their cars (GN 1213, A11, 1096, and 1097) they've used a 52% VLT Bronze tint, which is a kinda brown tint which gives the outdoors a nice warm look. I like the effect. 1146 has 31 windows (not counting doors) with a total of 221 square feet. At $8.96 a square foot, plus pattern charge per window and boxing, the glass quote is $2824.02.
Paul Dalleska, then MTM's Chief Mechanical Officer, tells me the gasket for the 3/8" glazing was custom manufactured by Precision Gasket in Edina, MN, at $1.00/foot, with a minimum order of 5000 feet. It was first used on GN 1213, so I estimate it was extruded in 1995.
For the outer weatherstripping - between the aluminum window sash and the exterior sheet steel skin - I purchased 400 feet of Wabtec P/N 131-A-6-B "Weatherstrip per ft. Pullman dwg # CEA 8596A". There are at least three versions of this gasket: What I got, which has a "hook" which extends 3/16" over the outside of the car's exterior skin; a slightly beefier version - the sample I have is labelled "BW-66"; and a version without the "hook". Wabtec charged $.79/foot.
Why didn't I re-use the nearly-new weatherstripping Bob had put in? For the simple reason that rubber hardens with time, and when squeezed in one shape for long enough will "flow" to conform. I figured new rubber would have a better chance of sealing.
Richard Kasseth at MTM found an news item in AAPRCO's "Private Varnish" magazine (Issue #93) that 30,000 ACF engineering drawings, donated to the Museum of Transportation in St. Louis several years ago, were now available for reference use. Knowing 1146's lot number from Randall's book, I called to inquire, and received several pages of relevant drawing numbers that were available. Cool! I can get construction blueprints! (Someday when funds permit.)
I took a week off work to have a window party. My parents came up to help, and we spent seven or eight ten hour days working on windows. We were able to finish about half the job.
 |
Just getting started. I've pulled a dining room window to show my parents what we need to do. Mom's taking pictures. The weather was awesome. |
 |
I think this is our cool "Rock Group" pose. |
 |
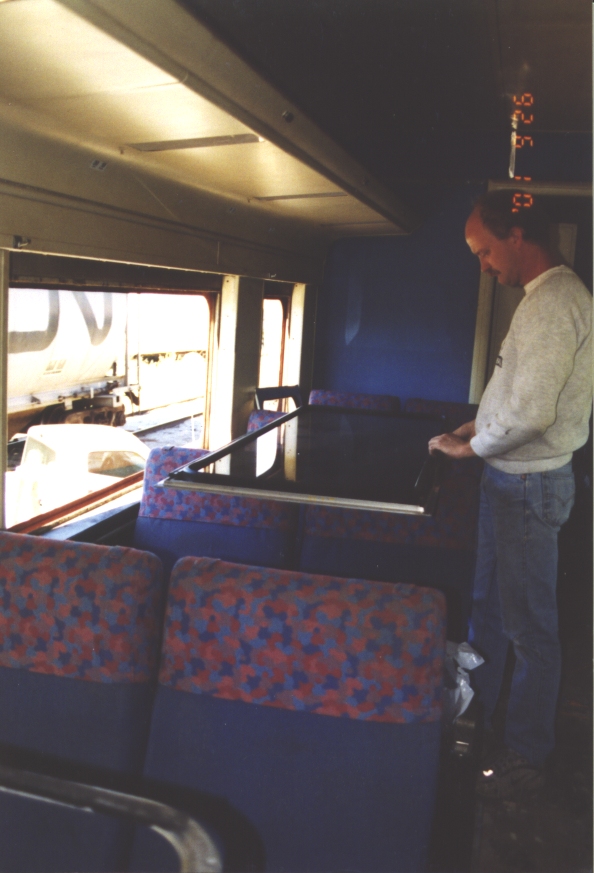
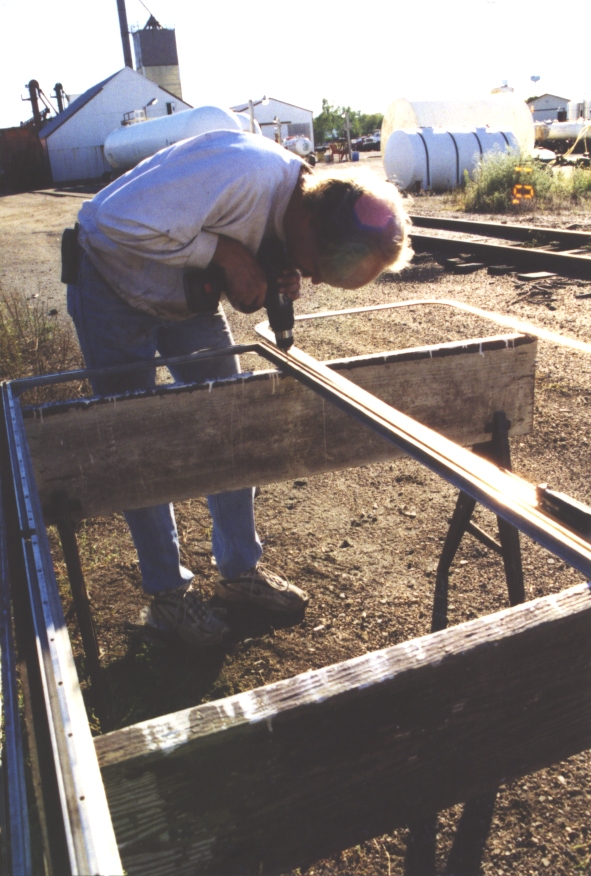
I'm starting to disassemble the window sash. It's a sandwich of aluminum around the glass and gasket, with a 3/8" Bakelite strip for correct spacing. There's a screw about every three inches. If water has been coming in past the window gasket, the screws may be frozen in. Sometimes it is possible to coax them gently, but usually they break rather than unscrew. Neither penetrating oil nor heat seem to help. |
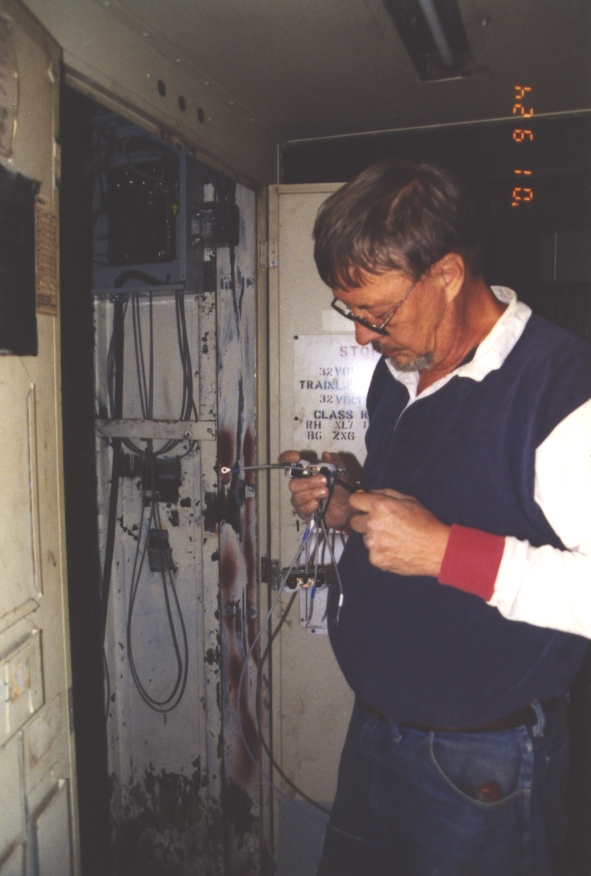 |
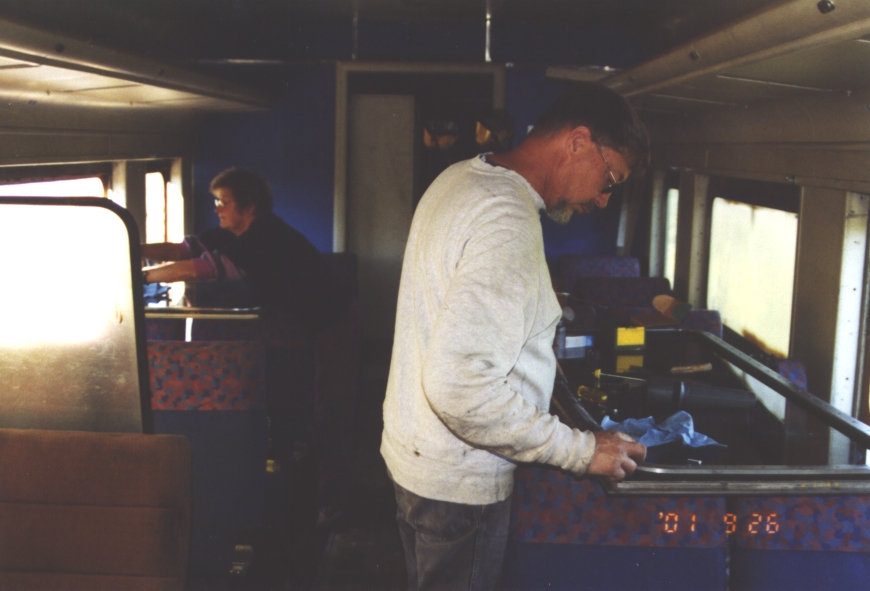
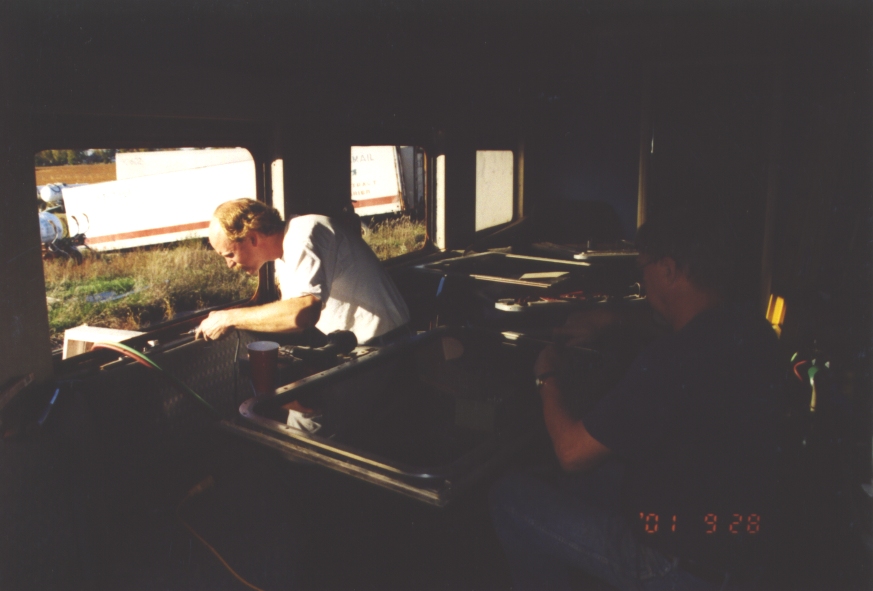
Dad is adding outlets to the lighting breaker box. |
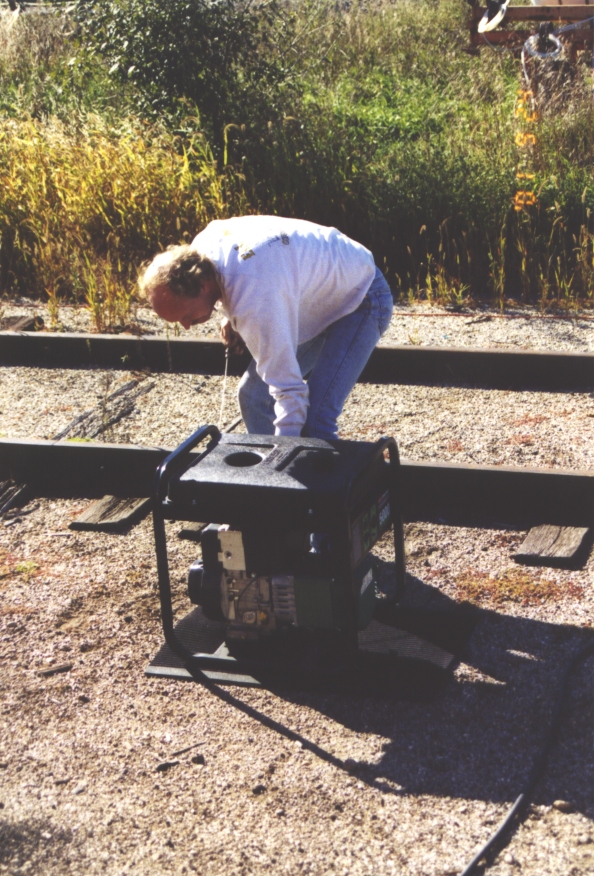 |
Starting the portable generator. 5kw - enough for a work party. |
 |
Dad and I discussing which wire does what. |
 |
Mom took in upon herself to clean the kitchen. The stove was particularly filthy. Once she got up into the exhaust blower cabinet, we were fascinated to discover the aroma of meat cooking - even twenty years after its last use. |
 |
Dad is applying the gasket to the glass. We did something kinda screwey: We unpacked all the windows, trimmed them with the gasket, and then leaned them up against the wall until we were ready for them. Why? Because the crate was too heavy to lift out of my pickup, and once we'd opened the crate I didn't want to drive off with the brand new glass flopping around. The edges are the most vulnerable, so we used the gasket to protect them. Then when we stacked them in a corner, we protected the surface with paper. |
 |
Dad and I putting gasket on the glass panes. The big coach and hall windows were easiest to work with laid on coach seat backs. Warning: Don't set any metal tools on the glass, it will scratch. Also, don't press hard in the center, it may break. This won't work with seats that have metal buttons to hold seat back cloths. |
 |
When Mom got tired of the kitchen, she started cleaning the coach section. I appreciated that - clean feels good. |
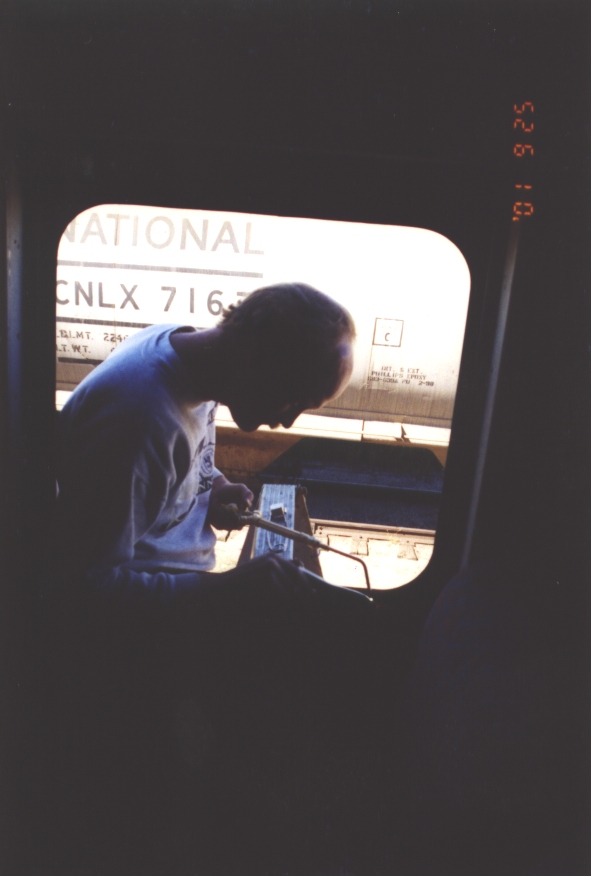 |
I'm removing rusted-in window screws. As the grain car on the next track hints, we are on live track. Blue flag protection of workers (similar to industrial lock-out/tag-out safety procedures) is very important! |
 |
Mom and Dad are assembling the large coach windows. First we laid the inside half of the sash down, then we laid the glass and gasket it. After some poking with a putty knife to seat the gasket, we laid the outside half of the sash on. When new, this gasket is a little oversize. We found it easiest to put a few screws in to hold things, poke the gasket into place with a putty knife, and then tighten everything. Notice the old plexiglass pane on the left. Yuck. |
 |
We also found some techniques don't work well - such as getting the bakelite all lined up before wrestling the gasket into the sash. Something else which doesn't work is forgetting that the port for the breather and the joint in the gasket must be at the top, and that the "FRA Type-II" bug must be at the bottom. Forgetting means take it apart and try again. |
 |
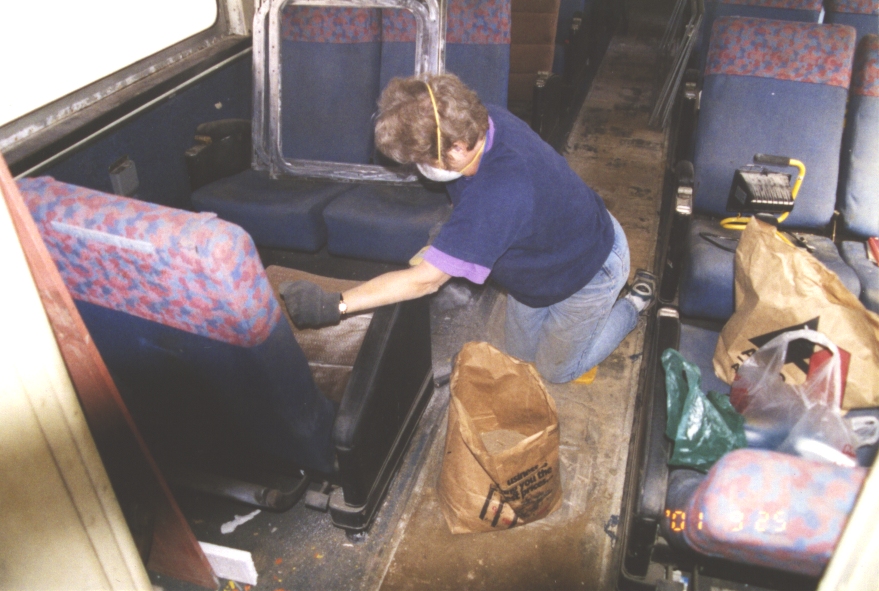
Mom and I removing rusted-in, broken-off screws. There were a lot - sometimes five or six in a row. A gasket can compress properly is one is missing, but two or three leaves a section "open". I felt it was important to take the time to open up every screw hole, in order to get a water-tight seal. So, why not just drill new holes? To avoid damaging a sash. Notice Mom is using the "wiggle the Vise Grip" screw removal method. It can work well if the screw is not too far gone. |
 |
Dad and I removing a window sash. Since Bob had already done the tedious job of busting/drilling all the rusted-in screws a couple years before, this went pretty quickly. |
 |
Here's a technique for removing rusted-in screws: Heat the screw to cherry red with an oxy-acetelyne torch. The heat must change the rust molecules somehow, so that they lose their grip. The screw will turn freely as long as it is glowing, but will lock up again once it cools off. It's more efficient to heat the screw, instead of the hole, because rust doesn't transfer heat efficiently. For screws too far gone to grab with the Vise Grip, I heated them and Dad used a hammer and punch to knock them out. That killed the threads, so later we had to use larger screws in those holes. DANGER: Steel passenger cars WILL BURN. Keep a spray bottle of water handy, set to "stream", for putting out all the little fires the torch lights. Also keep a large jug of water and a fire extinguisher around. Not only is the interior flamable, but the builders put fabric, cork, or wood between any metal pieces that were not welded or riveted, to eliminate car body squeeks. If there is dry rot, be careful. Dry rot catches fire even from grinder sparks. |
 |
I think I was trying to extract a broken-off screw. I ended up deciding it was impossible. Something about steel screws in aluminum just locks up tight when they corrode. They break rather than turn. Drilling them out by hand is difficult, because the aluminum is softer than the steel screw. |
 |
Window assembly. I use "Never Sieze" on the screw threads, so they'll come out more easily later. The green box contains new stainless screws I bought. Unfortunately, they were 1/16" too long. I didn't think that made a difference, until a few windows into it when I realized they had bottomed out and raised a dimple on the inside surface of the window! |
 |
The dining room windows, it seems, were made 1/4" too long. (My fault.) A local glass company was able to trim them, but I didn't have them try to redo the radius on the corner. The glass worked, but the corners look kinda funny. |
 |
Mom is cleaning window frames. We worked hard with scrapers, brillo pads, "Fast Orange", and anything else that would take paint overspray off. |
 |
The end of another day. Mom is taking the picture which follows. |
 |
This picture really illustrates the difference between the old and the new windows. Wow. |
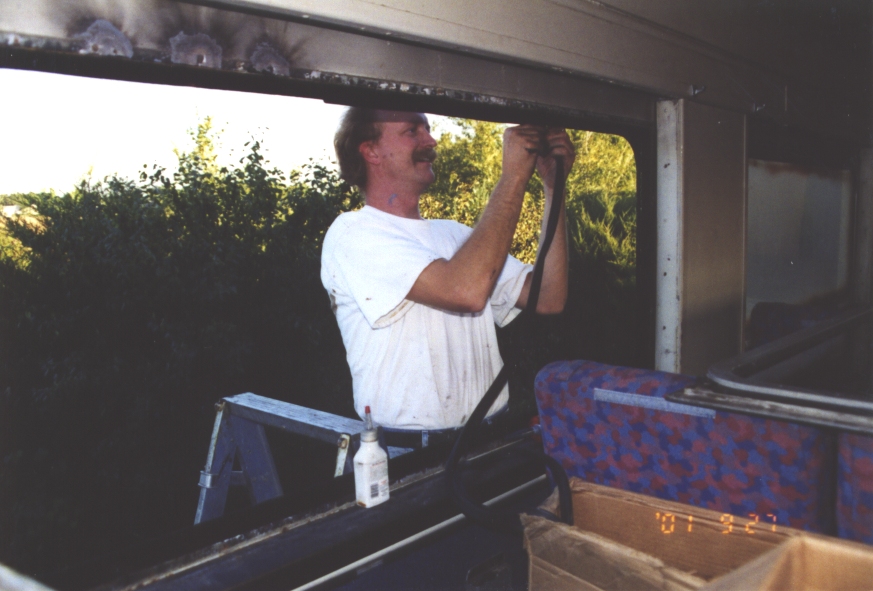 |
I'm applying the rubber outer gasket to the exterior skin, just before installing the sash. A couple pointers I've learned: First, don't stretch the gasket at all. That will make it pop out at the corners as the window is screwed down and compresses it, and leave a "buck tooth" gap where its ends meet. It's better to pack the gasket in slightly. Put the joint at the top - the one place where it won't funnel water into the car. A bit of urethane window caulk on the steel will hold the gasket in place until the window is in. Those three burn marks at upper left are from extracting rusted-in screws with the oxy-actelyne torch. I tried to work quickly and keep the heat down, but even so... |
 |
Dad and I getting ready to install a window. It looks like I'm sweeping the last of the crud out of the channel below the window. We tried to vacume all the crud out, because it will absorb and hold water. |
 |
For some odd reason, this picture amuses me. Something about the torch dangling out the window seems to tell a story. |
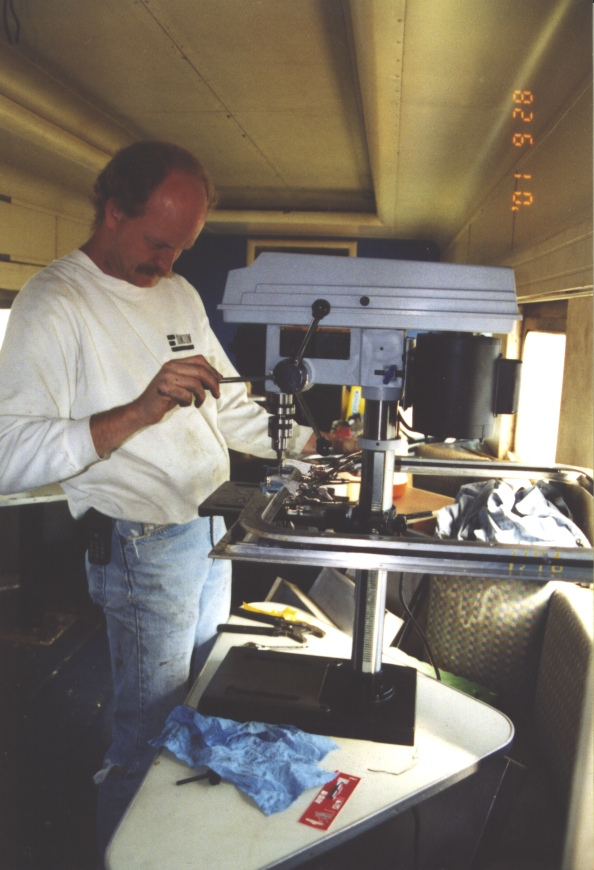 |
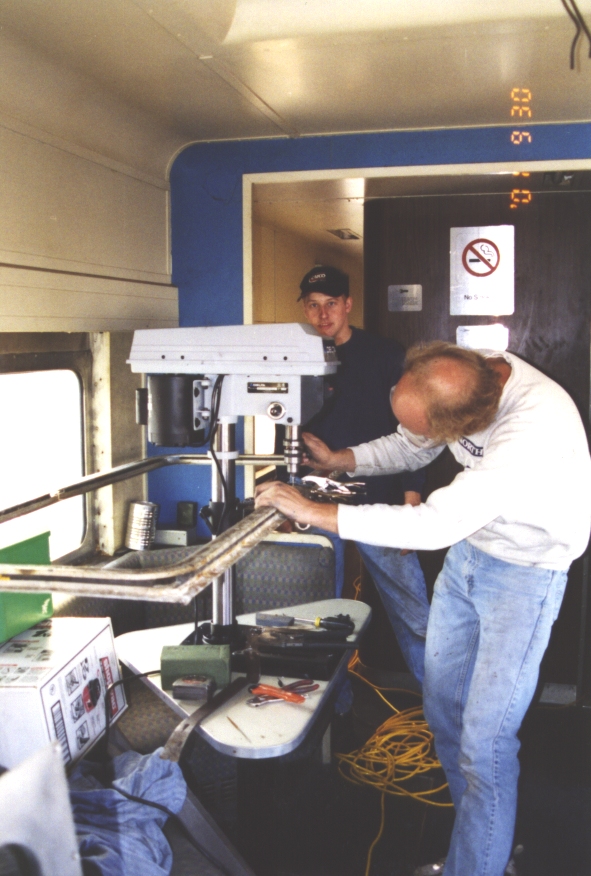
This is my solution to the corroded-in, broken-off screws in the sash. Drill and tap a new hole, about a half-inch away from the old. This little $150 drill press, with a couple Vise-Grip work clamps, was just the ticket for keeping everything aligned during the operation. First I drilled the pilot hole to full depth, then I drilled a clearance hole to the bottom of the bakelite, then I countersunk for the head. The pilot drill was carefully measured and marked for "stop here", because the bottom of the hole is 1/16" to 3/32" from the visible inside face. After drilling, the hole was tapped twice. Once with a regular tapered tap, to start the threads, and then with a sawed-off bottom tap, to cut the threads all the way to the bottom. Because the screw holes are on the outside of the sash, right where the outer gasket runs, I plugged the old holes with urethane window caulk, smoothed the surface with a wet finger, and let it dry. The reason for all this operation? That inner gasket gets clamped pretty hard. Any missing screw puts extra load on its neighbors, increasing the chance of breaking the screw or stripping the threads out of the hole. If two or three are missing in a row, there is the added trouble of the gasket not being compressed enough to seal. |
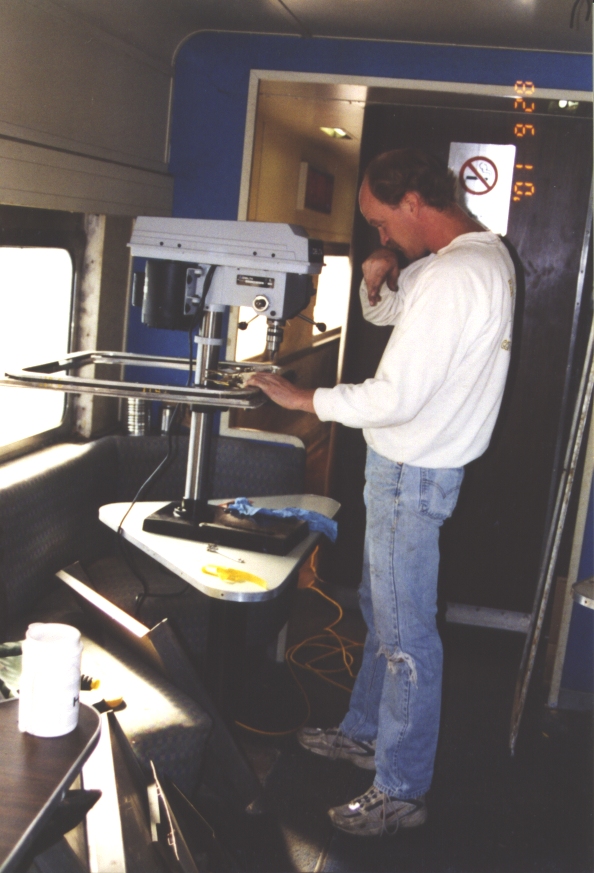 |
Here's another shot of the same operation. Notice I've partially assembled the window sash, with just enough screws to hold the bakelite still. Also, I folded some rags under the work clamps, so they wouldn't mar the aluminum. |
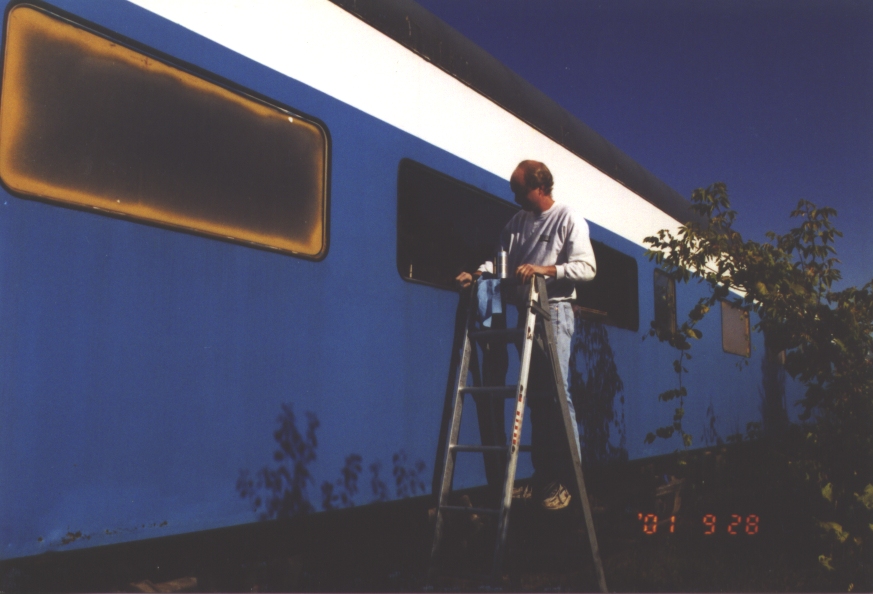 |
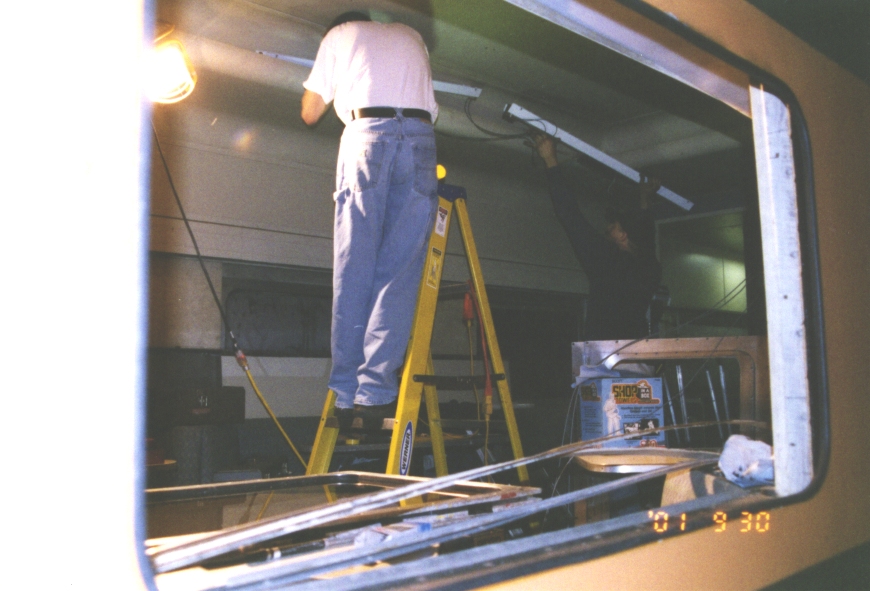
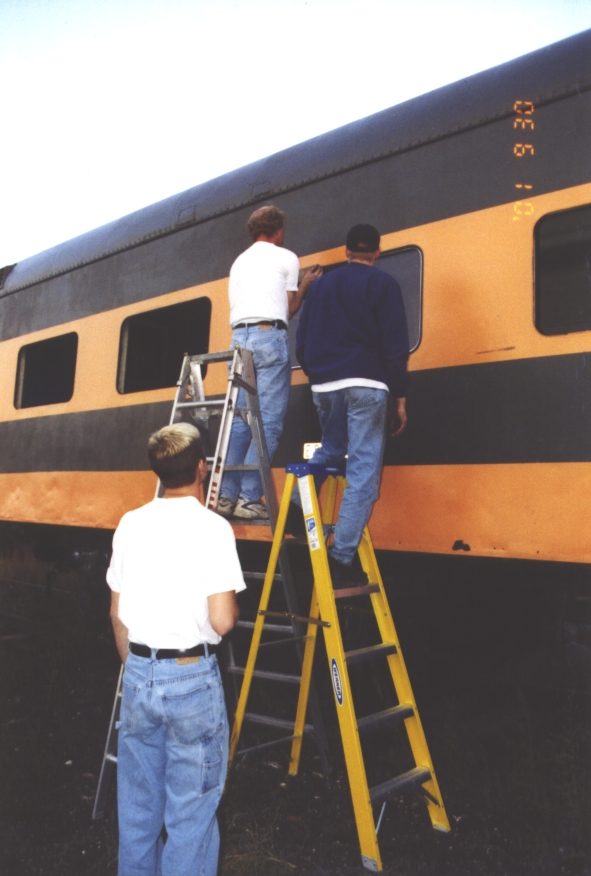
A tall step ladder is a real handy tool to have for outside work. This one is slightly over seven feet tall. Having steps on both sides was useful, especially with these wide coach windows. |
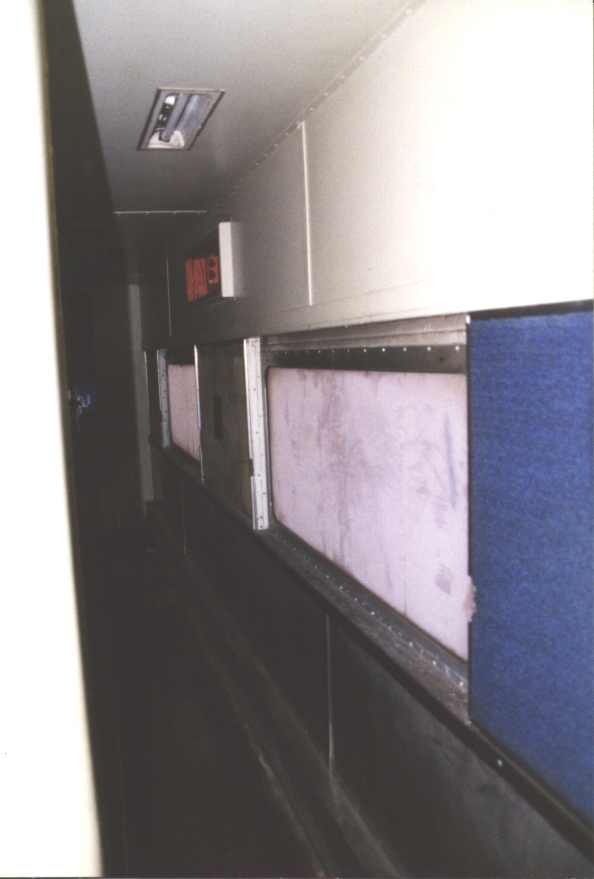 |
The hallway windows are identical to the large coach windows. Notice a piece of Amtrak carpet still on the wall. It didn't last long. |
 |
We decided we'd better do our best to remove the cakes of rust from inside the window channel, wire brush the metal, and then prime and paint to protect the metal from further rust if any water ever got in. At the time we were using Rustoleum rusty metal primer and gloss black topcoat. (I've since found an automotive restoration product I like better.) A strong work light is a real help when painting black paint in a dark place. |
 |
Mom and Dad are assembling a window sash. I think Dad got tired of the Never-Sieze pretty quick, but I insisted. He's gotten it all over his fingers! |
 |
Mom is cleaning and painting the steel opening for a dining room window. |
 |
Dad is screwing a window sash in. The original screws were #10 flat-head sheet-metal screws. In the holes we opened with the torch and punch, we had to use #8 screws instead. |
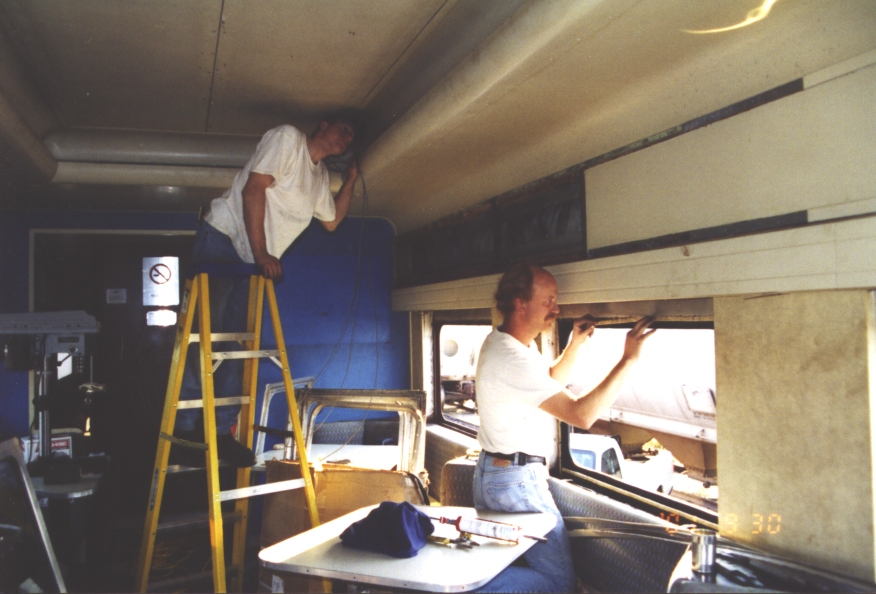 |
I am installing a 1"x1/8" strip of felt where the window sash will screw into the steel frame. This duplicates what was done by the builder to control carbody squeeks. Little dabs of the urethane window caulk made great adhesive. Phil is running new wires to the indirect ceiling light fixtures. That wasn't fun! The original wires were already out when I bought the car, and we discovered the conduit, rather than having a ninety-degree bend, was just two stubs at right angles in a totally enclosed space above that stack of window frames. We had to cut a 4" hole in the bulkhead wall above the linen closet, to be able to feed the wires from one conduit stub to the other. |
 |
Eric is pulling new wires into the kitchen ceiling trough. Several dining room light fixtures are in a cardboard box below him. |
 |
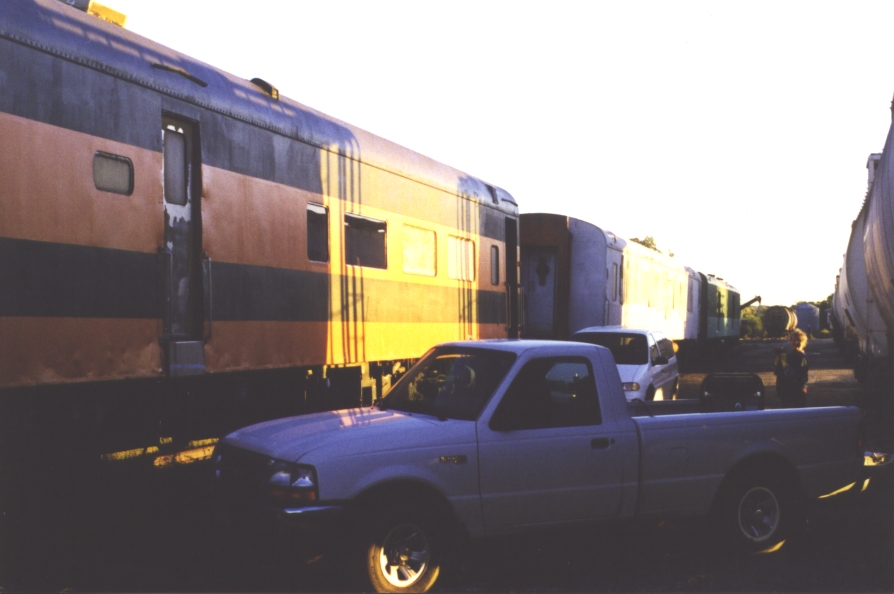
A slew of vehicles parked by the passenger cars. Someone is working on cleaning window frames. |
 |
Phil and Eric installing the dining room indirect lighting fixtures. They all looked the same, so I didn't bother marking which went where. All was well until we discovered the captive screws didn't line up with the holes! To this day I haven't gotten up there again to figure out which one goes where. |
 |
Phil is prepping a dining room light fixture. The electrical components are basically 100% new, and the steel was stripped and repainted. |
 |
I'm setting up another window frame for a new screw hole. Gee - I don't usually see my head from that angle. I have less up there than I thought! |
 |
We're trying to correct a mistake. We accidentally stretched the outer gasket, and as the window sash was screwed in it pulled out at the corners. Dad is loosening a few screws on the inside, and I'm using a wood block and a mallet to try to persuade it back into position on the outside. |
 |
Phil working on another light fixture. Smile for the camera! |
 |
The dining room got to be a mess of activity at times. Every mealtime it got clean, though. I brought my microwave down, Mom cooked the meals, and we had lunch and dinner in here every day. Better than than wasting time buttoning everything up to go eat somewhere else. |
 |
That new glass sure looks good. |
 |
Our work week is over, and while Dad enjoys the new view, Mom is taking some pictures of the results. Some of the more stubborn windows remain to be done yet. |
 |
Another view of the coach section, looking the other direction. |
 |
Here's the dining room, after the week's work. |
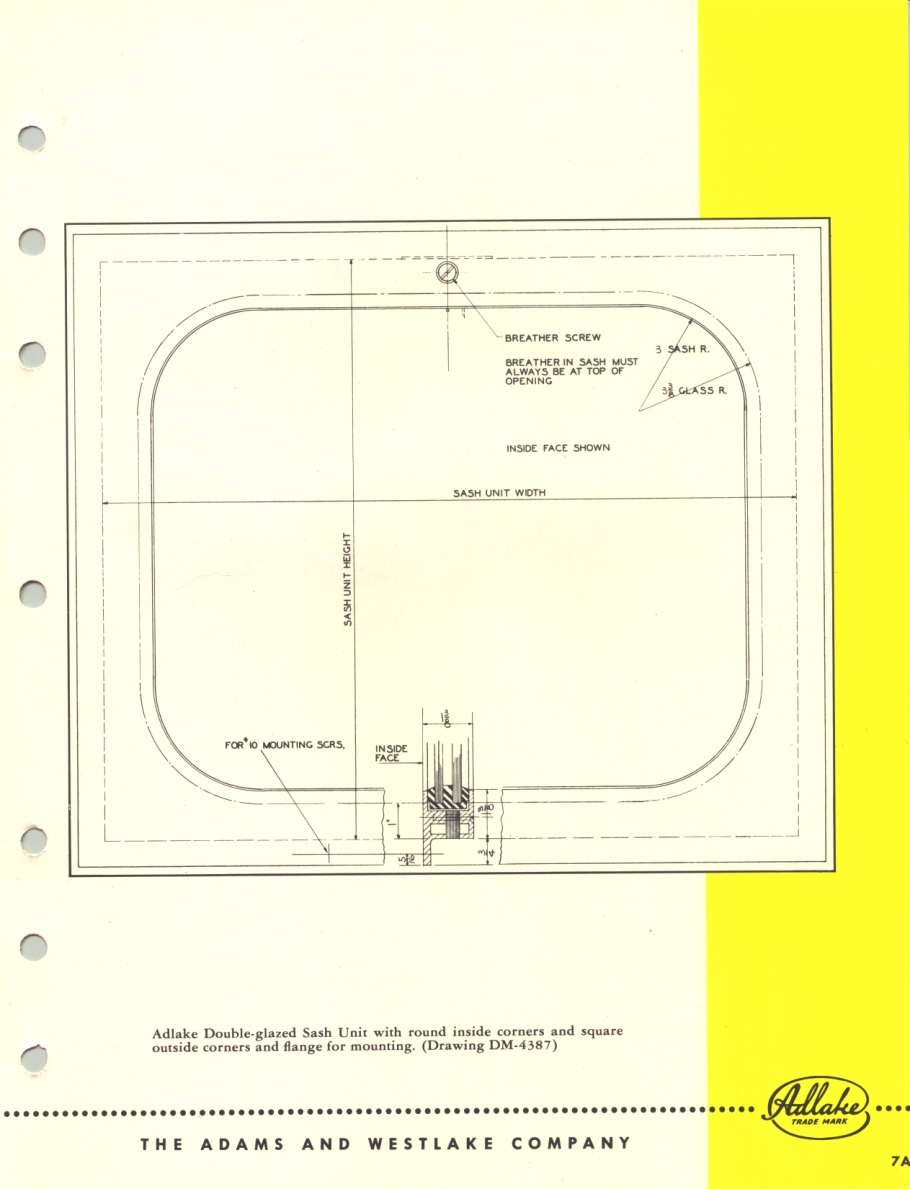 |
Here's a page from the Adlake catalog, showing the window sash units used in 1146. Note the overall width and height dimensions were specified by the customer. |
During the 2001 work session, we found several Amtrak articles:
|
A full Amtrak menu – eight pages. |
|
|
An Amtrak early dinner menu – single sided card. |

|
An Amtrak cold cereal card – double sided, folded to stand on table. |
|
|
An Amtrak seat check – single sided. |