I purchase a Bill of Materials ("BOM") and photocopies of the builder's photos for ACF lot 3124 for the John W. Barringer III library in St. Louis. The total bill (member rate) is $159.30. The BOM turns out to be 292 pages type-written on 11x17 paper, and itemizes every piece of steel, copper, plywood, et cetera - on down to fasteners - by quantity, dimension, and weight. For purchased finish items, the make and model is given. After getting it bound at a local copy shop, I start trying to index it for quick reference. The biggest problem is that its huge. Finding anything requires a lot of searching.
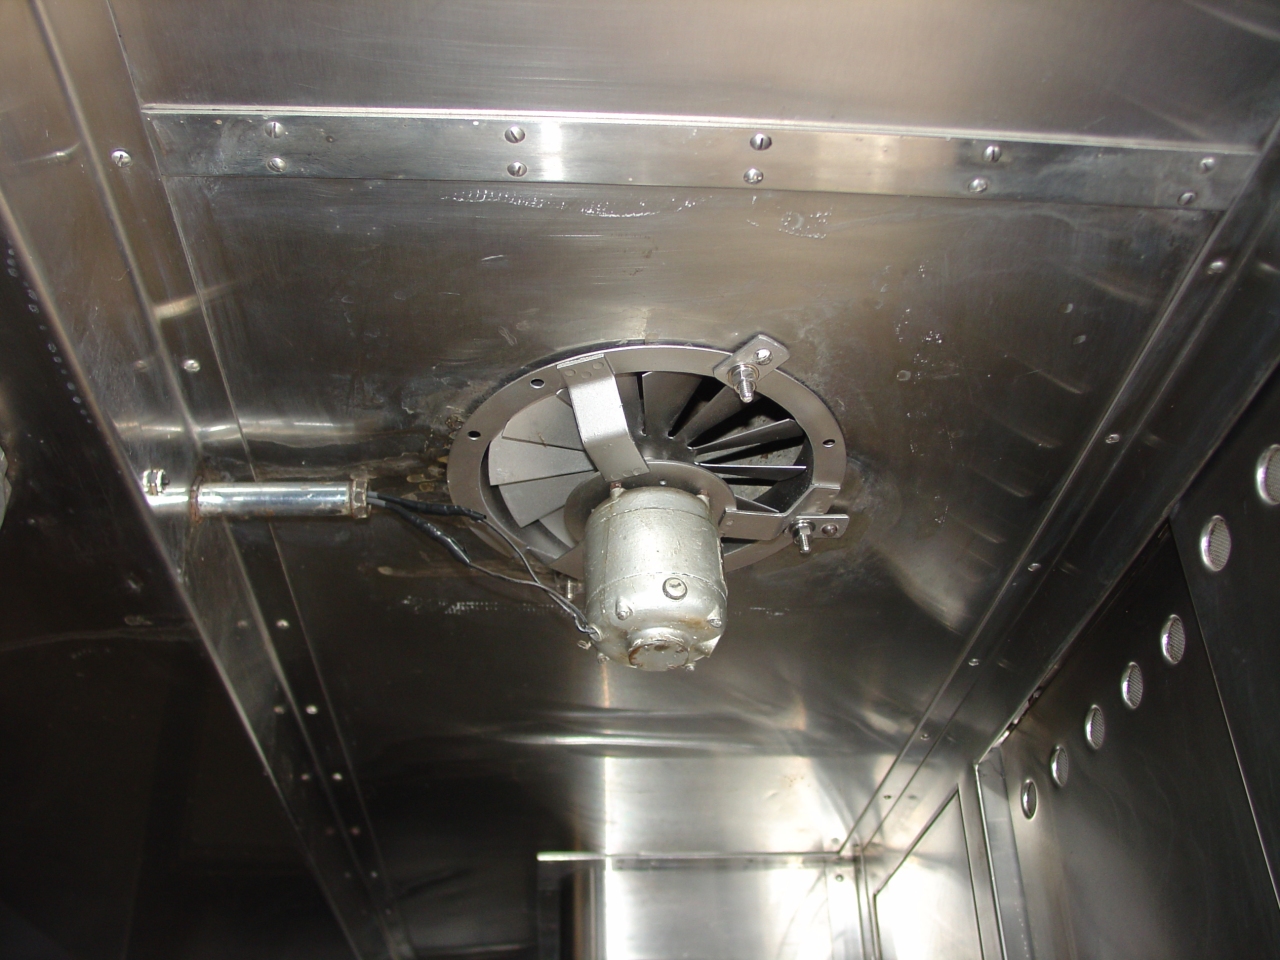
Unexpectedly, I managed to free up the motor for the kitchen ceiling fan. The bearings had filled with rust. (I took the armature out to get new bearings, and was just fiddling with it one day while waiting to drive into the car wash. Whaddaya know?!?) My plan had been to replace it with a 120vac motor, but since the 32vdc motor is exposed and more original, why not use it? A friend who knows electronics picked out a 2.2 amp, 36 volt step-down transformer, a 2-amp bridge rectifier, and a 1-amp circuit breaker for me. The motor draws less than 1 amp. I bought them from Allied Electronics.
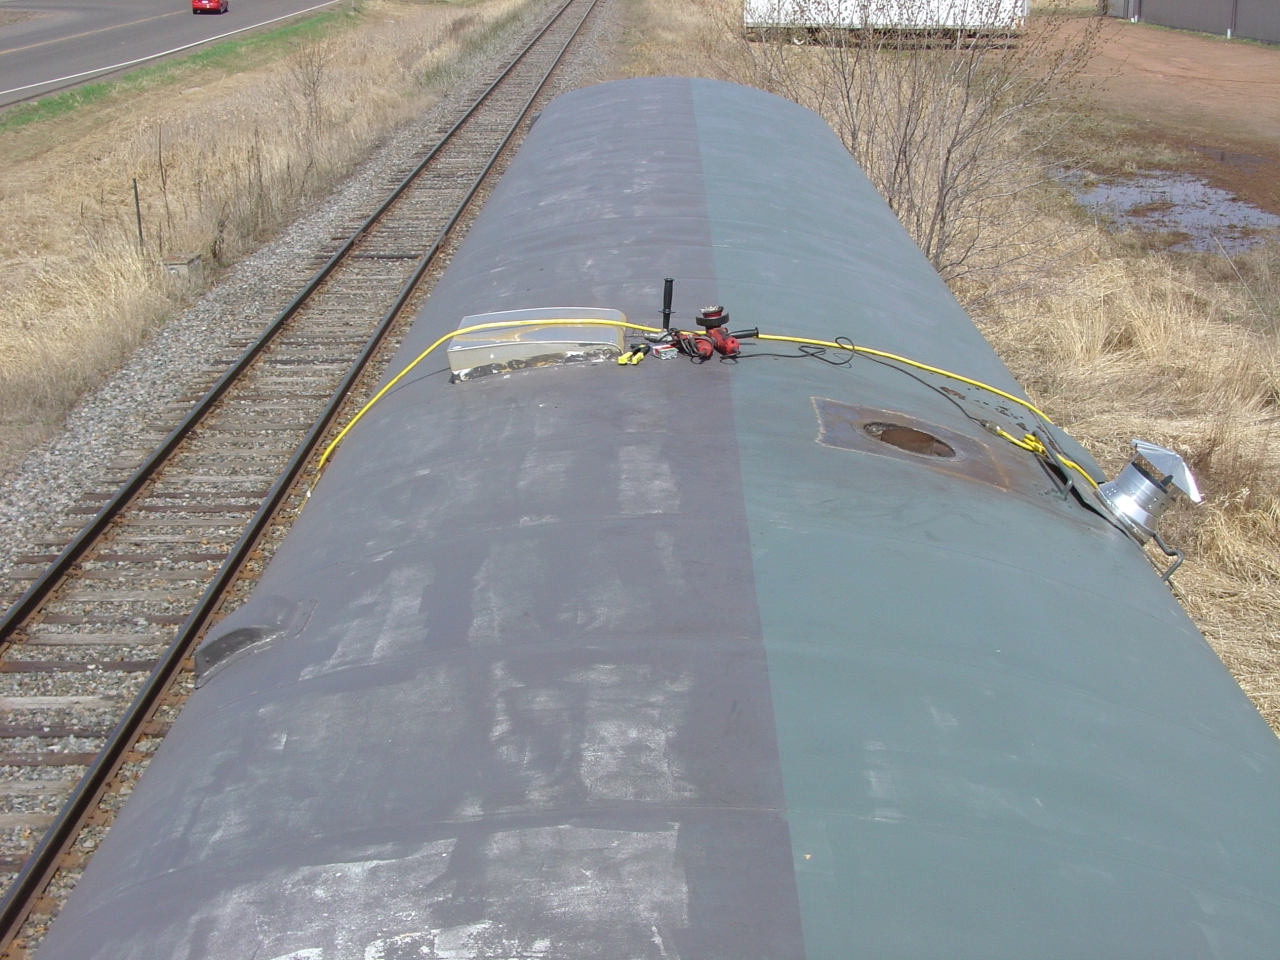
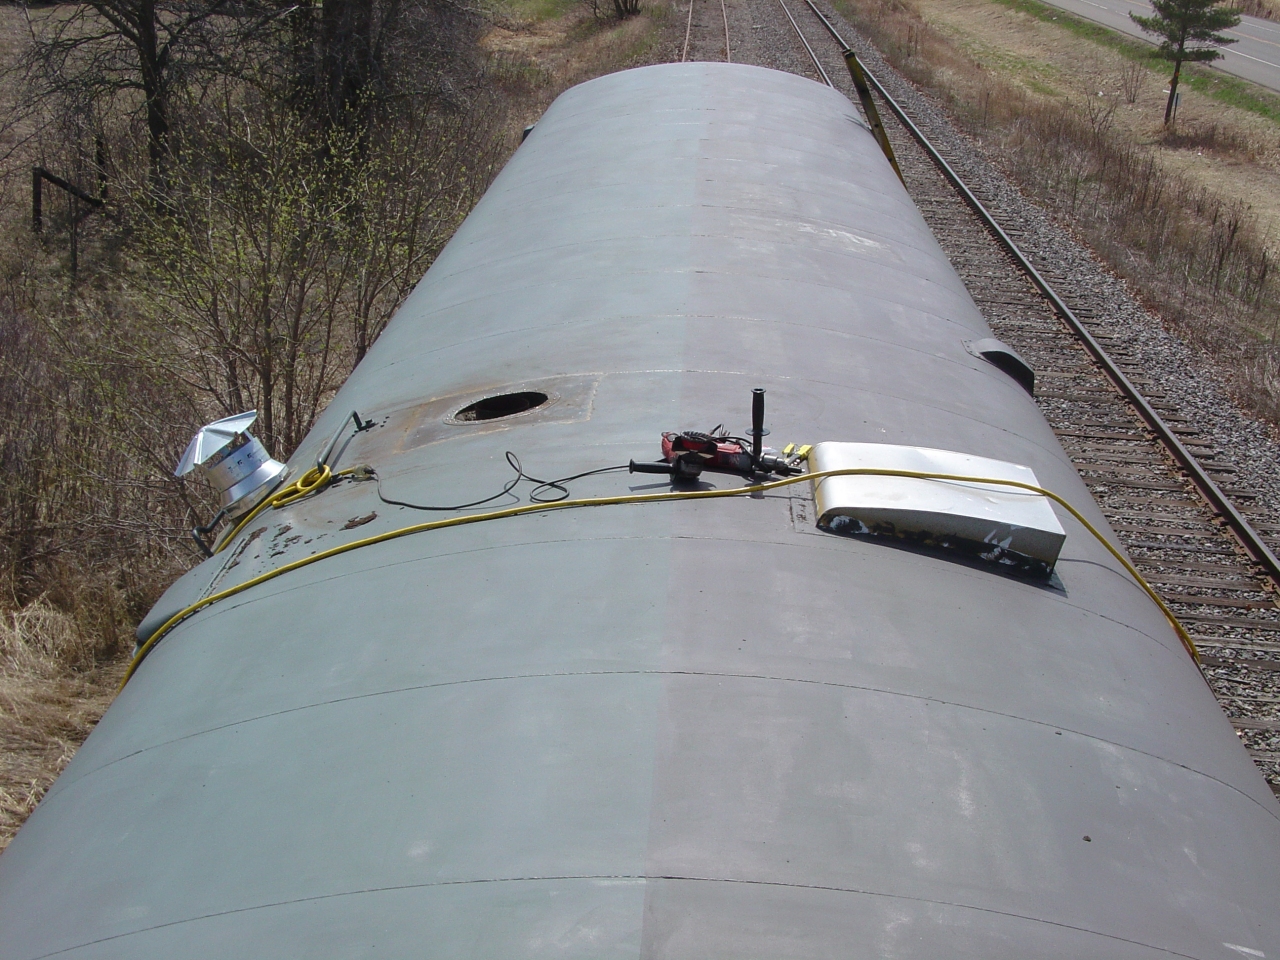
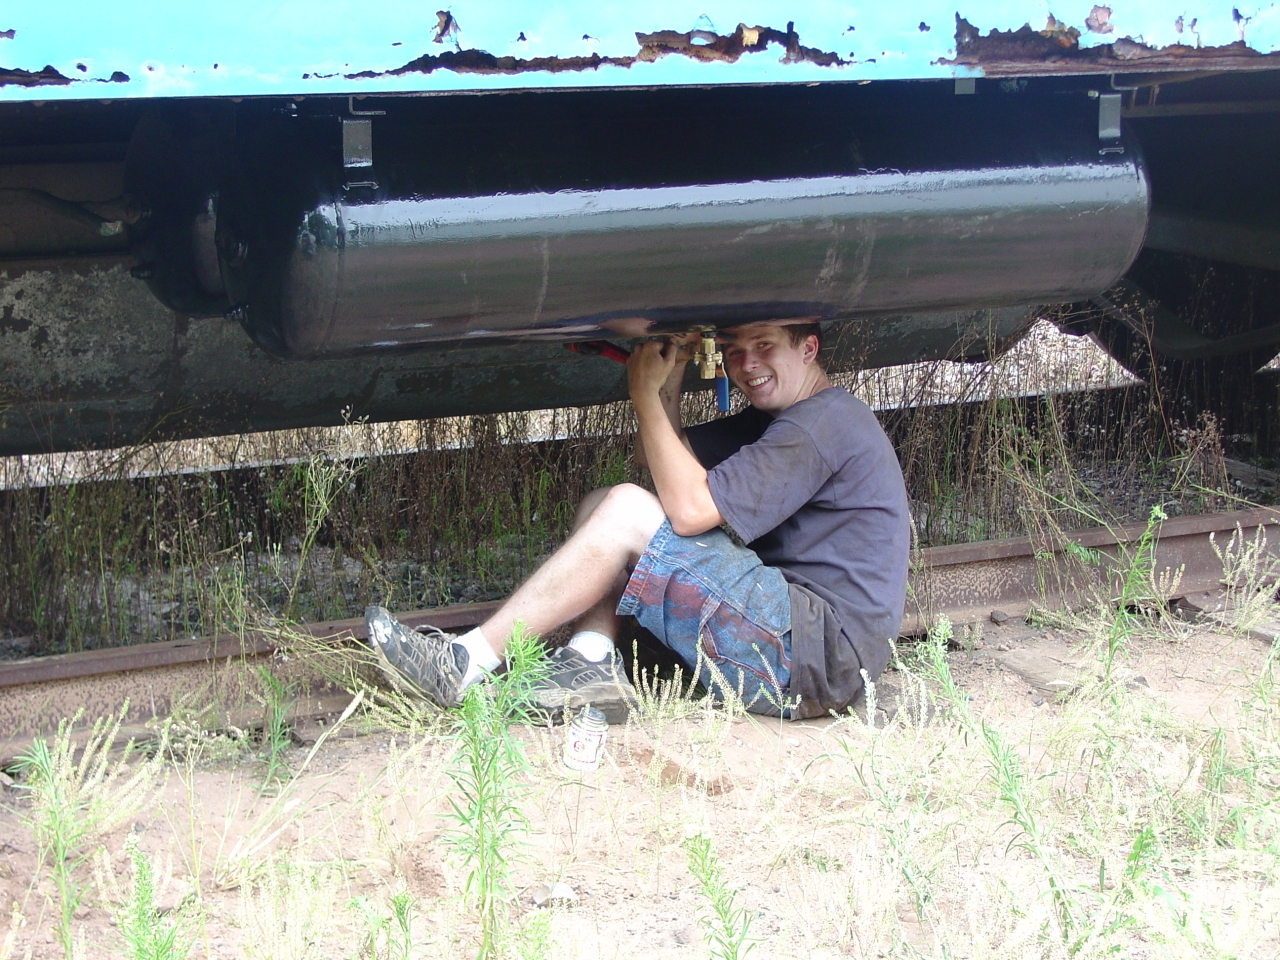
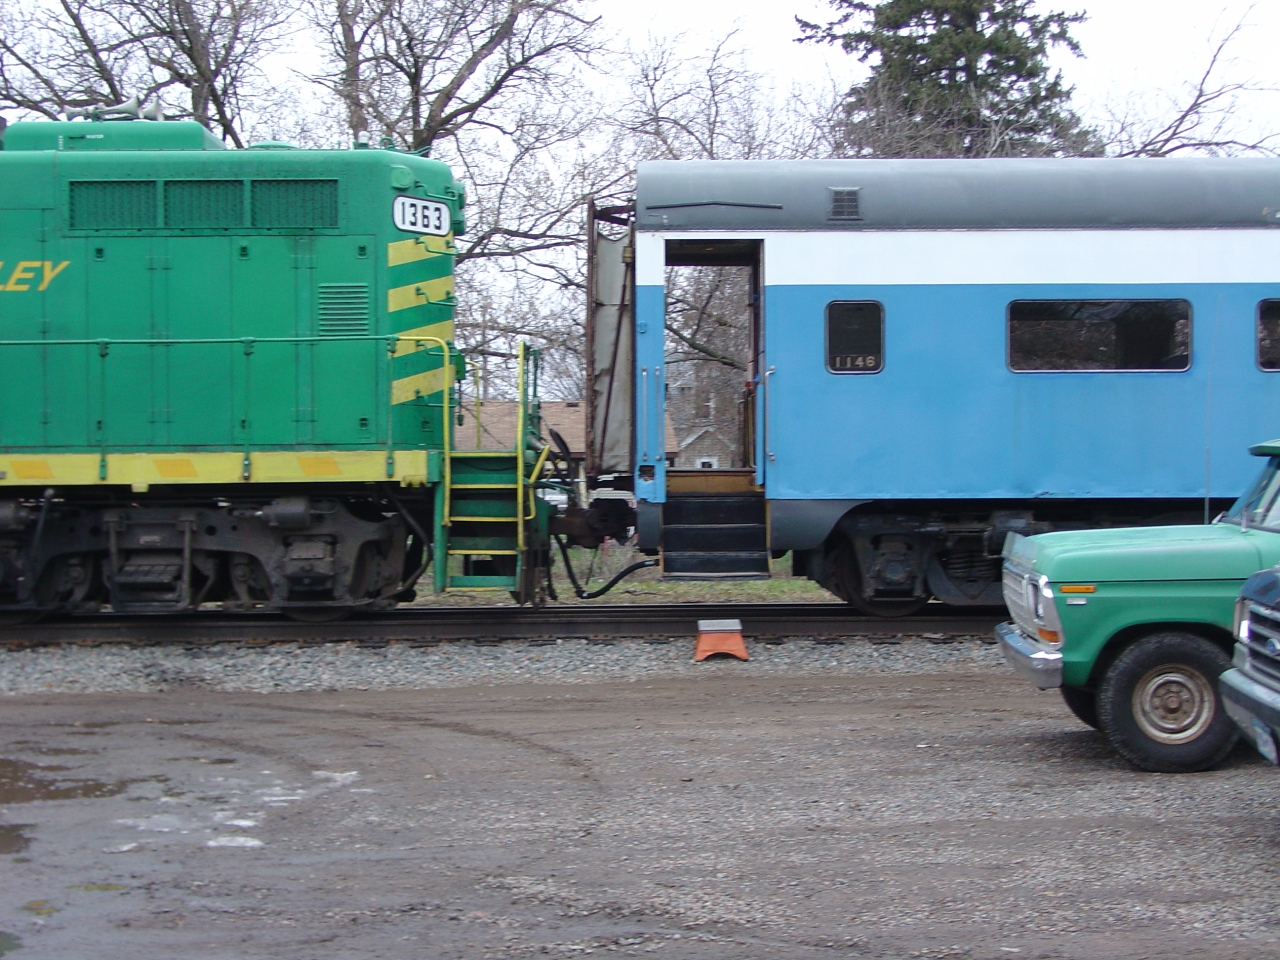
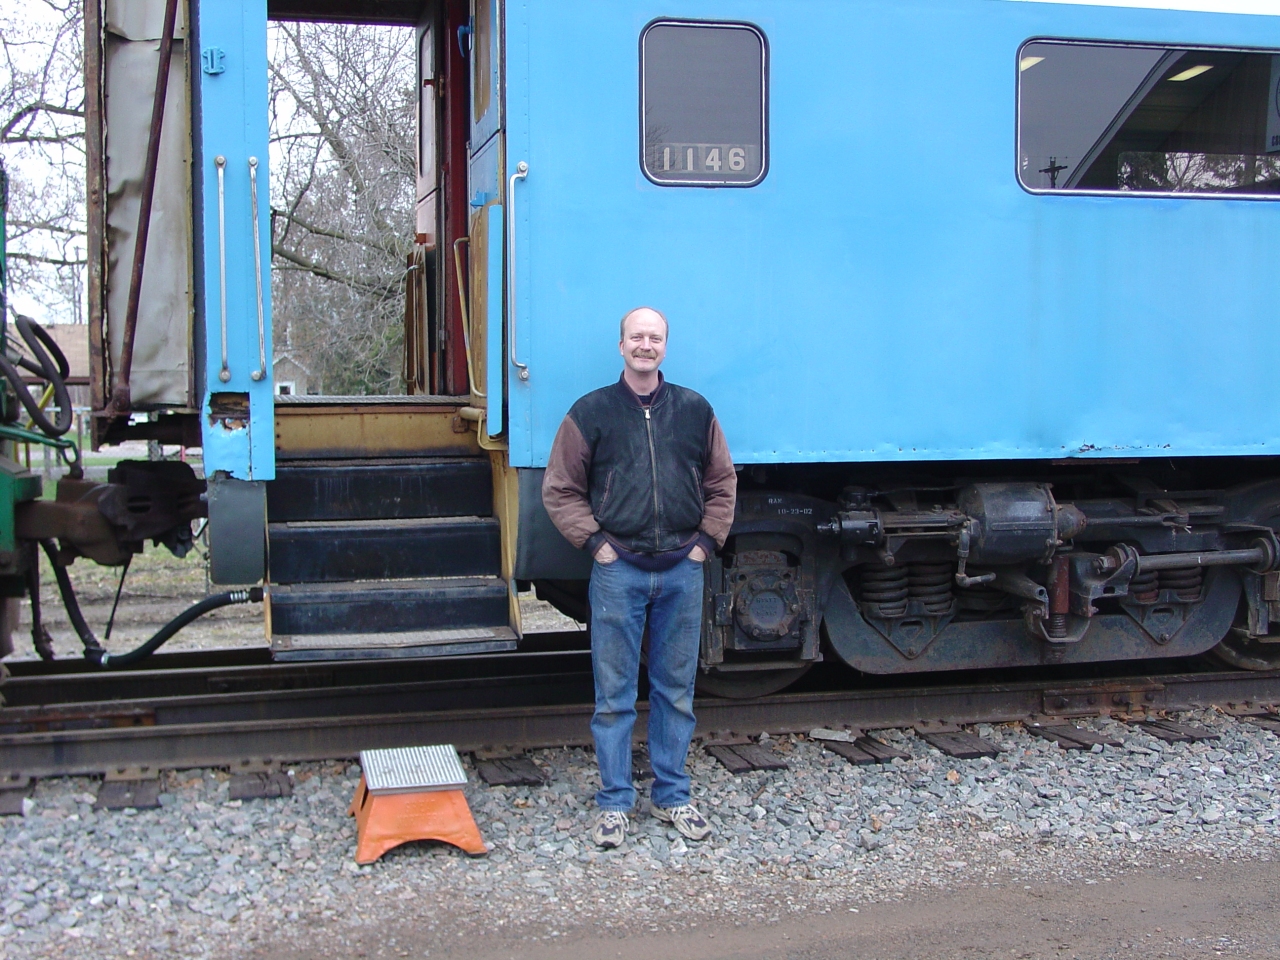
The following parts-shopping photos were taken April 17th, but the stories which follow probaly happened in March.
There is a single 2" conduit which runs from the electrical cabinet to a junction box above the A-end. It feeds the diaphragm light, marker lights, refrigerator, and A-end hallway ceiling light. I wanted the hallway ceiling light in particular, but we pulled the wires as a batch. While I was in the electrical cabinet terminating wires, my helper was outside the car on a step ladder unscrewing the marker light sockets. Now, my helper had just graduated from High School. Apparently someone driving by on old 61 though he was a vandal, and called the police. Pretty soon I heard him calling "Uh, Eric? There's a cop outside!" I went out to introduce myself as the owner, and explained that we were working on the car. No big deal, but I gave my helper a lot of ribbing on the way home. (To whoever cared enough to report suspicious activity to the police, Thank You. I do appreciate it that a neighbor was watching over my stuff for me.)
Once everything was wired up, we turned on the power to test and - BAMM! - the breaker tripped. ??? My poor helper unsoldered and resoldered the wires several times before I figured it out. I'd assumed the two tiny wires feeding the refrigerator from the top were inadequate for the 32vdc compressor motor, and that it was fed separately from the bottom. Wrong. We had a dead short because we were trying to start a DC motor with AC current. I flipped the compressor control switch from "Auto" to "Off" and suddenly everything worked.
Well, almost everything. As of March 2006, the marker light sockets and diaphragm light fixture have been reworked, but not installed.
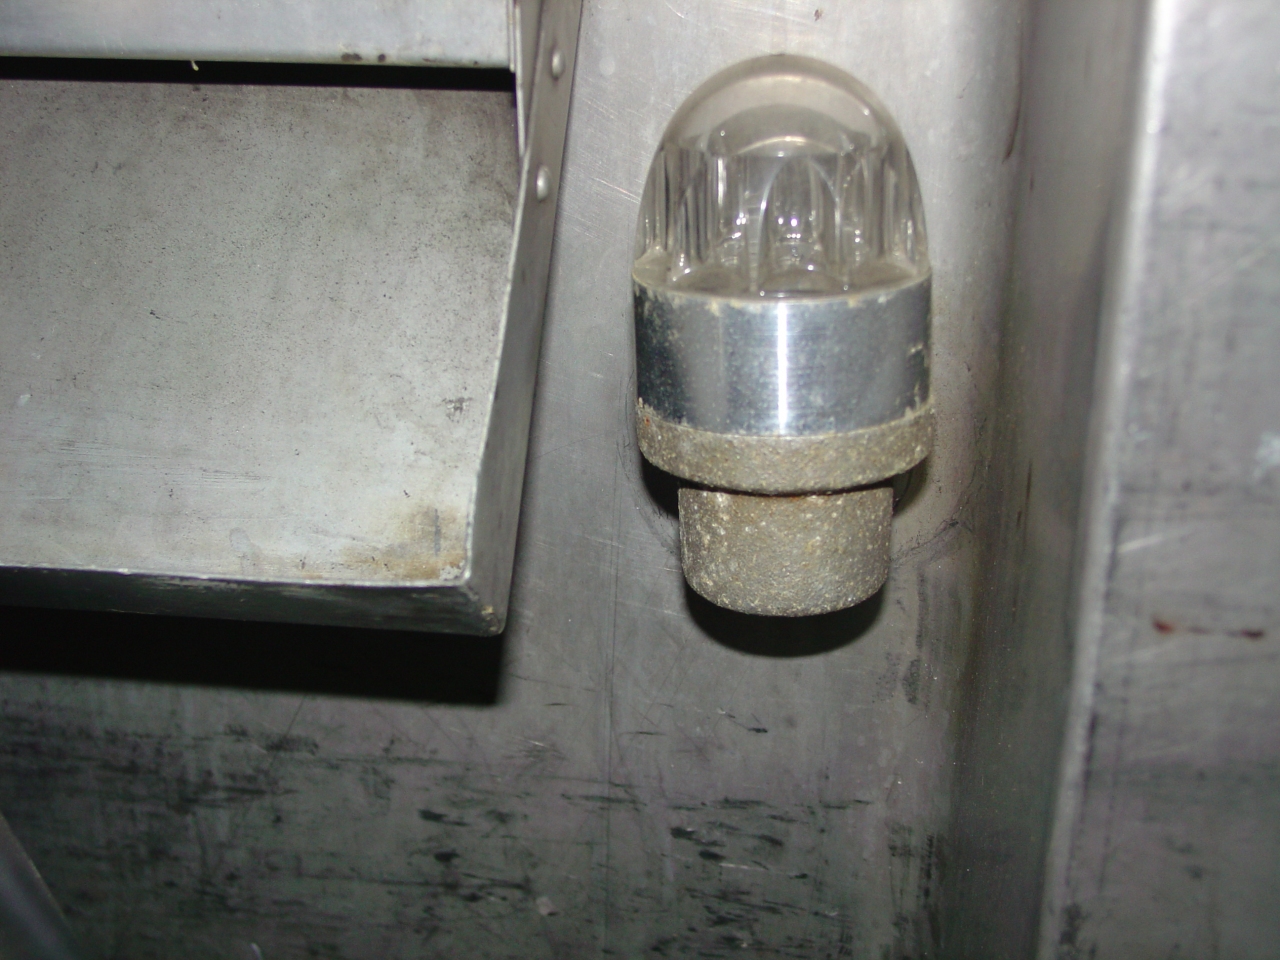
| Here is one of the refrigerator lights, which were used in all of 1146's refrigerators. |
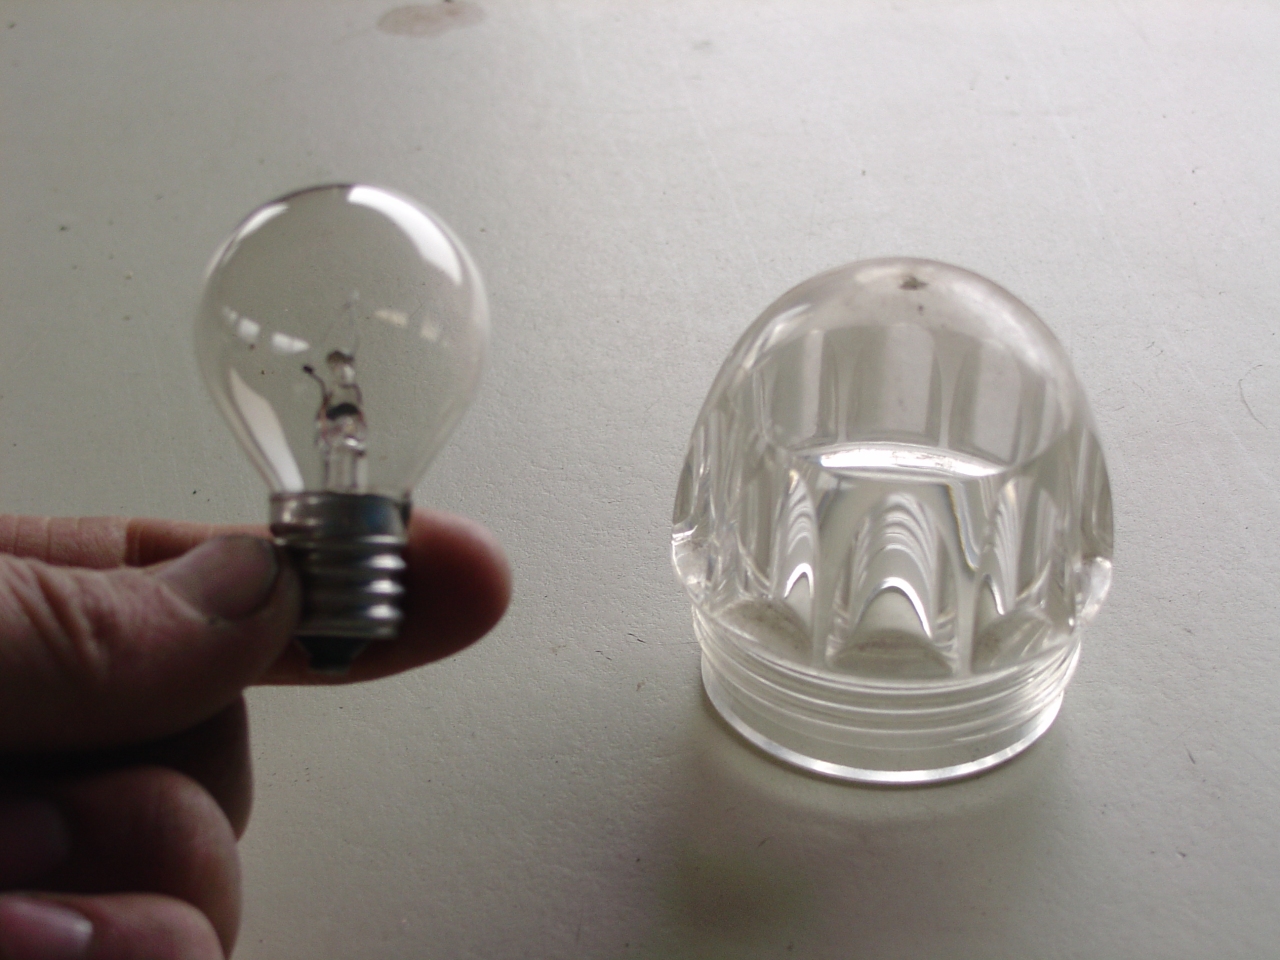
| The original 32-volt bulb - wattage unreadable - and plastic lense. |
| I found some Westinghouse 15w appliance light bulbs which fit. Bulb style T-7, 120v, intermediate base, 1000 hour life. $1.49 each at Menards. |
| The hallway ceiling light, lit up after being rewired. The refrigerator mentioned above is on the left there. |
All spring something had been bugging me. Every time I came up to work, I would smell a strong mildew smell when I entered the car. Thinking the men's restroom exhaust vent was to blame, I borrowed the museum's extension ladder, got permission from the railroad to block their main with the ladder (and also put up blue flags a half mile out in each direction!) and crawled up on top. I found the problem pretty quick. The wind had torn off the kitchen range chimney cap, and I had a 14" diameter hole in the roof! Thank God that the ACE hardware three blocks away was open on Sundays, and had something on hand which would work. I bought enough to make an emergency repair, and went to work.
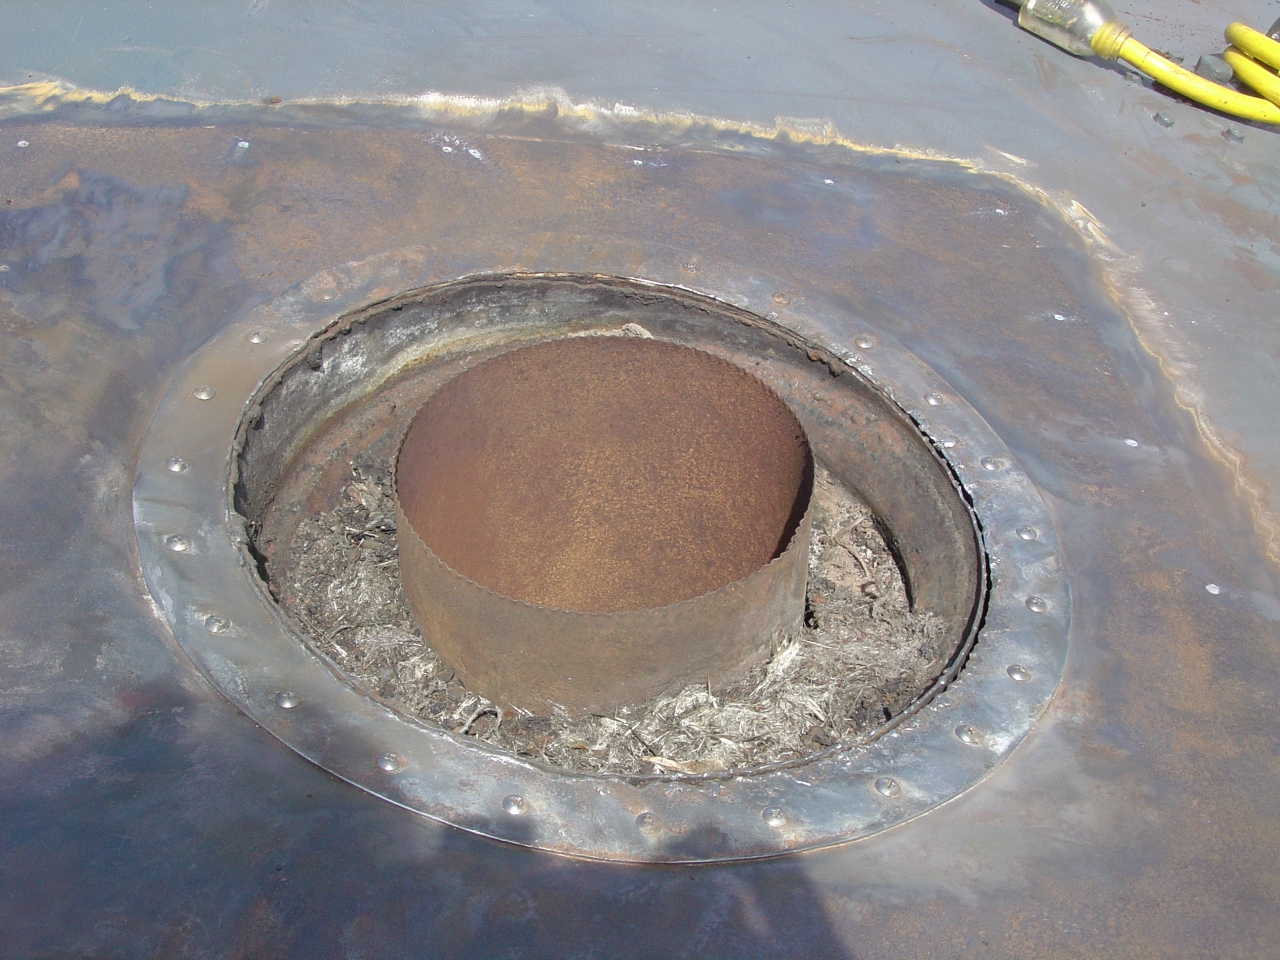
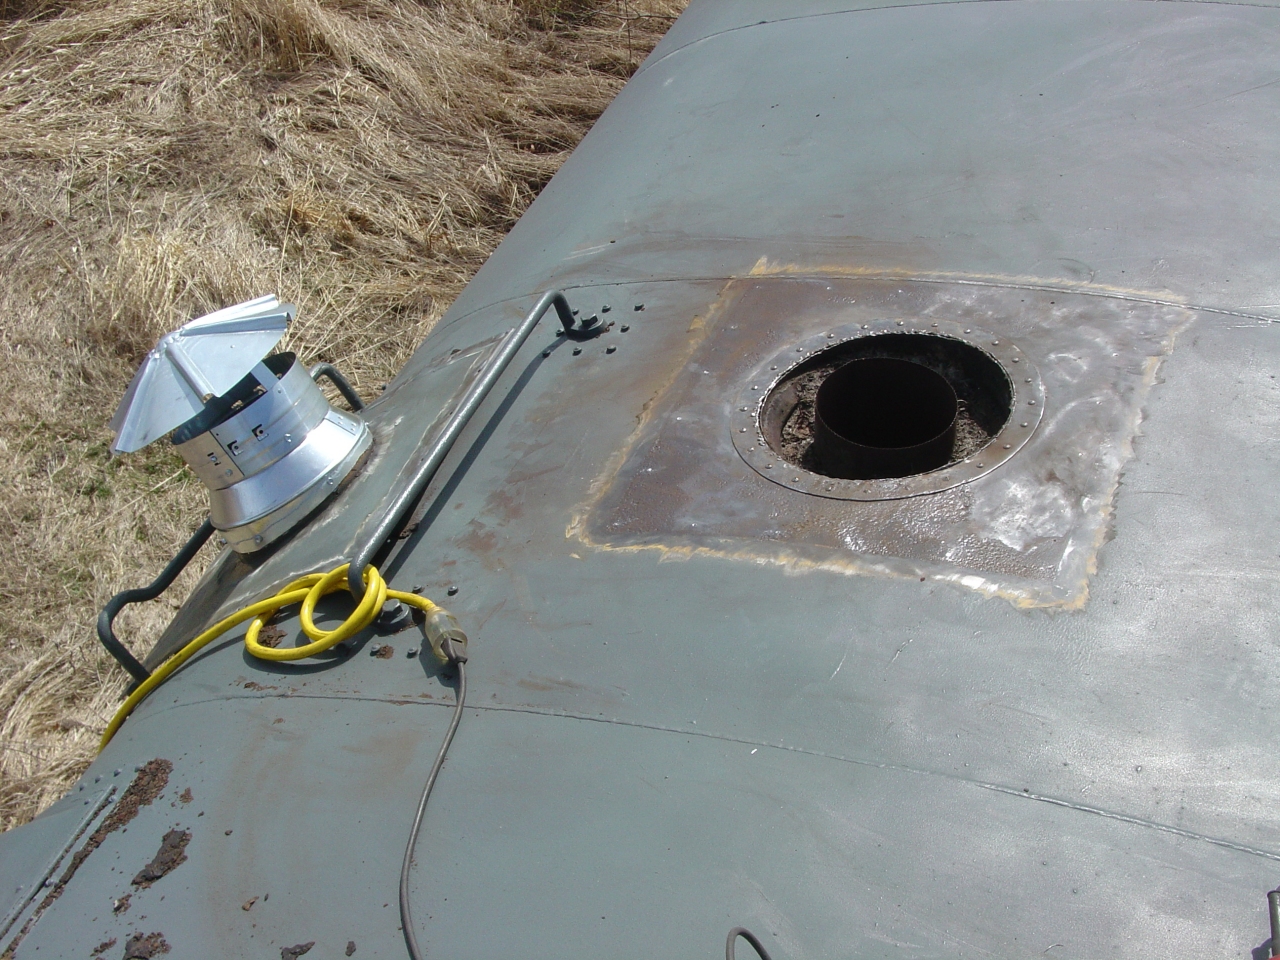
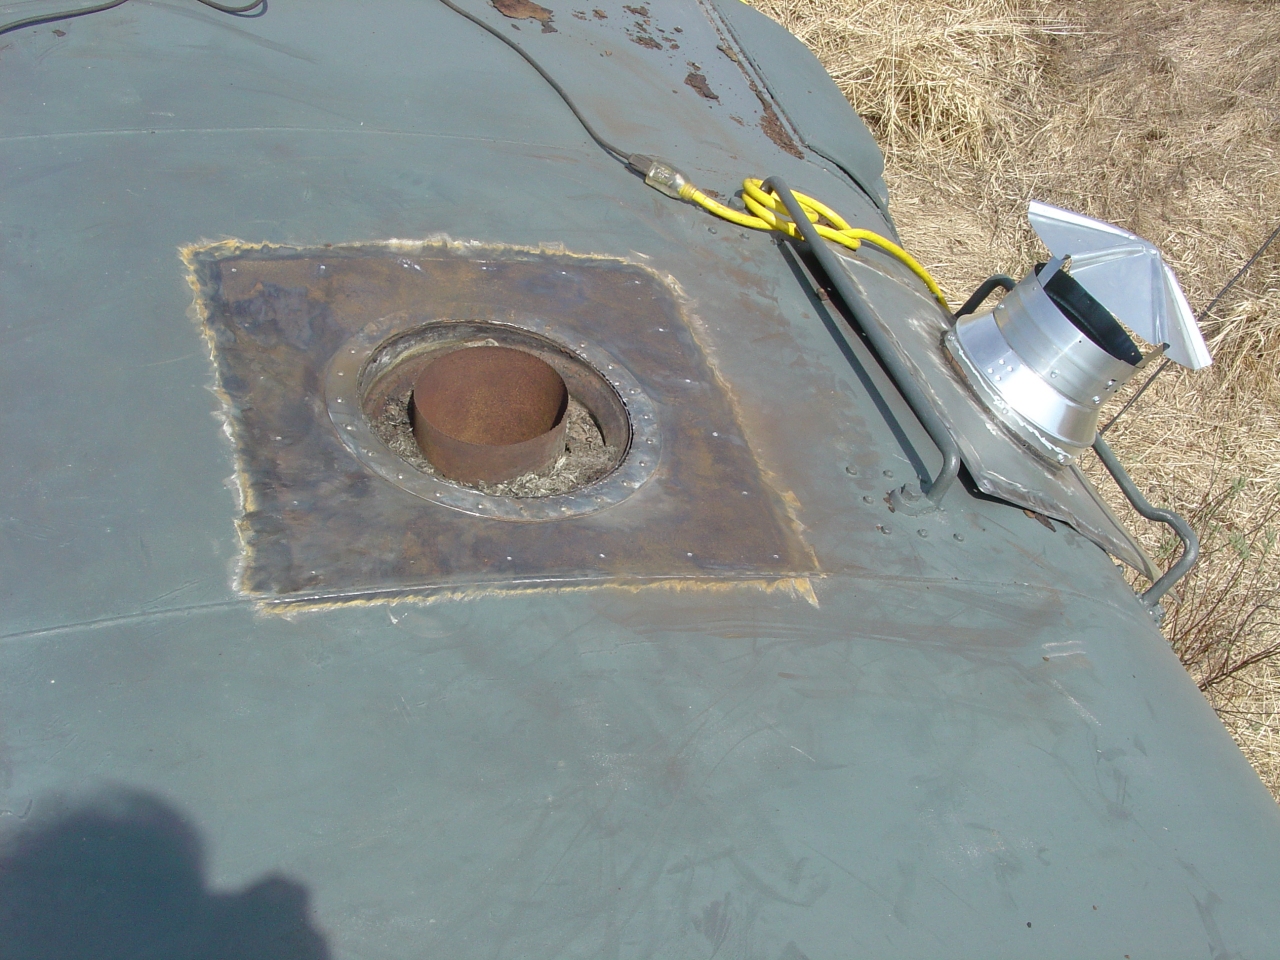 | Here's the big hole. That chimney flue is the natural range draft. It's an inner "hot" flue, with insulation and an outer casing around that. The screwed-on ring is the base of the original weather vane-type cap, which Amtrak just cut off flush to apply their replacement. My emergency repair is on the right. I re-used Amtrak's base, had to put a reducer on, and put on this residential cap. (It really looks goofy from the ground.) I used a wire cup in my 4.5" grinder to remove the old roofing cement. Judging by the rust pitting in the roof, it had long since failed and was letting water in. I applied copious quantities of fresh tar, pop-riveted the cap on, then applied tar and fiberglass mesh tap over the joint lines. |
 | Close-up of the remains of the original weather vane-type cap. I'm not sure what the insulation material is - I just left it alone. |
 | The lower grab iron is bent like that to provide a place to rest a ladder, so that it won't slip off sideways. Notice the roof panels span from eave to eave, and are welded to the carlines - I've never seen a roof leak there. Mostly I've seen vents and eave batten strips go bad. Those extension cords with little neon "power is on" lights are real handy - especially when trying to find the end in the dark. All those rusty crumbs came from the "sealed" area under the flange of Amtrak's replacement cap. |
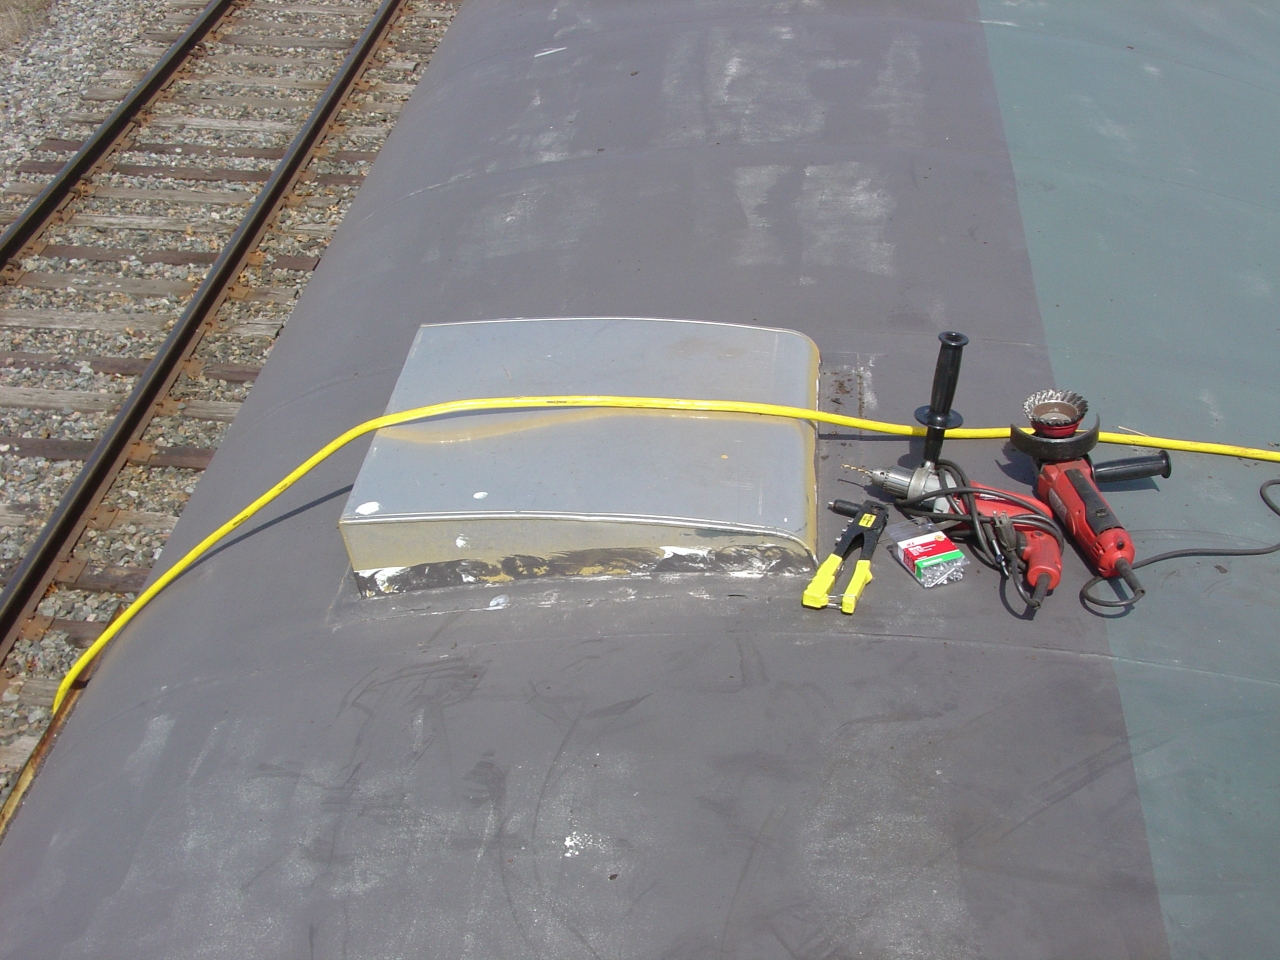 | Here are the tools I used for the job. That aluminum cover is over the kitchen's ceiling fan. It's also an Amtrak replacement - the original was a weather vane-type like the range chimney. |
 | Looking towards the A-end. Foreground, left to right, we have the electrical cabinet vent, the kitchen ceiling fan vent, the range chimney, and (partly hidden) the range hood fan exhaust. |
 | A closer look at the A-end refrigerator exhaust. |
 | Looking towards the B-end. I put the ladder where I did, thinking I would be working on the men's room exhaust fan. It did not clear the main, so I had to coordinate with the railroad. |
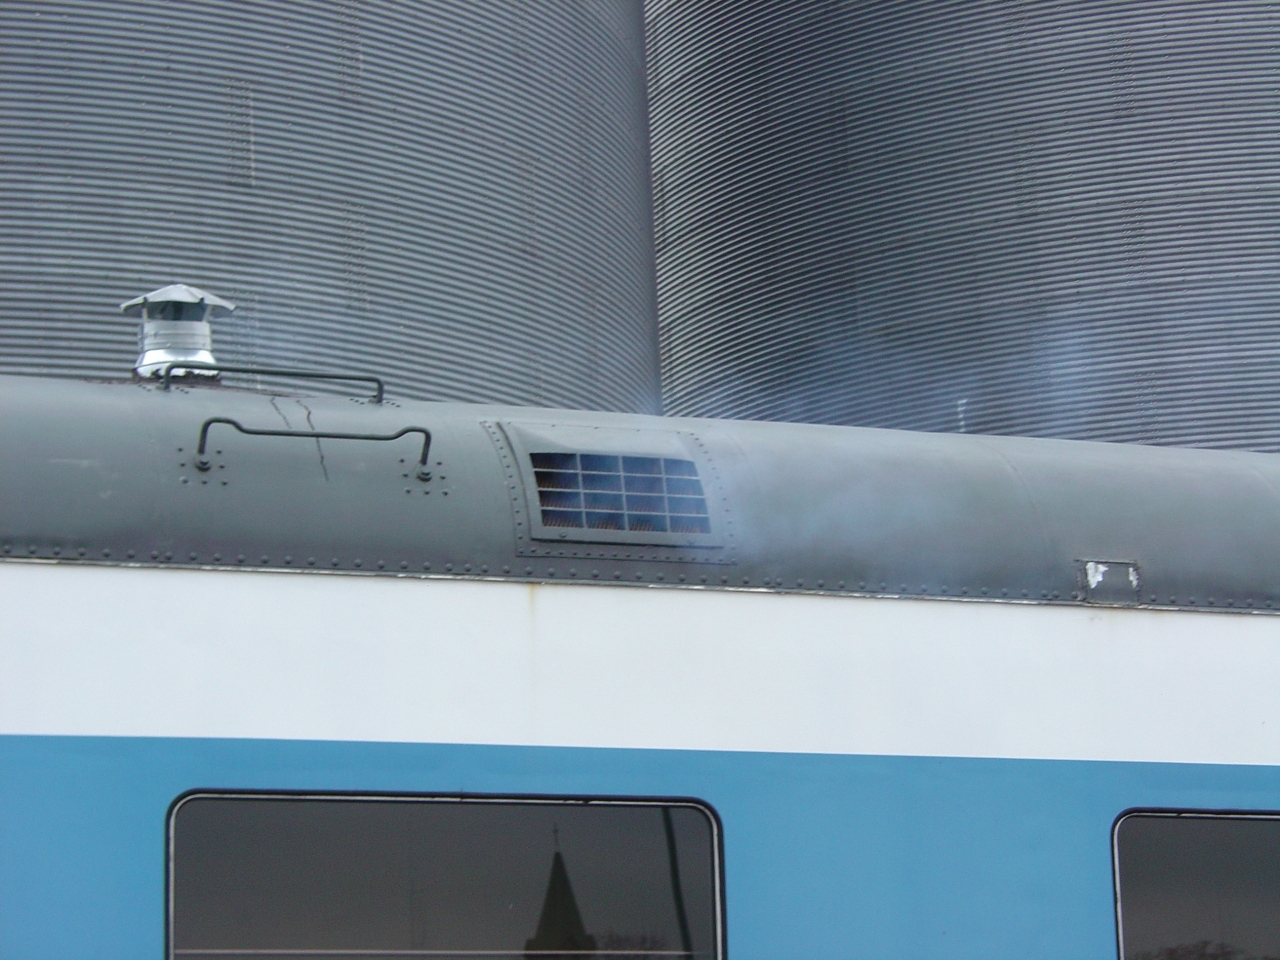
 | B-end closeup. Ladie's restroom on the left (car's right) and Gentlemen's on the right. Notice that ACF, unlike Pullman, did not put the fresh air intakes above the vestibule doors. Instead, it is in the vestibule ceiling. I prefer ACF's design because that's two less places for the roof to leak. Several Pullman cars exhibit severe rust perforations below the fresh air intakes. |
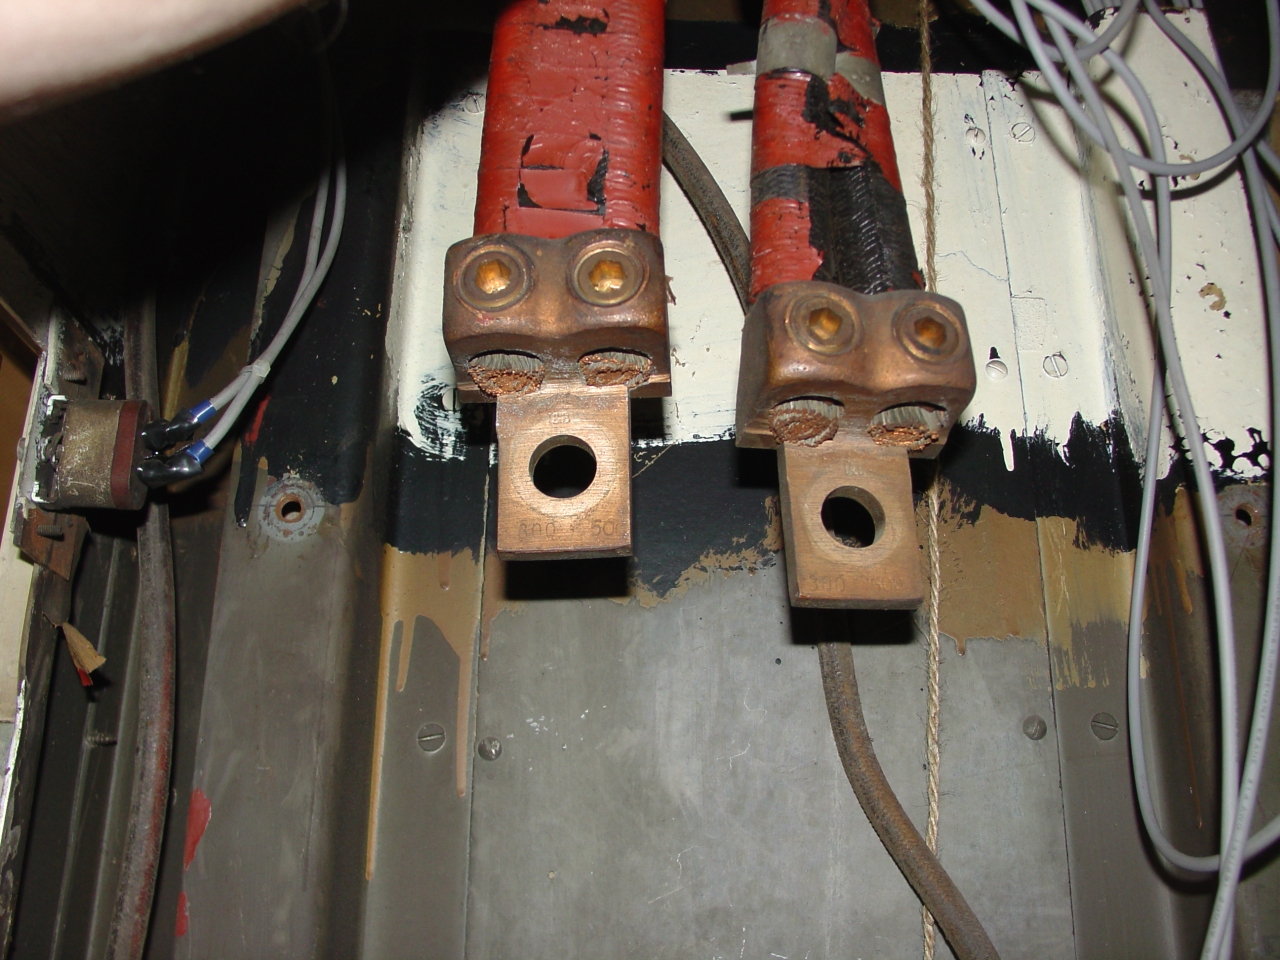 | That same day I took pictures of some other odds and ends. This is what's left of the 32vdc train line in the electrical cabinet. Those are 350kcmil conductors. Glad they're still there - that's a lot of copper to replace! |
 | One previous work session I'd fitted new pencil latches to the electrical cabinet and water cooler doors. (The originals were gone.) I had to use washers to stand it out from the door the correct amount, and I soldered brass shims to the catch to get the right throw. I like to disassemble, clean, and lubricate as well. |
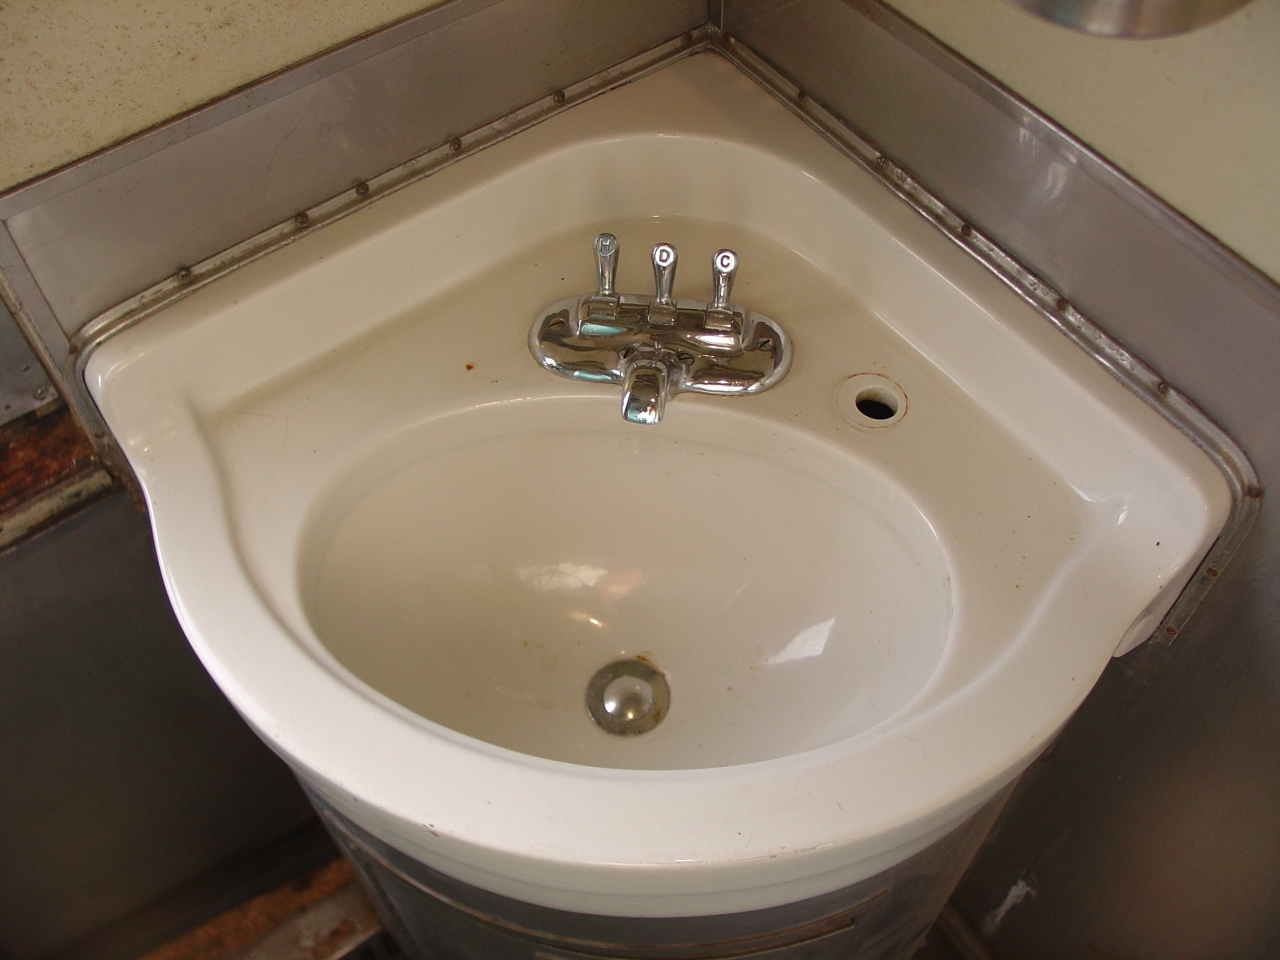 | This is the men's lavatory with freshly overhauled faucet and drain assemblies. |
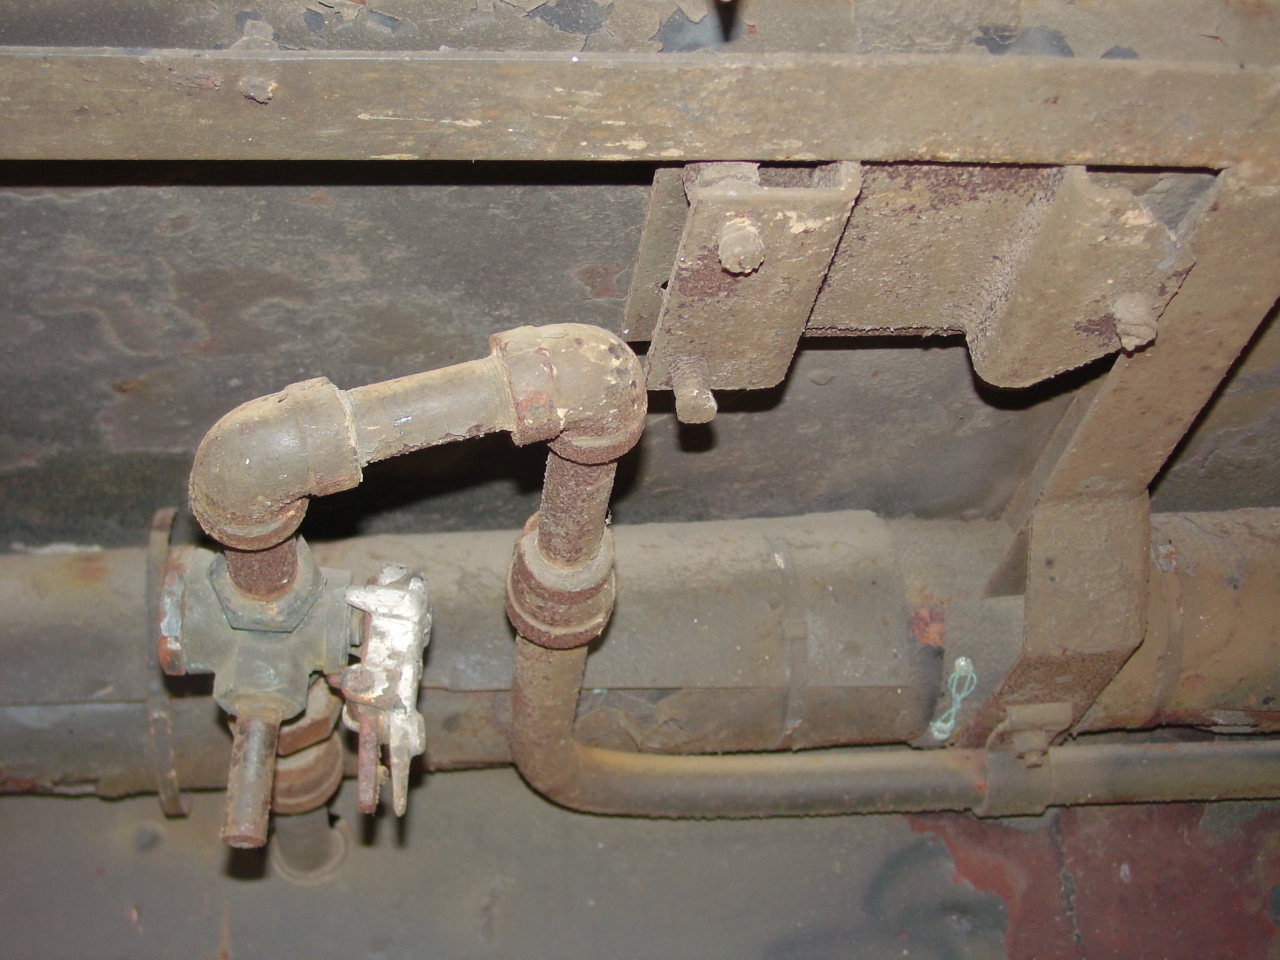
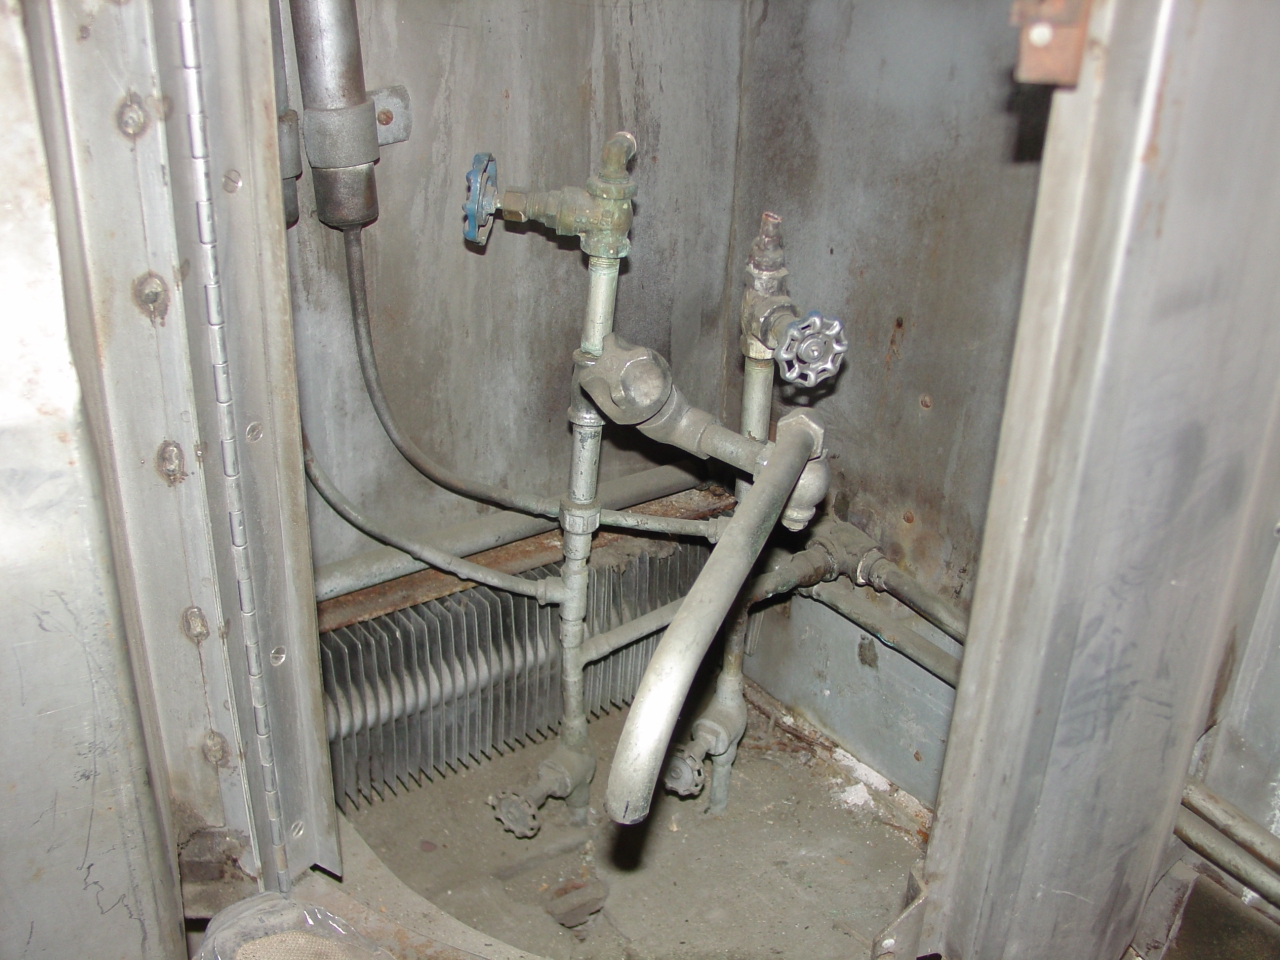 | The plumbing under the men's lavatory. I've never seen another car with a swing-out spigot for filling a mop bucket. There's no drain provided, so any spillage went right into the floor structure. Note the shutoff valves for the faucet, the water hammer arrestors, and the lower valves for draining the system. Copper pipe is vulnerable to freeze damage - the plumbing to this restroom had a split soldered closed about every two feet. |
 | The plumbing under the women's lavatory. Obviously it was dumbed-down somewhat during a trip to the repair shop. |
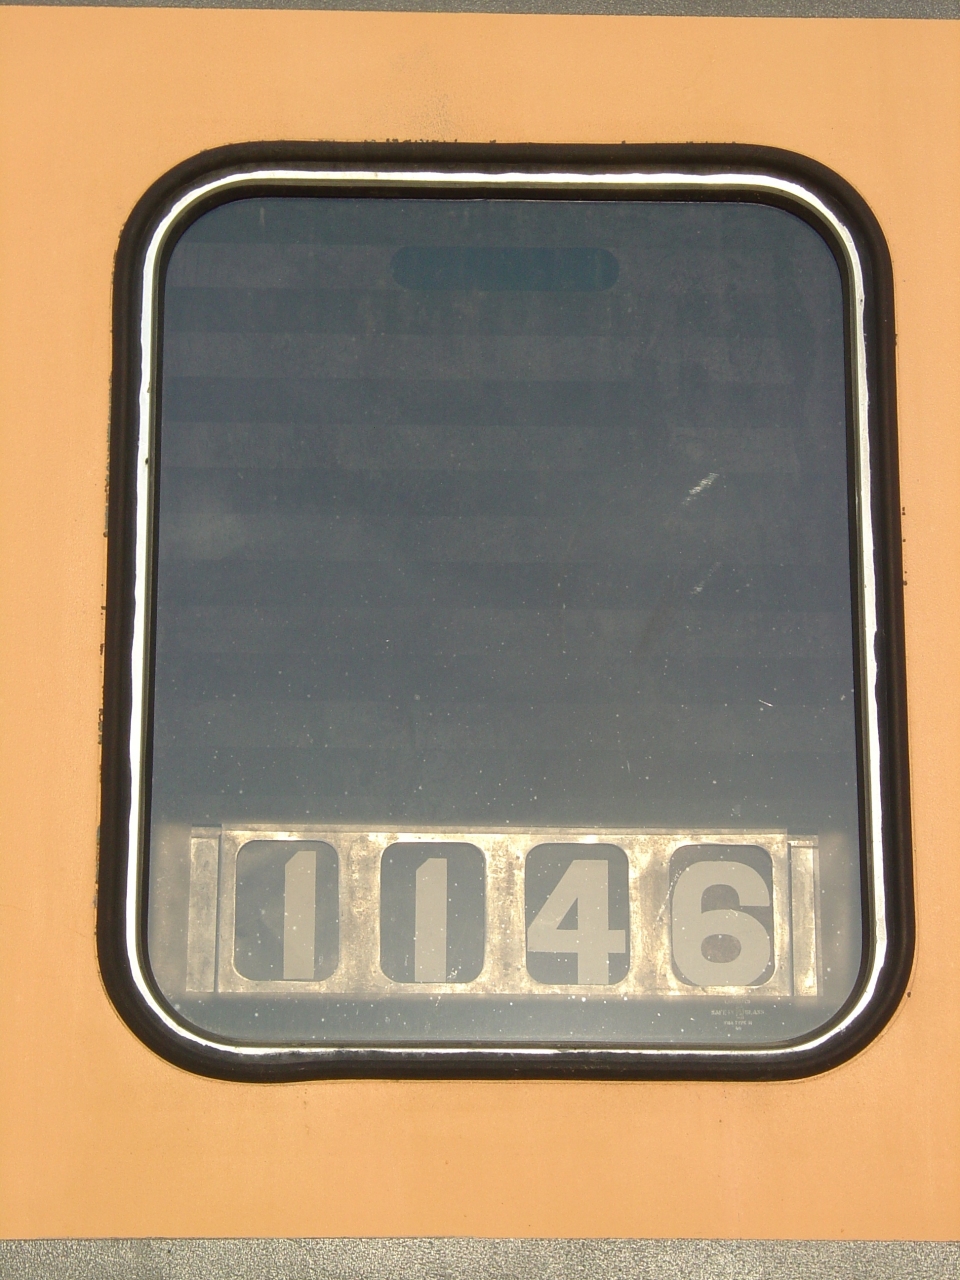 | Quite a while before I'd put the restroom windows and some carline numbers in, but never gotten a picture! These are just individual numbers printed on cardstock - 1146 originally had illuminated car line number boxes. The original window was pressed prismatic glass. (Just like pressed glass crystal vases, as a cheaper 'look-alike' alternative to real cut crystal.) Because I'd installed FRA type-II safety glazing, I decided to simulate the effect using craft-store glass etching compound. |
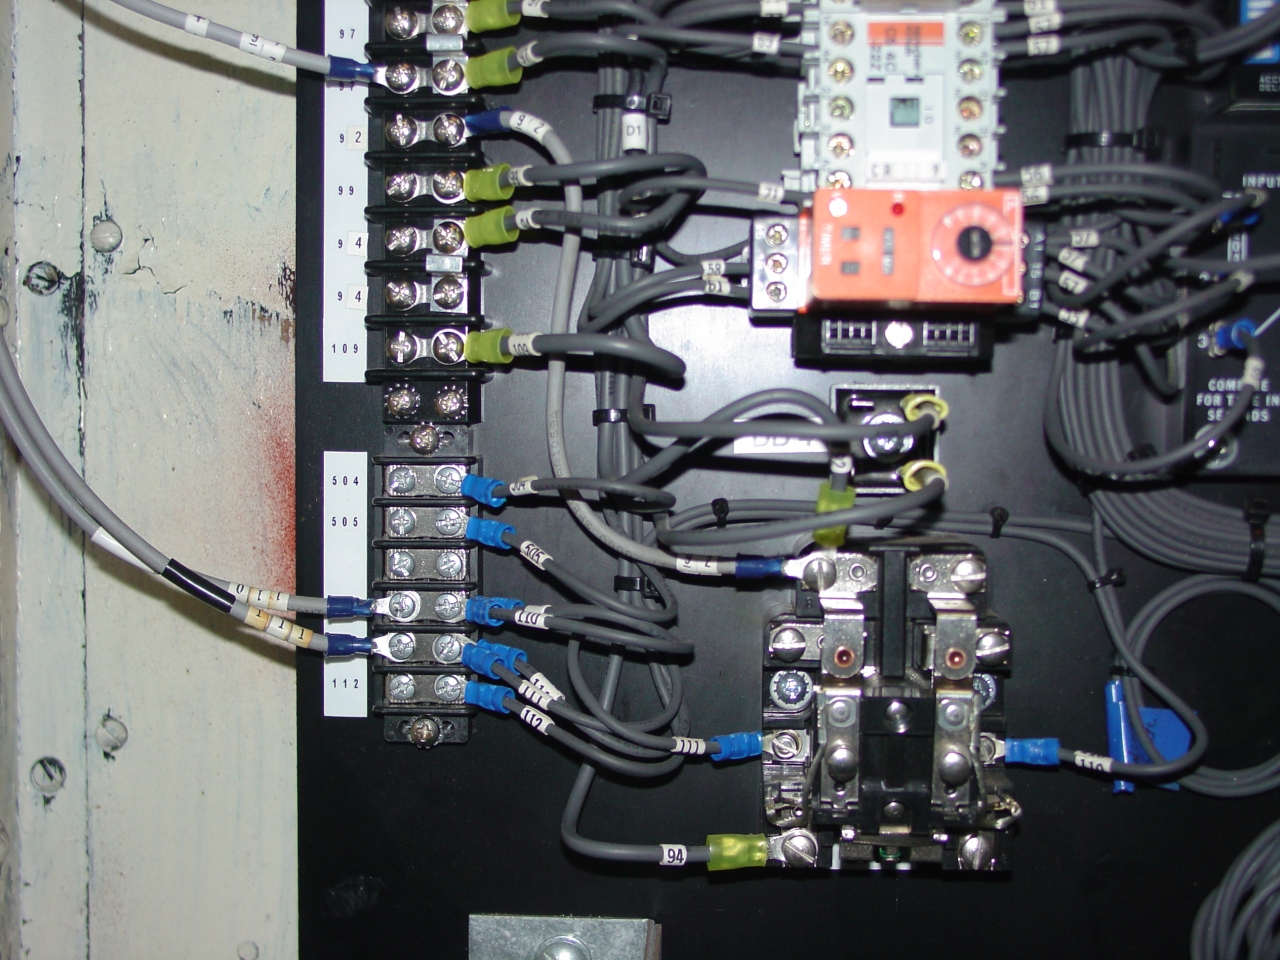
As lighting circuits were rewired, I just left enough spare wire in the electrical cabinet for whatever termination scheme I would eventually cook up. As more lights were rewired, it got to be a real rat's nest. Time to do something. I looked at regular screw-type terminal strips, (like along the left edge of the panel,) WAGO spring-cage DIN-rail terminal blocks (approved for railroad signalling use,) and some Square-D DIN-rail screw-type terminal blocks I found on Grainger. I forget why I went with the Grainger option - it was probably the path of least resistance, and getting DIN rail solved the "what to mount to" problem. I got Square-D 30-amp blocks for 22 to 10 AWG wire. Grainger P/N 5B362.
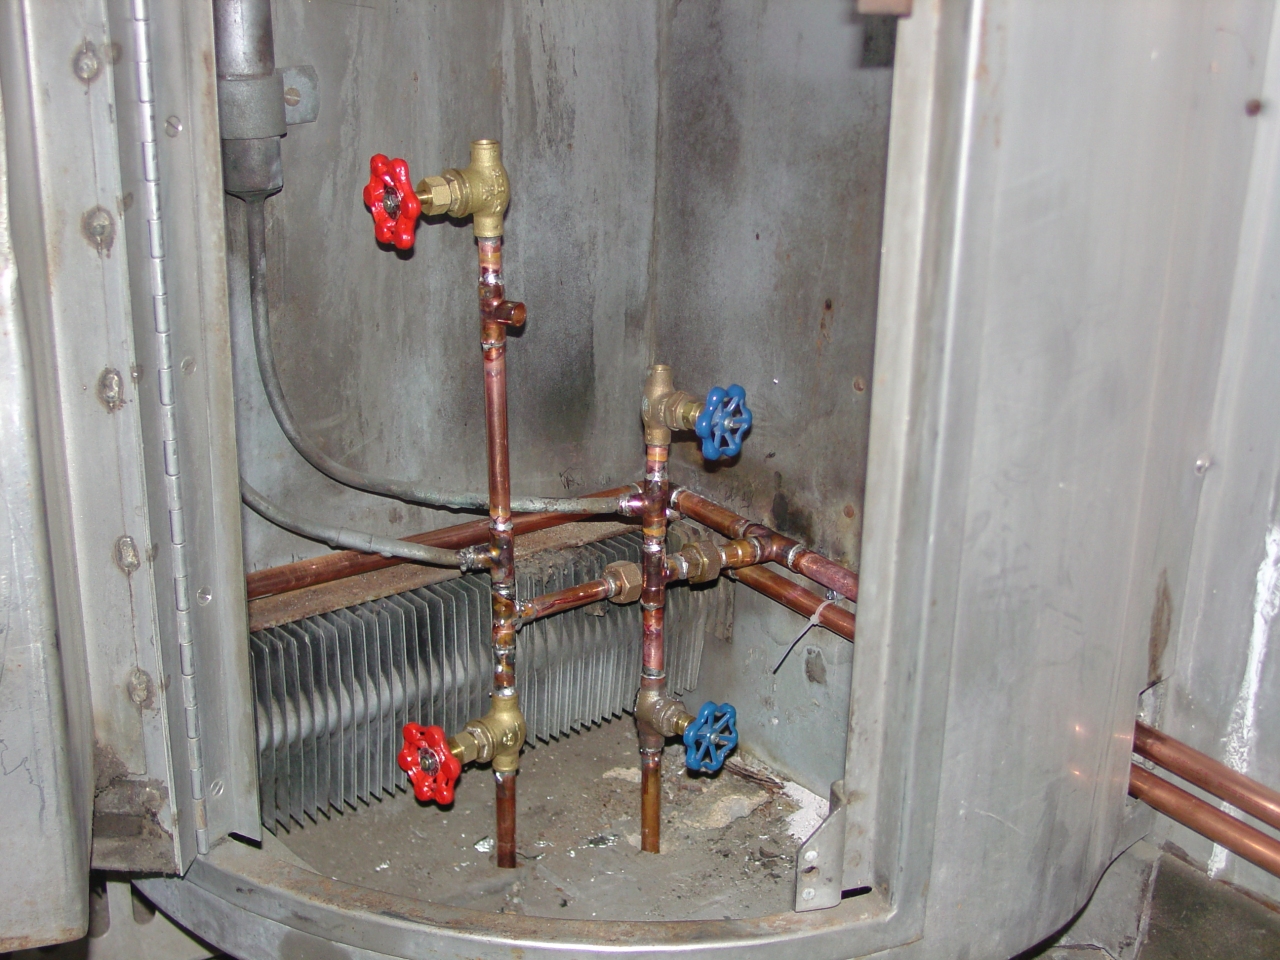 | Continuing with the lavatory work, I decided renew all the plumbing to the restrooms. I just happened to find two different brands of 3/8" solder-on valves, one with red handles and one with blue. Cool! The unions are to allow disassembly for servicing if necessary. |
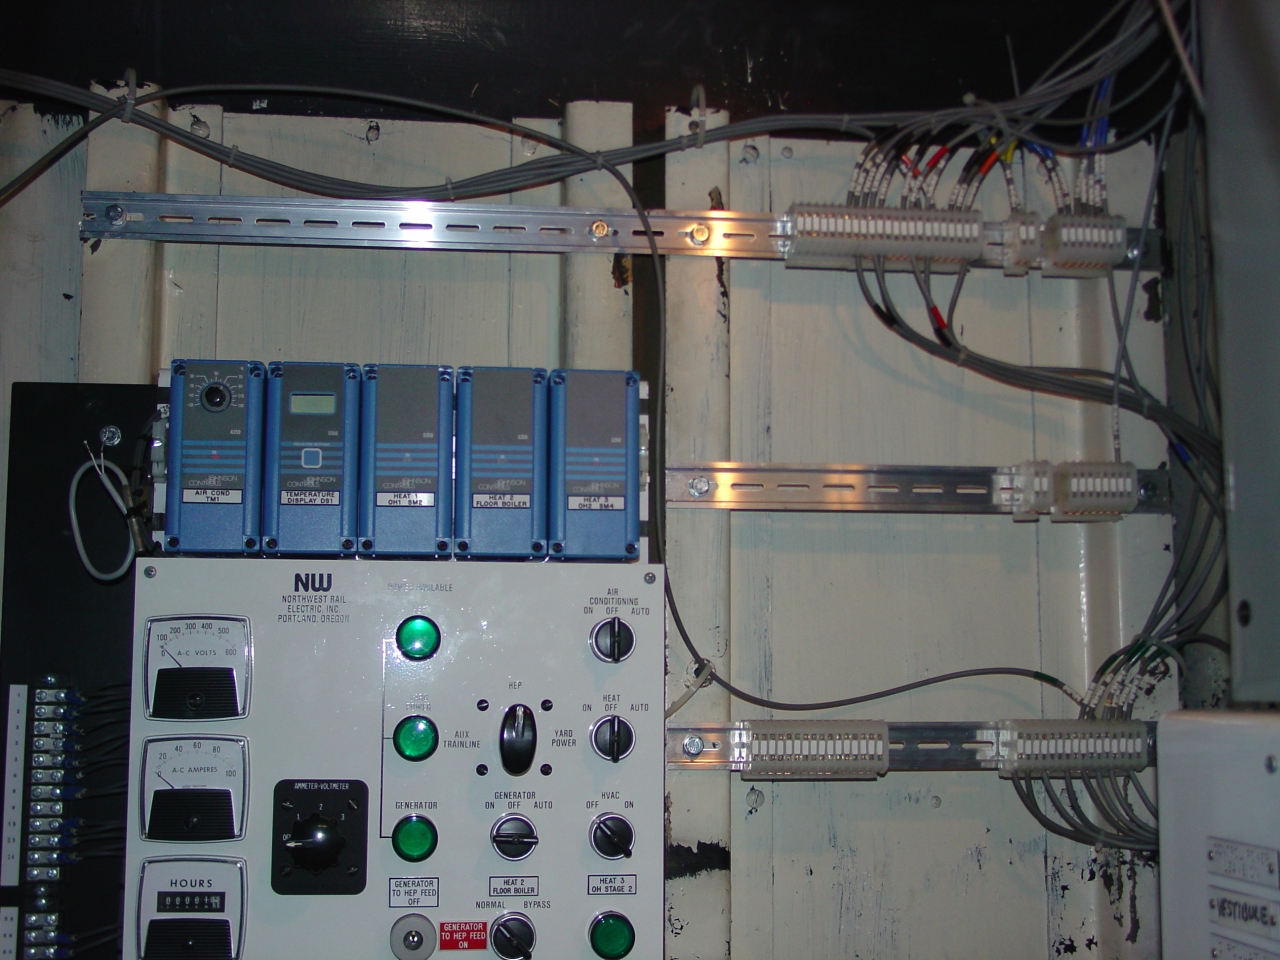 | Here are the DIN rails and terminal blocks, being installed in the electrical cabinet. The top rail is 'hot' for AC loads, and positive for DC loads. The middle rail is a matching negative for DC loads. (Negative ground system.) The lower rail is for common and neutral busses. |
Around this time I was informed that my neighbors in the industrial park - and the city of Pine City - were less than pleased with the presence of my railroad car. They were putting pressure on the railroad, and to keep good neighborly relations, I was asked to find a new home for 1146. (I hasten to point out that the railroad was always extremely good to me. I also wish to emphasize that railroads, as interstate commerce carriers, are under Federal jurisdiction and *not* state, country, or city.)
Finding a new home for a railroad car is not a simple task, for several reasons:
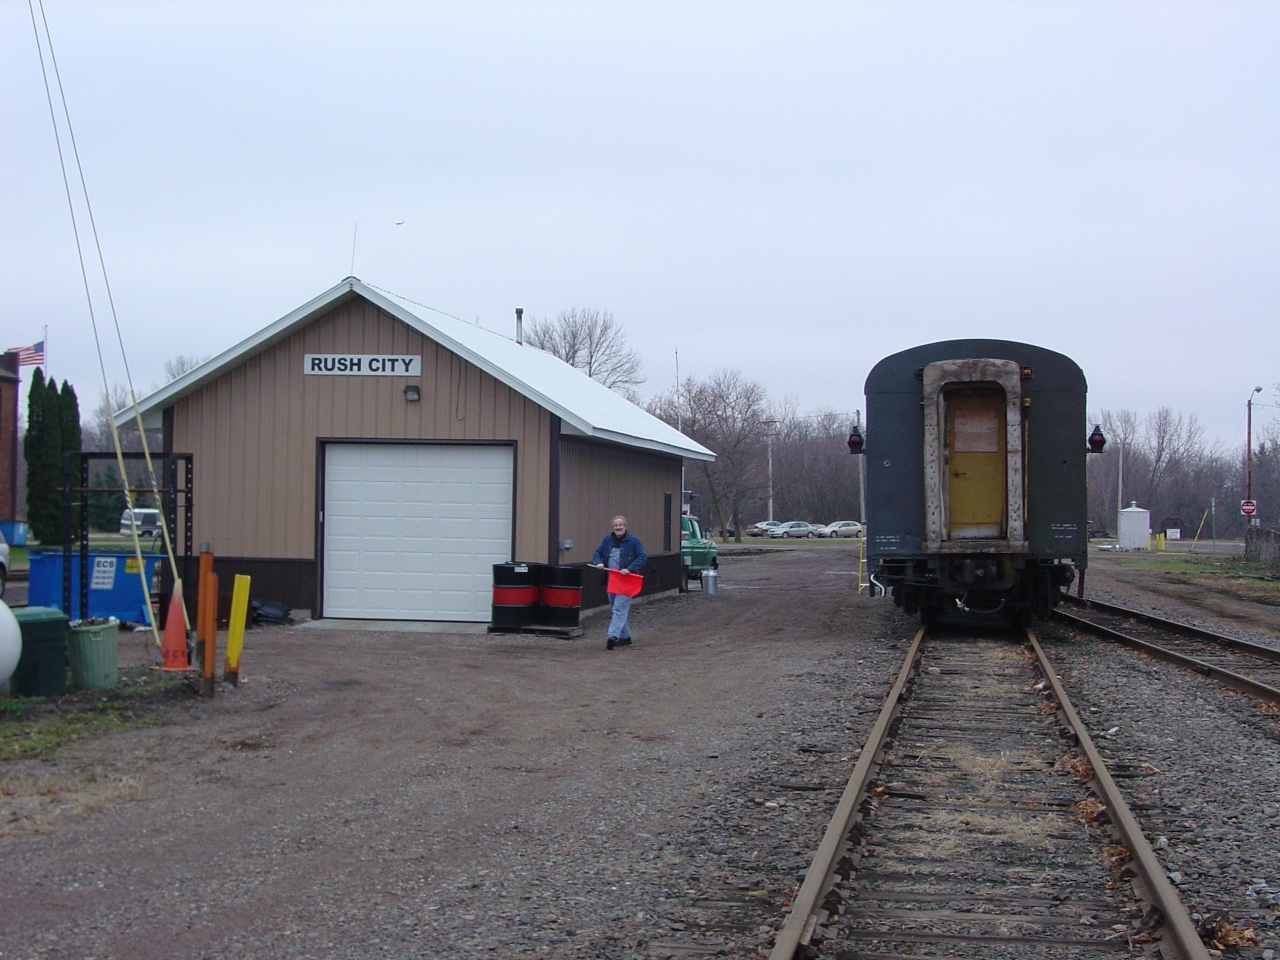
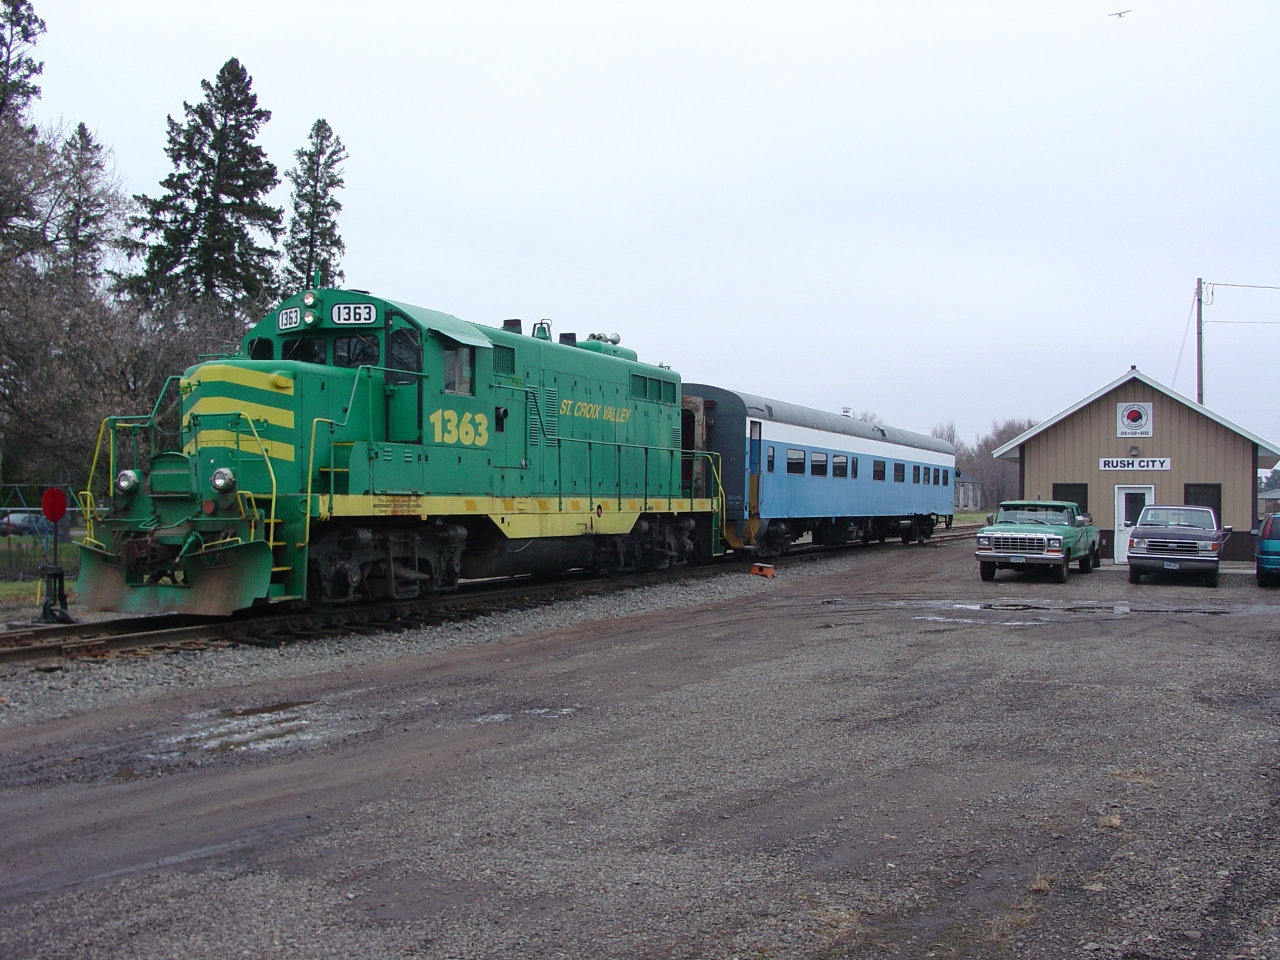
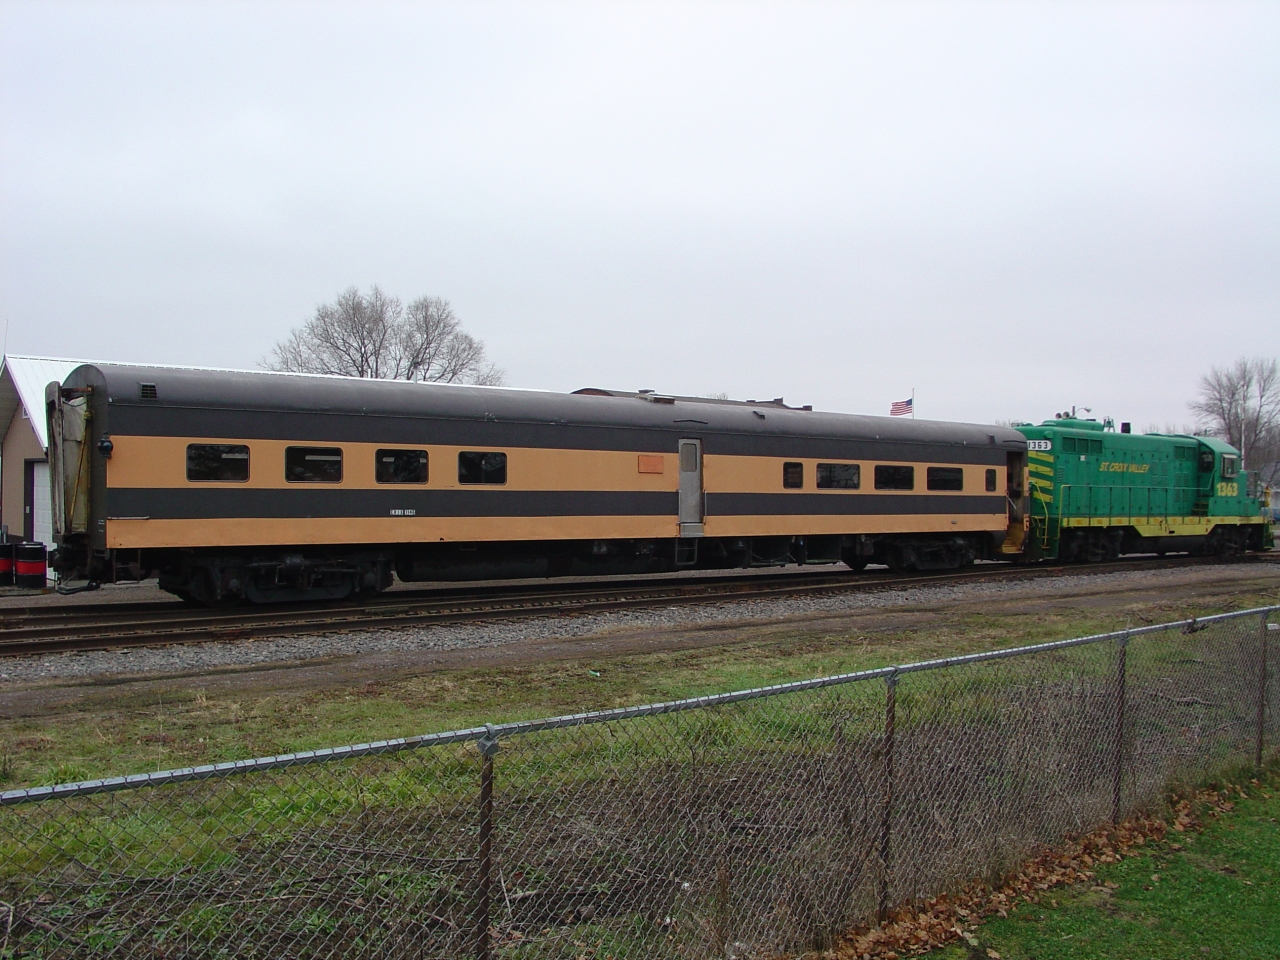
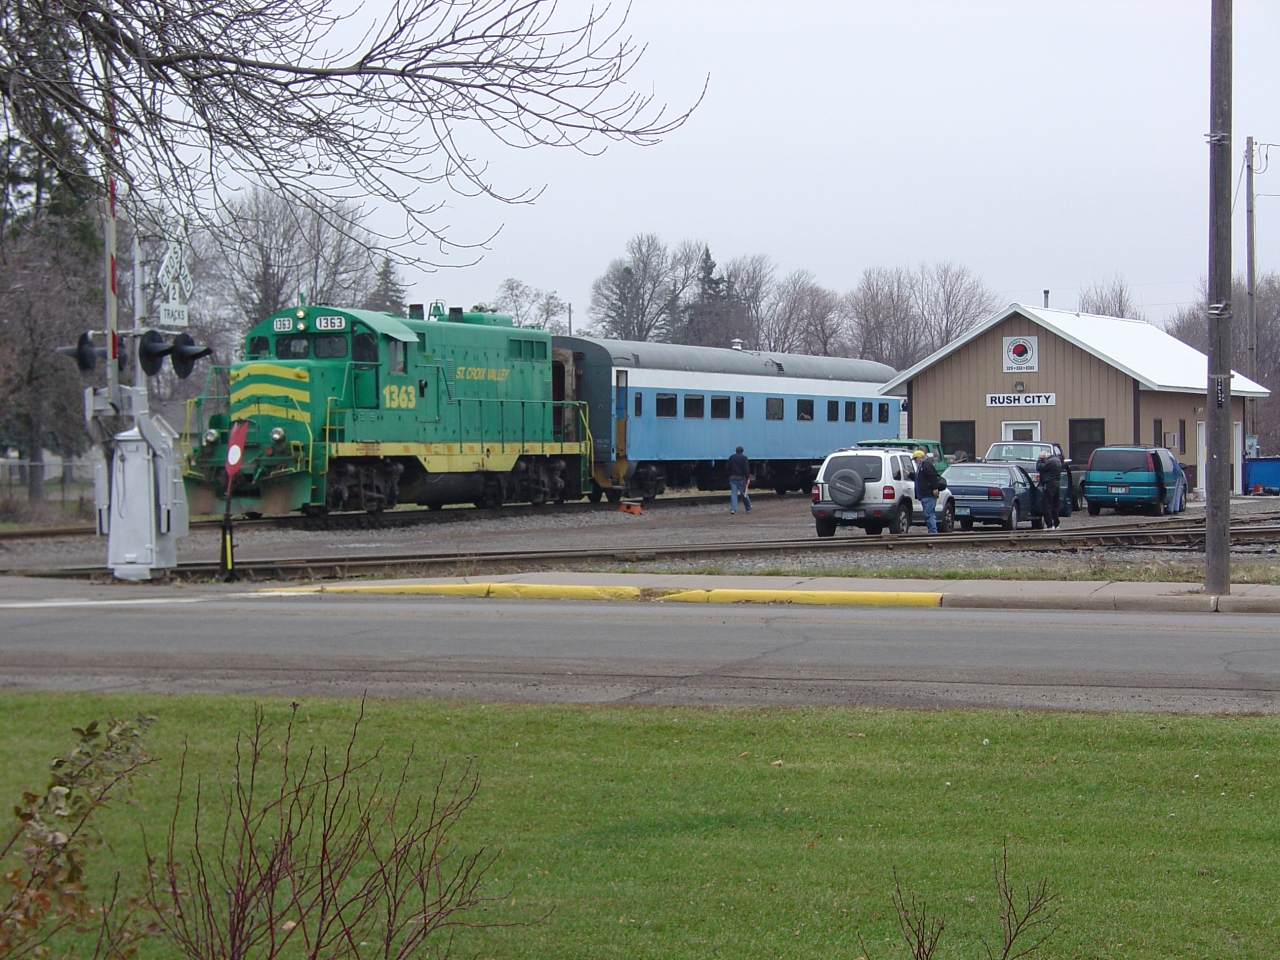
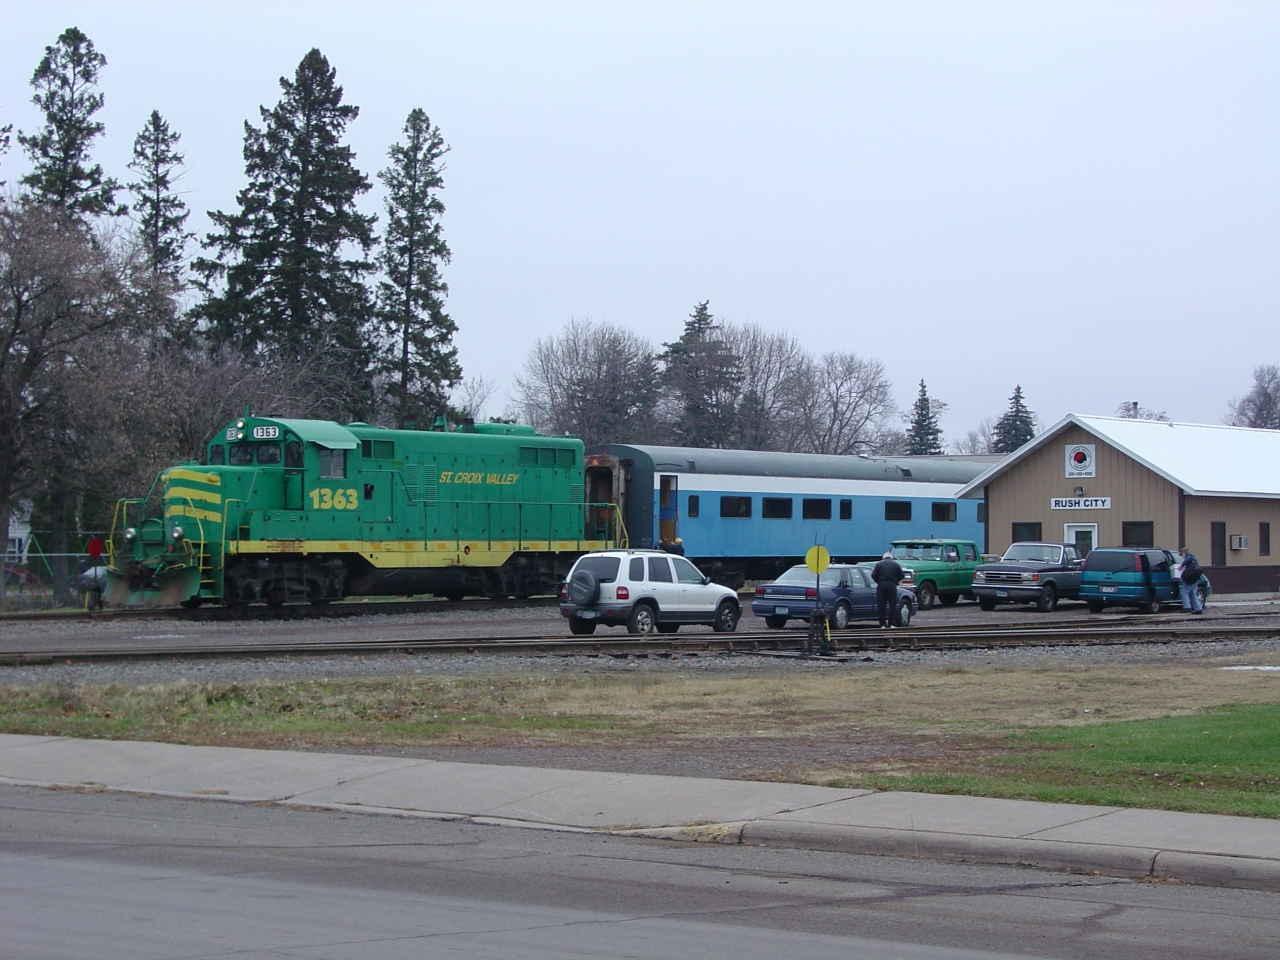
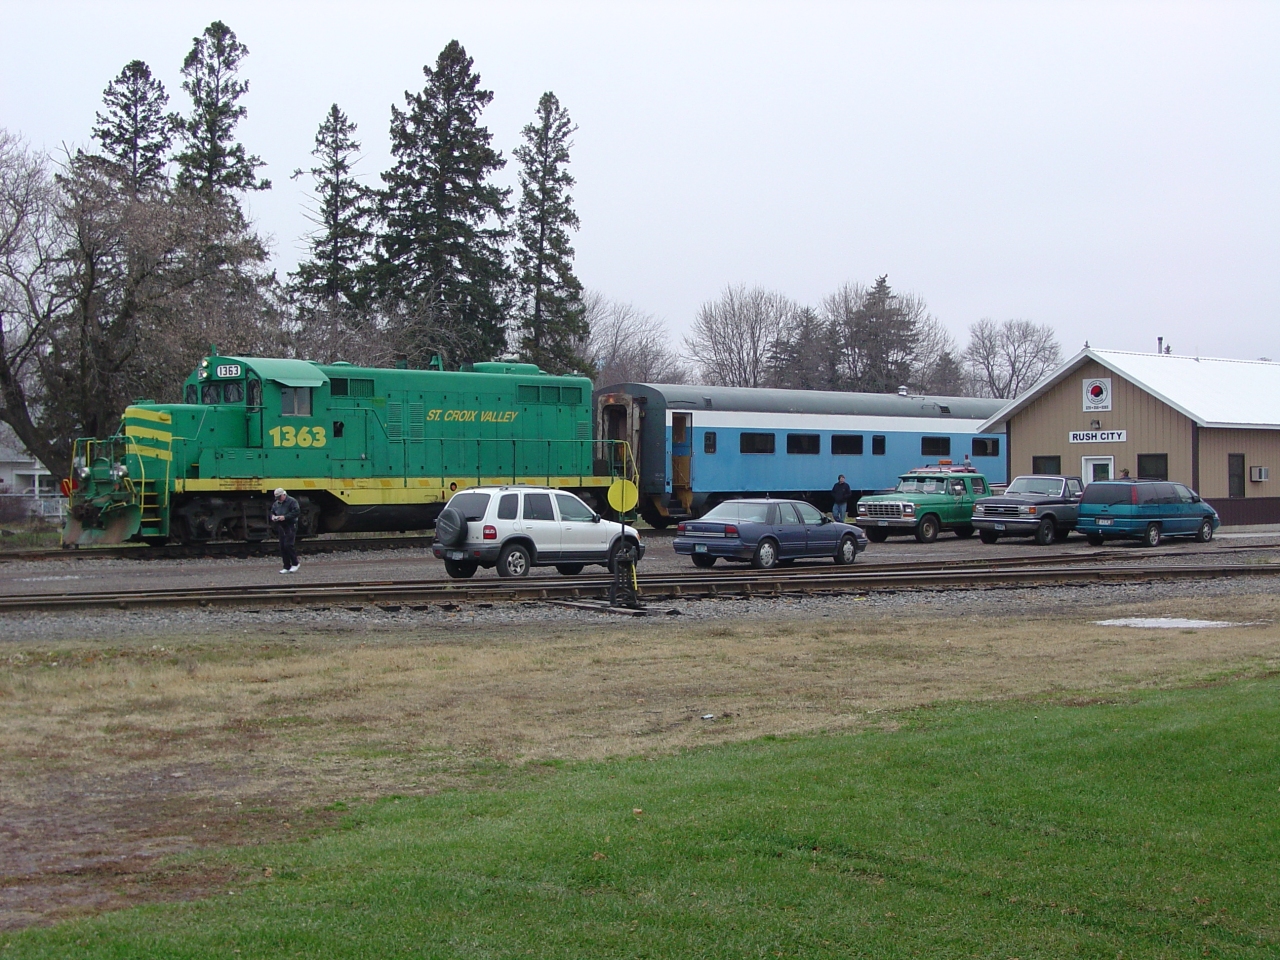
While I was looking for a long-term home, some of the guys with the railroad set me up with the local co-op in Rush City. They moved it on a Friday, and by coincidence a local video producer (C-Vision) was up filming that day. So 1146 got on a railfan video! I'd owned it for five years and never seen it moving, so it was kinda weird that others got to see it moving first.
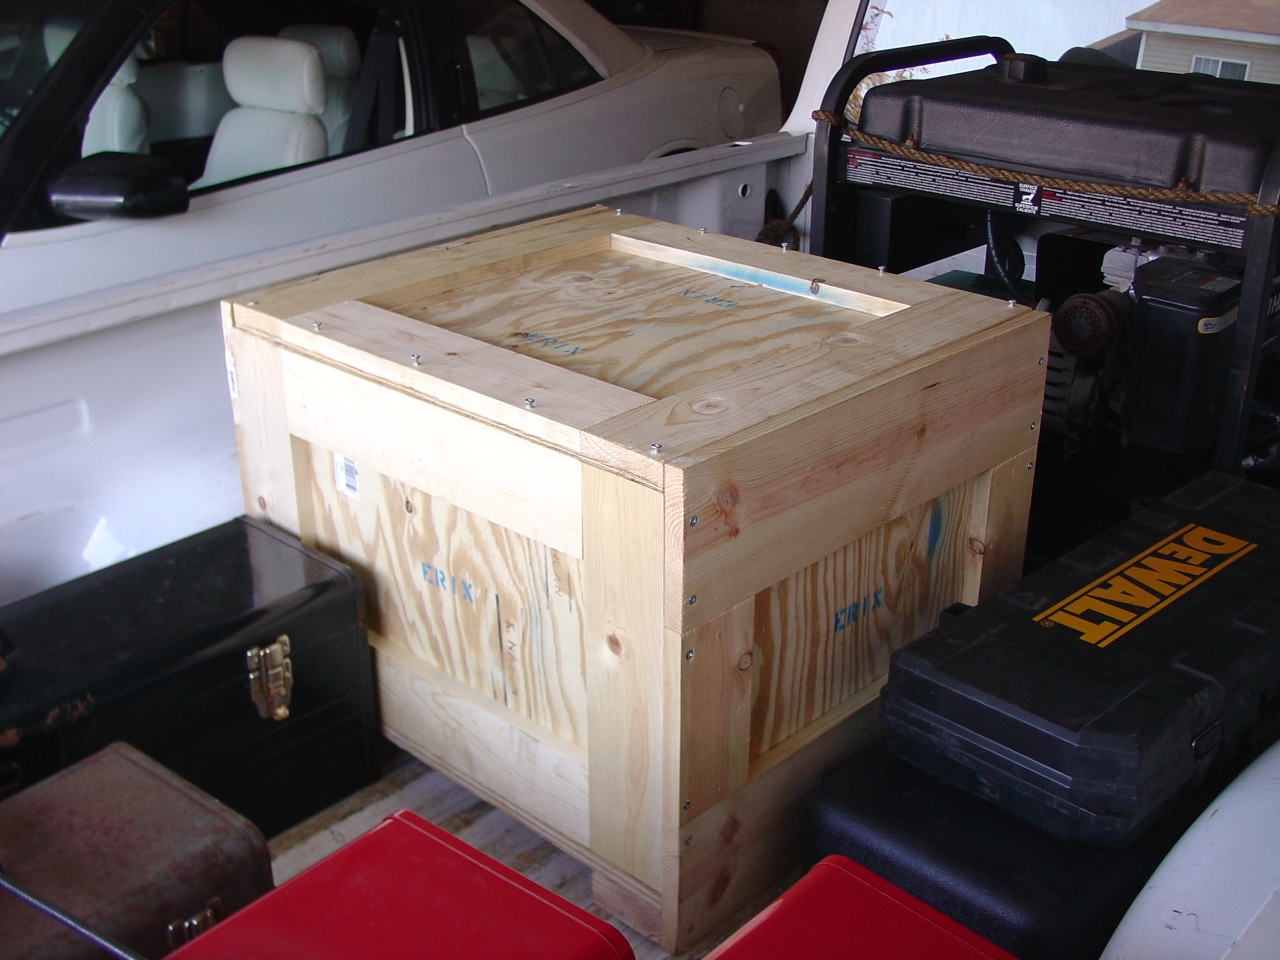 | I have a spare set of D-22 valves, and this is the shipping crate I built for them. I shipped them LTL to Pittsburgh Air Brake Co. for servicing. |
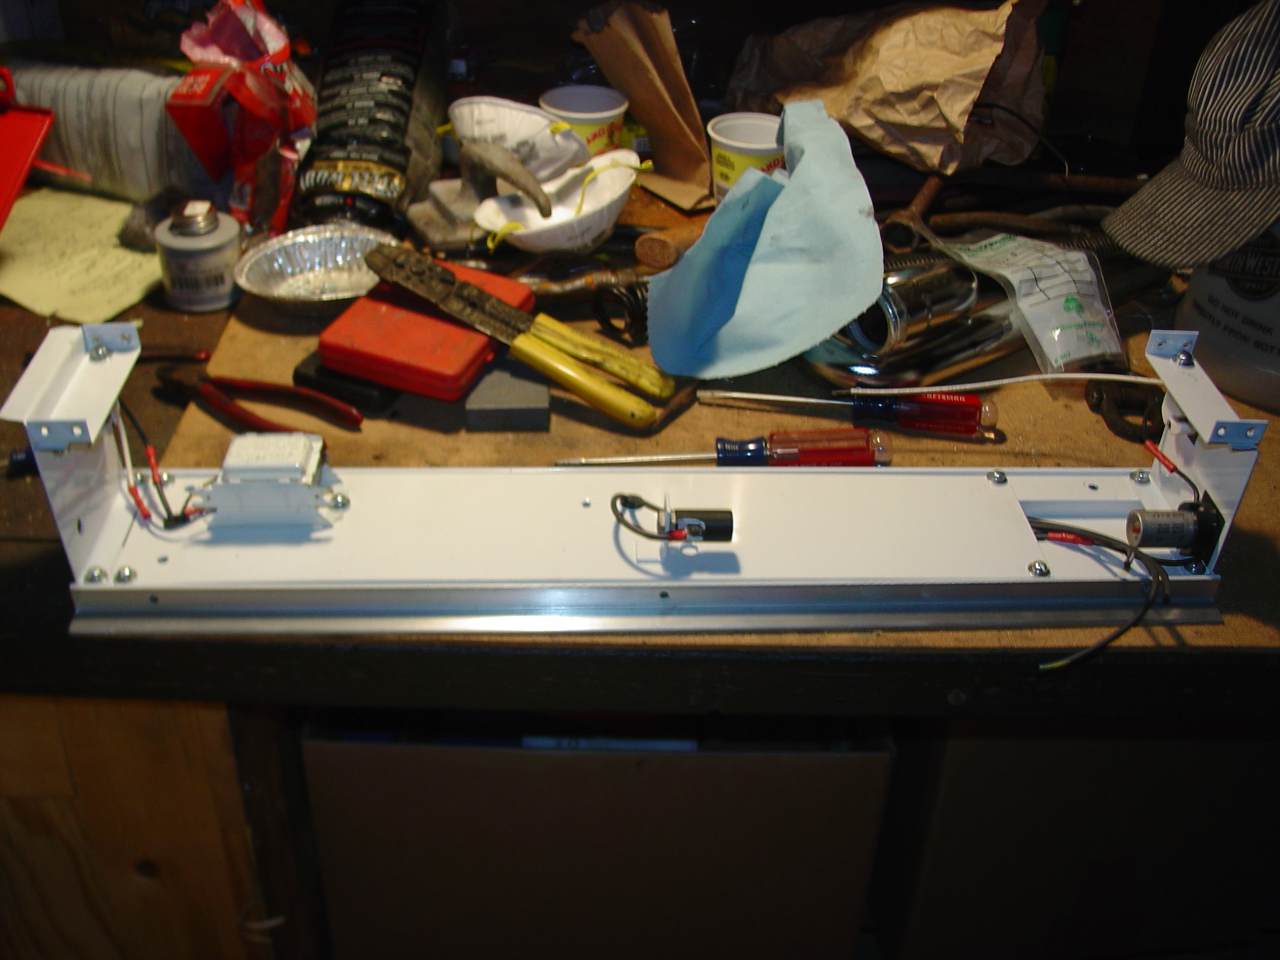
 | On a different front - the dining room light fixture rebuild was progressing slowly. Here's how I kept the pieces in order. |
 | There were some loose ends in the air brake system I wanted to tie up, before doing the official air brake test. One was installing the missing air reservoir. Both reservoirs were tested with a ball-peen hammer, then hydro tested to 125% of working pressure, then cleaned and painted. The spare I bought was done first, and replaced the original. The original was then done and hung where the missing one had been. In this picture a friend is installing new drain cocks. |
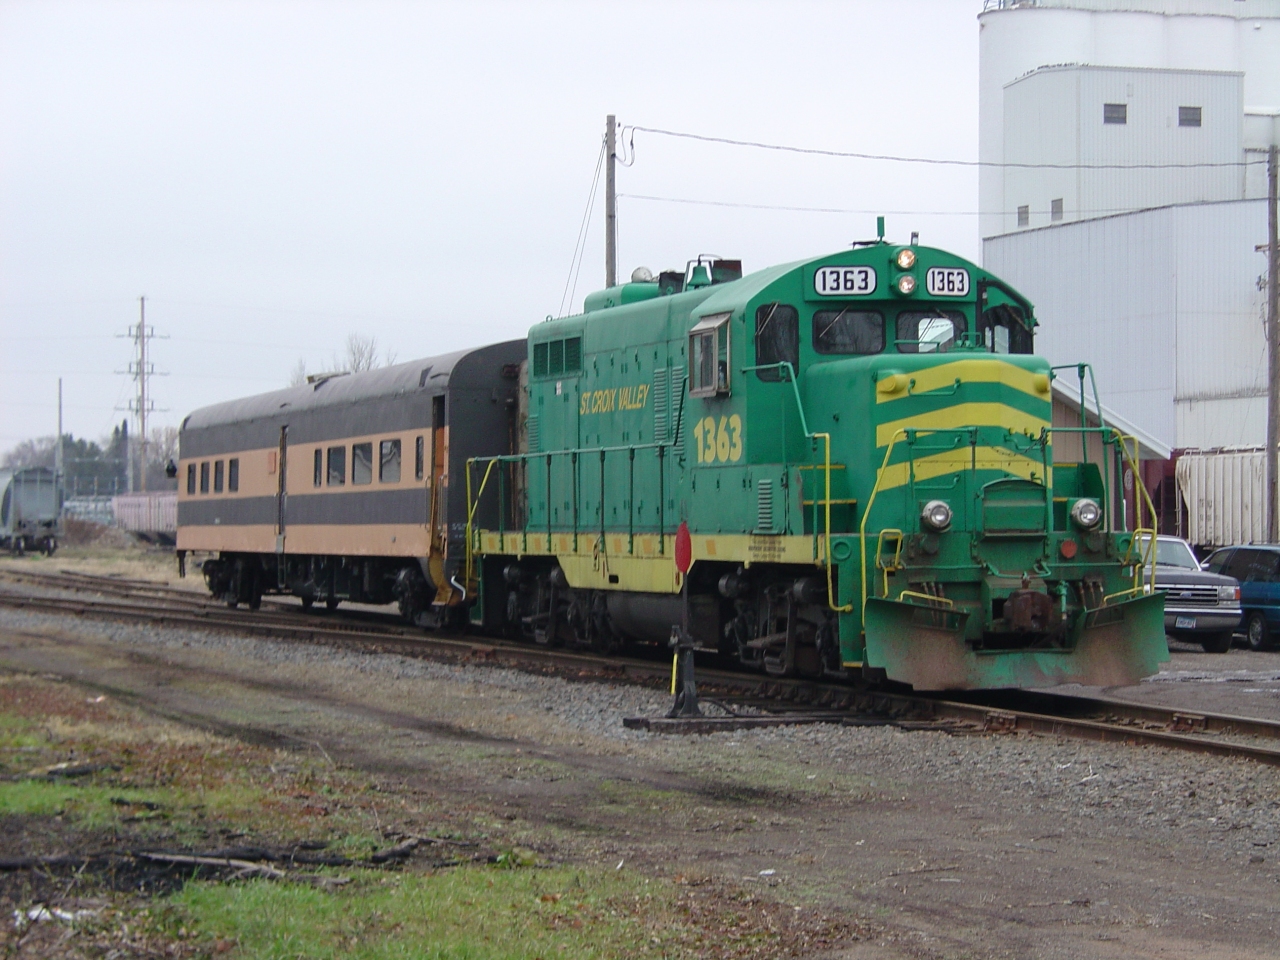
 | Working behind the co-op in Rush City. Those 6x6x48 timbers (from a house mover) were how we got the reservoir lifted into position so that we could bold it on. |
 | While I had the camera out, I grabbed a couple "over all" shots. This is the old NP Skally Line. That switch is all that's left of the wye - there was another switch under the locomotive, and the wye basically followed the tree line. The wye was the beginning of the Grantsburg branch - which is famous for the spindly bridge over the St Croix River which kept an old 4-6-0 number 328 alive. I got the chance to work on 328 in the late 1990's, so this location was kinda cool. |
 | I really like the way this picture turned out. |
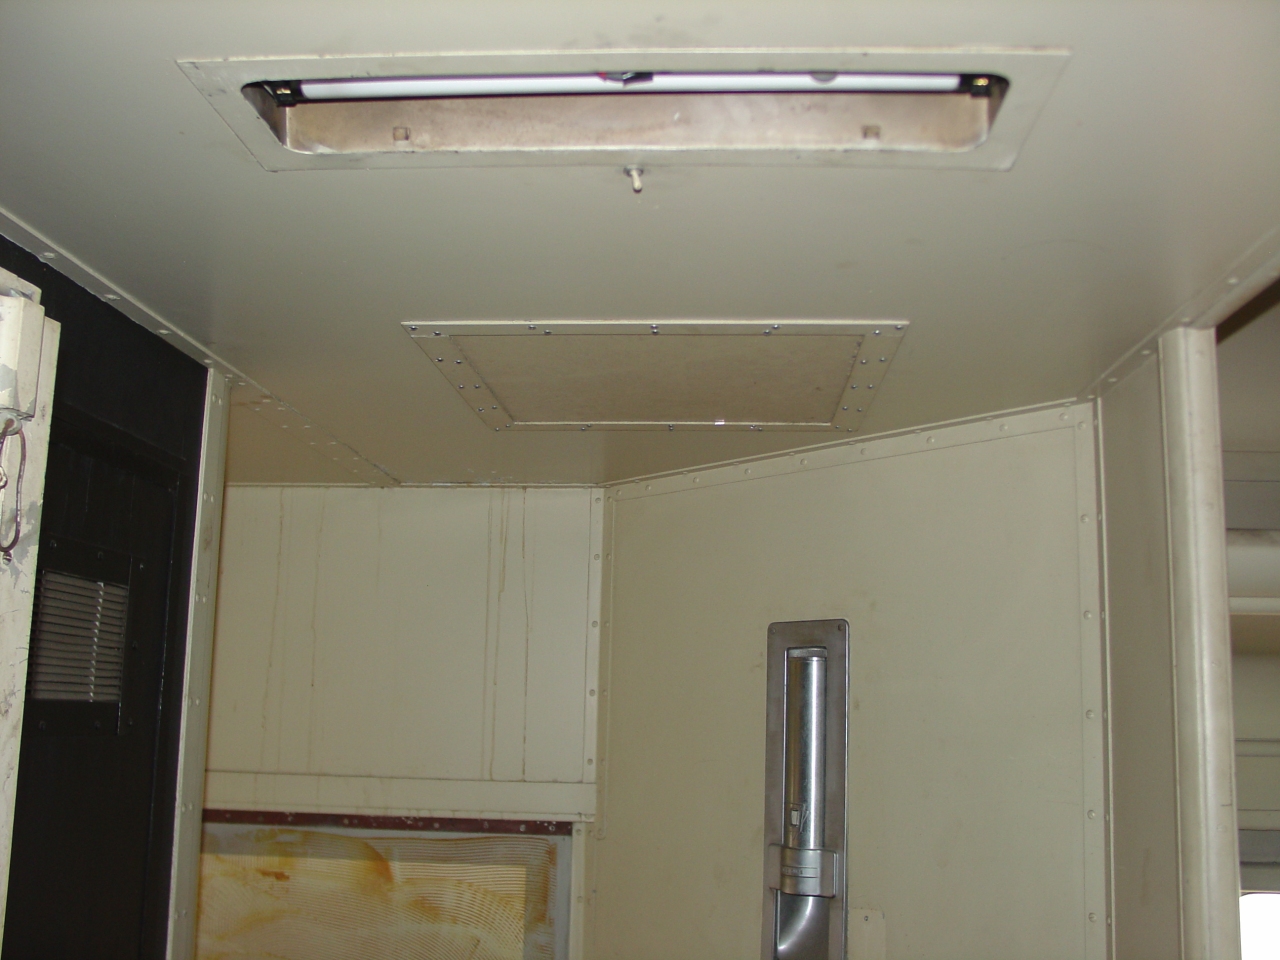 | A small victory: This ceiling access hatch was removed by the mad cable cutter. I got everything buttoned up again. |
 | Same story above the A-end door. Getting this one in got light in that dark corner. Funny story: I'd assumed the two small 32vdc wires to the refrigerator there were lighting only, and that the compressor underneath was fed from below. ("Obviously", I thought, "it needs more starting amps than those two wires can provide.") Well, we hooked up the fridge lights, but kept blowing breakers. I eventually discovered the "dead short" was the DC compressor motor! |
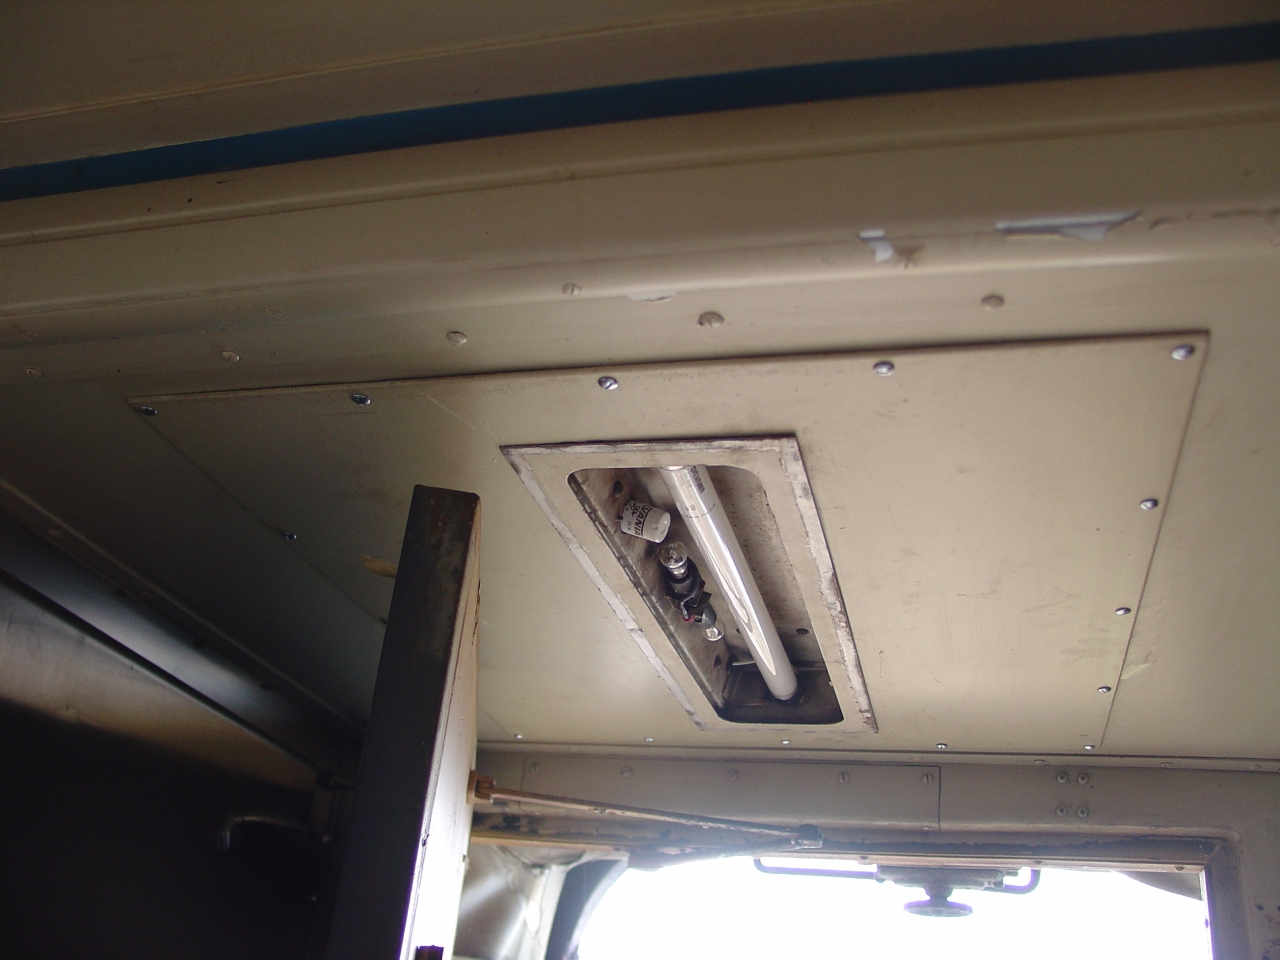
 | The old 32vdc kitchen ceiling fan, cleaned up and running again. There's a small step-down transformer, bridge rectifier, and circuit breaker hidden in the cable raceway right next to the fan. Some day it will need new bearings, but it works for now. |
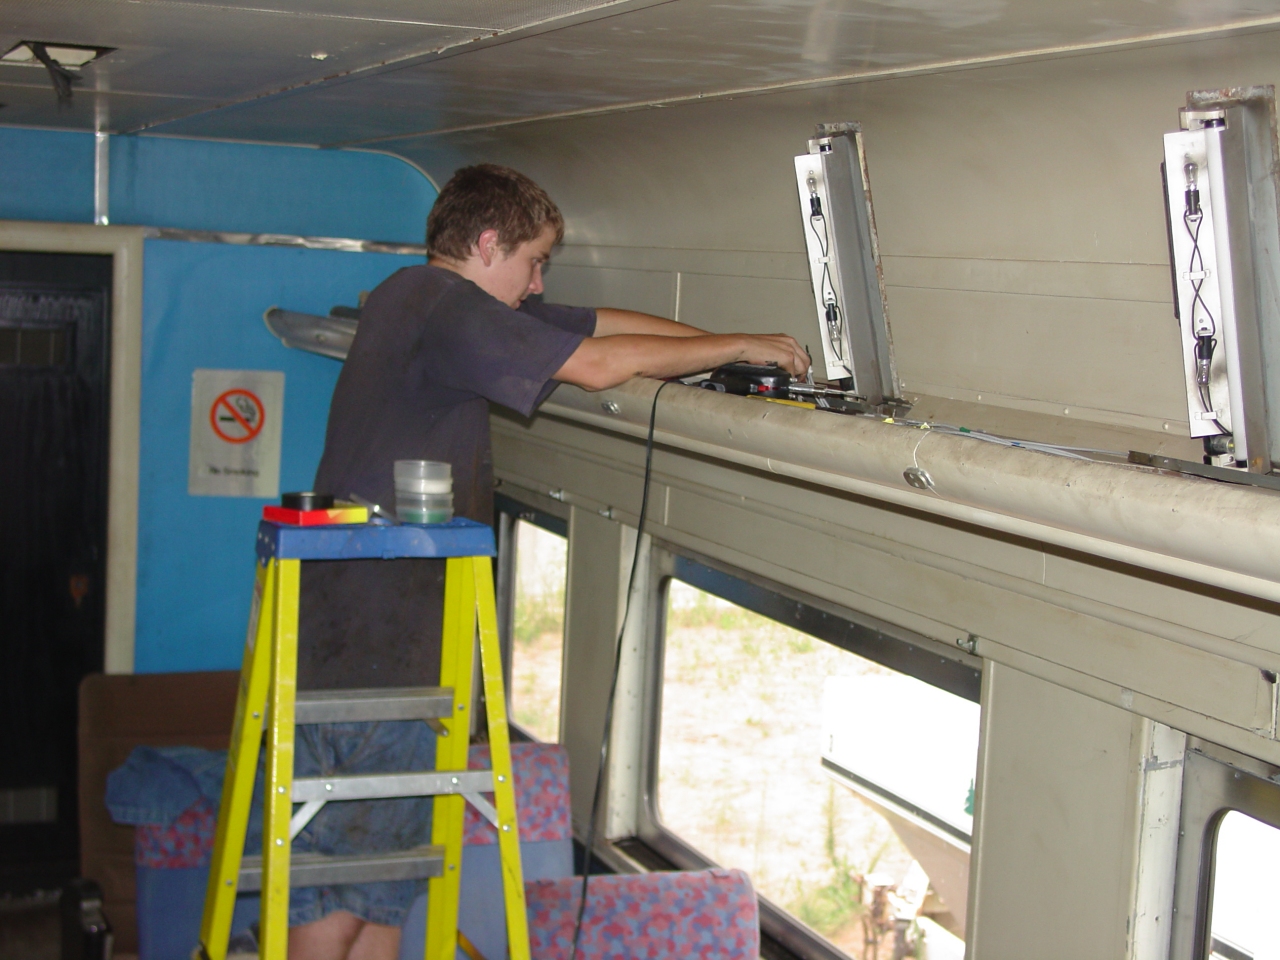 | I didn't bother completely rebuilding the luggage rack light fixtures (and a couple need it) - the more immediate goal was stringing new Exane from light to light so that both the fluorescents and the night lights would turn on. |
I decide to purchase a complete set of ACF's construction blueprints from the Museum of Transportation in St. Louis. (I'd made an initial inquiry in 2001.) They'll be very useful when I start doing the steel work - whether I do an in-kind repair, or need drawings for an engineering firm to start from.
In the electrical cabinet, I'm needing a 12vdc battery charger. The batteries won't exist for a while, but the 12vdc will supply the emergency lighting circuits, marker light circuits, radio, power/HVAC control, and engine control circuits. My friend in the signal design and maintenance business tells me the units they use in signal bungalows are nearly indestructible, and recommends the "Cragg RailCharger" product line from Railway Equipment Co. I decided the ferro-resonant model 15Mv-12v/LA/N-1 met my needs, and got it on order. (20/20 hindsight - get the electronic kind - they're quieter.)
 | The air brake valves are back from Pittsburgh. Here a friend is helping change valves on the car. (That D-22 service portion is *Heavy*!) The new FRA regs require that, when the work is completed, the tested by performed by someone who is certified. The RPCA had a certification coursed scheduled in St Louis in late August, so I figured it was cheaper to get certified than to hire someone. |
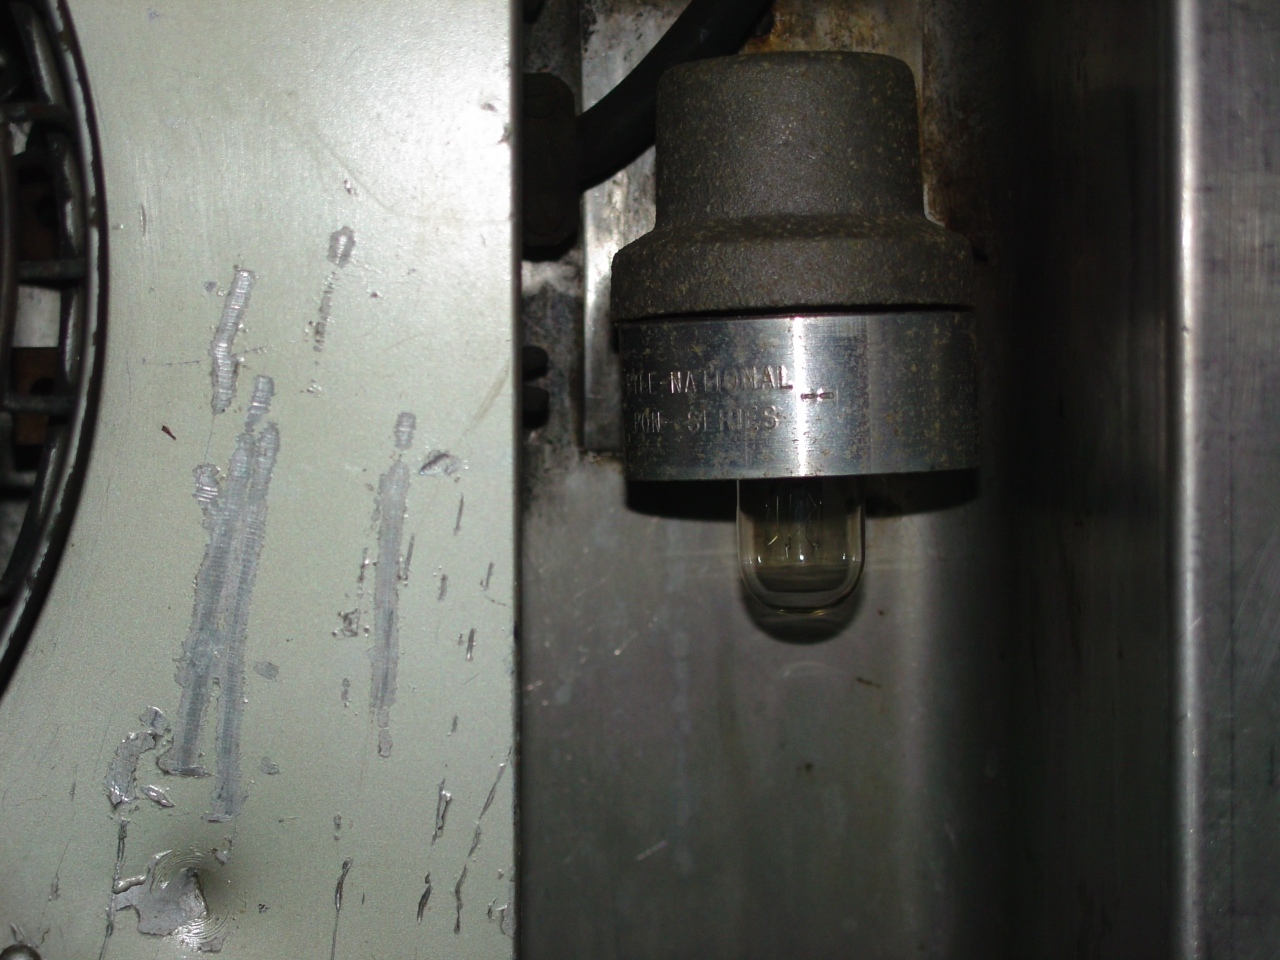
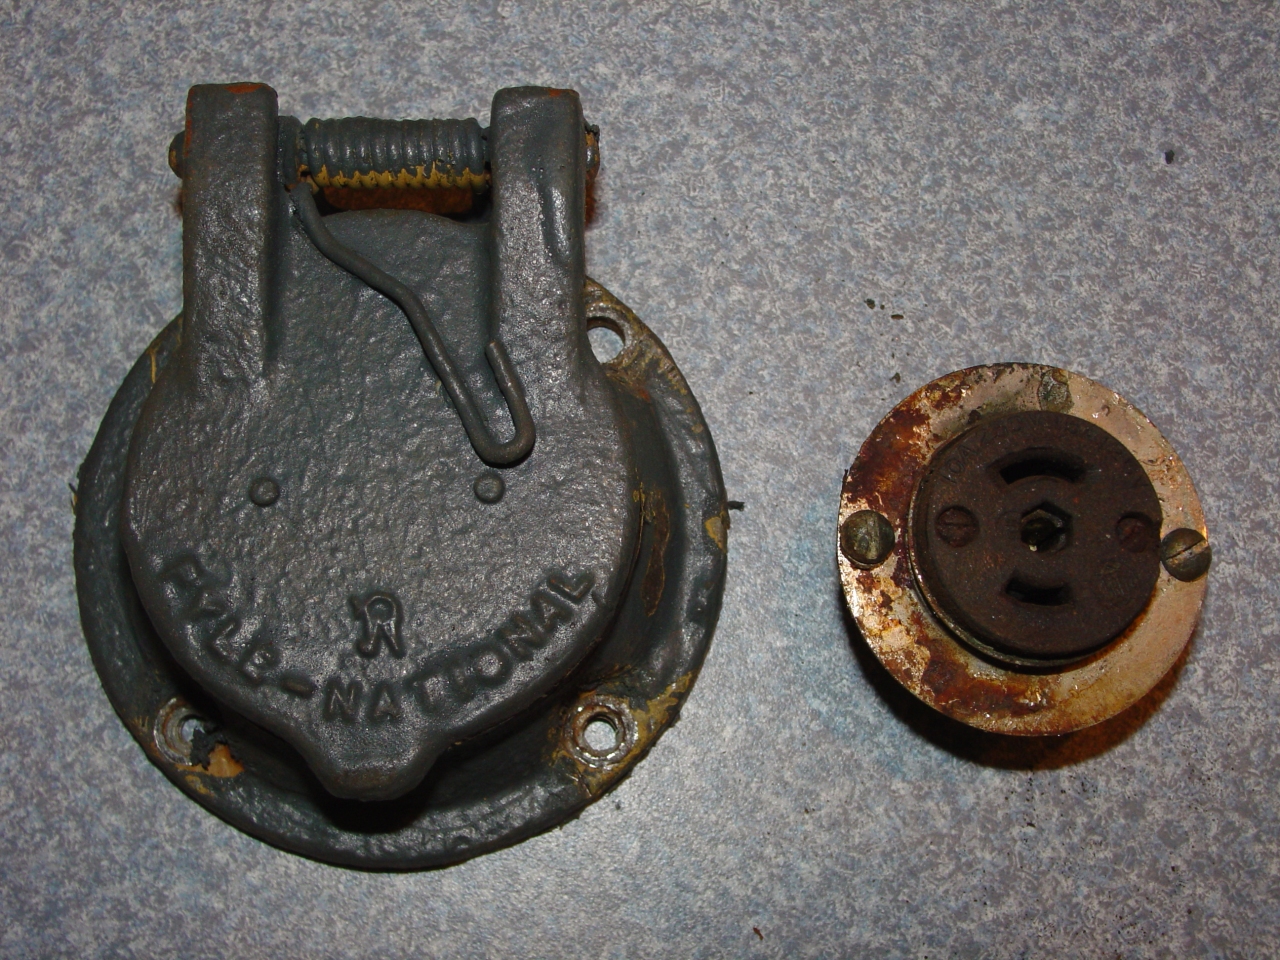 | I'd have the opportunity to go parts shopping in St. Louis, so I took lots of pictures of things 1146 needed. I'll show this one to illustrate something I learned: The marker light sockets use standard NEMA "Midget Locking" ML-2P plugs and ML-2R sockets. |
The ACF drawing set arrives. It works out to 180 drawings, in sizes ranging from standard 8.5x11 up to several feet in length. My total bill is $778.79. Figuring they'll be most useful in some sort of order, I group them by size, sort the groups by drawing number, and then have them trimmed and bound at the local copy house. The drawing list I've had for four years makes a handy index, so I'm keeping it with the drawings.
 | The electrical panel I got was designed to use 12vdc emergency lighting. (Emergency lighting kicks any time they shut down the HEP - like adding a car in the station.) The suggestion was to use the old 5 watt night light bulbs in the fluorescent light fixtures. Well, I still wanted them for night lights, so my solution was a small mod to the panel, adding wire 92 so that either the night light switch or a power failure would turn them on. |
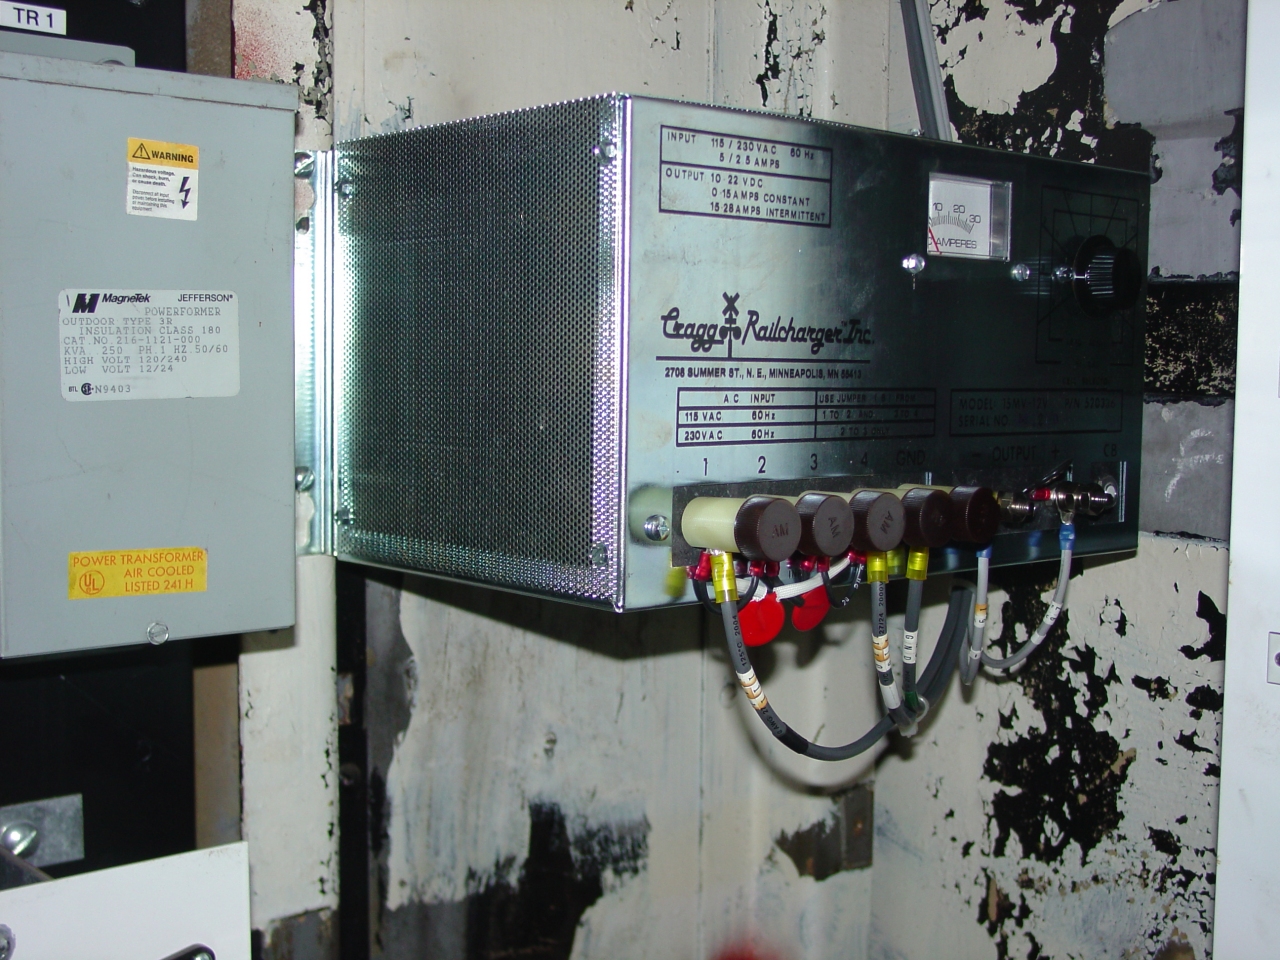 | The new 12vdc battery charger has been installed. Right now, it only powers the night lights. (More to come later.) |
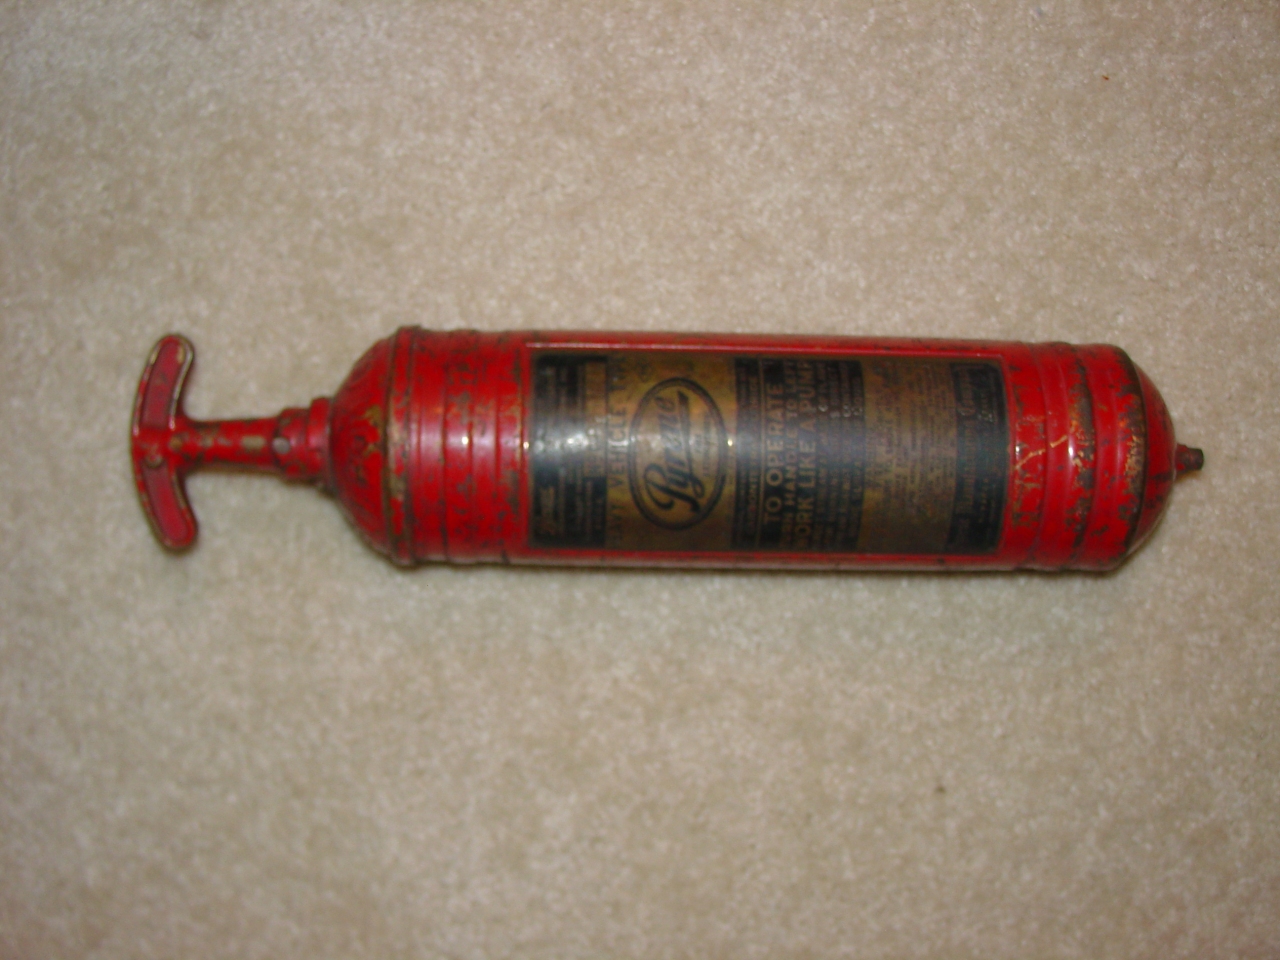 | Here's a neat e-bay find: A Pyrene fire extinguisher marked "Stolen from the GN Ry". 1146 had two of these, one in the hall between the restrooms, and one in the kitchen by the commissary door. It's a hand-pump spray type. The label proudly advertises "25% Carbon Tetrachloride" - Cool. Carbon Tet. Good for dry cleaning, putting out fires, gluing plastic models together - and lethal in high concentrations. Mom used it to kill insects for her insect collections. |
October was spent with final preparations for movement - mainly getting the air brake "Single Car Test" completed - so that it could travel to the museum by rail.
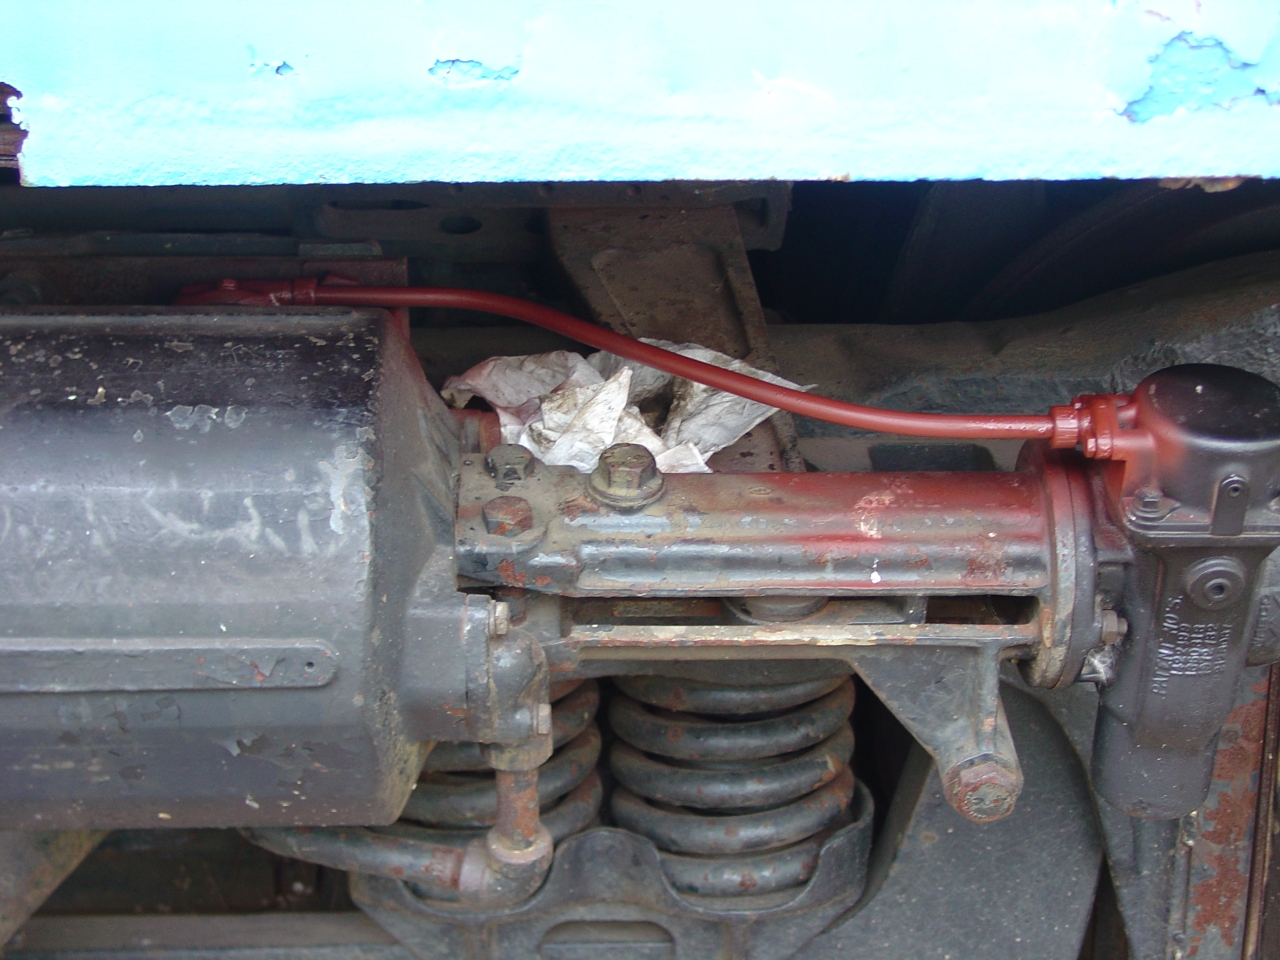 | Of four slack adjusters, one had a really shoddy pipe, two had dead rubber hoses, and one was missing altogether. The flange fittings aren't made anymore, so I scavenged parts off an old C&NW coach in St. Louis. I used new schedule-80 pipe instead of rubber hose, because the later would have to be replaced every 15 years. One lesson learned the hard way: The brake cylinder has three ports for the slack adjuster. One is open and two are plugged. Those plugs are important! Without them the brake cylinder air bleeds off around the piston. |
 | The Wabco A1A water raising system includes a medium-sized air reservoir, to maintain water pressure when the water tank is full (no air cushion) and the brake pipe drops below the minimum pressure required for supplying water pressure. This is where the reservoir was. So far I haven't found a replacement. |
 | 1146 once had anti-lock brakes. This is a brake cylinder pipe and cutout cock, where that feature's control valve was. The cutout cocks were frozen. The new ball-style valves are less prone to leak than these older lapped-fit conical valves, so I replaced these with new ones. Note the cock either connects the brake cylinders to the brake system, or exhausts them to the atmosphere. |
 | A friend of mine came up to help. We got the hand brake chain replaced and the re-bent coupler cut levers reinstalled. |
 | It just looks cool having the lights on after dark! |
 | At long last, 100% of the overhead kitchen lights are working. (Even if I had to use a couple temporary light fixtures.) |
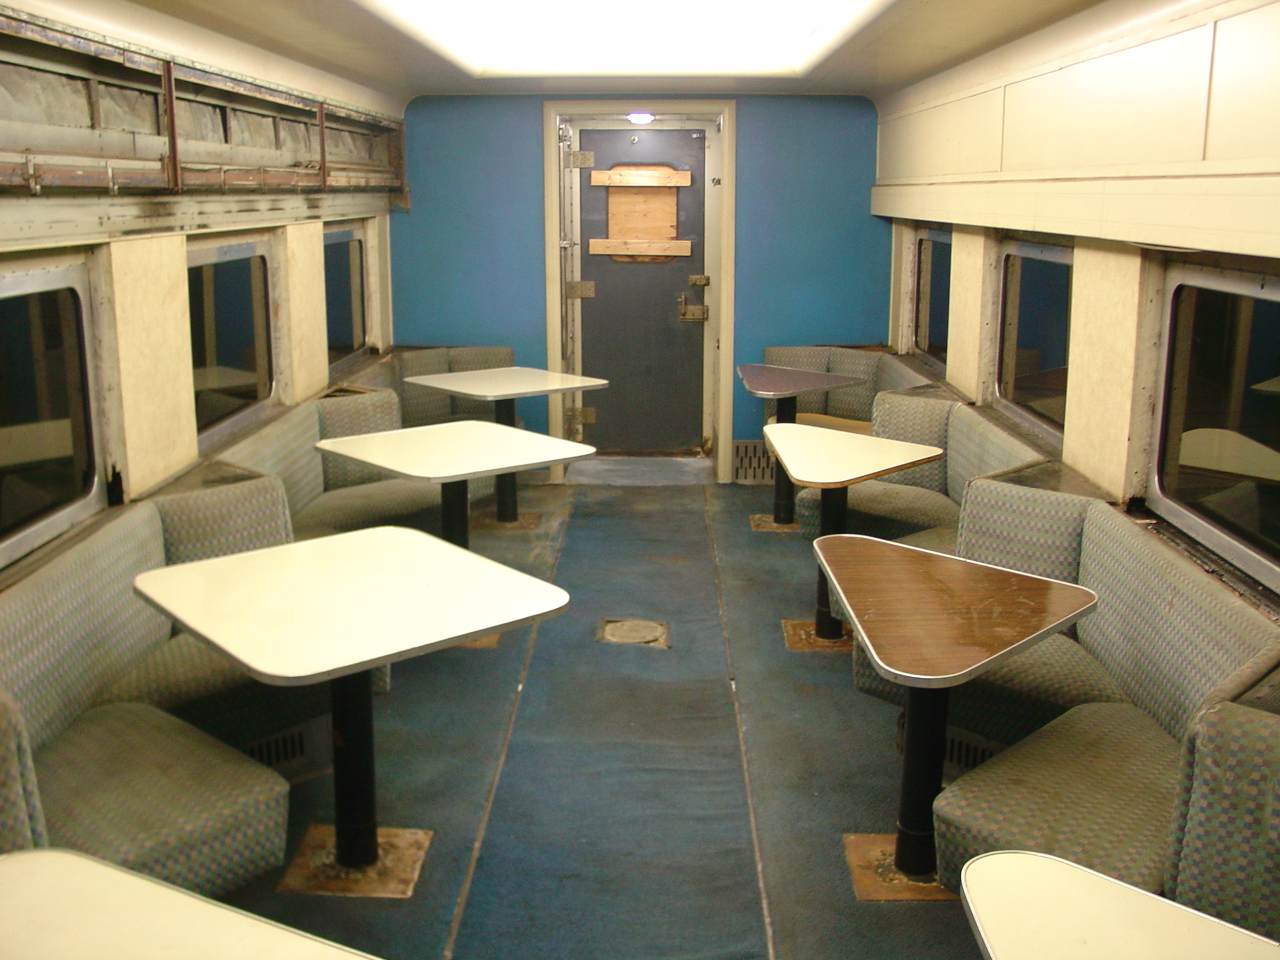 | The dining room at night - cleaned and ready for the party. |
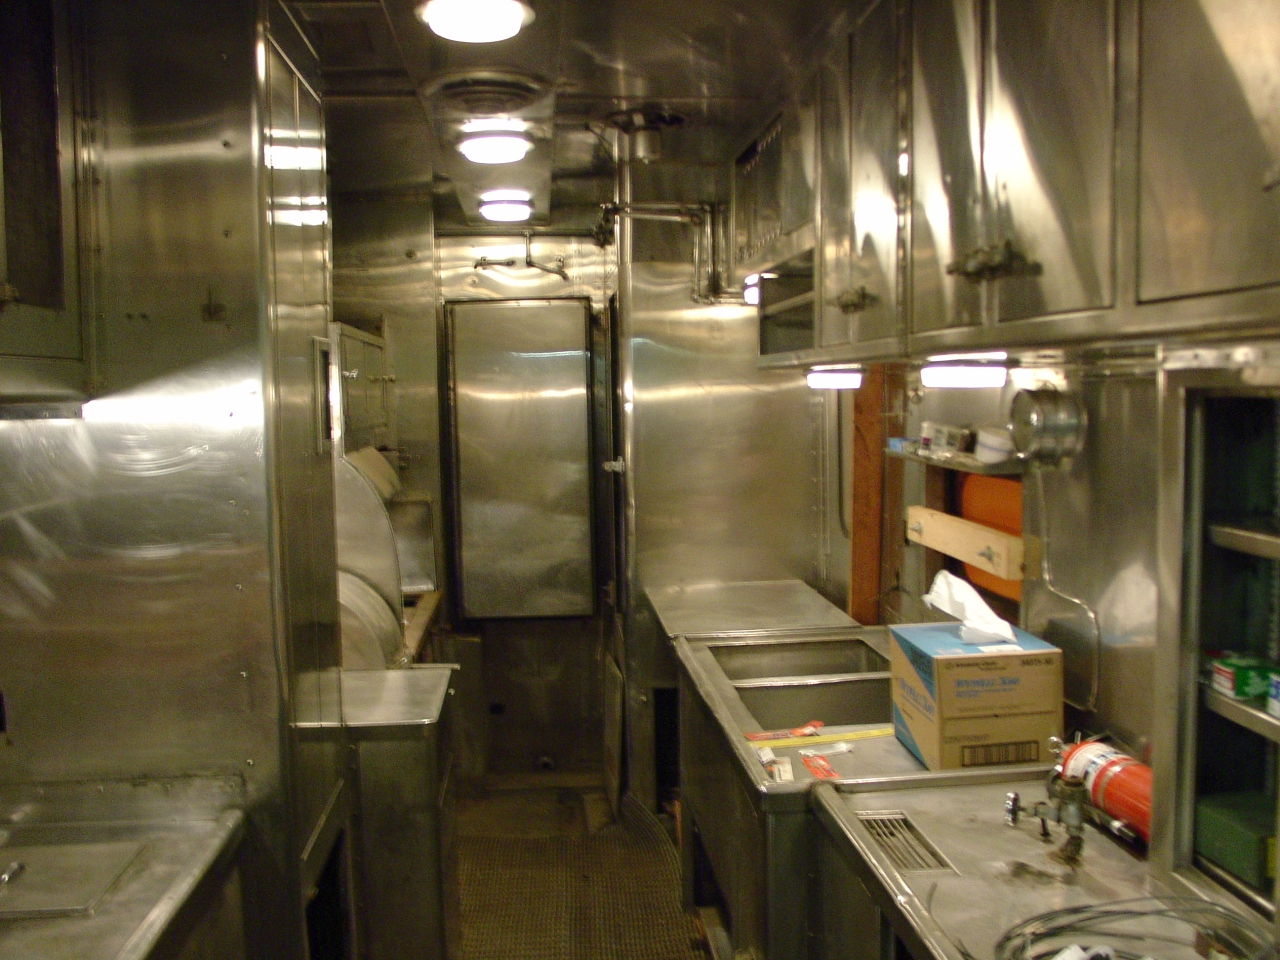
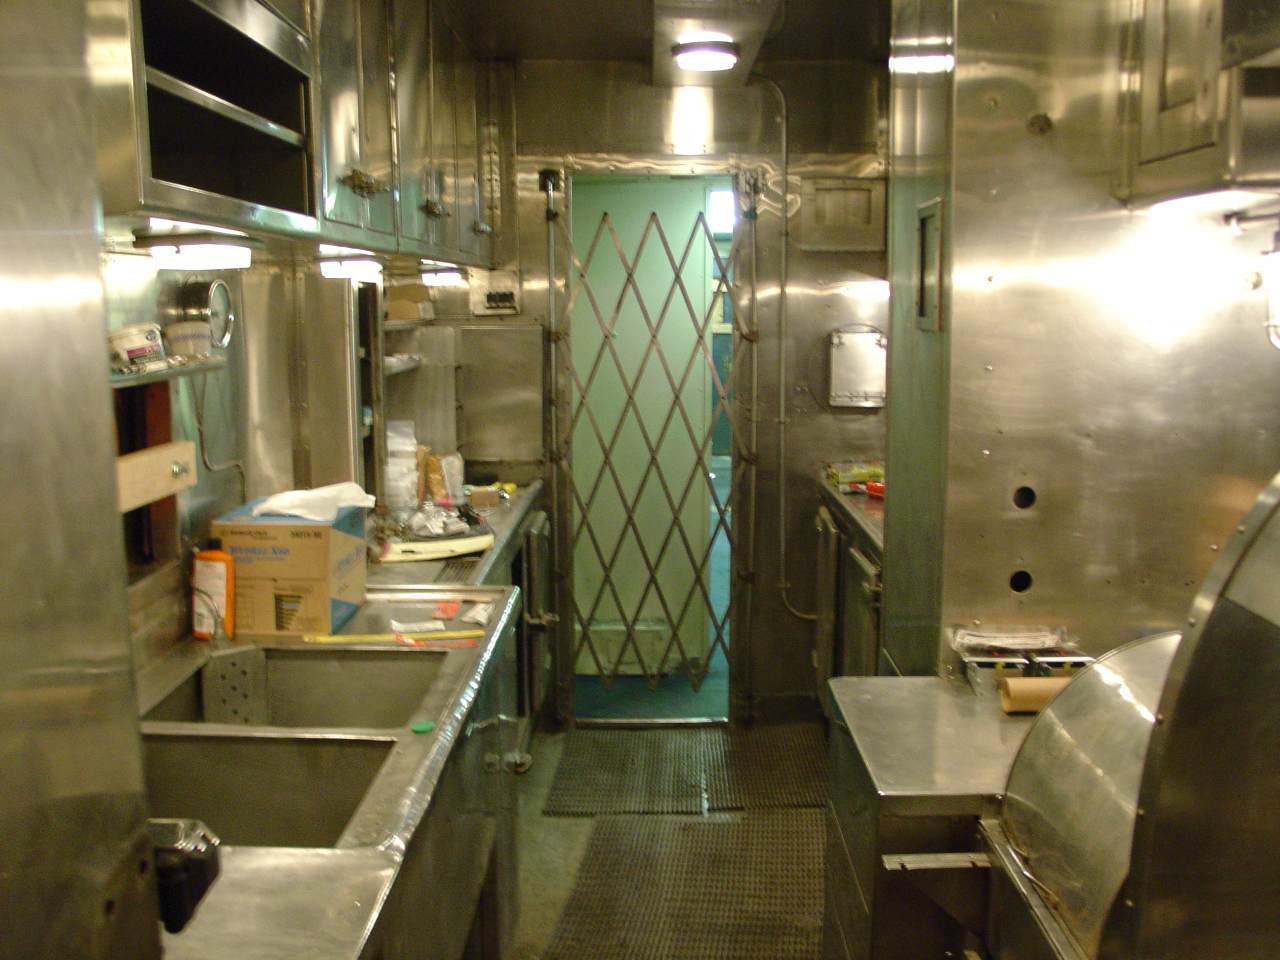 | The kitchen, from the stove end. The folding "kitchen closed" gate is original. The conduit to its right and the floor mats are not. |
 | I spent some cool dark October evenings rebuilding light fixtures in my garage. |
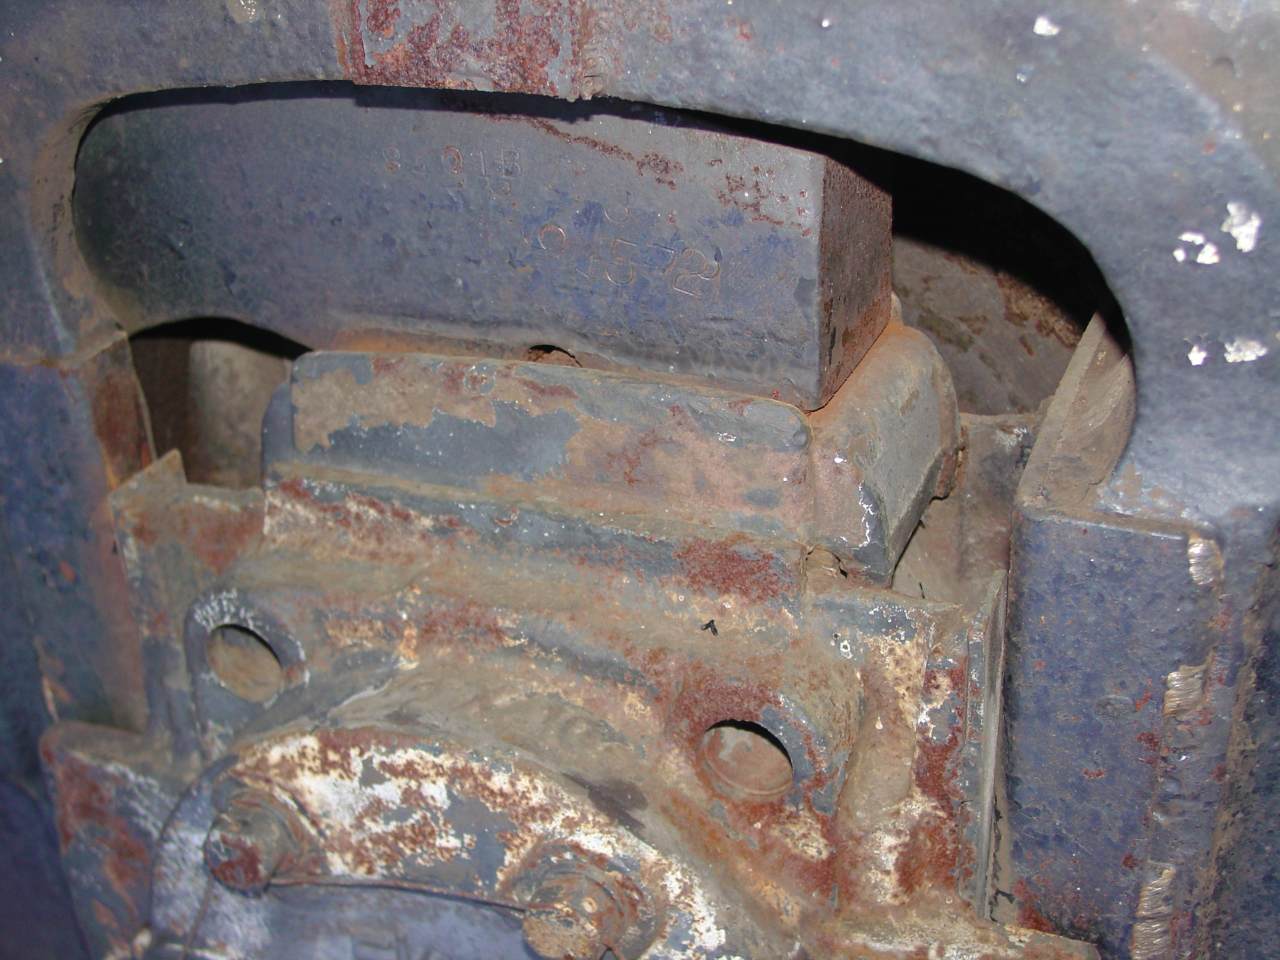 | Some truck "tribal wisdom" I've heard: It's good that the drop equalizer shows no signs of rubbing against the truck frame. That results from worn/wrong components (especially a wrong-size journal box seat) and can quickly wear the equalizer past the condemning limits. The pedestal and box wear liners are made of manganese steel. They have to be welded to the truck frame with 309L stainless rod. Welds made with regular rod will crack prematurely. It's also good that the liners don't have any cracks. (Which I've observed at the 90-degree bends in the liners on other cars.) |
 | This might explain why the B-end coupler is high (though within allowable limits.) We're looking at journal L2. Both B-end axles were traded from a CN&W 400 coach. The box seats - the adapters between the journal box and the equalizer - come in various thicknesses to compensate for wheel wear. Compared with the next photo, this box seat seems to be intended for wheels with much thinner treads. |
 | This is journal L4. The box seat appears correct for the wheel wear. Wheels have a 3" tread thickness when new, and are scrap when worn to 1". This wheel is about mid-life with a 2" tread. ...Hmmm. But looking at the pictures again the journal box seems to be riding above the center of its travel. I've been told things should be centered and level at rest. I'll definitely study this more before changing anything. |
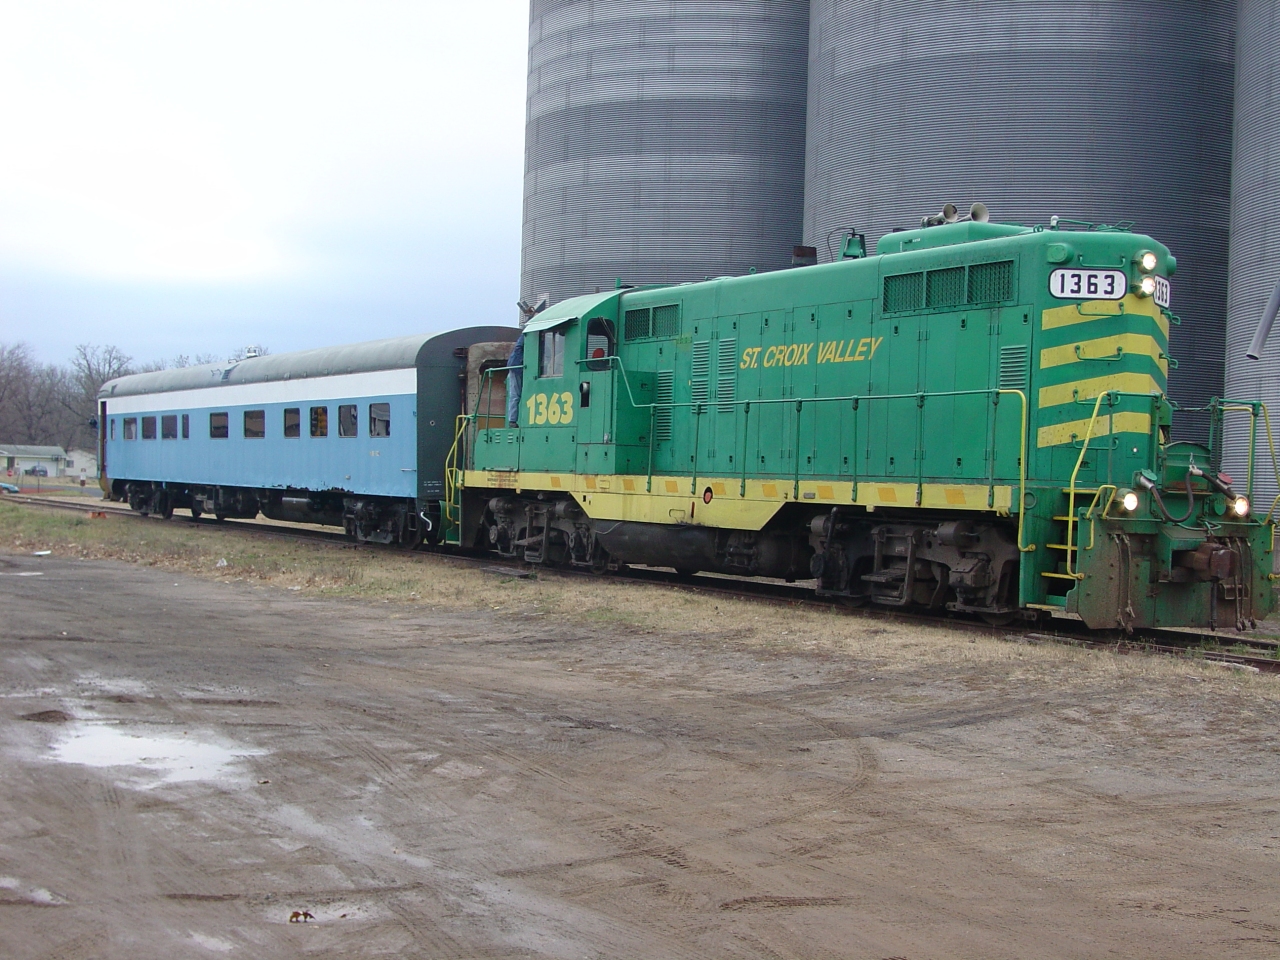
The big news was 1146's inaugural trip! The St Croix Valley provided the crew, and starting at noon on November 20th, we went for a round trip of the 35-mile line.
 |
Putting on a few last touches before train time. Now I just know someone will tell me that side sill needs work. Yup, it does. That's part of the reason for leasing it to MTM - so that I can do the steel work in their well-equipped shop. |
 |
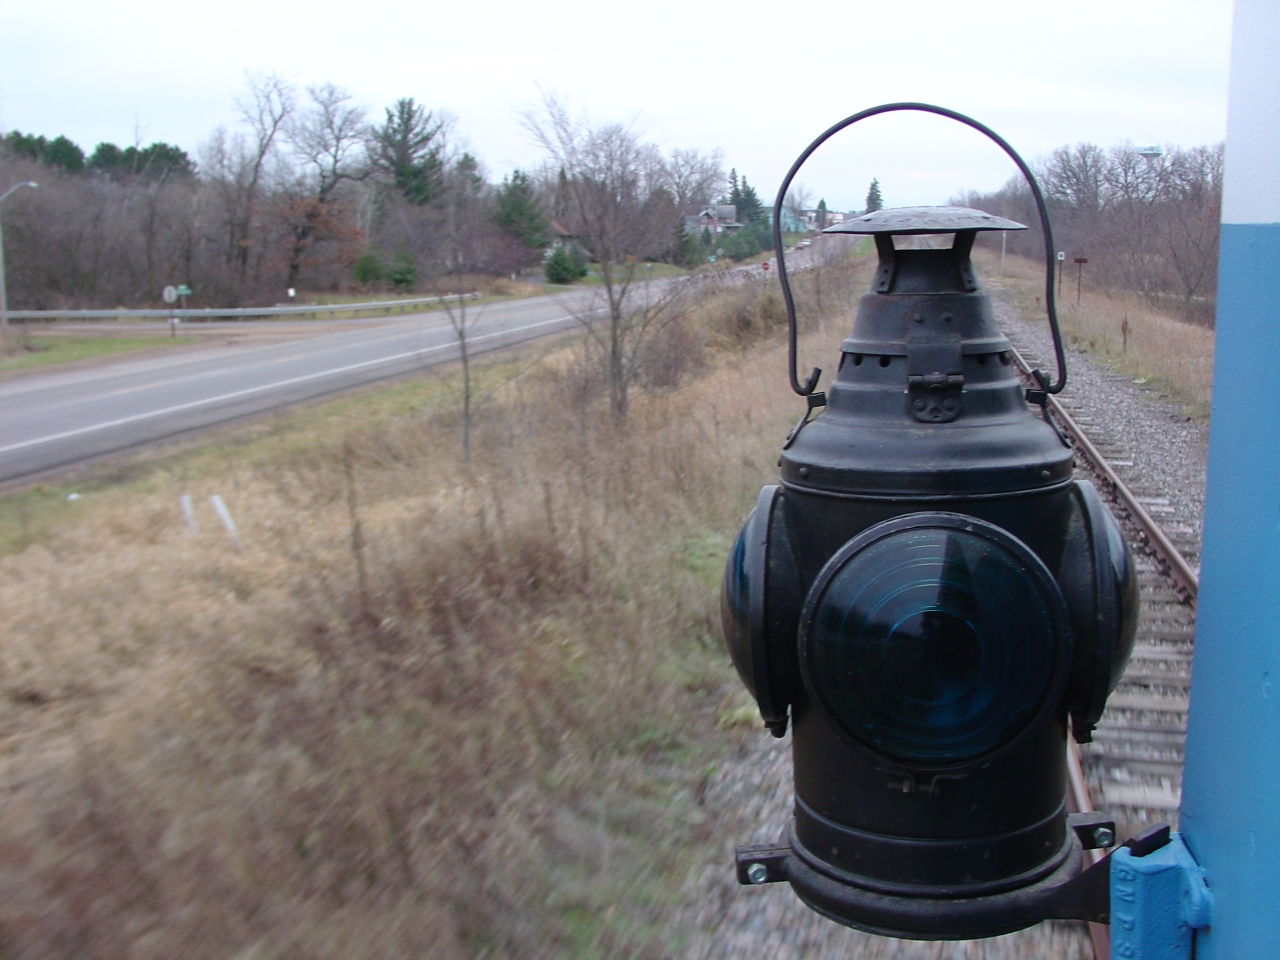
My friend Art Nettis brought the marker lights. Going by photos of GN passenger trains in the 50's and 60's, they are perfect. But, they don't meet current standards. The real end-of-train marker is that orange flag which will go in the knuckle. |
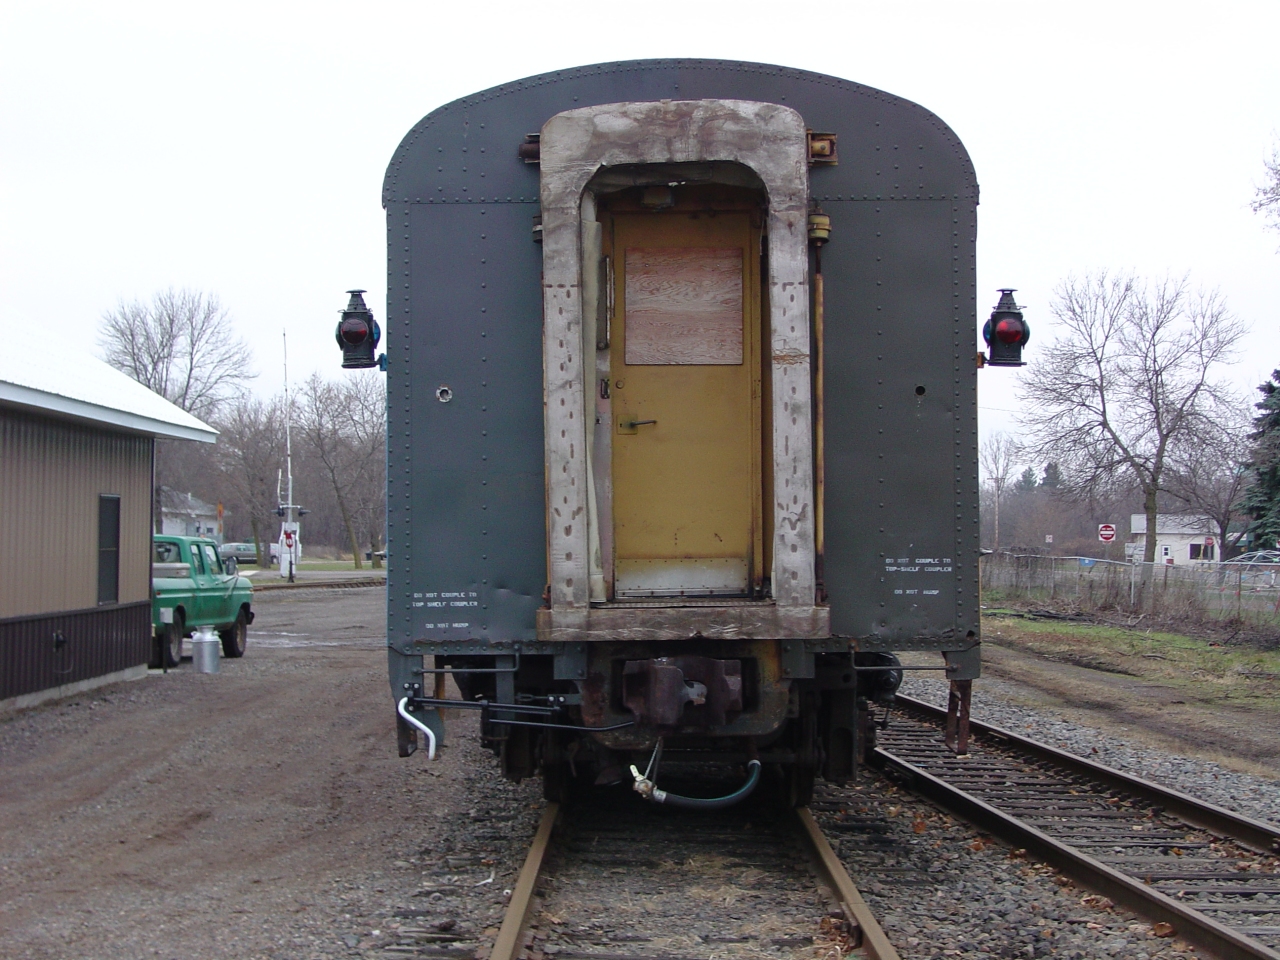 |
A detail study of the A end. The marker light sockets have been through the shop, and new wires pulled, but I just haven't gotten them installed yet. The door's window is missing because I haven't yet found an FRA type I solution that looks "original". Maybe for looks I'll just clean the gasket, soften it up with silicone grease, and put 1/4" safety glass in... Hmmm... Notice Amtrak put a stainless skin on the diaphragm and buffer. The "do not couple to top shelf coupler" is because those couplers can get hooked under a passenger car's buffer. When that happens it takes jacks, a crane, or usually just a cutting torch to separate them. The "do not hump" is because when a passenger car goes over a hump in a classification yard, there is no guarantee it will meet the next car at a safe coupling speed. I've seen spectactular damage on other passenger cars which went over the hump. Fortunately, there is a field in the UMLER database for this, and the BNSF's computers pay attention to it. I'd also point out the cut lever, which had to be bent back into shape, and the vented dummy coupling which keeps the air hose out of the dirt, switch frogs, etc. |
 |
I was killing time taking pictures. The near four windows are the dining room. The door is for stocking the kitchen. Here's an interesting tidbit: There is no equipment hung under the dining room on this side is because that's where the sanding control equipment was. Sanders on passenger cars? Very unusual, but the GN was experimenting when they ordered the "International". The vent on the near corner of the roof, by the way, is over a refrigerator. |
 |
I took this picture to show the kerosene markers were lit. They have freznel lenses to focus the light towards an approaching train. From any other angle they really don't appear lit during the day. |
 |
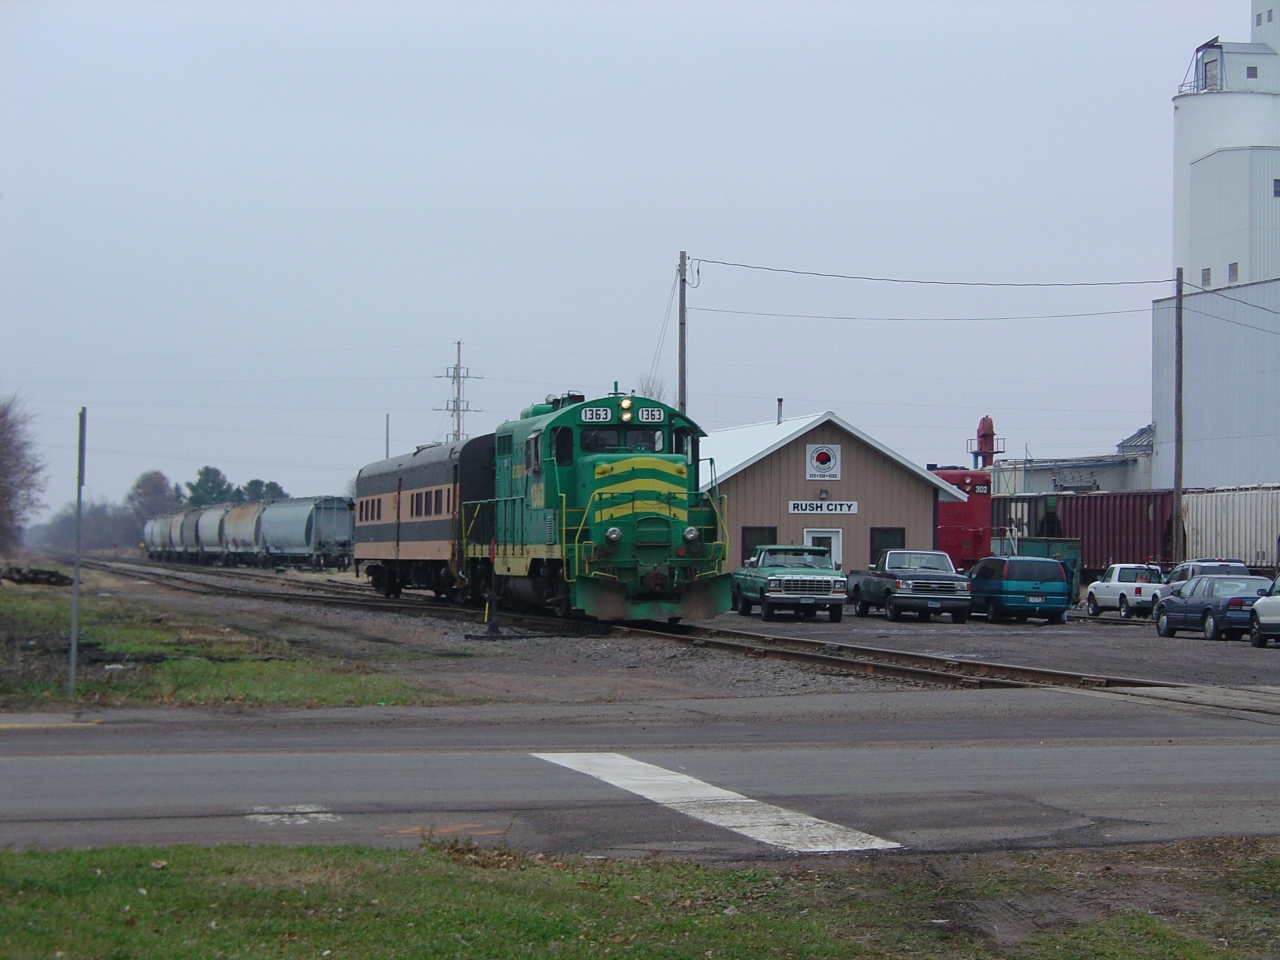
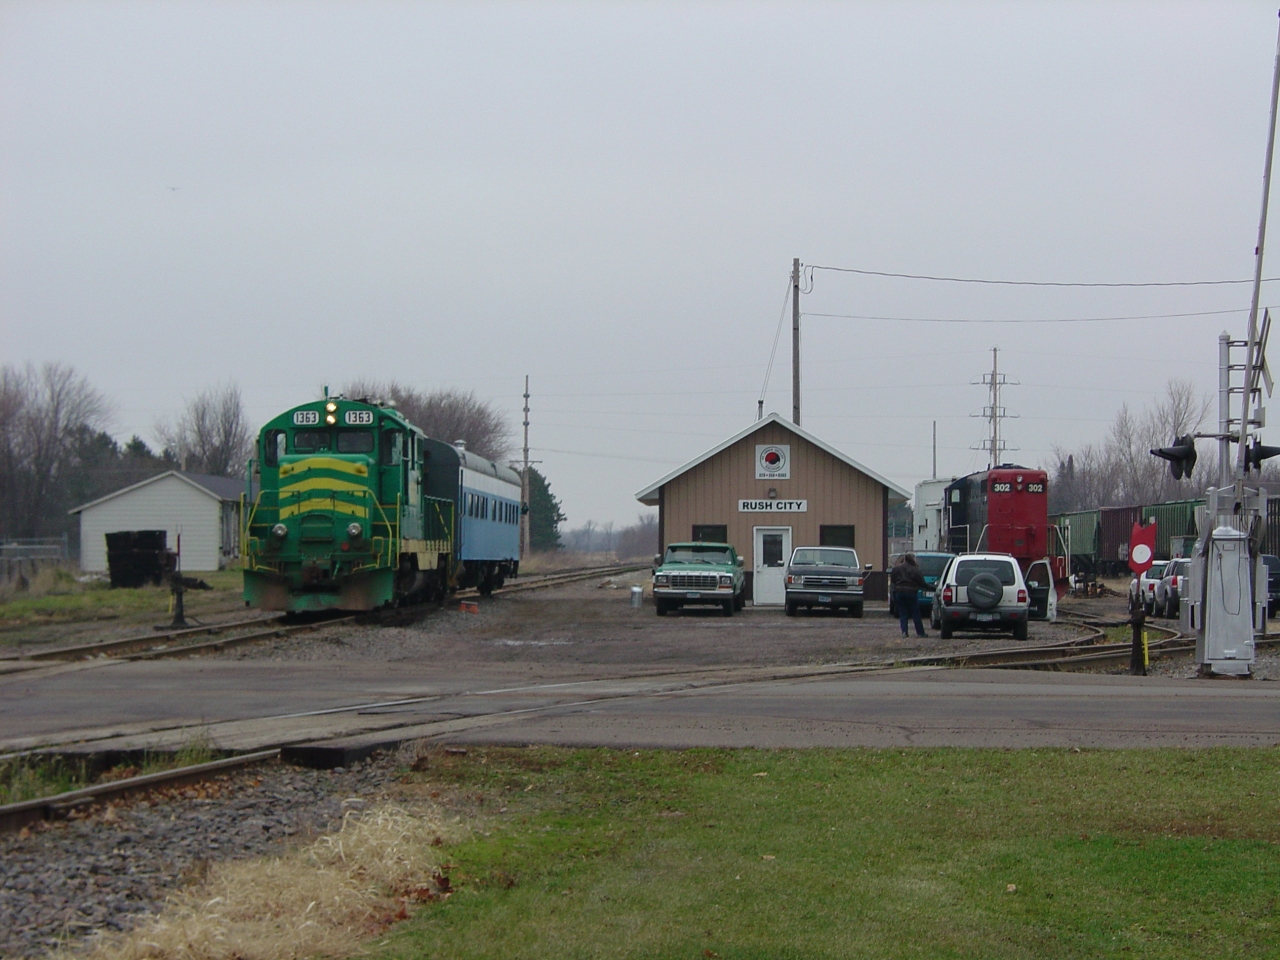
Our train, waiting in the station. I think the St Croix Valley did a wonderful job evoking the architecture and "feel" of a turn-of-the-century wooden station. This building, their office and garage, is barely a year old. |
 |
Same pose, from the other side. That flour mill in the background is probably the biggest customer on the line. That's why the office and motive power are stored here. |
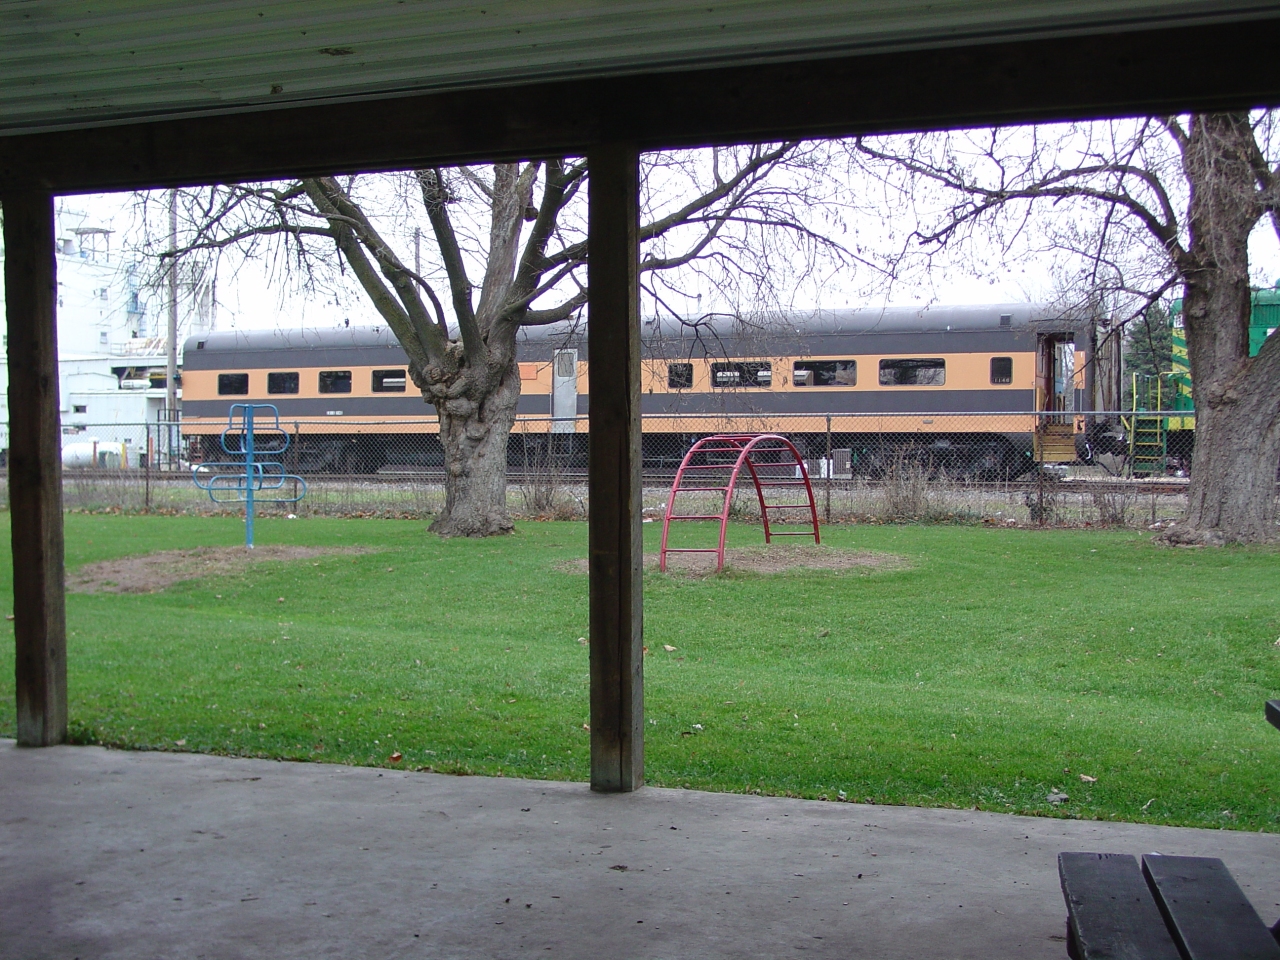 |
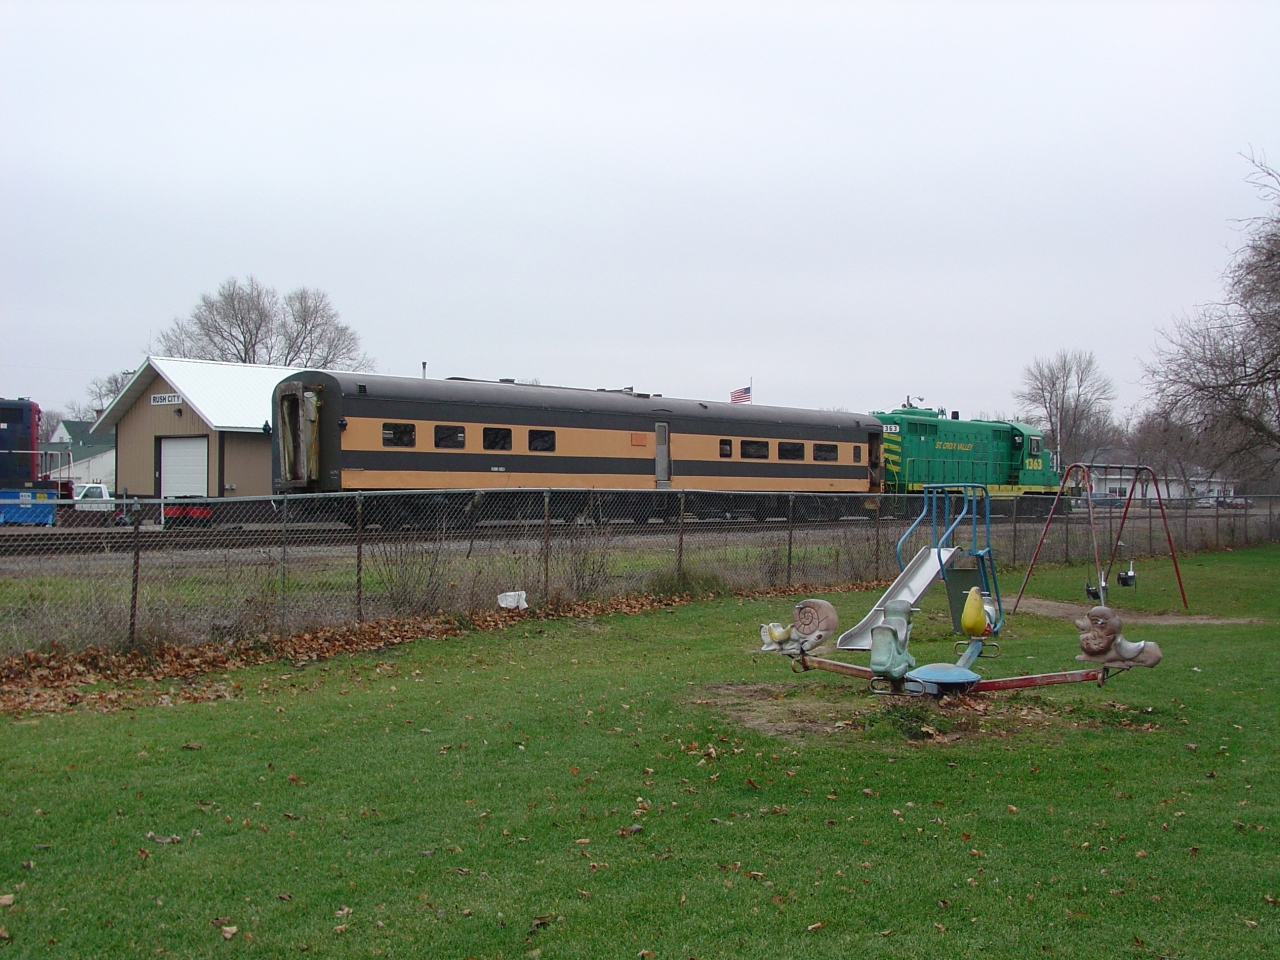
I took a few pictures from the playground next to the station, going for that more distant "train in station" big picture. Man, don't those windows look good? |
 |
I really love this picture, with the way the trees frame the car. 1146's dual function is really obvious on this side. The dining room is the four windows on the left, next to the kitchen. All standard dining car stuff. Right of the kitchen, however, its 100% coach - complete with restrooms and vestibule. Interesting tidbit: The GN liked to standardize window frames. The dining room windows are interchangeable with the 1240-series ranch cars (one window is marked for my friend's 1243 "Iceberg Lake"), and the big coach windows match the 1210-series coaches like MTM's 1213. |
 |
This could be a good 3/4 view roster shot. The composition doesn't really melt my ice cubes, though. Doesn't it look like 1146 is feeling patriotic, waving the flag? |
 |
Not all my shots turn out... |
 |
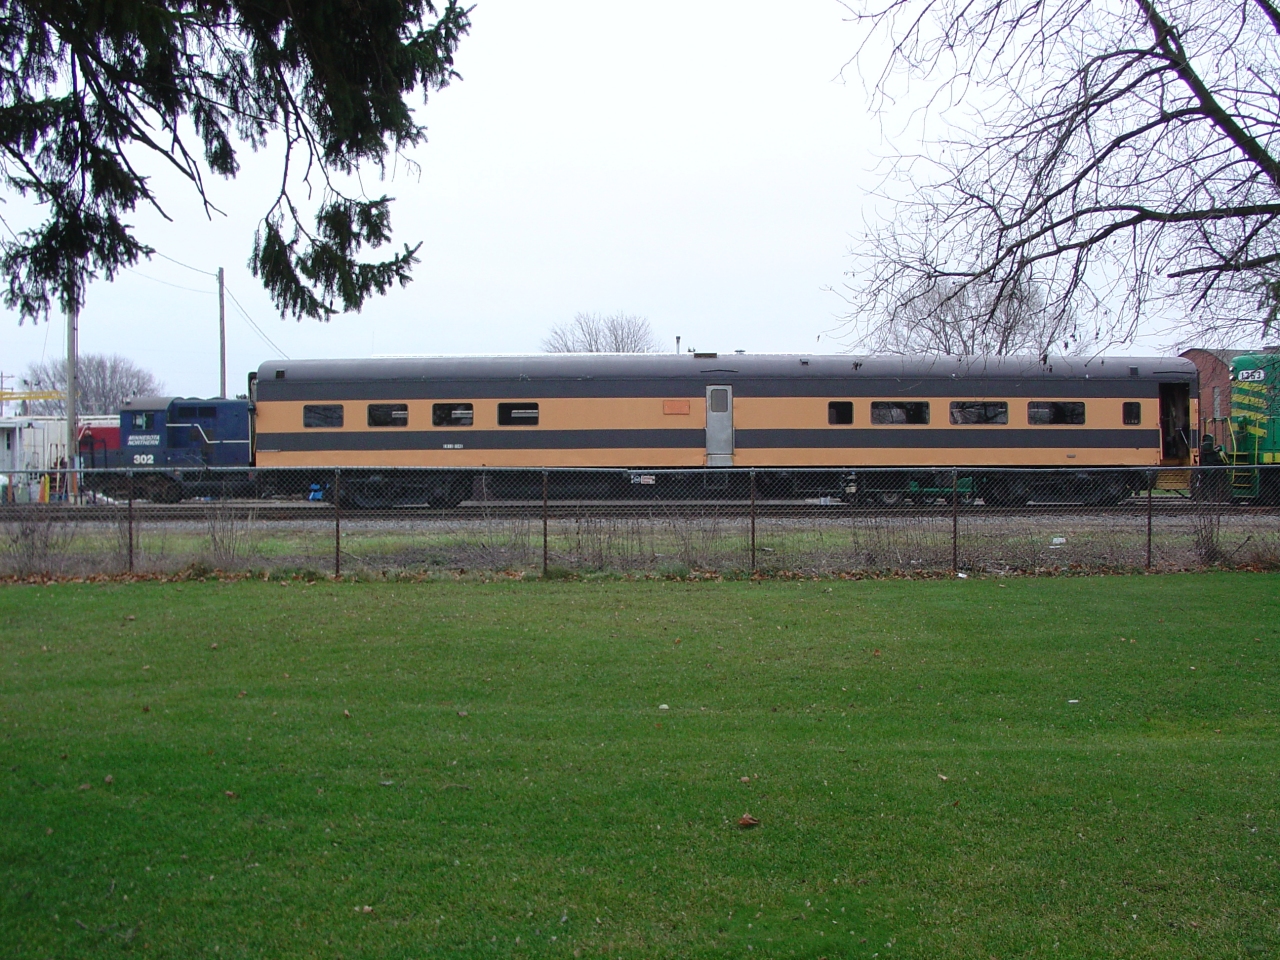
After the park I went across the street. This one kinda gives a feel for the St Croix Valley's plant in Rush City. This line, by the way, is a remnant of the Northern Pacific "Skally Line" between St Paul and Duluth. The Minneapolis and St Louis had trackage rights in the early years. In more recent times, the Milwaukee Road used these rails. A friend, Lee Tuskey, remembers firing NP Q-3 Pacifics at up to 90 miles an hour on this line. |
 |
This is nearly a "straight down the track" angle. Is that a milk can sitting by the station? |
 |
Hands-down, this is my favorite picture! The composition really works, there are many elements of a small-town station, and there is quite a bit of activity around the station as people arrive for the ride. |
 |
A variation on the previous picture... |
 |
And another... |
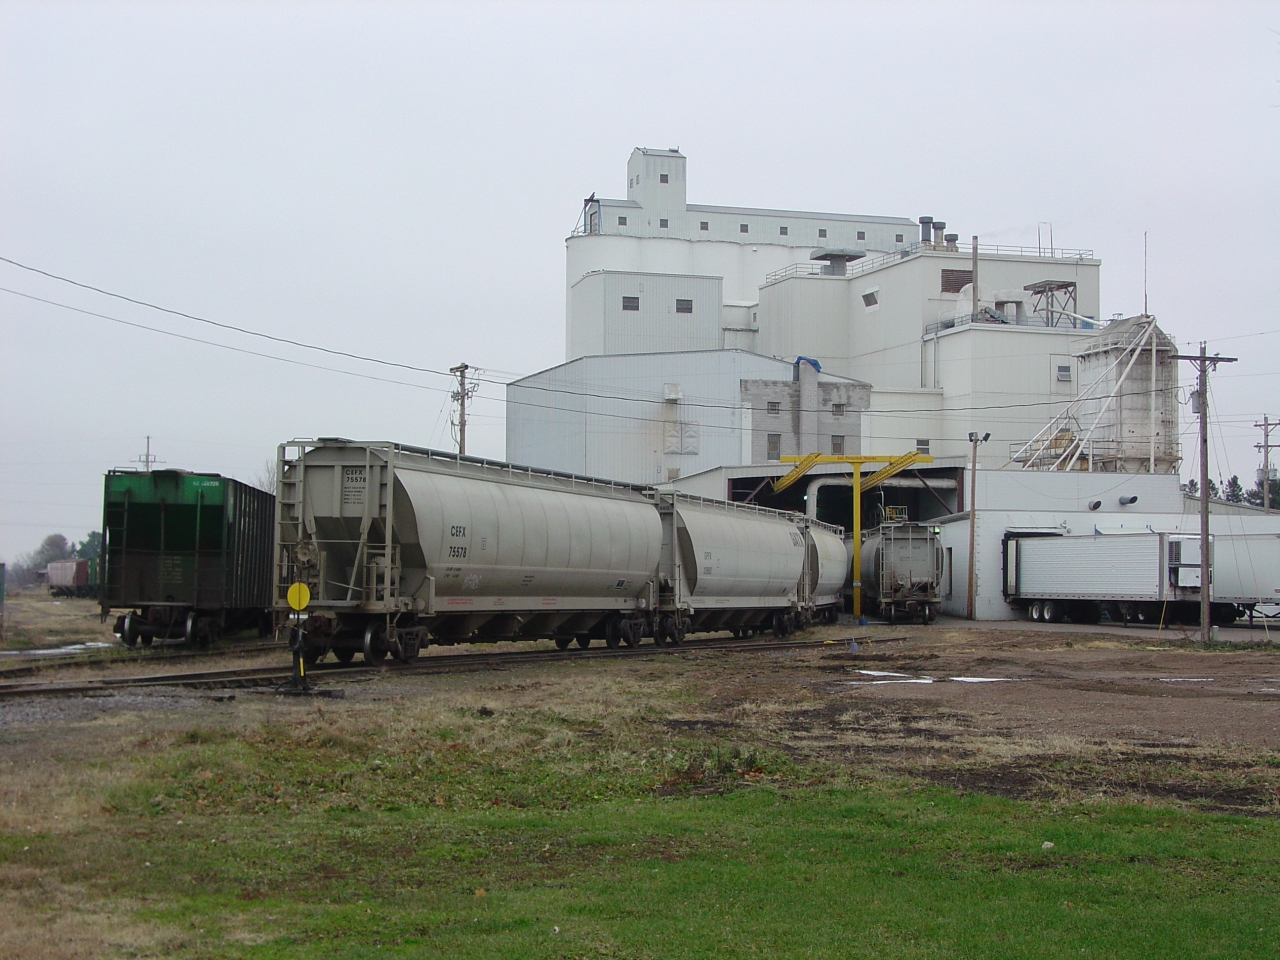 |
And now for something completely different! This flour mill is the St Croix Valley's largest customer. |
 |
This is one of those pictures which reveals a technical issue - on that I'd overlooked a hundred times but, once I'd noticed it, really stands out. Notice 1146's coupler is higher than the locomotive's. Now, I put a straight edge across the rails, and measured the coupler height (measuring to the center line.) It is exactly at 34.5 inches - the maximum allowed by 49 CFR 231.31 "Drawbars for freight cars; standard height". The happy medium is 33 inches. Why is this end so high? I suspect because the box seats were not changed when the wheels on this end were changed. As the wheel tread thickness wears from three inches to one, the box seats are supposed to be changed to compensate. These box seats appear to be sized for thinner wheels, so this end of the car is jacked up. |
 |
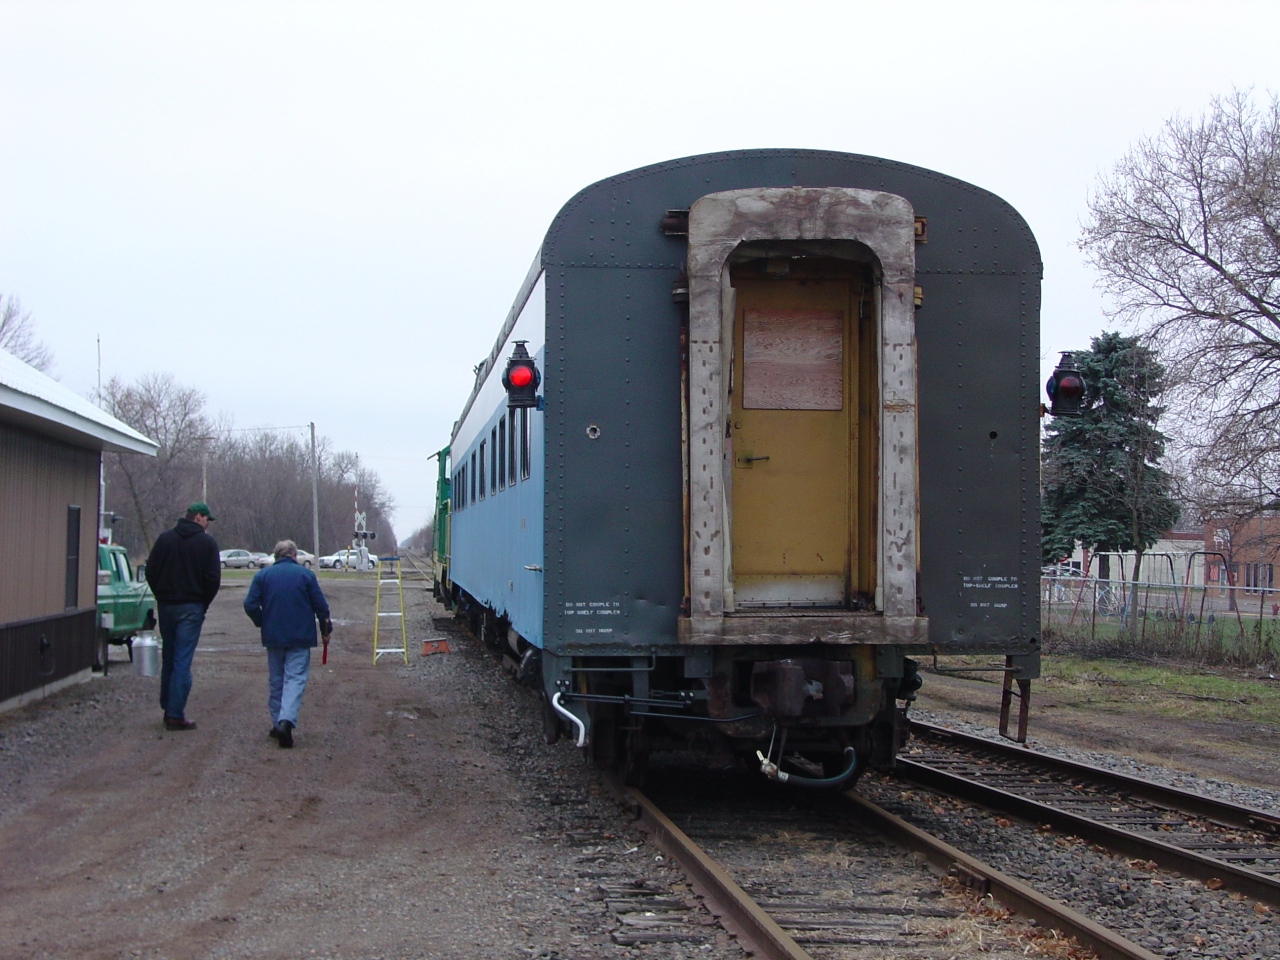
Around the back side of the depot. The old marker lights are pretty, but the red flag stuck in the coupler fulfills the rules for marking the end of the train. |
 |
It's just about train time, and the proud owner is ready to welcome his guests aboard. (Actually, several early birds had been helping with last minute cleaning for two hours already.) I wish I could say I own that Great Northern step box. It belongs to MTM and is used with their business car A-11. |
 |
Allow me to show off the dining room. It is still in its original configuration, though redecorated by Amtrak. The original decor was more gold/walnut/leather with stainless and mirrors. The original ceiling color I haven't figured out yet. The light fixtures above the windows (being reassembled with new wires/ballasts/tombstones on the left) edge-lit silkscreen images of ducks flying. The piers between the windows were walnut, with carved images of pacific northwest wildlife. The seats were upholstered in leather, and the end wall there had mirrors on it. Notice the evidence of water damage: One window pier on the left is rotted out at the bottom (all the sills were hopeless) and the carpet is badly stained. |
 |
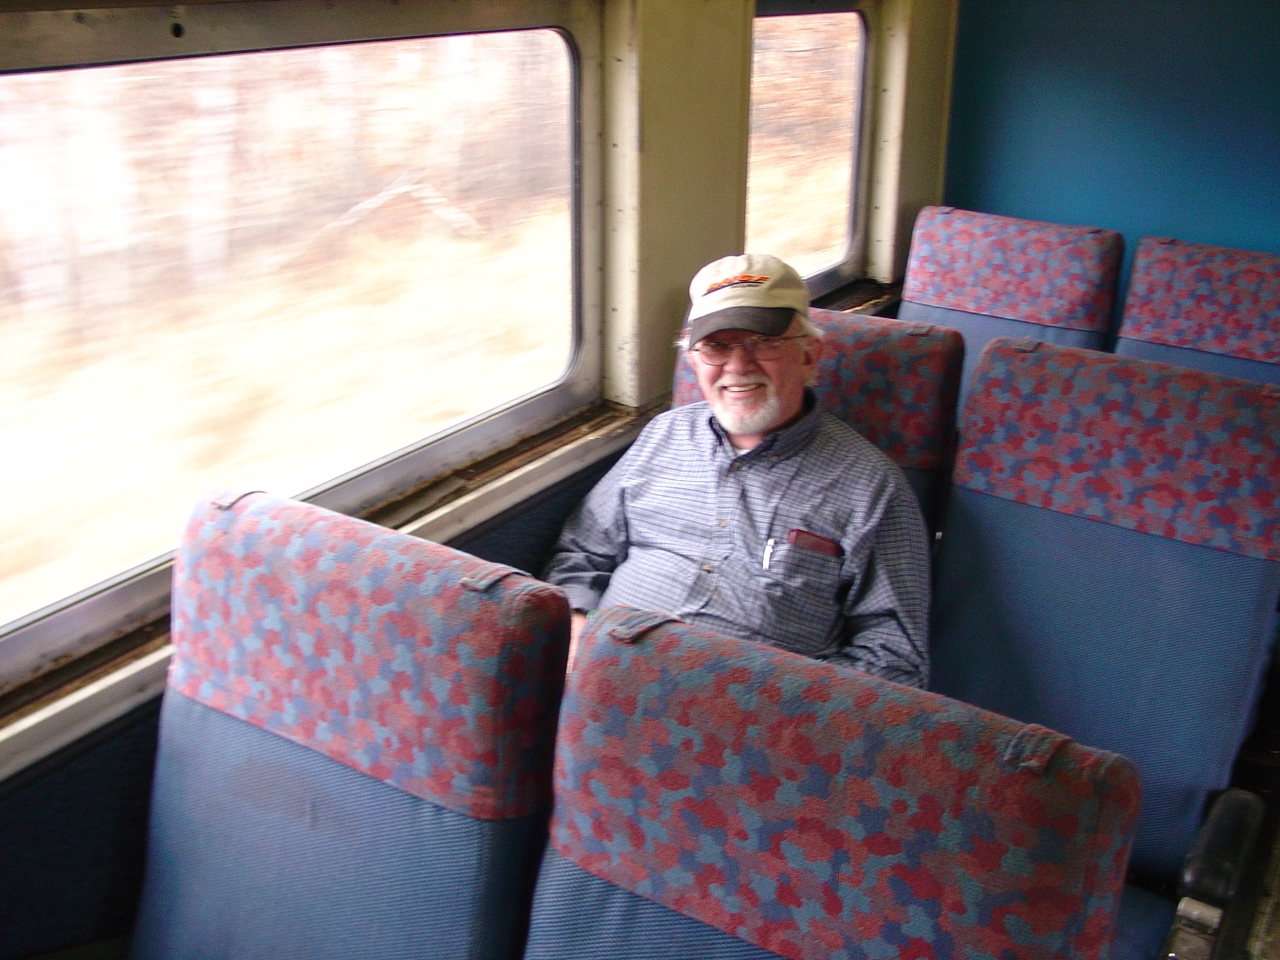
We're moving! The first part of our journey was south to North Branch for lunch. Most of the guests are friends from MTM who have, at one time or another, gotten dirty working on 1146 with me. I really appreciate the help - the work goes so much more quickly with two. |
 |
Burt Foster was kind enough to be our cook. He's been an MTM member longer than I, and occasionally brings steak he's cooked - so I asked him if he'd like to do the honors. That stove is a trip. I'd never before seen a 1950's vintage dining car stove in action, so it took some learning. The center is a charcole firebox - with firebrick, grates, dampers, and all. Once filled and lit off (we used a mapp torch from underneath) it takes a couple hours to warm the whole stove up. I definitely need to learn more about regulating the fire with the dampers. Cooking is not like a gas or electric stove - there are hot spots and cold spots, and positioning the food becomes part of the art of cooking. |
 |
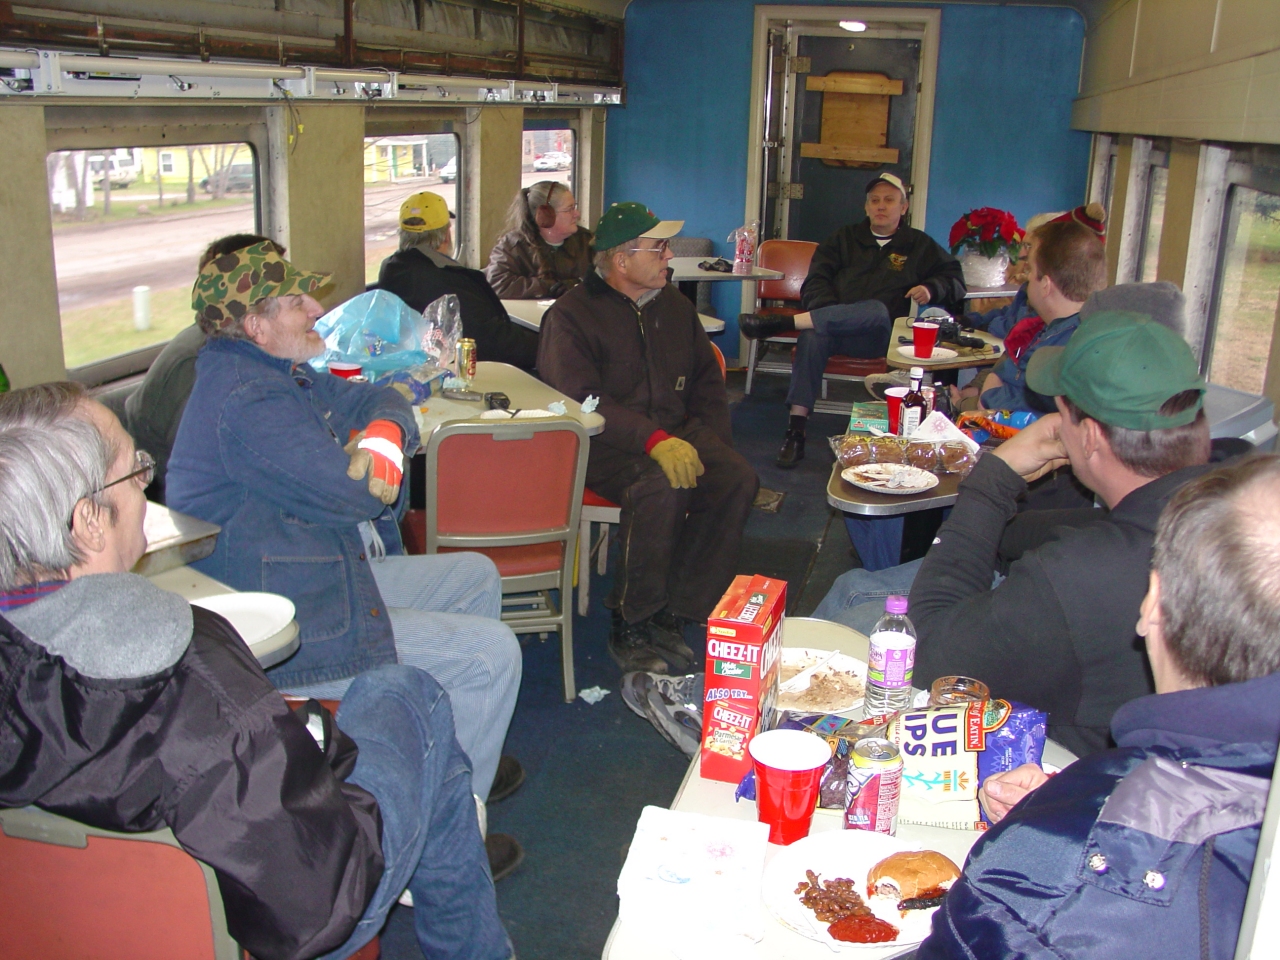
We broke out the appetizers for the trip to North Branch. Let's see: In this picture we see the train crew's family, friends from MTM, a railfan photographer, a co-worker, and a fellow dining car owner. |
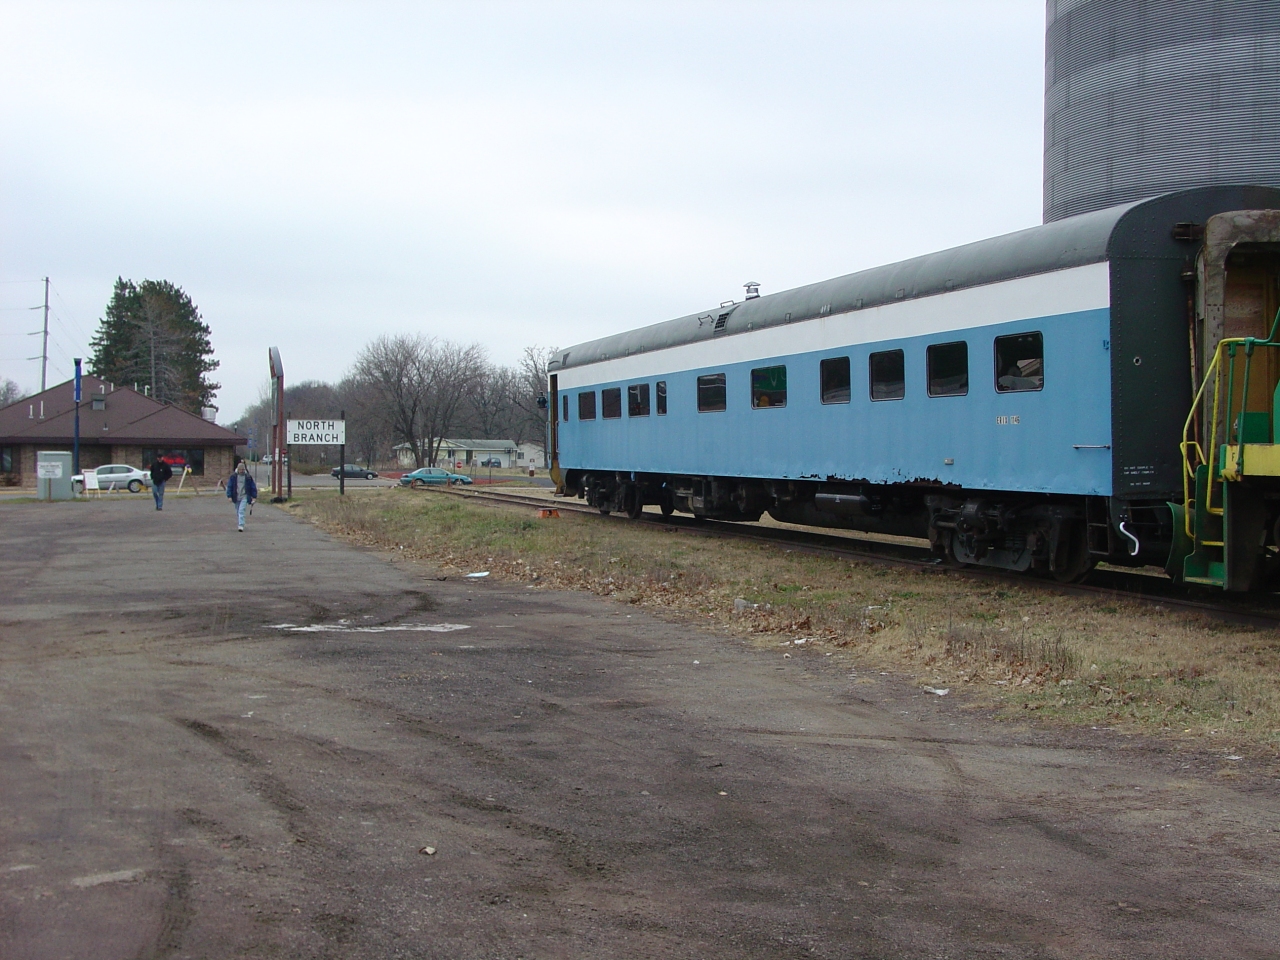 |
The line ends in North Branch, right next to the a main intersection in town, and that's where we parked for lunch. I think we were somewhat of a novelty - more than one curious family stopped by to ask about our event. Of course, most of us had to get out and take pictures. |
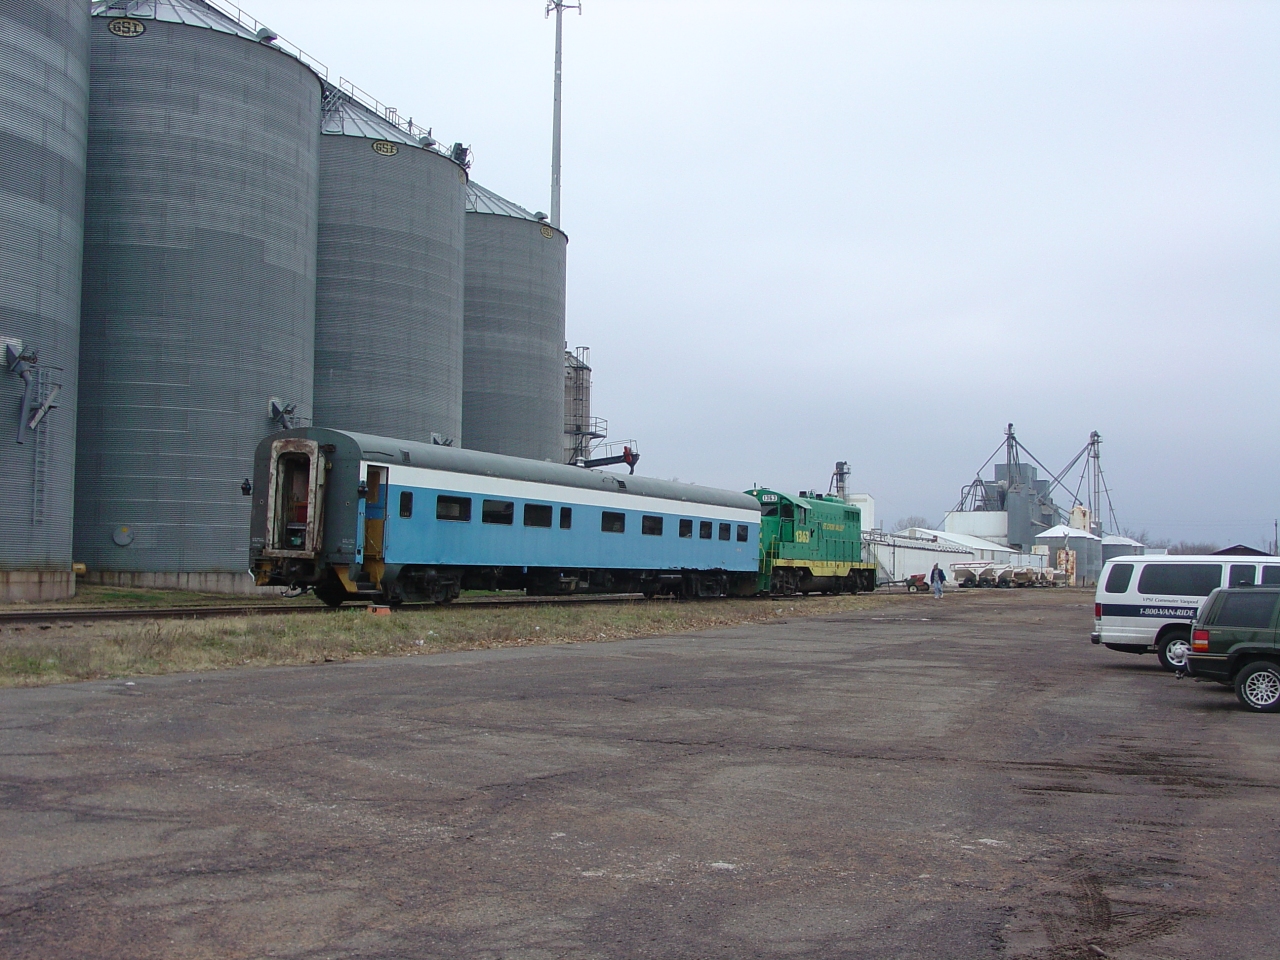 |
Behold the reason the tracks still go to North Branch. Also, visible for the first time is the Coleman portable generator we used for electricity. Normally it rides around in the back of my pickup, and I have an umbilical cord hanging out of the electrical locker. It's a small 5kw unit, big enough for work lights and tools, but it's not three-phase, which will be its undoing. |
 |
To me there's something profound about the point where a through route was chopped off. In North Branch, this is it. The main and the double-ended industrial spur where cut just shy of where the main street crosses. Notice the rail ends in the foreground are spiked to switch ties - this was a switch allowing access to the industry from the North Branch siding. |
 |
It's obvious from the smoke that we've just poured more charcole on. The stove actually has two chimneys. The upper (with the hardware store cap) is a natural draft chimney. The lower is range hood exhaust blower. We had to run across the street to the grocery store to buy another big bag of charcole. |
 |
A happy passenger munching his lunch, looking at us through a clean new window. Isn't it wonderful? |
 |
The crew has finished their lunch, and we're about to head back to Rush City where we started from. |
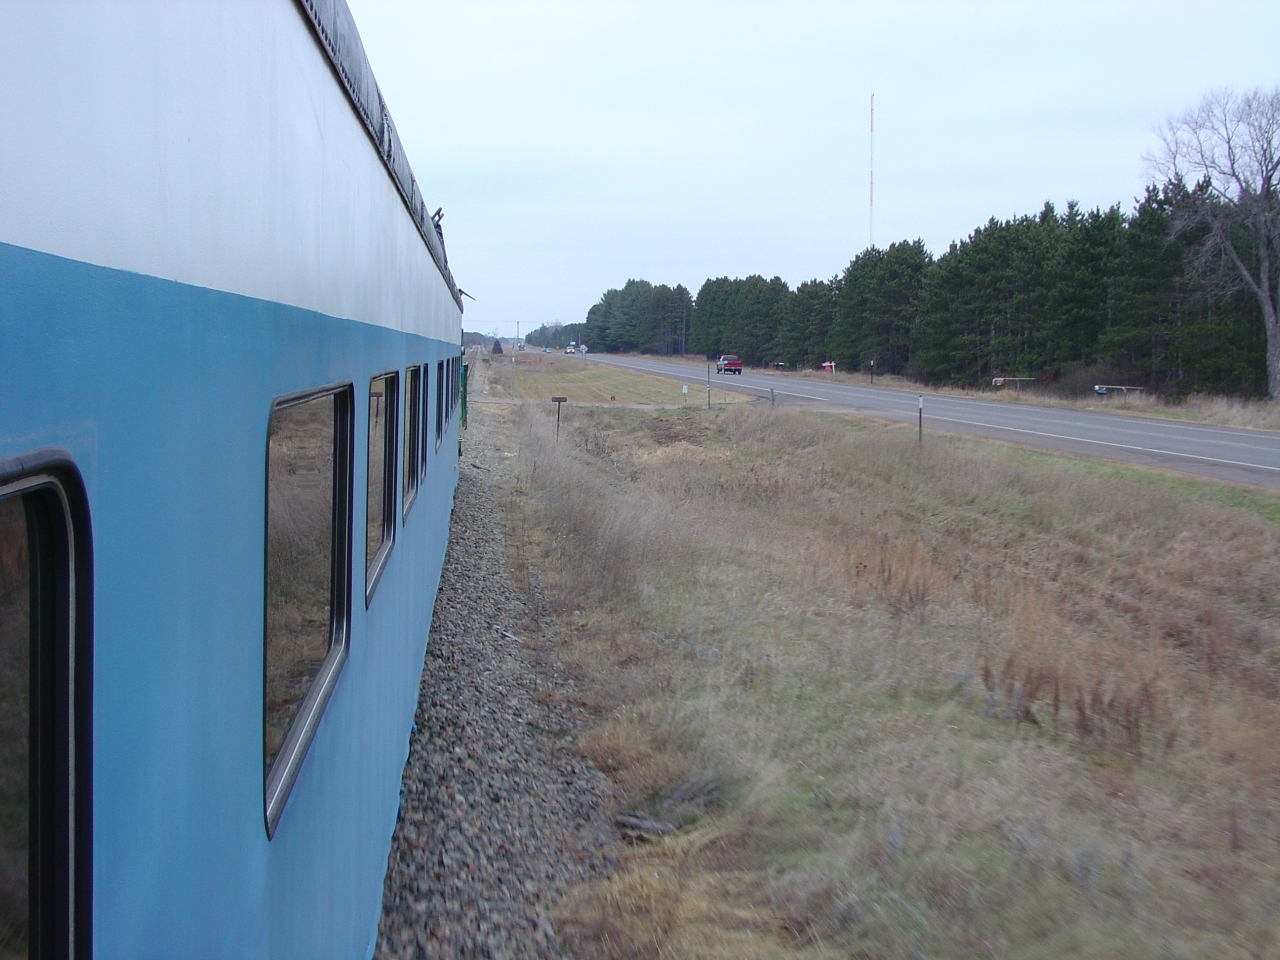 |
As we cruised back to Rush City along side highway 61, I had to hang out the vestibule dutch door to enjoy the fresh air. It was real cold (fourty degrees outside) but I just had to. I'd owned 1146 for five years and this was my first ride. The guy in the red pickup is a railfan photographer, and a friend of the crew. He was our unofficial escort. |
 |
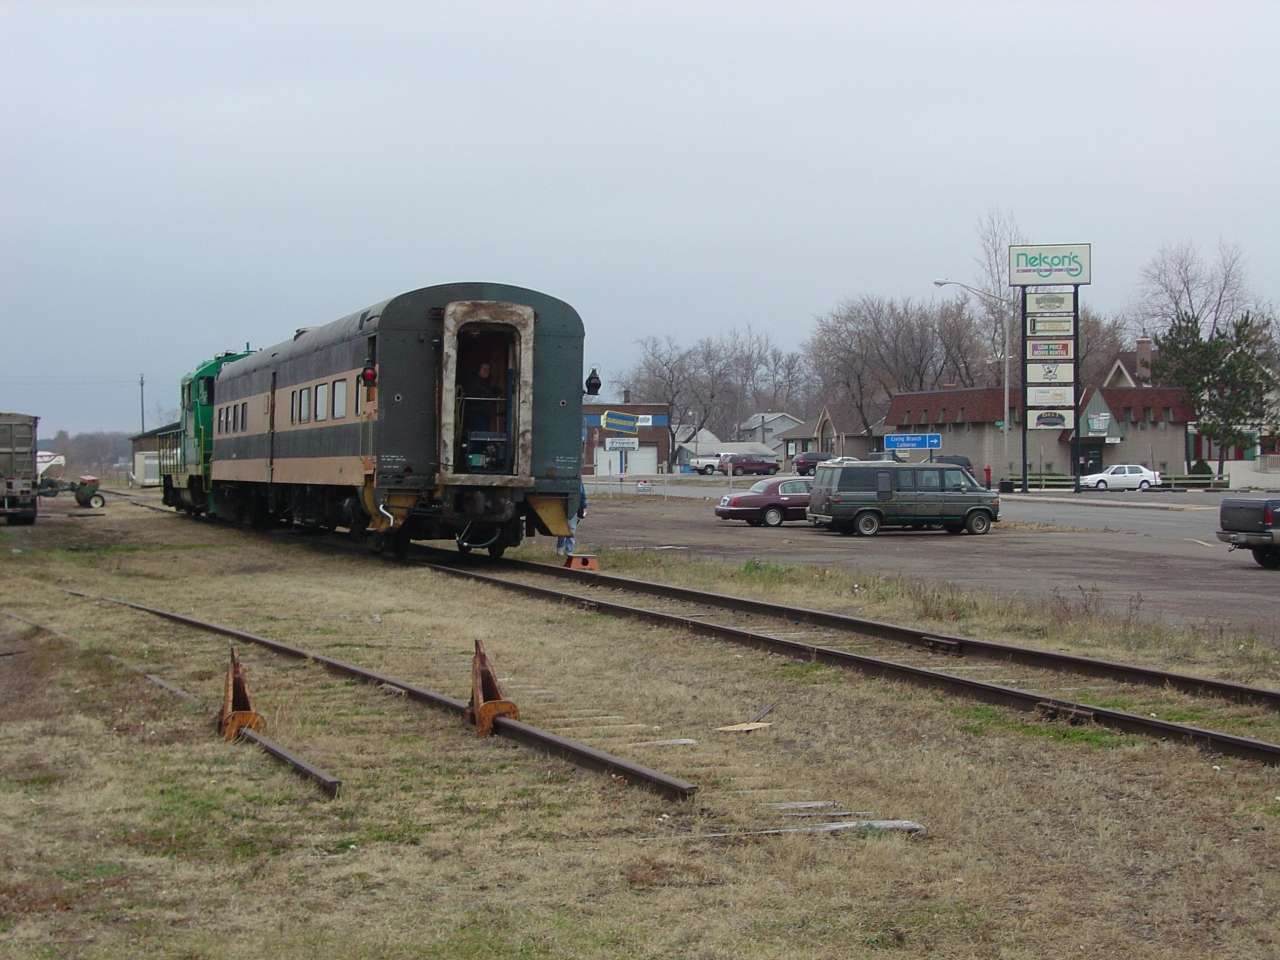
Looking back as we leave North Branch. That's the Zinpro plant on the right, and highway 61 on the left. This was once a mainline with Griswold crossing signals and upper-quadrant semaphores, and Pacifics hauling heavyweight passenger trains and speeds approaching ninety miles an hour. |
 |
After lunch we had a nice ride and good conversation. Train travel is wonderful - there's room to get up and walk around, great food in the diner, often a neat lounge car for sightseeing, and a private "hotel room" in the sleeper. Getting there is half the vacation. |
 |
Same as previous, from the other end of the dining room. |
 |
Another view out the back. This is Harris, Minnesota if I recall. We just split a pair of rare, fully-functional Griswold crossing gates. |
 |
A portrait of an Adlake kerosene marker lamp. The single red lense faces the rear, the rest are green. |
 |
Here's a dutch-door shot of the left side. |
 |
Phil had the same idea I did. |
 |
One last shot out the rear door. |
 |
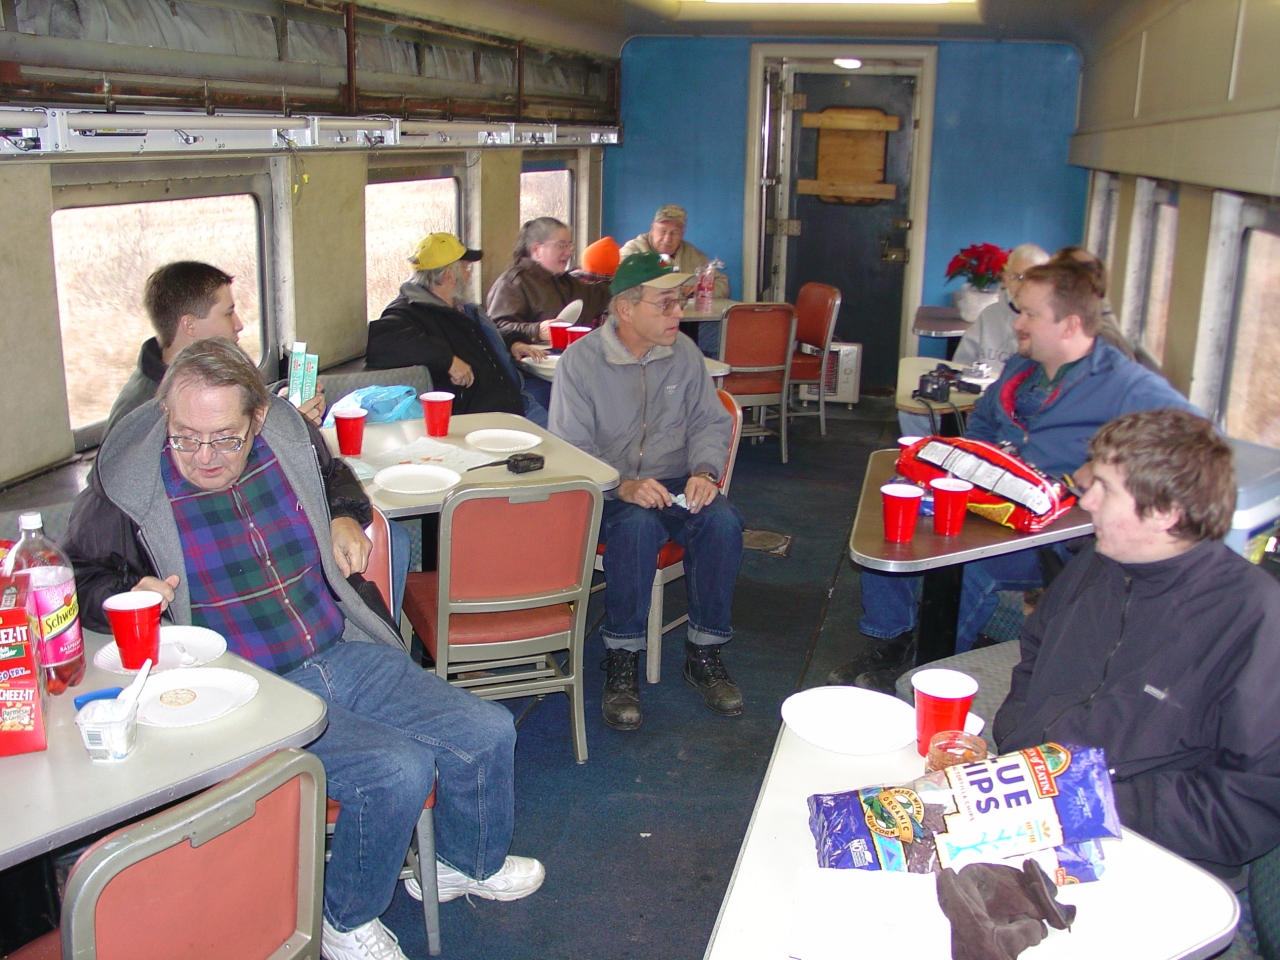
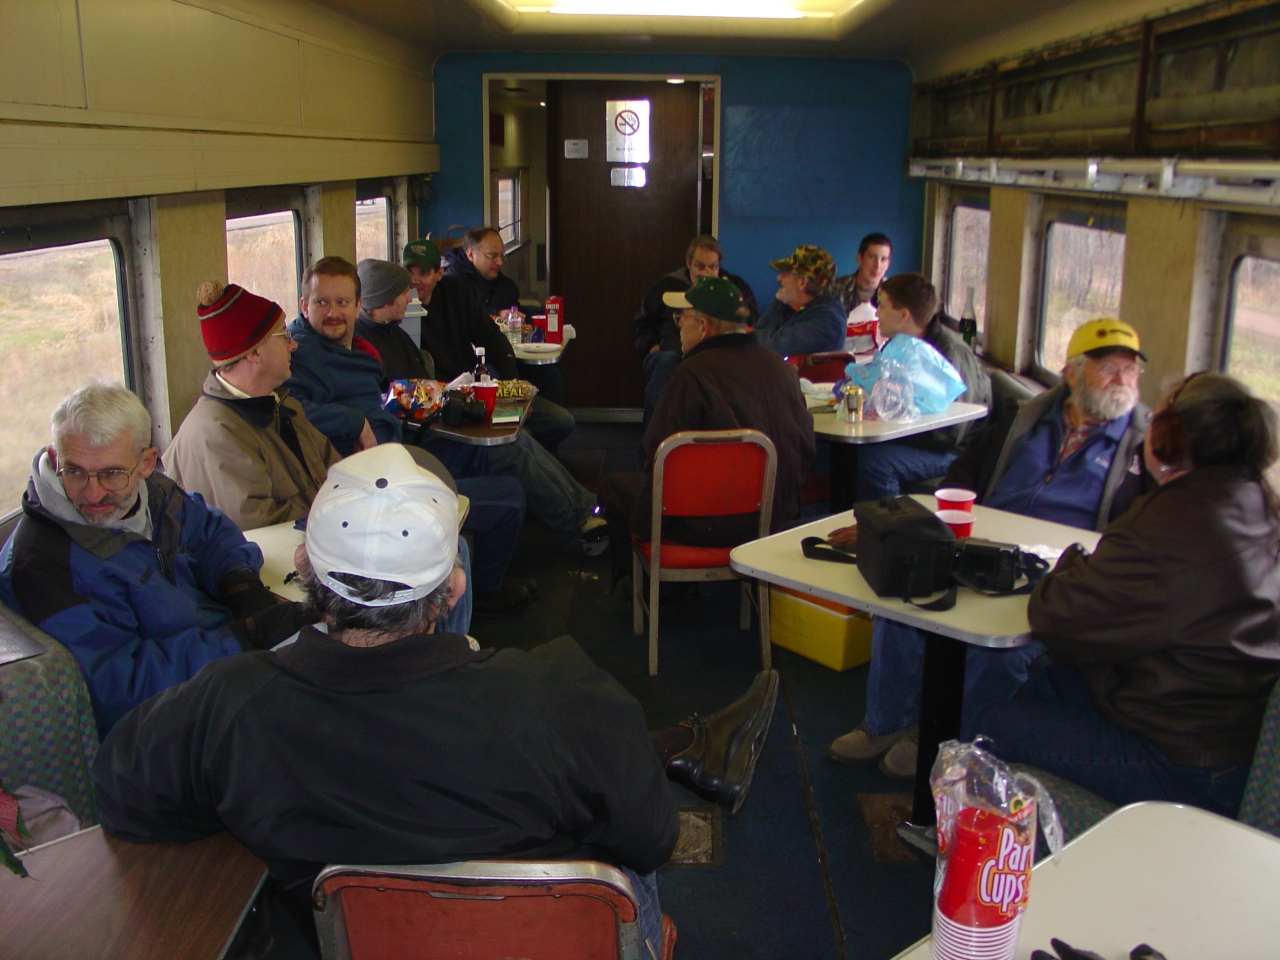
This was the last picture I took, and the only one in the coach section. We stopped for a while in Rush City (for a potty break,) lost a few people who had to head home early, and gained a few local residents who were very interested. I was sorry we could only have fifteen - I enjoy a good party. The round trip to Hinckley was a social event, with people hanging out and talking nearly everywhere in the car. The sun was setting as we made our return trip. |
Satisfied that everything was working properly, I decided to start the process of creating a waybill with BNSF, to get 1146 moved to the museum's Jackson Street shops. I got onto the BNSF web site (http://www.bnsf.com) and applied for a customer account. Despite the warnings, I supplied my Yahoo! e-mail address. (I didn't want to use my work e-mail address.)
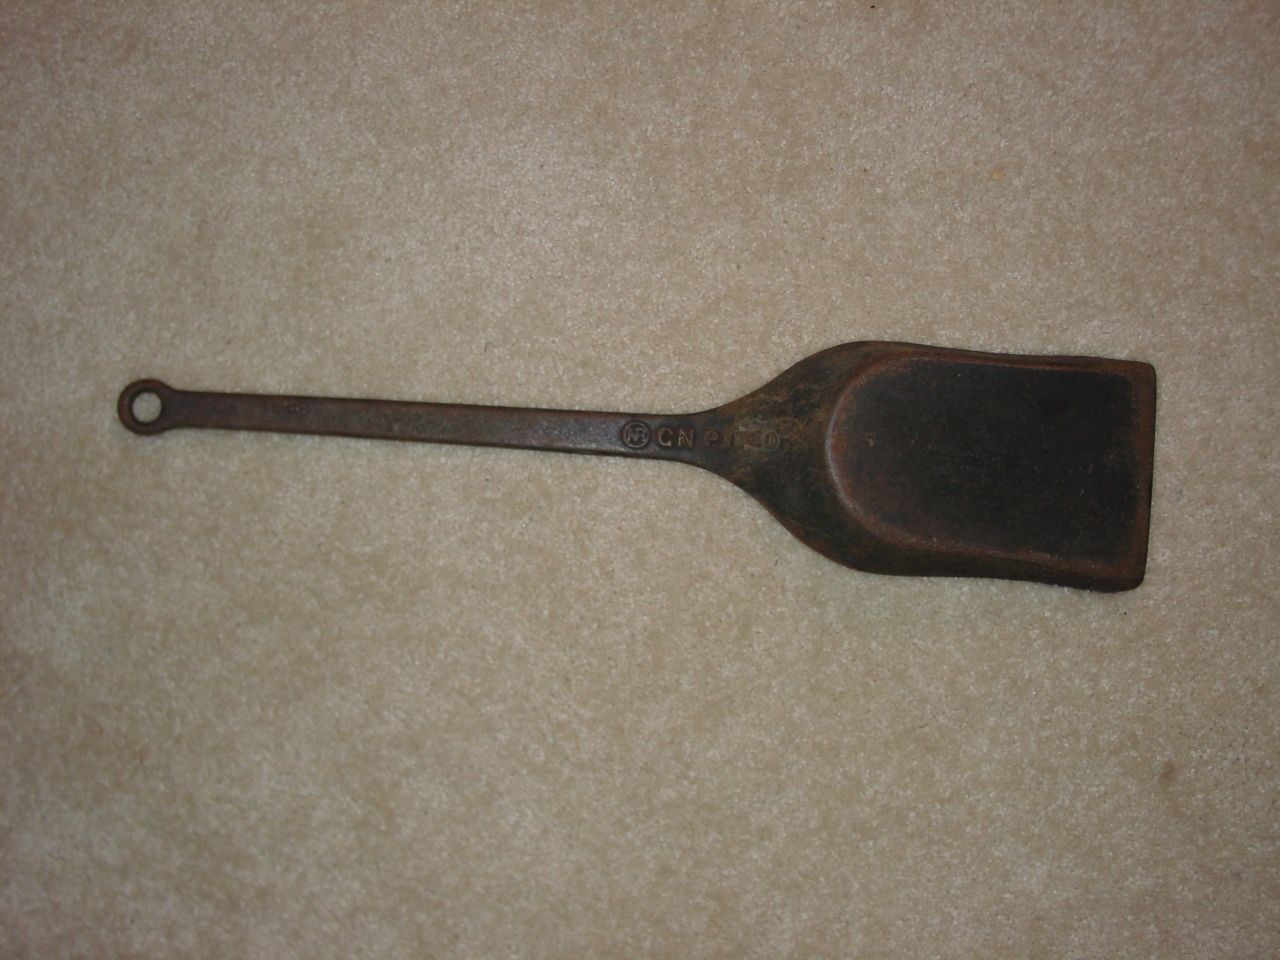 | For the big excursion, I'd bought an ash scoop for cleaning the kitchen stove's ash pan. Then I found this on e-bay. It's a cast-iron ash scoop with a GN pattern number. Not totally correct for 1146 (it had a propane stove in its GN days) but very cool anyway. |
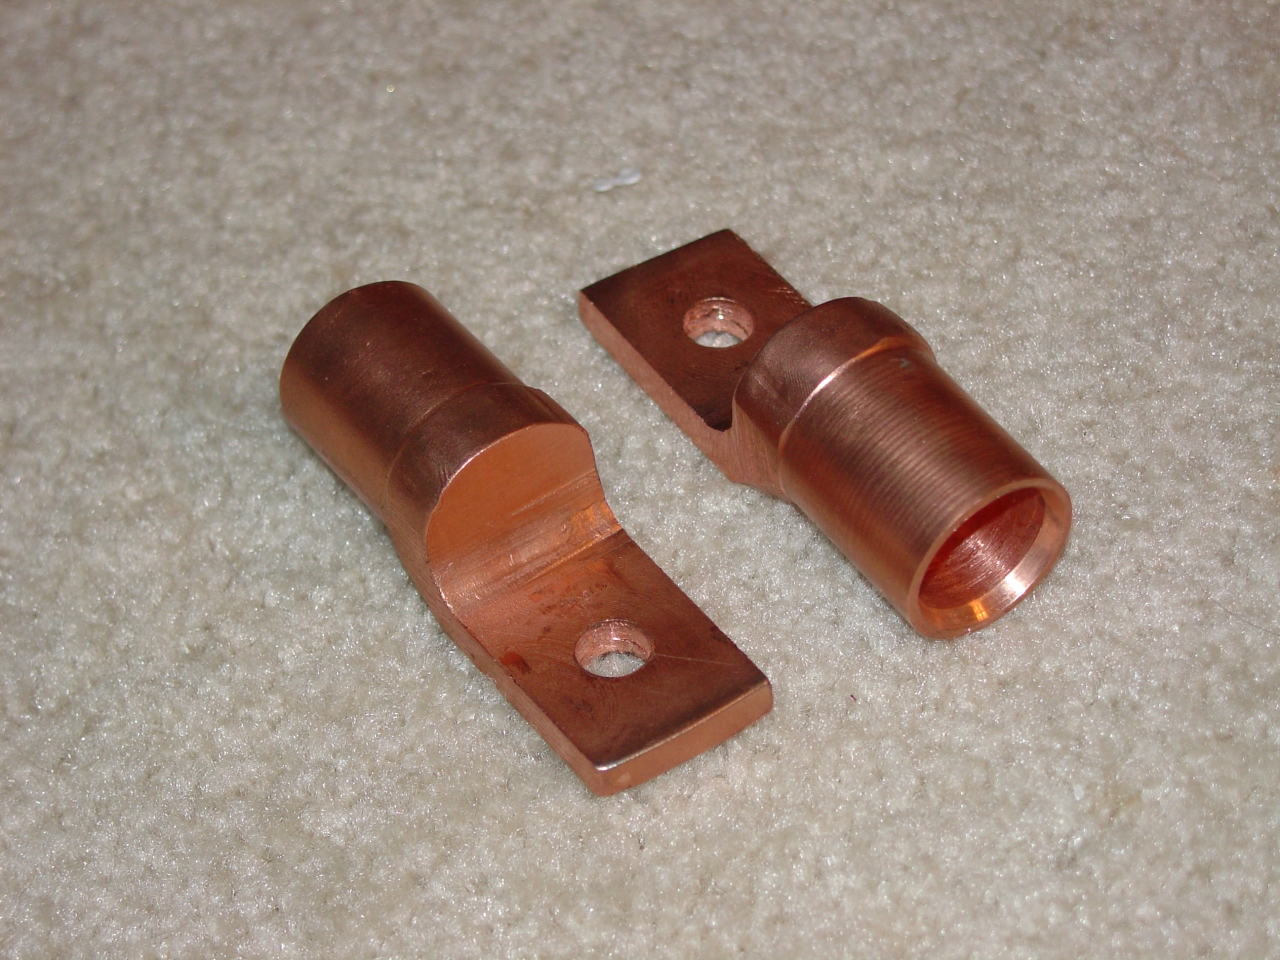 | The 32vdc trainline (thank God it's intact) is 350 kcmil stranded cable, and the trainline connector has 5/16" bolts and accepts lugs up to 1" wide. I've looked at dozens of commercially available solder-on or crimp-on lugs, and anything big enough for the cable is way too big for the connector. So, I made these in the museum's shop. I started with 1" square bar stock, and cut them to length. Then I turned the barrel end on a lathe. Next, the tang ends were milled and drilled on a vertical mill. Finally, another fellow used a hand file to clean up the transition. |
Dave Varilek is downsizing his (immense) collection of passenger car hardware. I sent my shopping list, and he was able to come up with a number of items I needed. The biggest prize was two white-metal Adlake fold-down sinks which can be combined to make one good one. They are perfect for the one which is supposed to be in 1146's kitchen. Also in the box were 50-count Scott Towel dispensers for the kitchen, pot hooks, cupboard latches, a couple hinges, and .. gee, I'm forgetting something for sure.
Because I used my Yahoo! e-mail address, the BNSF computer kicked out my account application. I got ahold of a customer support rep, and he helped me out as best he could. Being lazy, I hoped he could help me work around the system - but in the end I had to play by their computer's rules. He did, however, generate a rate quote for me. Click Here to see it.