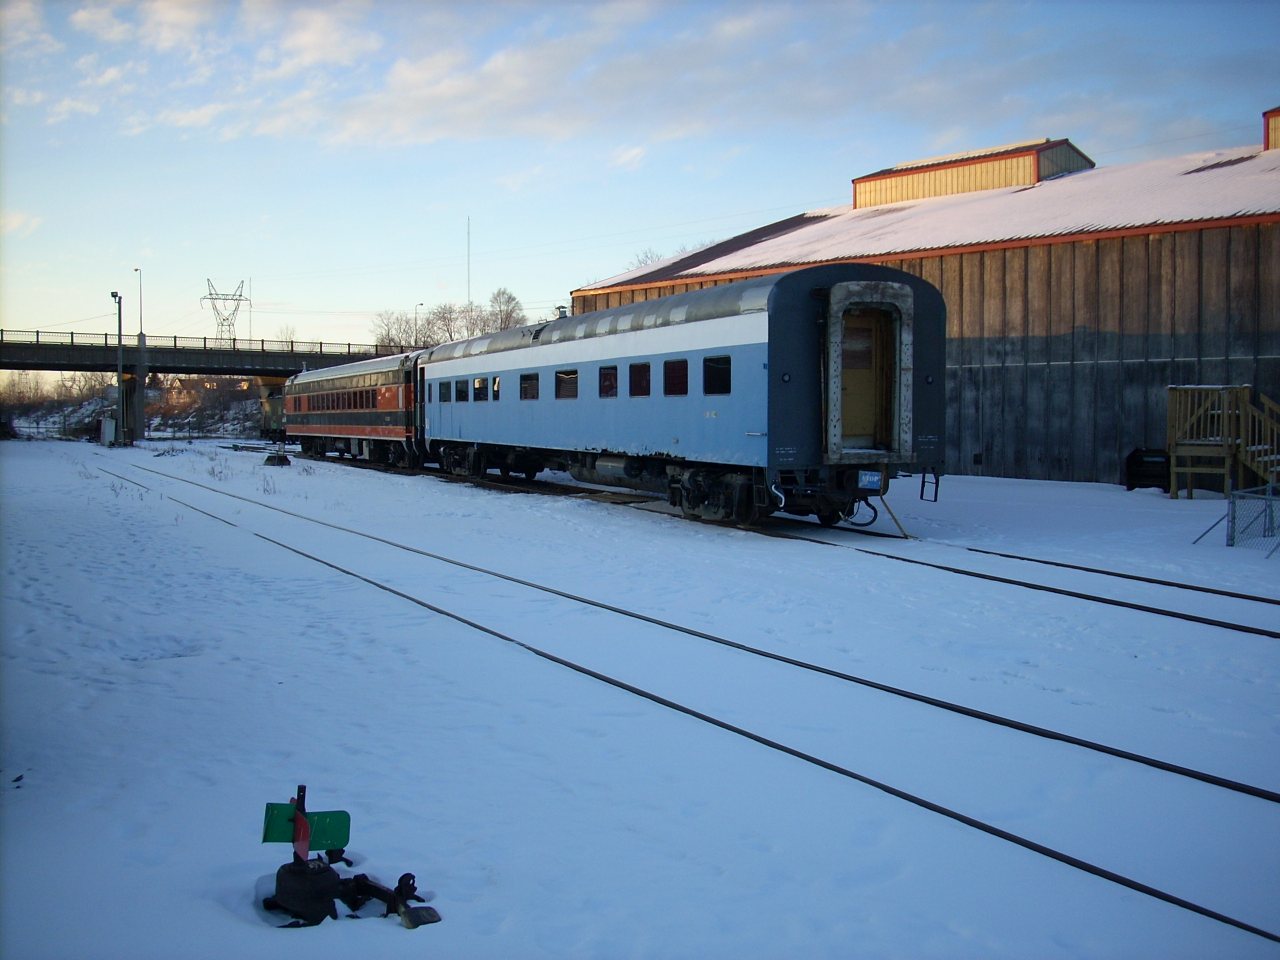
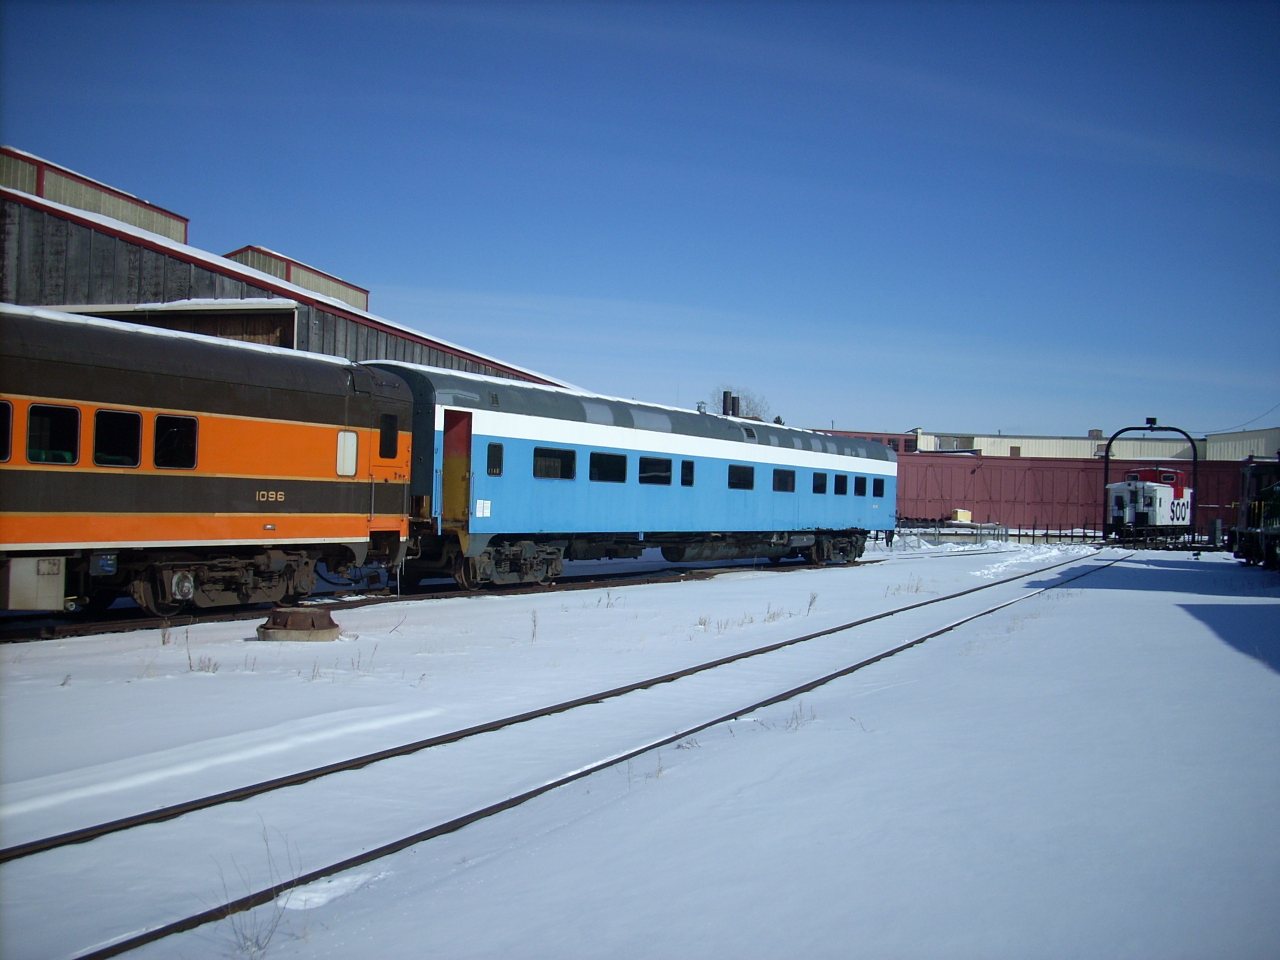
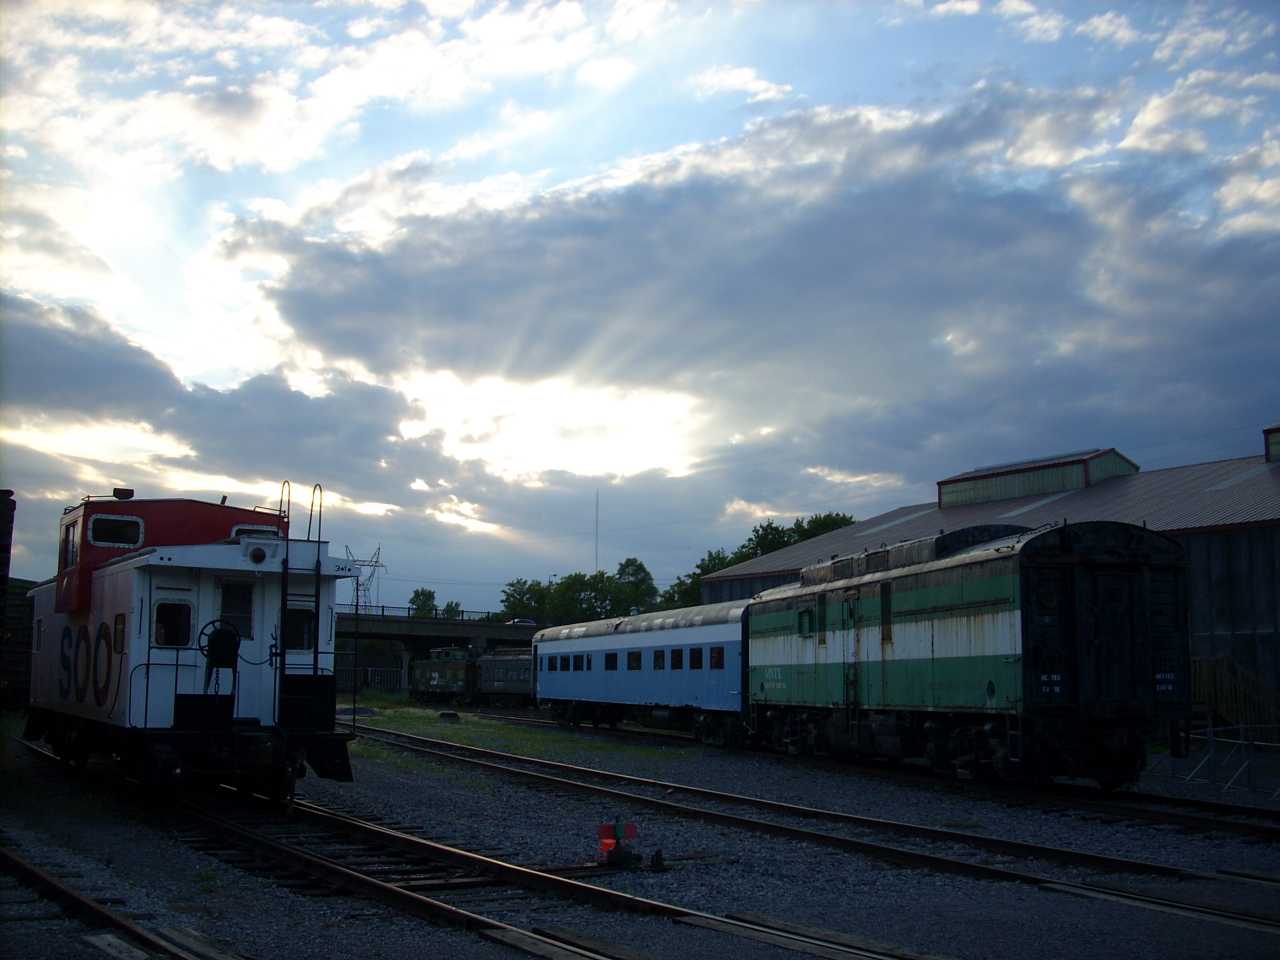
| New Year's day, 2009. Great Northern 1096 and 1146 enjoy a winter evening's sunset at the Jackson Street roundhouse. Happy New Year, everyone! |
I asked a question at Home Depot about underlayment for tile - while they were installing a new demo countertop. The professional took time to answer my questions about floor tile. I believe now the restroom floors were a "Quarry Tile" mosaic.
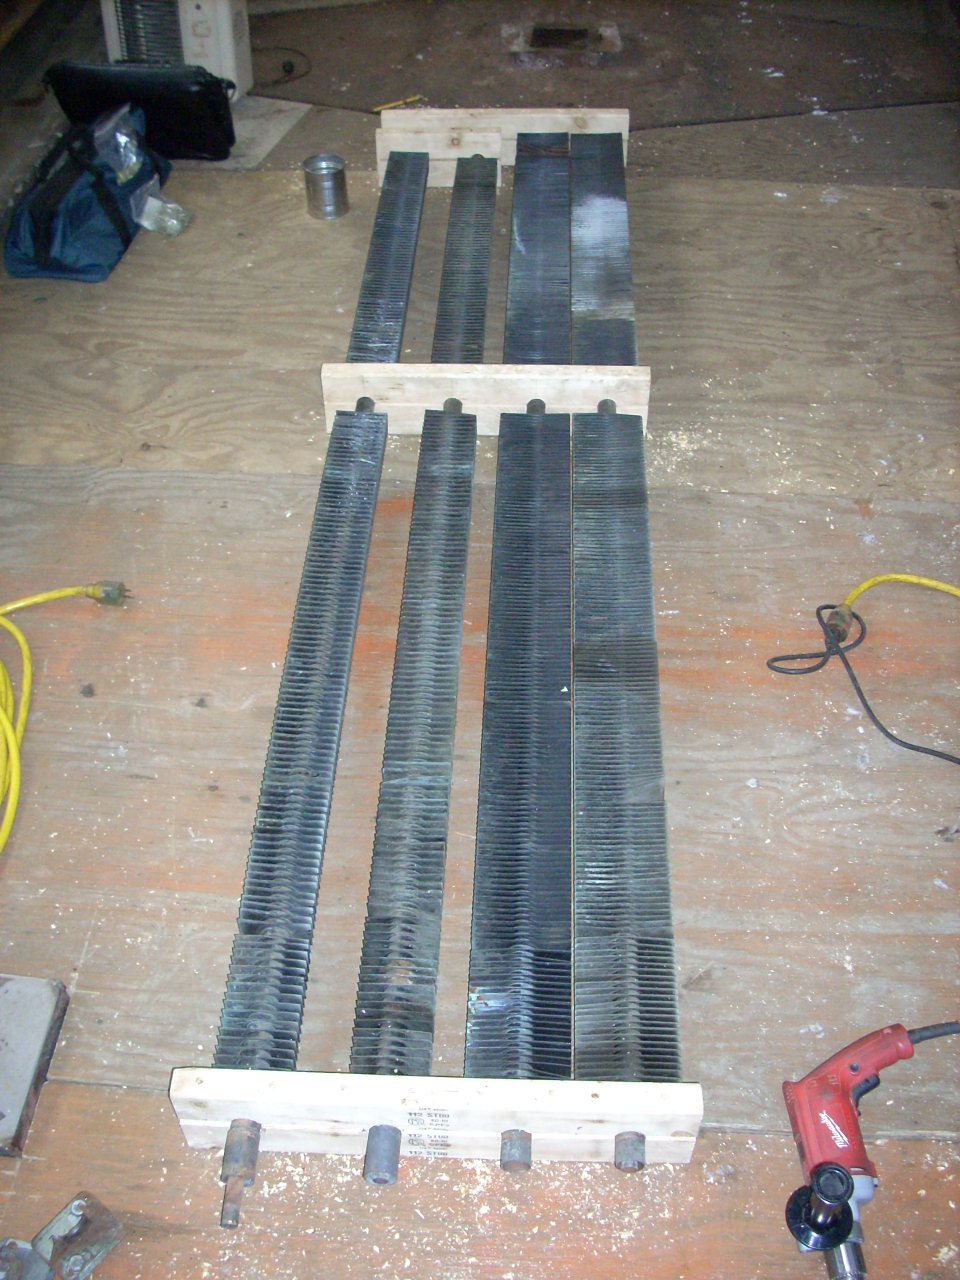
The steam heat components from 1146 have found a home. (Not made any more, and in good shape, I really didn't want to scrap them.) The Friends of the 4449 in Portland, Oregon have a car which is missing parts, and they use steam - from 4449 - for heating. There is more which is ready to pull, but its been awfully cold.
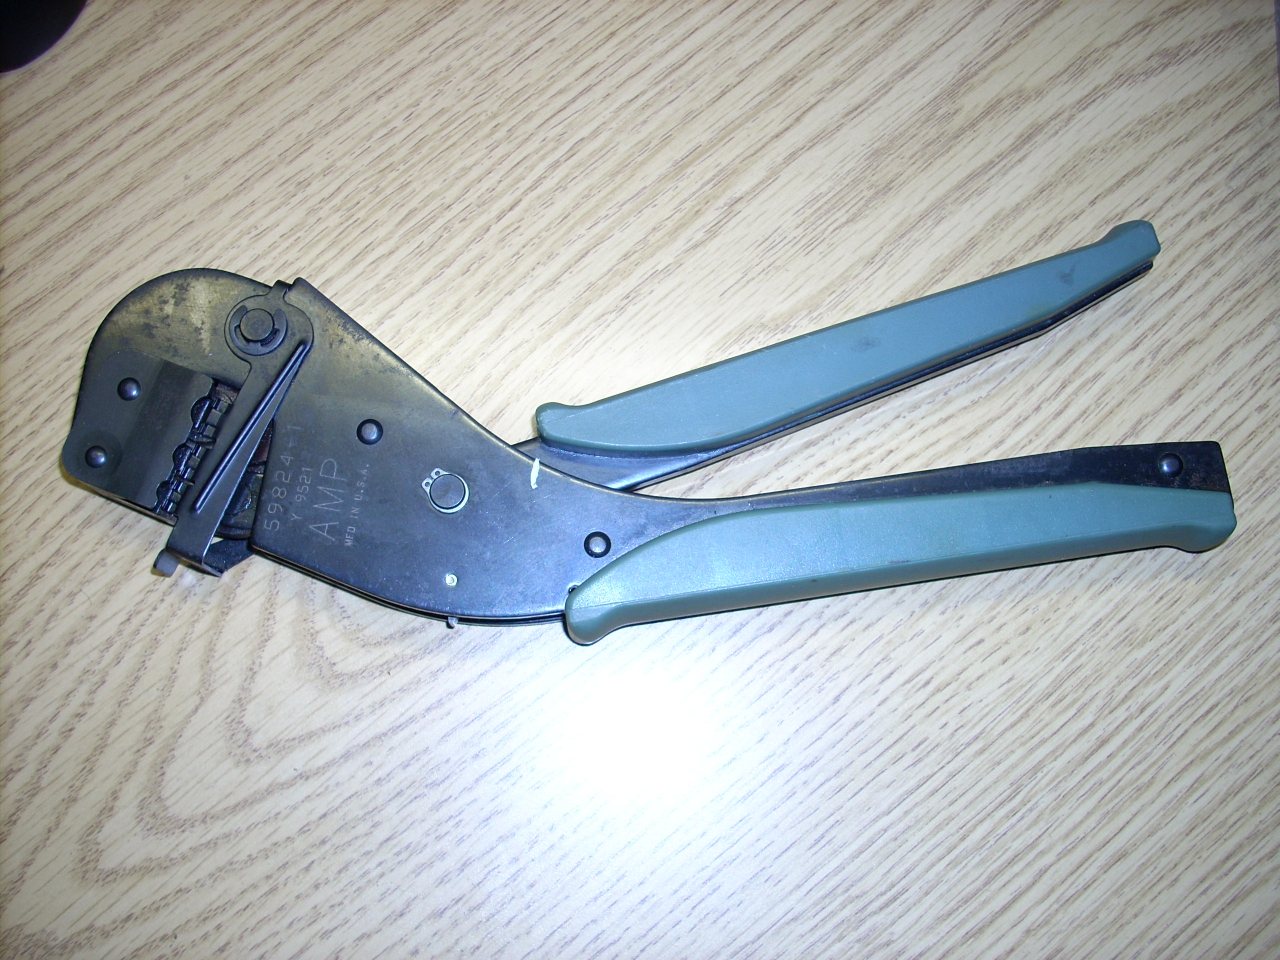 | New tool: AMP 59824-1, for yellow, yellow/black, blue, green and red PIDG crimp-on connectors. These are specified for the yellow/black connectors for 16-14 AWG, 2kv 125°C Exane in EMD locomotive wiring. I'm using the same wire, the blue connectors are too small in diameter, and my AMP Pro-Crimper isn't rated for yellow/black. |
I've also ordered yellow/black ring terminals for my kit - thinking of the two ballasts that need replacing and some fixtures not yet rewired. MTM ordered from OnlineComponents.com, and I piggy-backed on their order.
| Part # | Shape | Type | Color | Stud Size | Wire Size | Insulation Dia. | Comment |
|---|---|---|---|---|---|---|---|
| AMP 35106 | Ring Tongue | PIDG | Yellow/Black | #8 | 16-14 AWG | .150-.250 | Heavy-Duty |
| AMP 34805 | Ring Tongue | PIDG | Yellow/Black | #10 | 16-14 AWG | .150-.250 | Heavy-Duty |
| AMP 347743 | Ring Tongue | PIDG | Yellow/Black | 1/4 | 16-14 AWG | .150-.250 | Heavy-Duty |
Another car restorer responded to my inquiry about current sources for stainless snap-on moulding. The manufacturer, Kroh-Wagner, directed me to distributor Component Hardware Group. I was delighted to find they sell all sorts of kitchen and lavatory hardware.
We had great weather the first Sunday, so I got some work done.
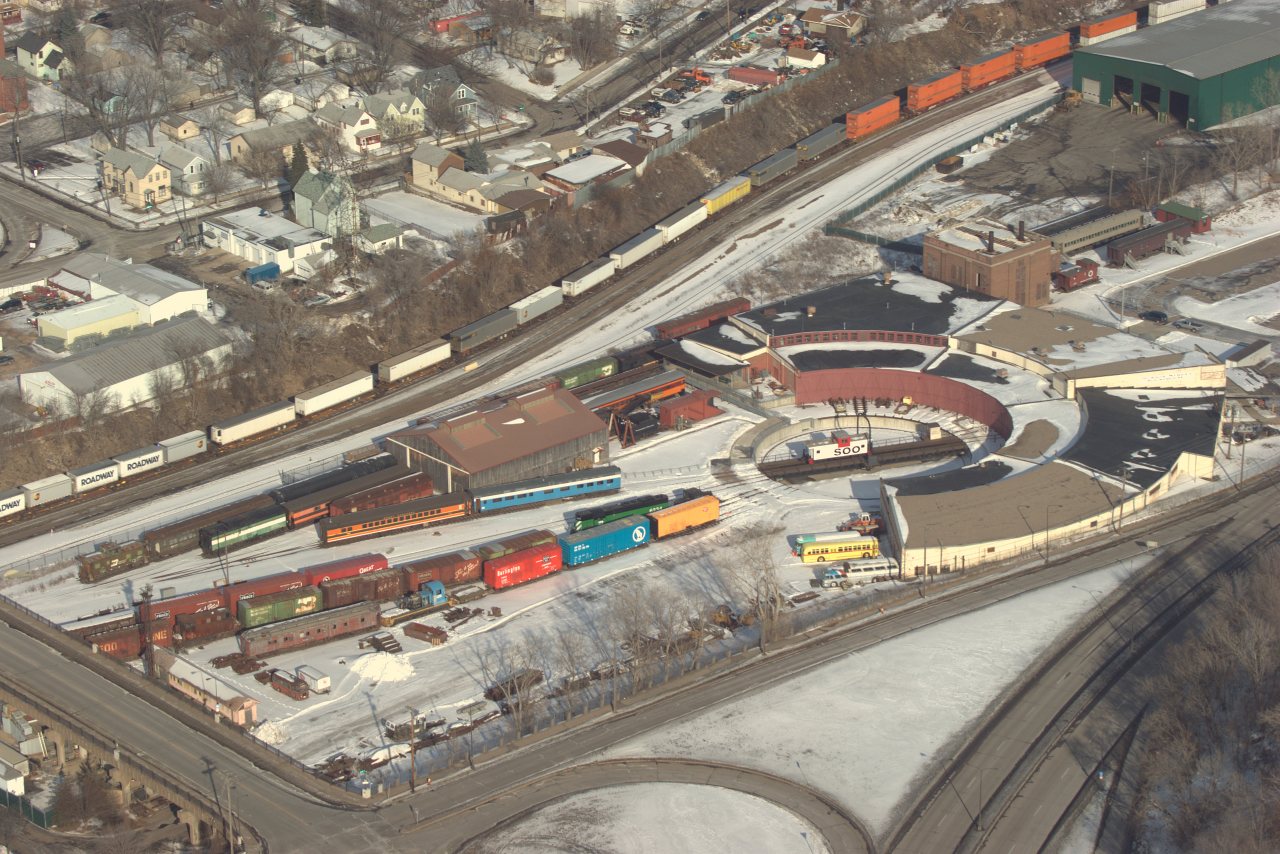 | My friend Charles Barthold is a photographer at a local TV station (and owns L&N tavern-lounge 3003 "Aristocrat".) He was up in the chopper near St Paul on February 2nd, and had a bit of time between assignments, so he took some pictures of the Jackson Street roundhouse. 1146 is at center in Big Sky Blue. Other GN rolling stock visible:
GN 1096, coach coupled to 1146. GN 1084, "Twin Ports" obs-lounge, 2nd car behind 1096. GN 16, heater car coupled to 1084. GN 20522, BN box car several tracks nearer than 16. GN 13397, red box car two tracks nearer than 1096. GN 138407, blue box car on the closest track. GN X1735, derrick between pole barn and roundhouse. GN 480, rider-mail bag two tracks beyond the derrick. GN 138687, mostly hidden behind pole barn. GN 3533, BN box car on the opposite side of the pole barn from 1146. GN 454-A, F7 coupled to GN 3533. GN 1224, Coach barely visible beyond the power house. |
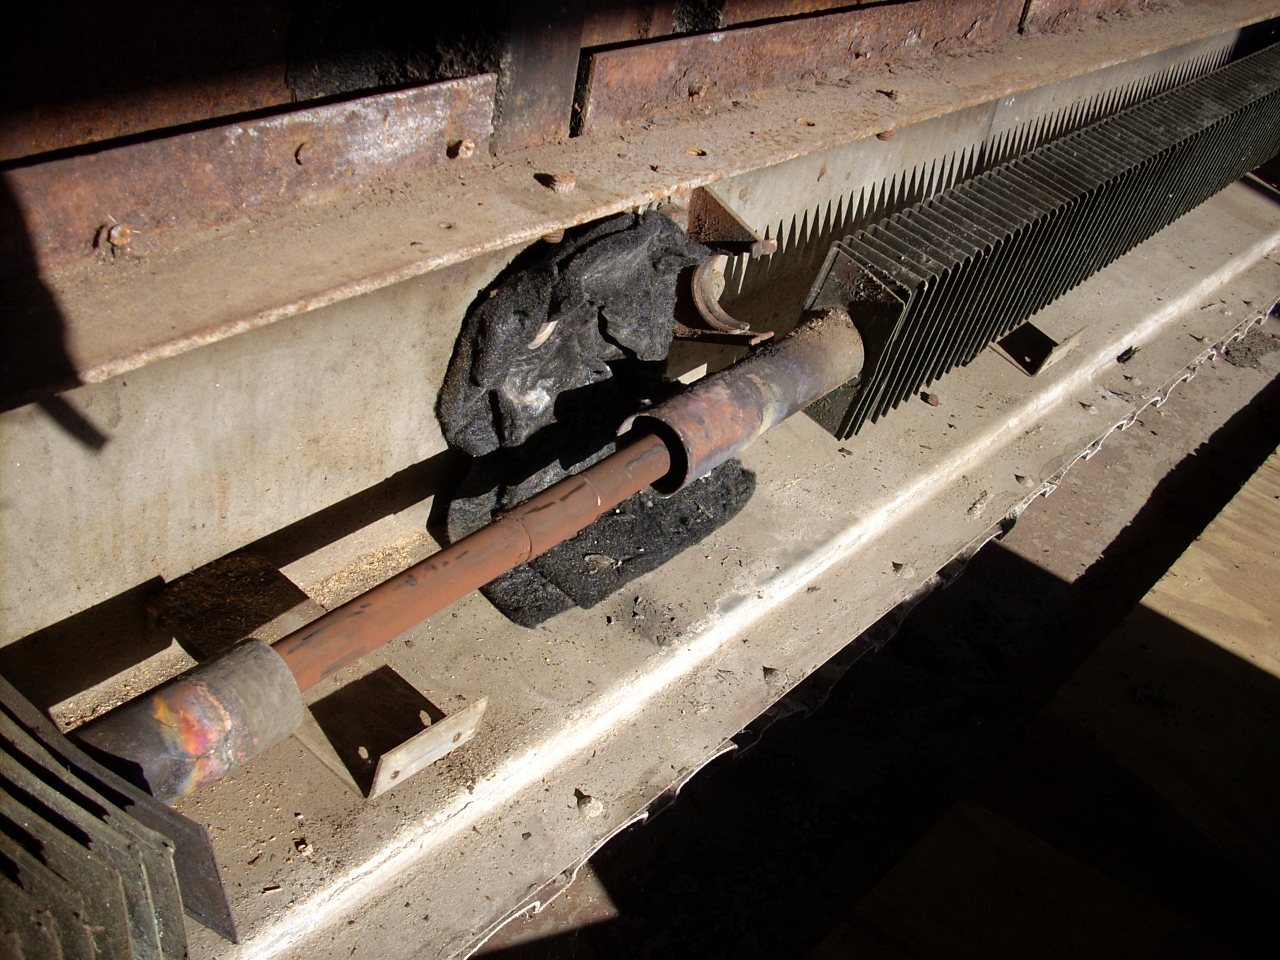 | First, liberating the rest of the coach section's Vapor steam radiation for The Friends of the 4449. I'd started pulling it back in September 2007, but stopped because I couldn't find a home for it. |
 | Details are interesting: An ACF employee's pencil mark, showing where the radiation support bracket goes. Note the spot welds for the tapping plate on the back of the thin stainless heat shield. |
 | With the radiation out, I started removing the heat shield. The "L2" mark is mine - Left side, 2nd from handbrake end. |
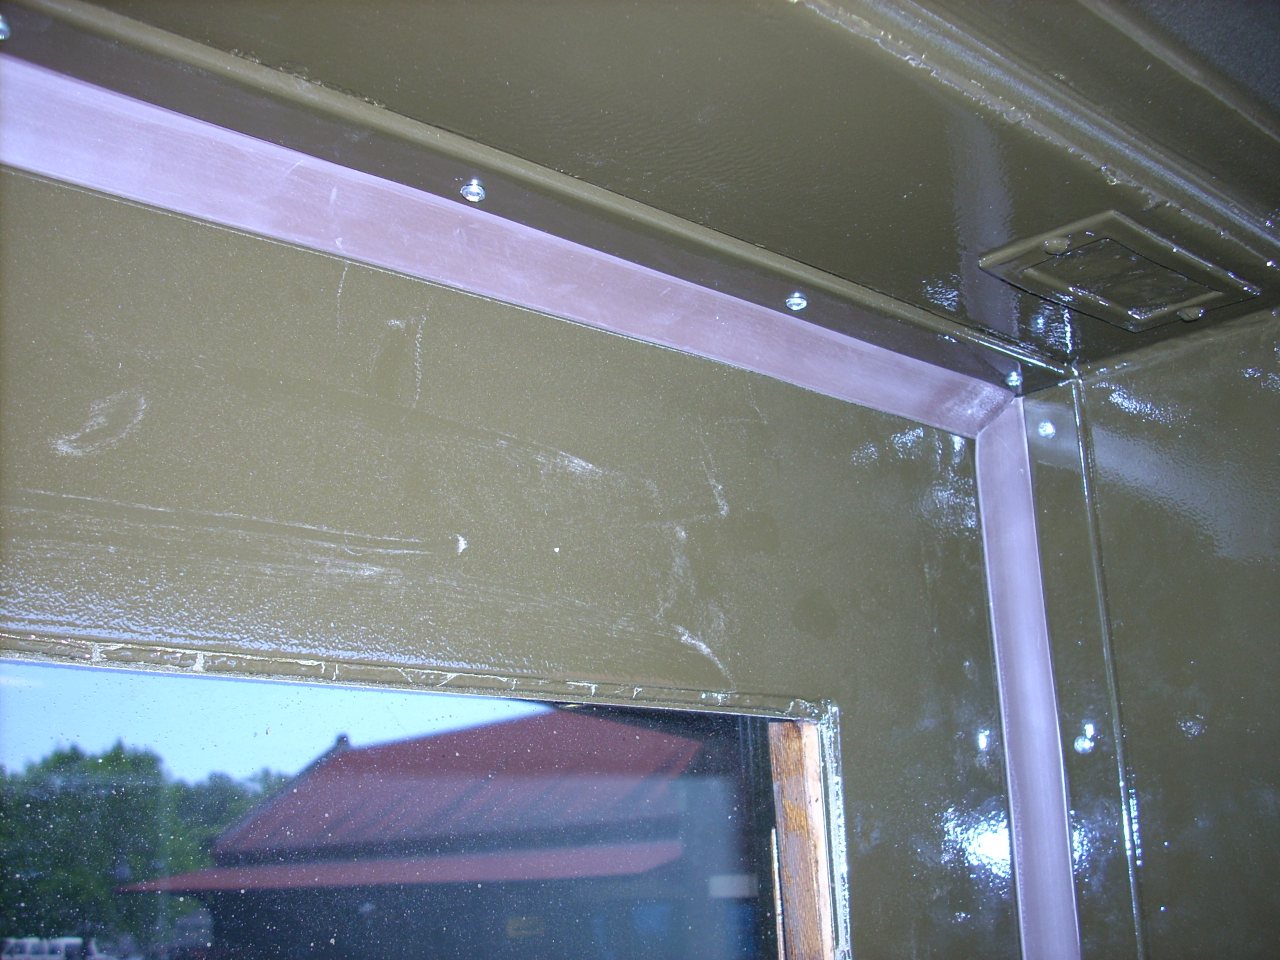
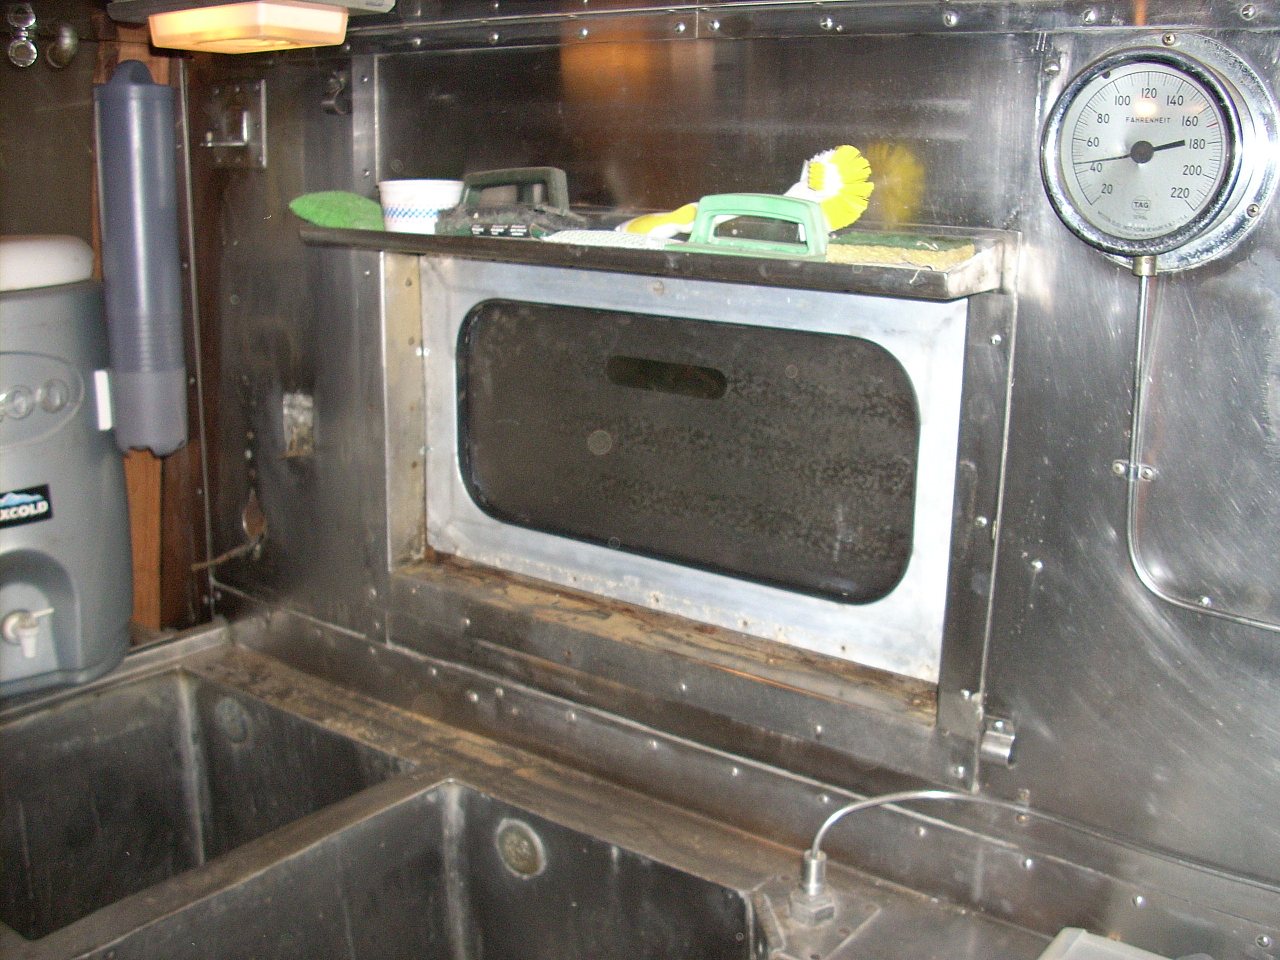 | With the changed window weatherproofing, I was able to put the kitchen window in. (Temporary.) |
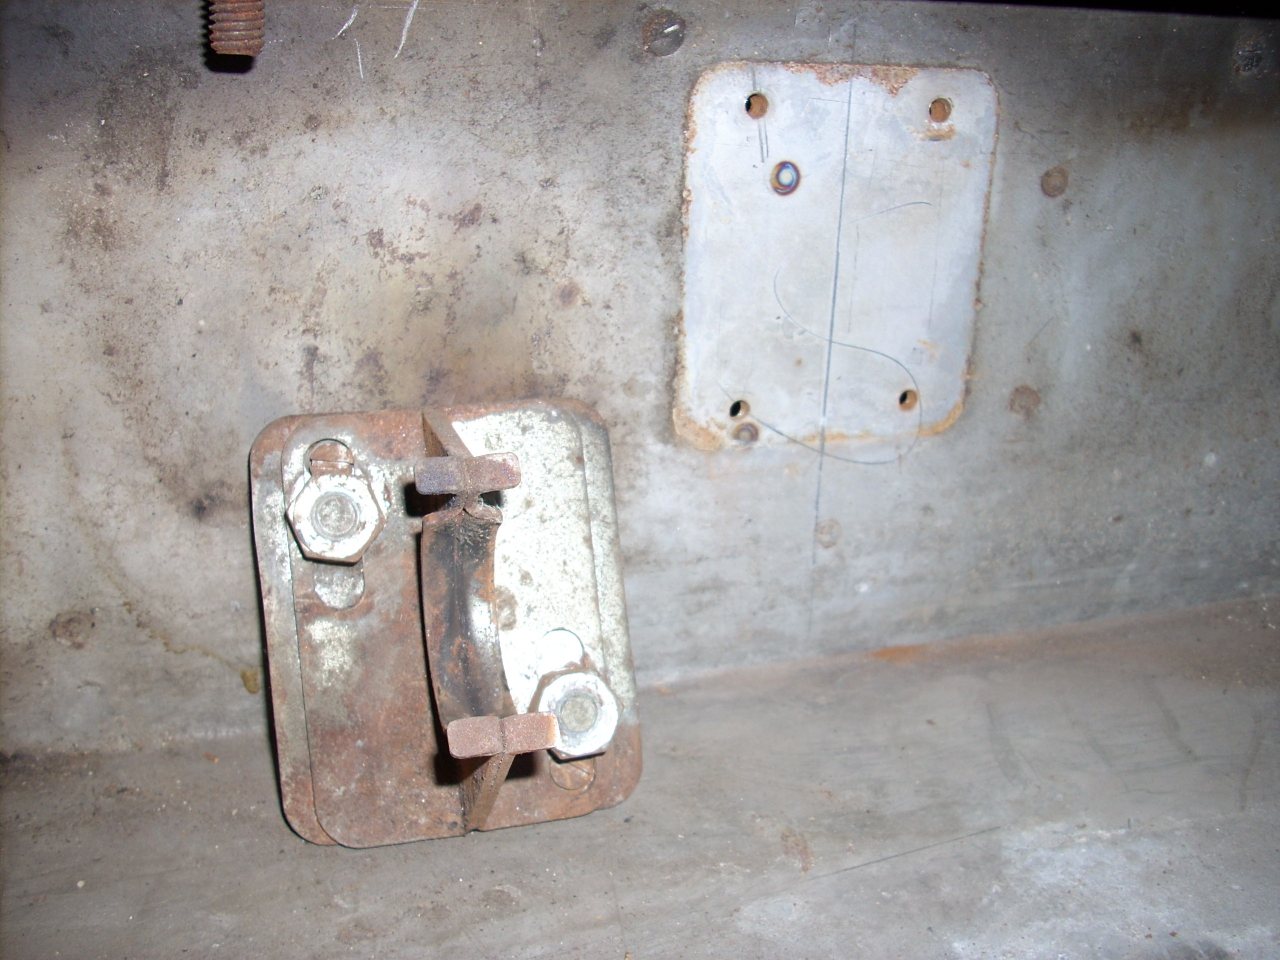
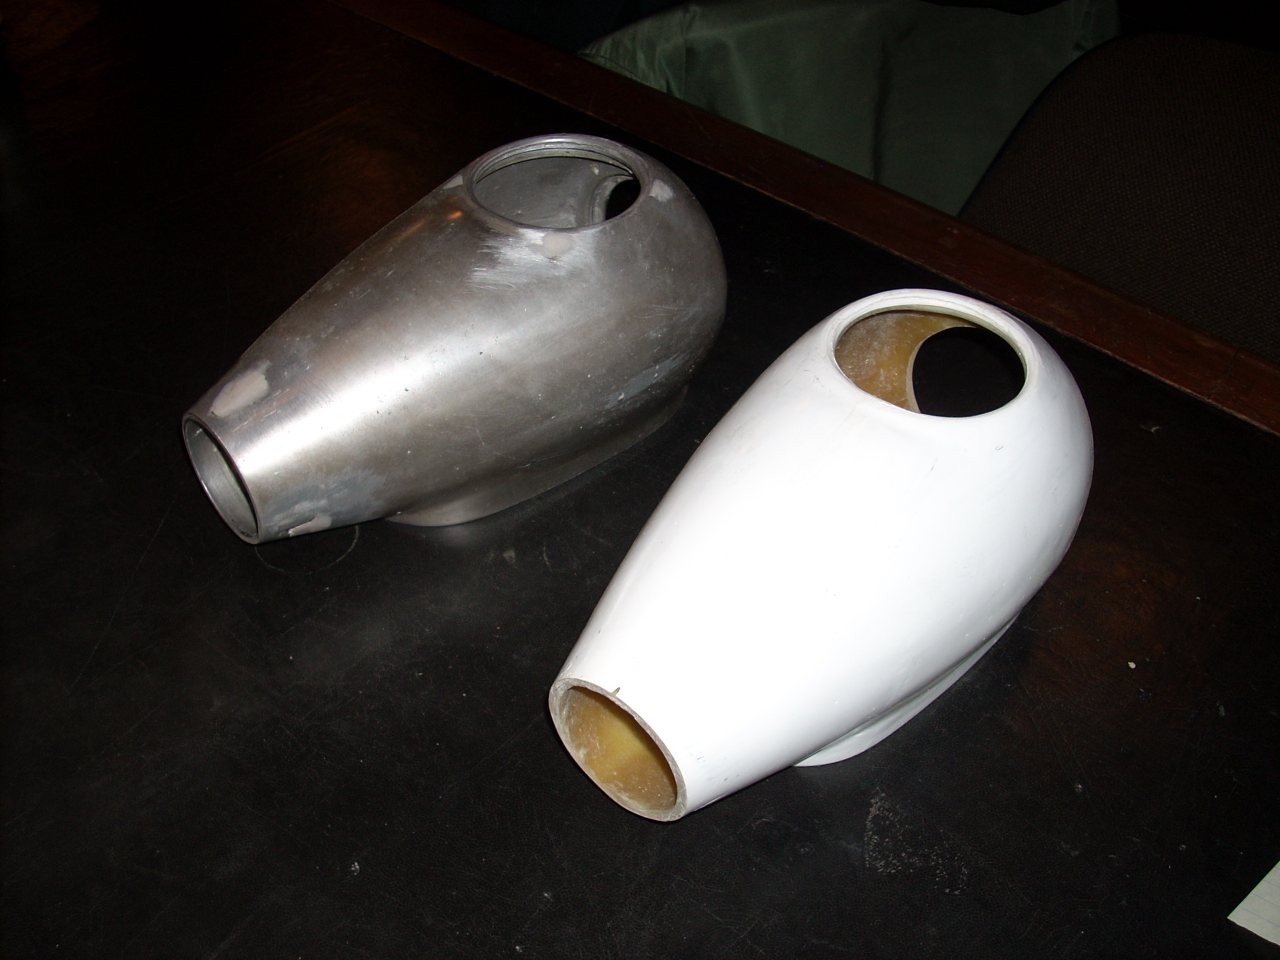
In my garage I've been cleaning water reservoir fills. I've accumulated two or three sets by now, in hopes of making one good pair. After disassembly, I lapped the conical air valves. "Lapping" is an old, old process for making parts fit tightly together. Grease with fine grit mixed in ("lapping compound") is spread between the surfaces, and they are worked against each other for a while. Pull the pieces apart, reposition a bit, and go at it again. Repeat. I used engine valve lapping compound from Napa, worked each valve for about half an hour, and then washed with warm water and dish soap. The brass parts had a nice satin finish when done. Mike Jubeck at Pittsburgh Air Brake said to lubricate with air brake cylinder grease.
The fill covers - with four bolt holes and spring loaded caps inside and outside - are all a bit chewed up. They have a machined lip, a ring around the fill hole, which presses against the rubber insert in the cap. The lip gets chewed up over time, resulting in a fine water spray when the reservoir is filled and pressurized. Mike Jubeck offered to lap the lips - they have a machine and test rack for doing it - for a nominal fee. Or, they have a few new ones on hand. He also said Bernie Watts of Backshop Enterprises in Colorado has been working on molds for new castings. Or, I could buy directly from Wabtec. In the interest of saving money, I haven't moved yet.
I have one accomplishment to share with you: This month I got my revolving credit down below $10,000. Hurrah!
The PIDG crimp lugs arrived.
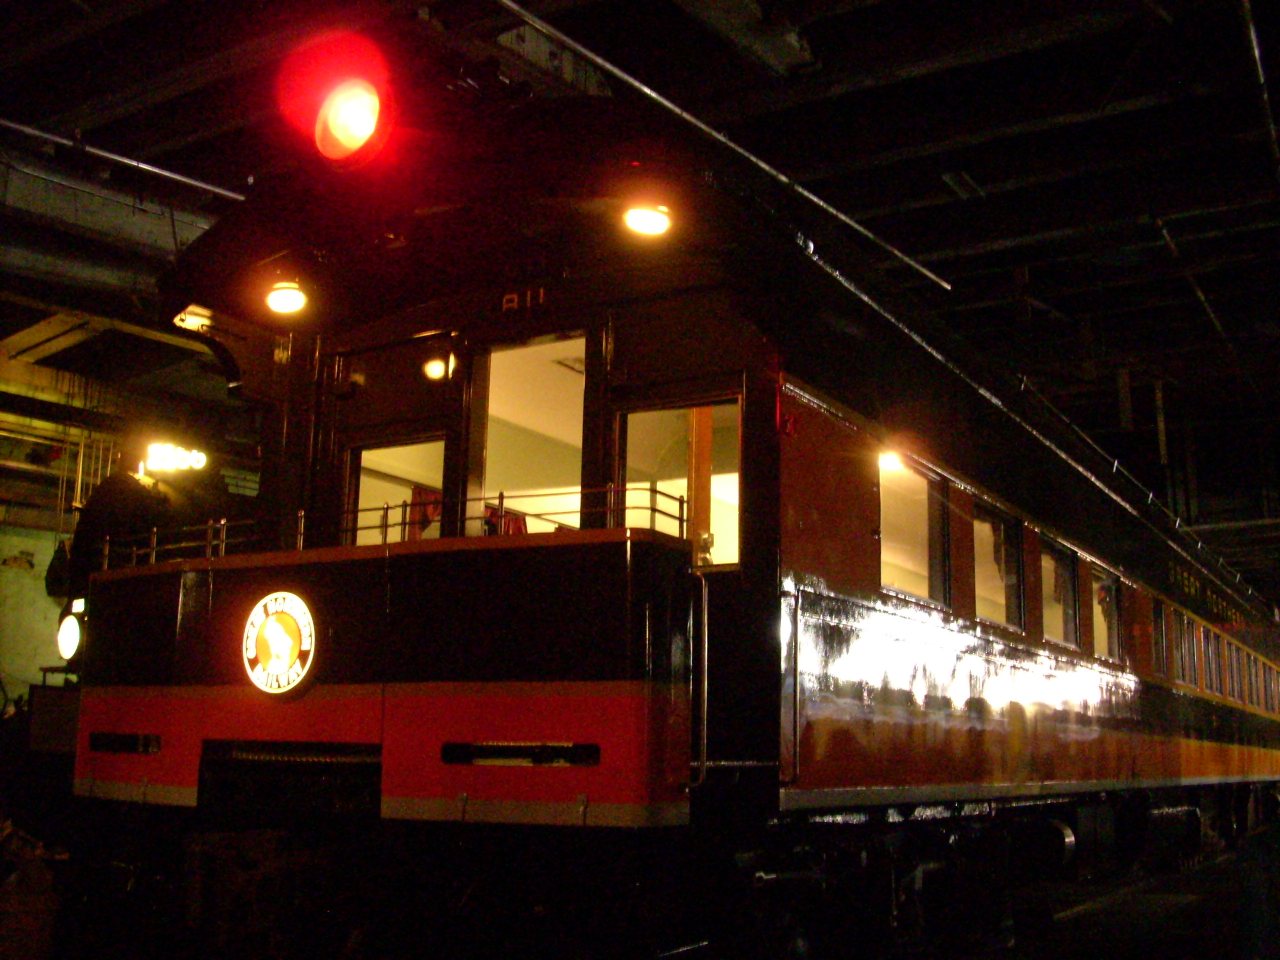
Check this out. MTM's GN A11 is getting steel repairs. Several people had a hand in this, but the curved sheetmetal on the end is mostly my work. That's me in the welding helmet.
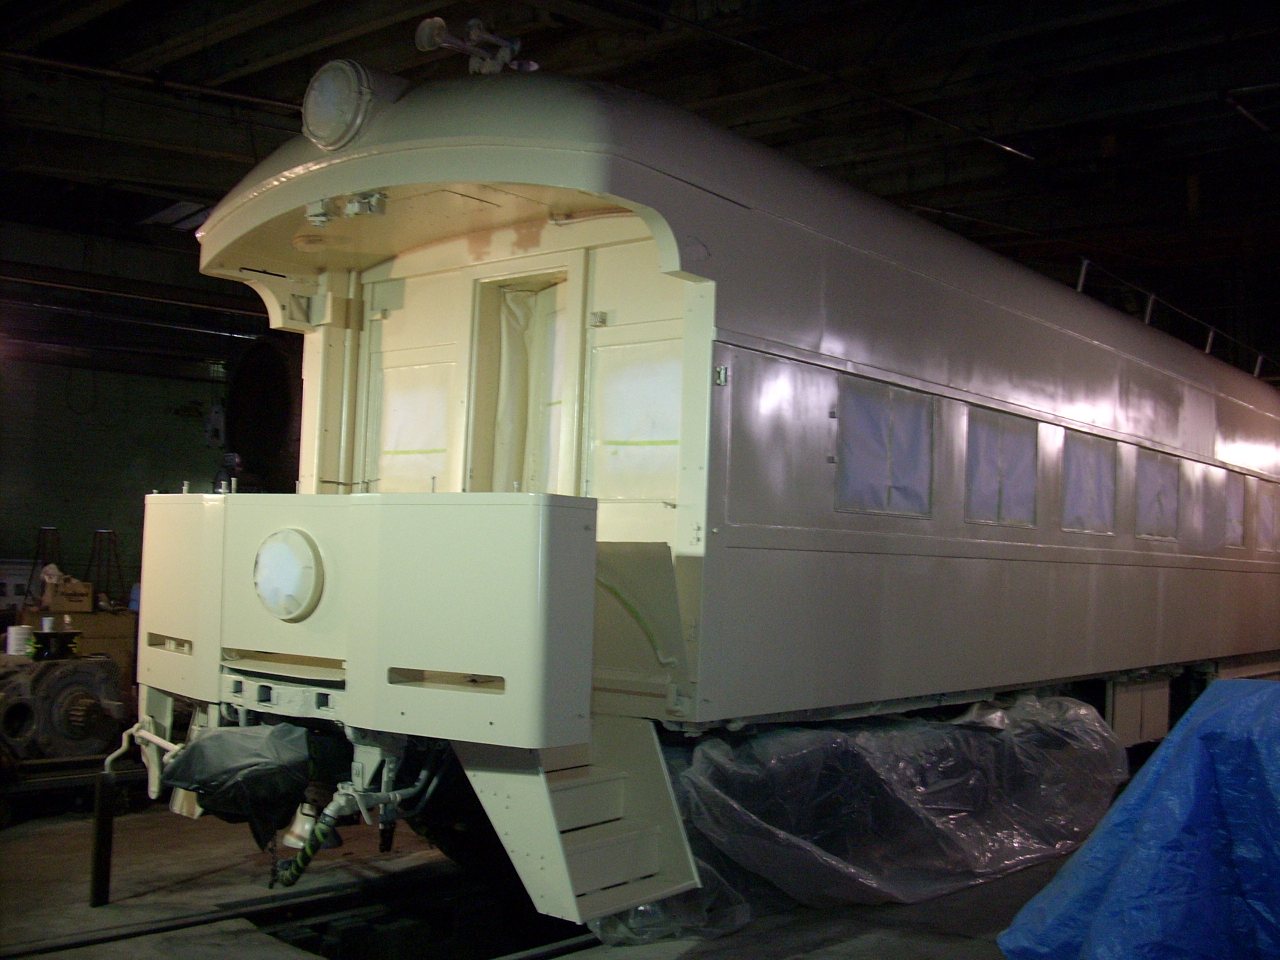
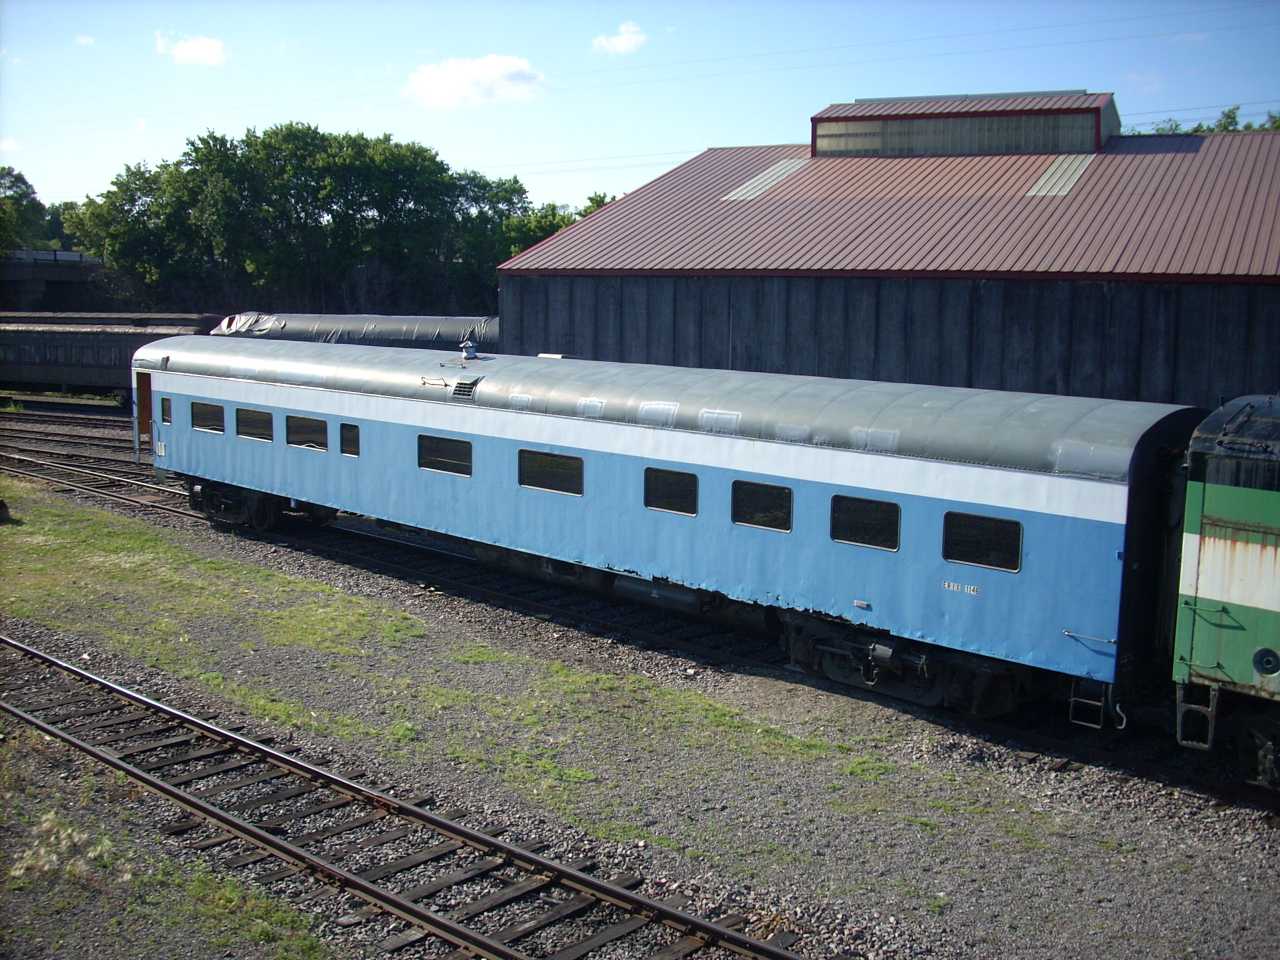
 | Just a pretty picture, taken March 1st. It really illustrates why the colors are called "Big Sky Blue". The white squares by the vestibule are magnetic interpretive signs. |
 | I made some progress packing the radiation for shipment. |
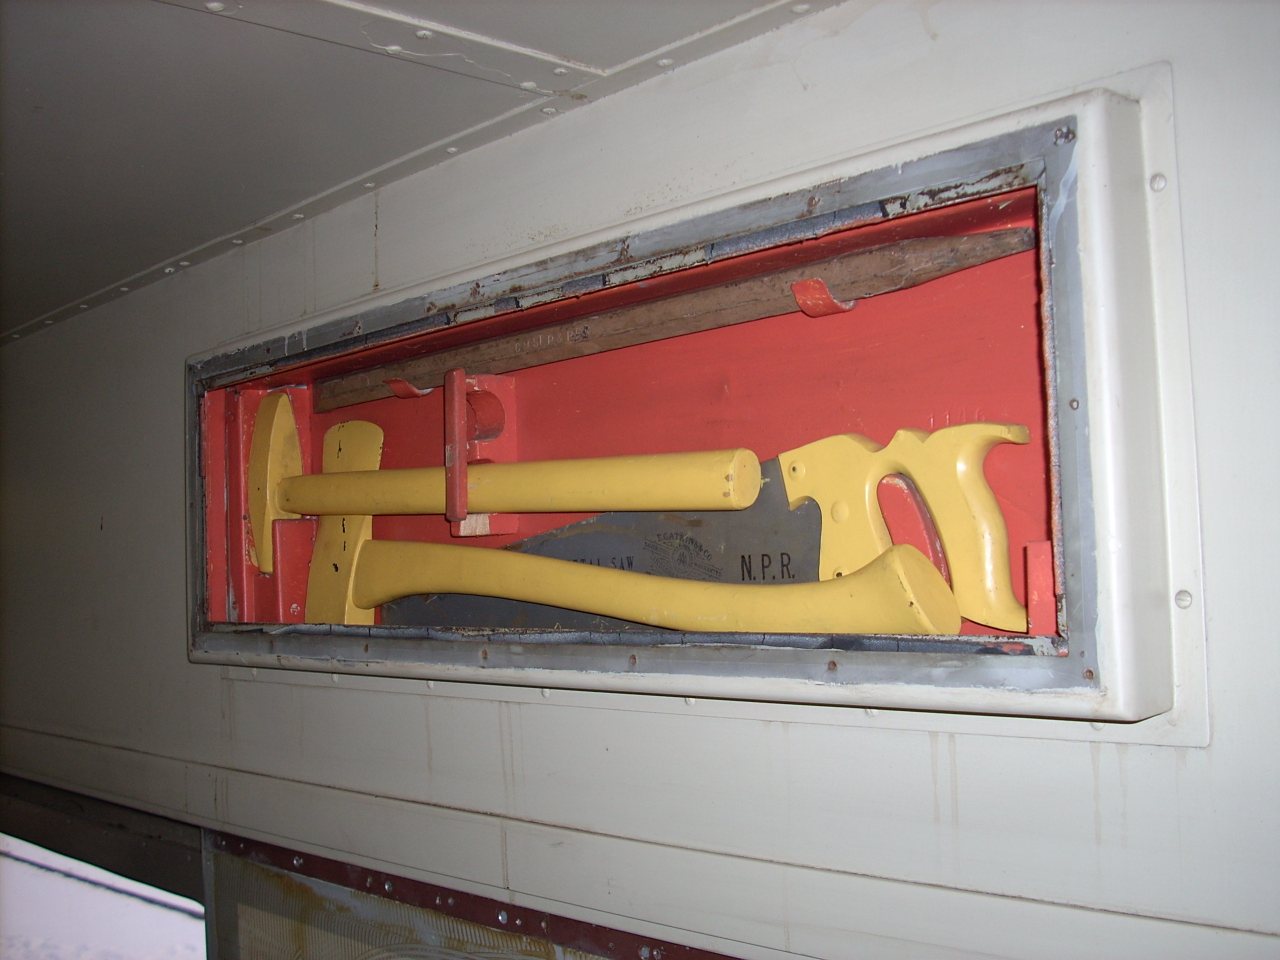 | I found most of the tools for the wrecking kit. Now I'm just looking for a sledge hammer - preferably marked G.N. |
Thanks to a good income tax refund, my revolving credit is down to $6500. It's reasonable to expect an August or September payoff. At that point I'm thinking to engage StarFire Engineering of Lawrence, Kansas, to review the collision post repair I had designed a year ago. I would like them to take it further, building Amtrak connector boxes into the car end, and working out necessary repositioning of the hand brake. They will make an initial site visit, at which time I'll also want them to look at the rest of the car, and start thinking about the side and end sills, and placement of undercar mechanicals. Before they visit, I'll ask whether the steam heat trainline should be removed first to better expose the center sill for inspection. If "yes", I'll be paying for more abatement this fall, and bringing StarFire in next spring.
In the "not 1146" department - MTM's GN A11 is making progress. For fun, here are some pictures of my contributions:
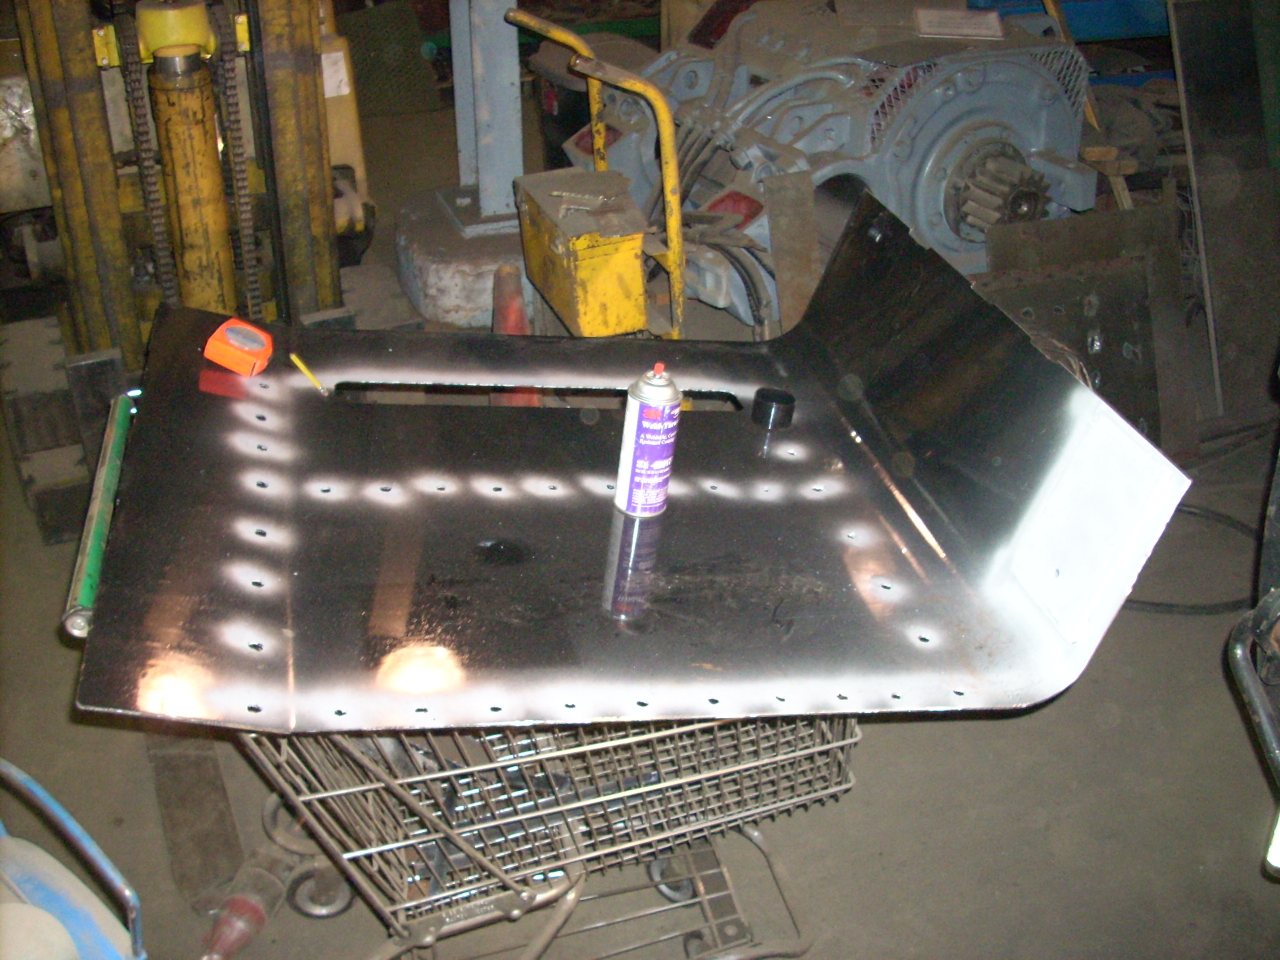 | A11's right-side platform skin, ready to install. Cut with a plasma cutter, bent on a brake, rust-proofed with POR-15 and 3M weld-through anti-rust paint. |
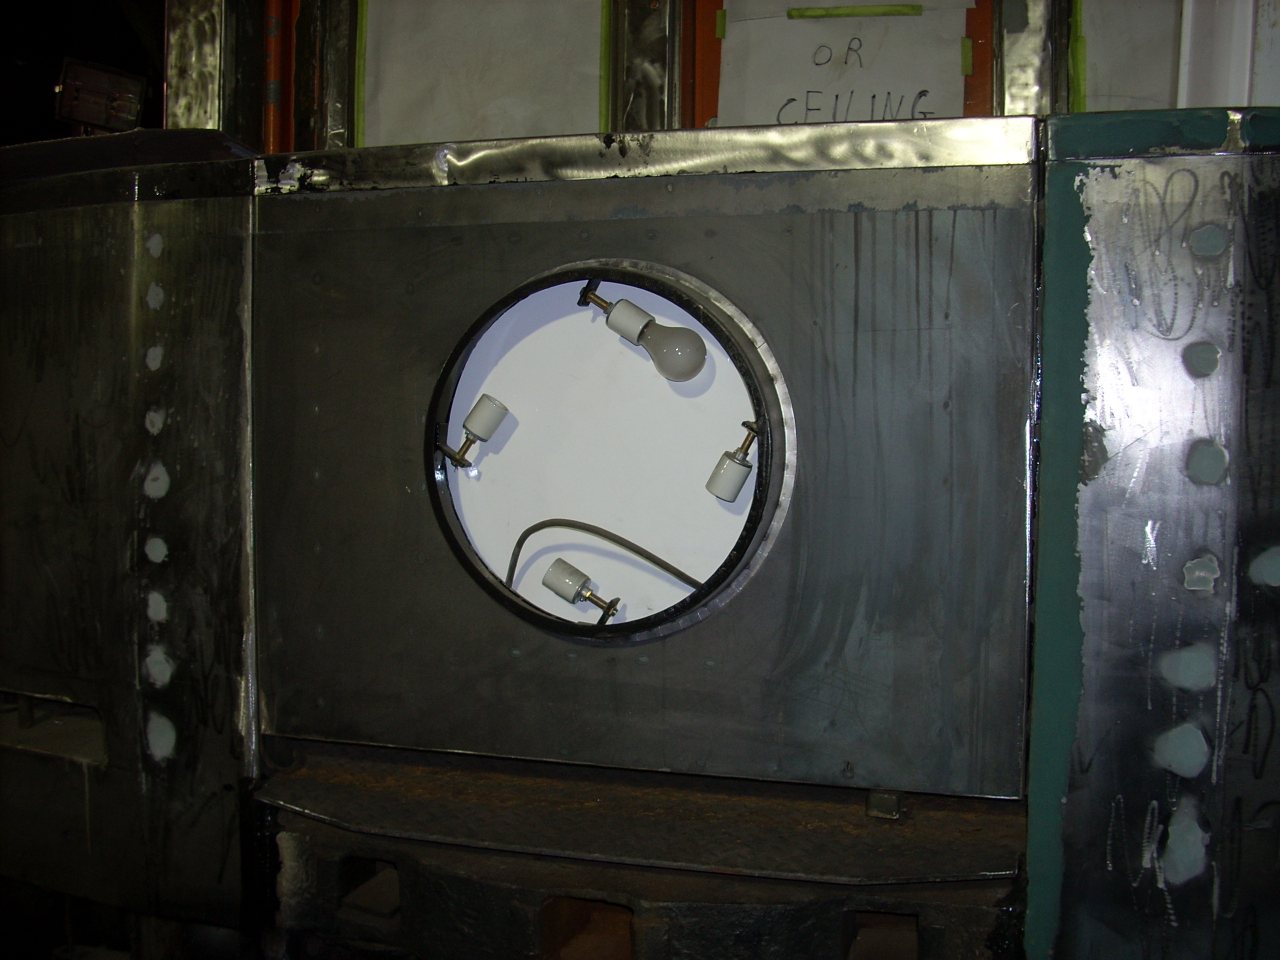 | A11's drumhead. Other volunteers did the tailgate steelwork and drumhead wiring. I mounted the lights. |
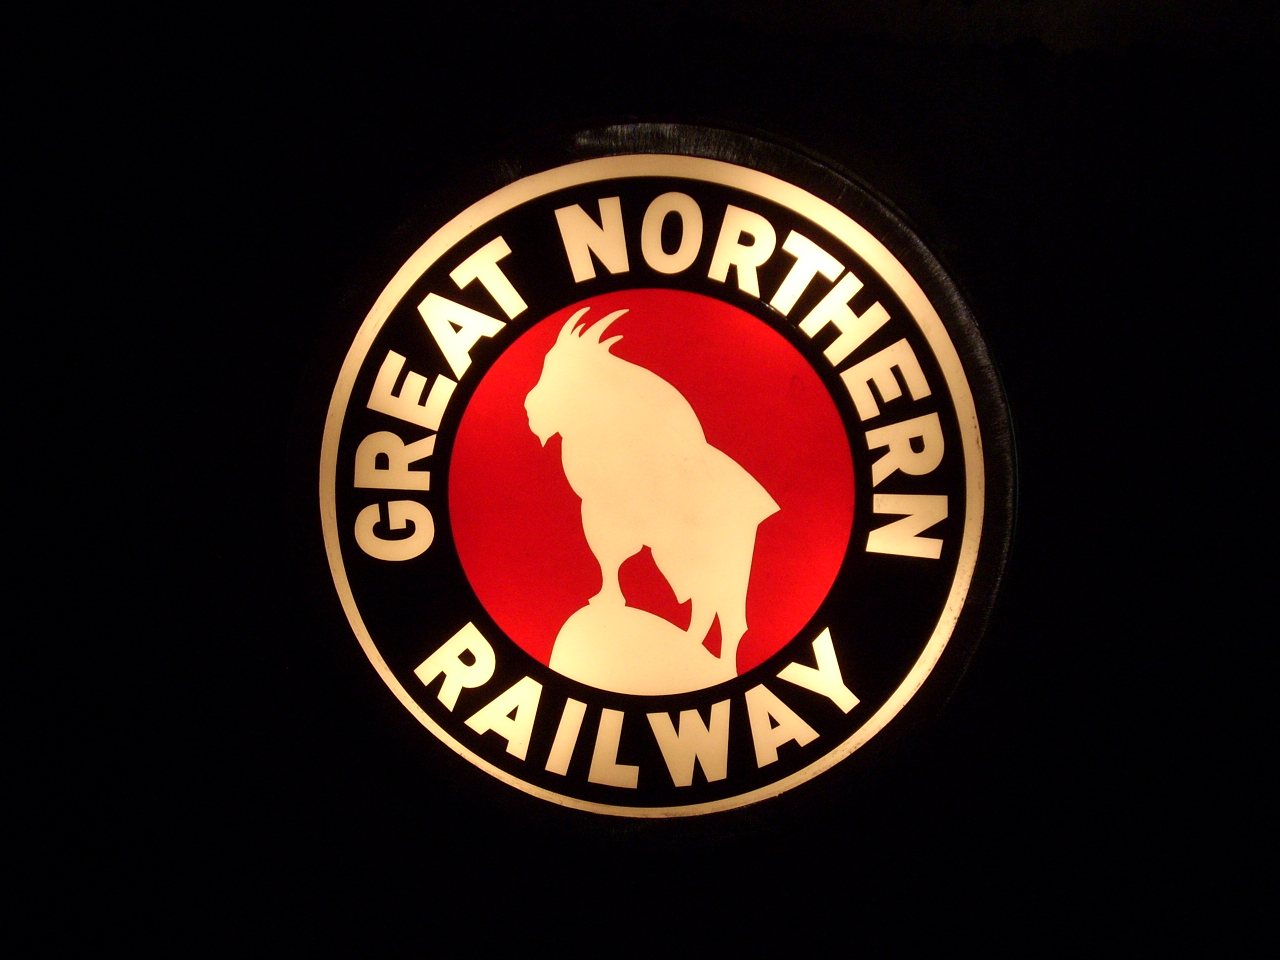 | First test illumination of A11's drumhead. (Not properly centered, obviously.) It's 1/4" white acrylic with 3M Scotchcal vinyl. Late GN employee and MTM volunteer Tony Becker had, ten years ago, donated an 18" GN logo on steel. I reduced it to 15" on a photocopier and used it as a pattern. The black was cut by a signmaker, and I hand-cut the red. There was a glitch during assembly, so there's some chaf under the black - not too bad, though. We're using 15 watt bulbs. |
Other volunteers are doing some pretty fantastic work on A11 - one is making fiberglass reproductions of the Pyle-National teardrop marker lights, for example. We'll be painting it in April, a repeat of painting 1213 a year ago. I'll post pictures here when its done.
MTM's planners are working on a passenger car restoration roadmap. I contributed this project template, and we'll fill in specifics for each car. It distills what I've learned over the last twelve years. The overall sequence is: Structural integrity, make weather-tight and attractive, trucks/brakes/draft gear, interior. Word Document or Adobe PDF.
First, a friend found an on-line rapid prototyping service, eMachineShop.com. Enjoy browsing their capabilities - I think they could be useful for duplicating hard-to-find repair parts one just has to have.
The rumor mill says that CSX does not wish to move passenger cars with roller bearings that require periodic lubrication. While I do not know any details, that is a concern since most passenger cars (such as 1146) have such bearings. The only exception I know of are rotating end cap bearings without a grease fitting - such as Timken's AP-EE used by Amtrak and commuter agencies.
I literally accomplished no 1146 tasks in April. Instead, may I present GN A11's new paint job.
 | The original Pyle-National marker light is at left, and the fiberglass replica is at right. It will be the right shape, and we think we can get most of the lenses from General Signals, Inc., but we won't duplicate the inner mechanism for changing the color displayed to the rear. The small bullet-shaped lense for the end is a problem, but GSI offers:
26901-G-GD AAR green plastic lense, ground to diameter. (Correct for side?) K4227-C-GL AAR clear glass freznal lense. (Looks correct for rear.) AAR green and red plastic sheet - for rear gell and forming bullet. |
 | A six-man team primed A11 in an evening. Two people mixing a gallon at a time, one runner, and three painters. We used Sharpe Finex FX-200 guns with 1.8 tips. (Discontinued = cheap!) My own Anest Iwata W-400 has a 1.3 tip, with last year seemed too small for the thick primer. The new 1.8 still seemed small. Note to self: Use an electric mixer. It takes a lot to work the reducer in. We ended up with very thin primer at the top, which made wave-like ripples and runs, to very dry primer at the bottom, which made a distinct orange peel. 220-grit in a dual-action sander fixed the most visible primer defects. We didn't think to power-wash the trucks before doing steel and Bondo work, so had to leave them unpainted. |
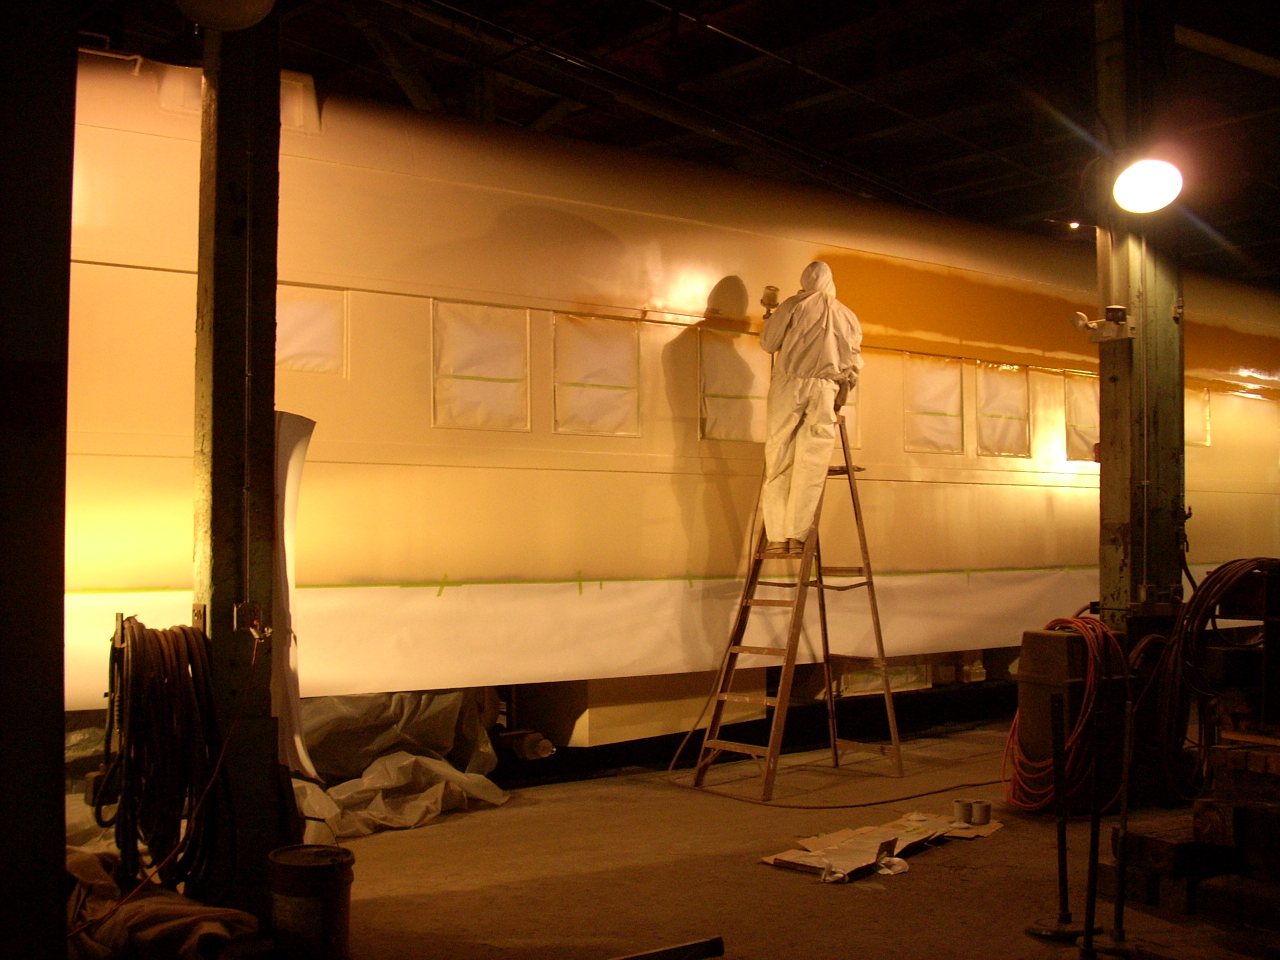 | My helper was inspired by O. Winston Link to hide the light stands, and got this wonderful picture. The bottom silver stripe is on, and I'm painting the gold. April was warmer this year, but it still worked best to give each color two nights to dry before masking over it. |
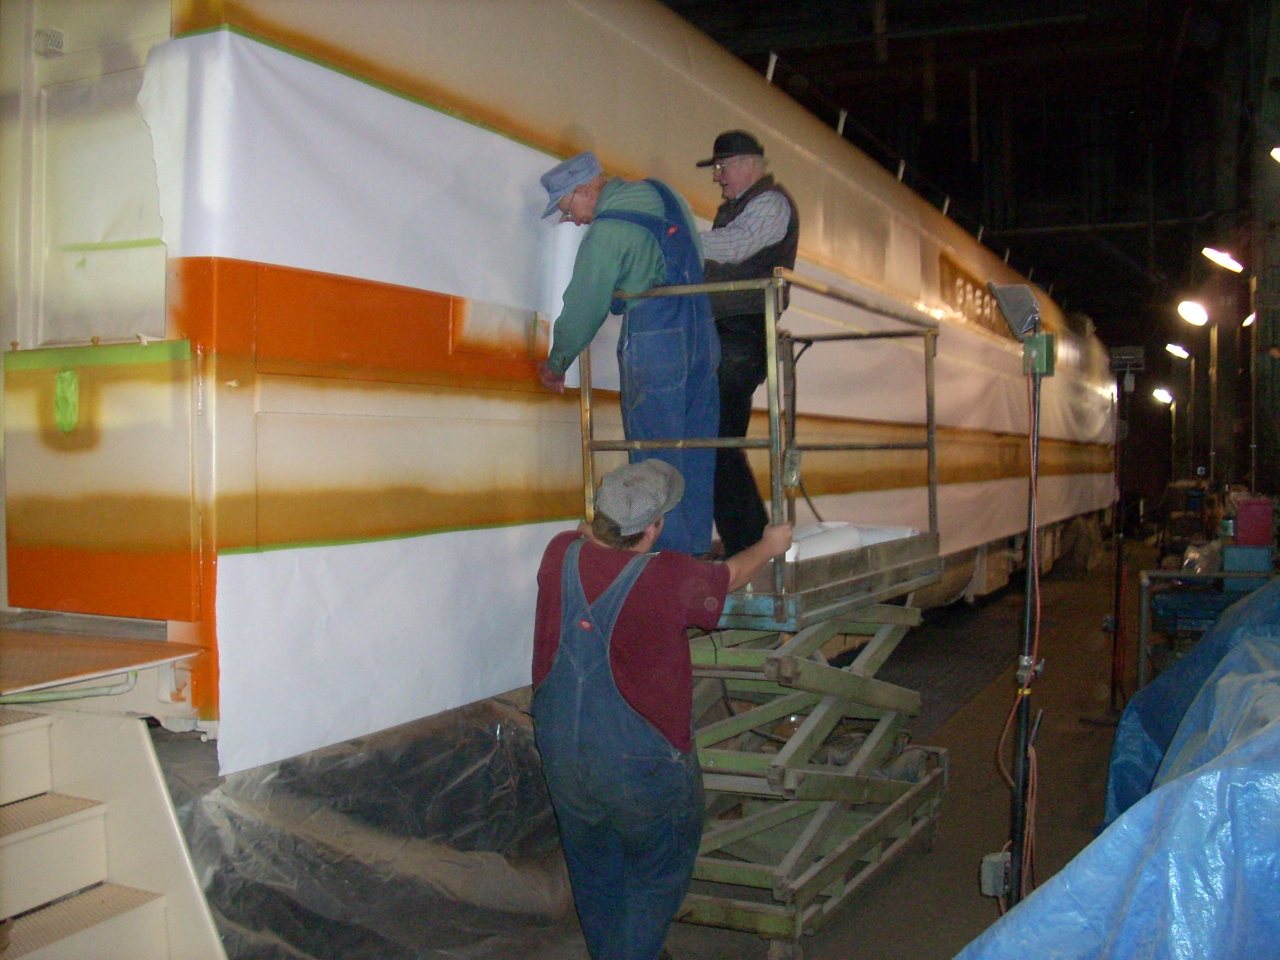 | This worked well: A rolling lift on a hard floor, one person holding the roll, and another taping. Note on the orange: This is the most see-through color. Multiple coats would be best, and using a primer color closer to the silver and gold would help, but if one is just shy of too much paint, it will cover. I spray a light coat with horizontal strokes, let it set for a bit, then go over it again with vertical strokes. |
 | It looked so cool when we killed the house lights and turned everything on. Take a close look at the light reflecting on the green stripe. Even though its completely covered, the gold underneath the orange and green is completely visible because high-gloss Imron is flatter than the satin Corlar. I had the same problem on 1213 last year. Not sure yet how to fix that... |
A friend taught me a new trick: Turn off the air to the spray gun's horns, and it will shoot the paint four or five times farther. Handy for doing the black underside, or to touching up rooftop details that were missed. WD40 and Dupont Prep-Sol remove tape residue and pencil marks very nicely.
Tricks from our Bondo expert: Wipe rubber gaskets with Acetone so the tape will stick better. Used carefully, tape can remove enough paint to fix a sag. Scrape on very thin Bondo to fill pinholes in the thicker water-proof fiber-reinforced Bondo.
For lack of time and fire concerns, we used fiberglass to fix some roof perforations, rather than welding in new metal. I'm very curious how well the fiberglass will deal with roof expansion, contraction and flexing. (Bondo, it is said, doesn't do well on roofs at all.)
The most difficult part this year was muscle fatigue. If time allows, doing masking and painting on different days might help.
Duplicating last year's paint scheme allowed me to fine-tune my shopping list. Here is an Excel spreadsheet version and an Adobe pdf version. Prices went up a bit.
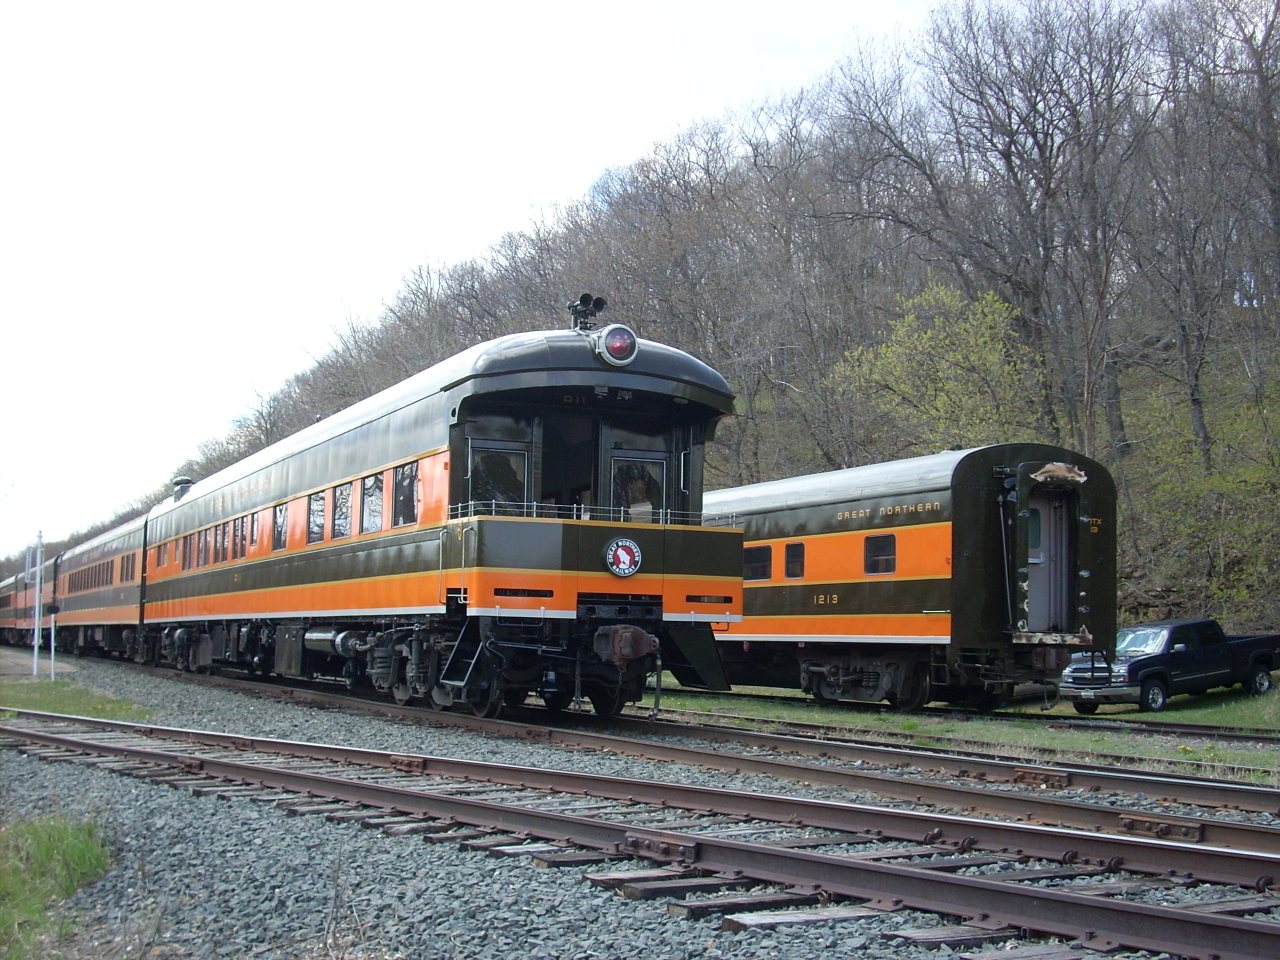 | A11 and 1213 side-by-side. Beautiful. |
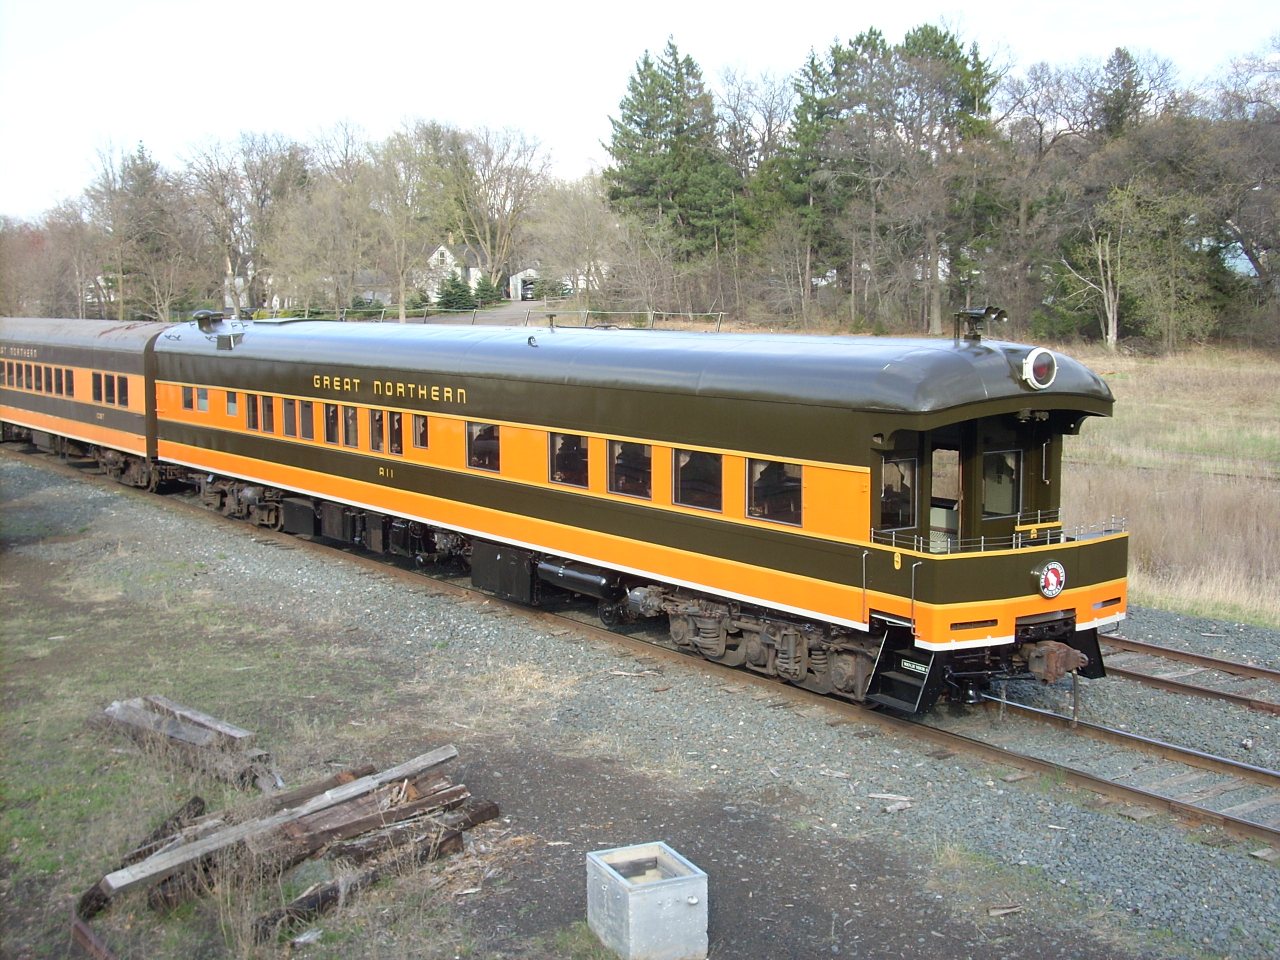 | A11 in its glory. |
There are several new resources in the See Also section, and a bit about Big Sky Blue in the History-->Lines East Pool chapter.
I saw a few interesting things at Bob Moen's annual open house.
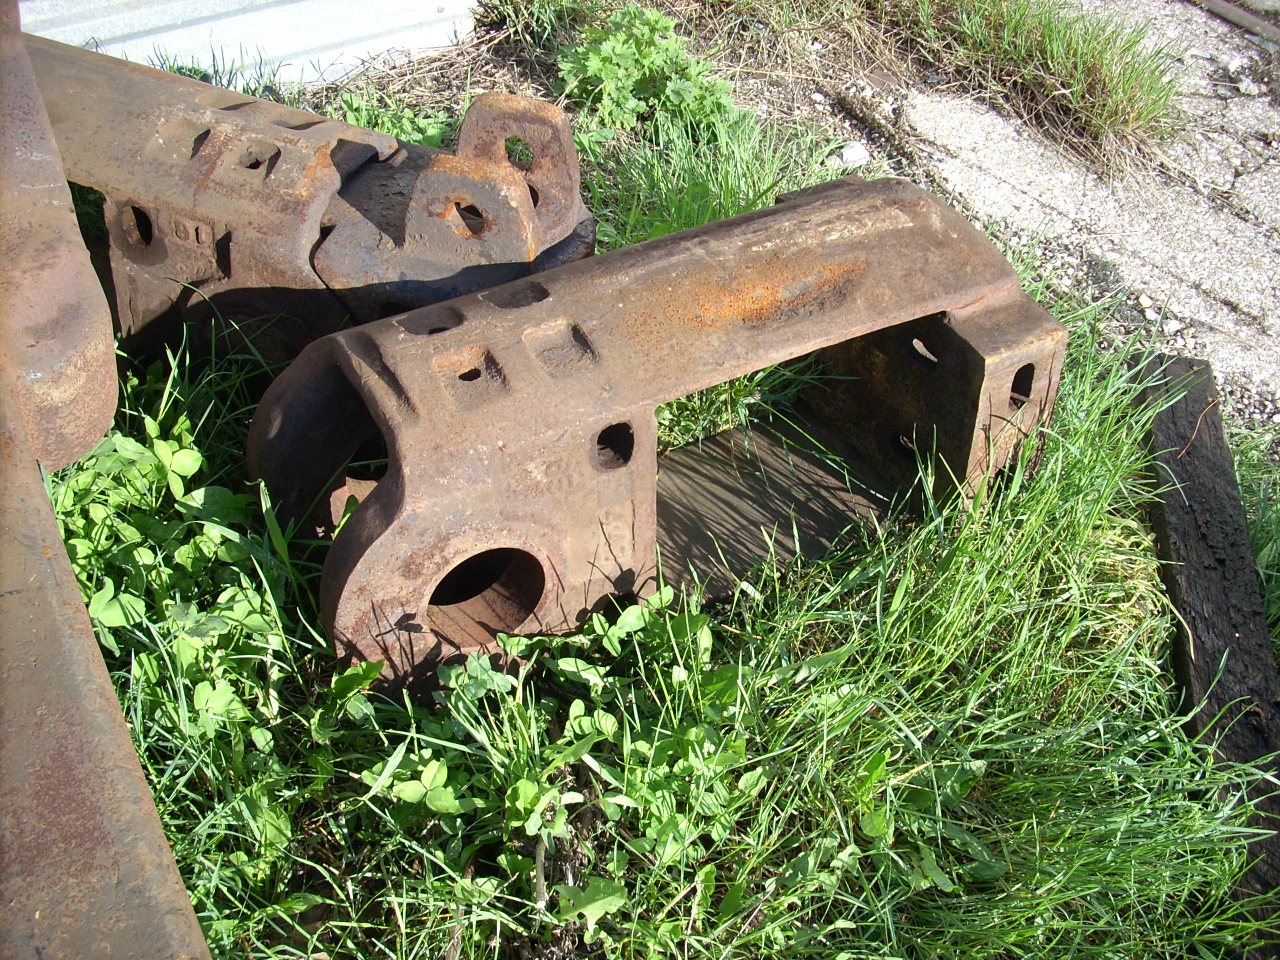 | The draft gear yoke of a type-H tightlock coupler. The spring pack goes in the yoke, and works against the lugs in the draft gear pocket. This one was unpinned at the vertical-motion joint. |
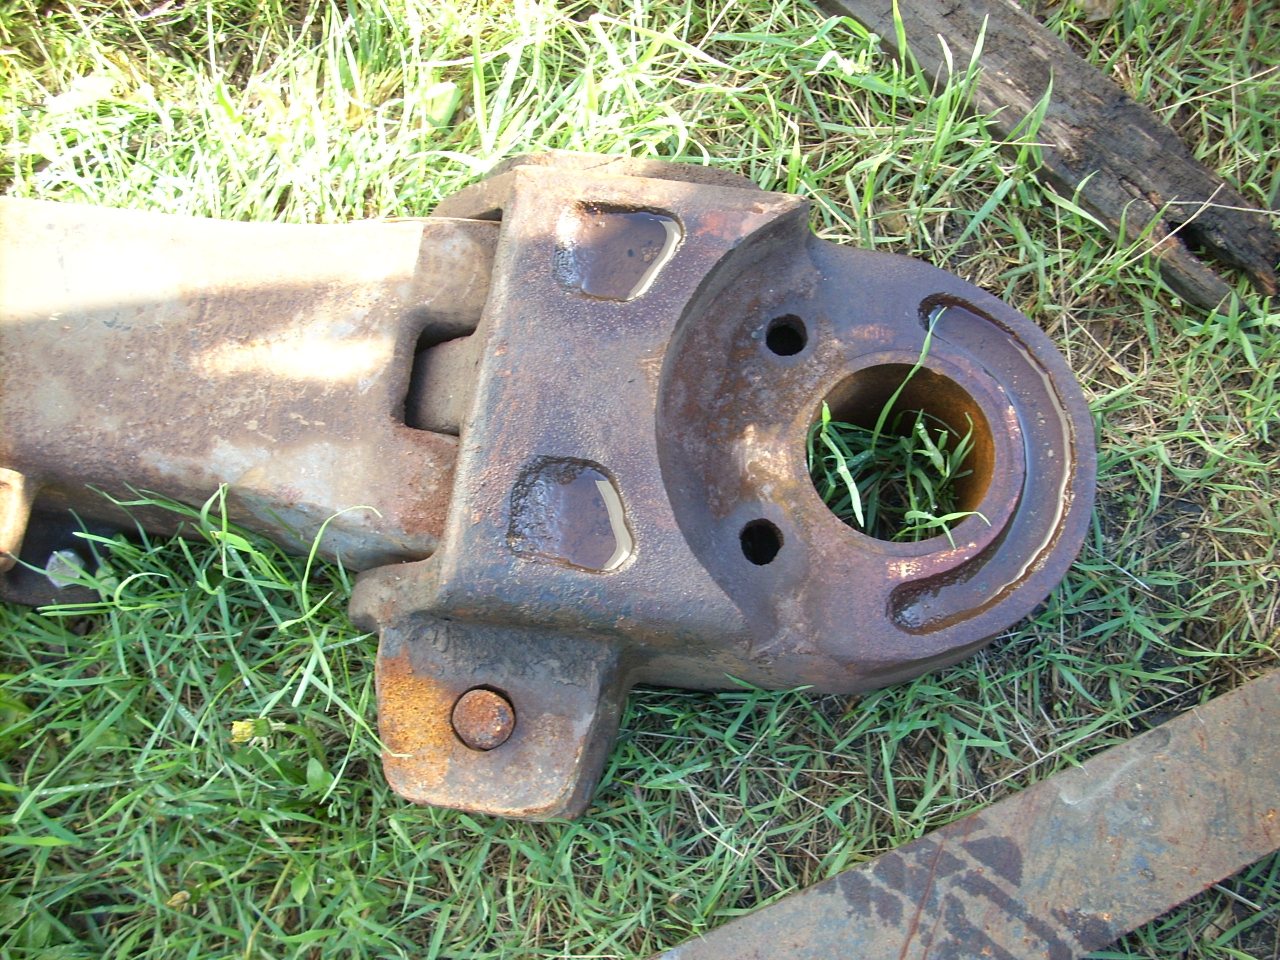 | The rest of the vertical joint (note the hardened bushing pressed into the casting) and the complete horizontal-motion joint. The small lower pin keeps the horizontal-motion pin from falling out. |
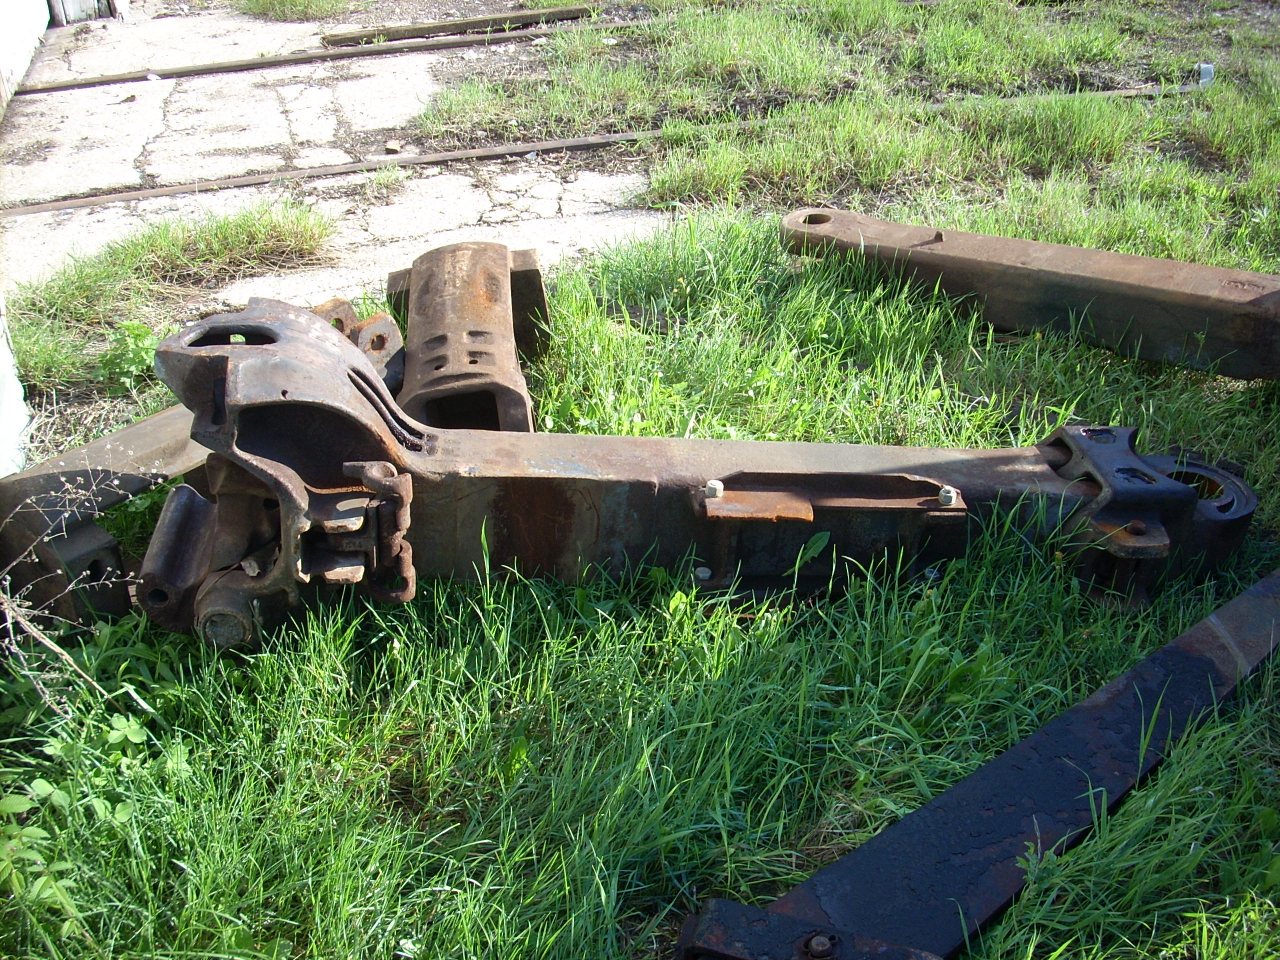 | The entire drawbar, including coupler head, coupler carrier wear plate, lugs for air hose brackets, and swivel joint. This is typical equipment for most streamlined passenger cars, including 1146. |
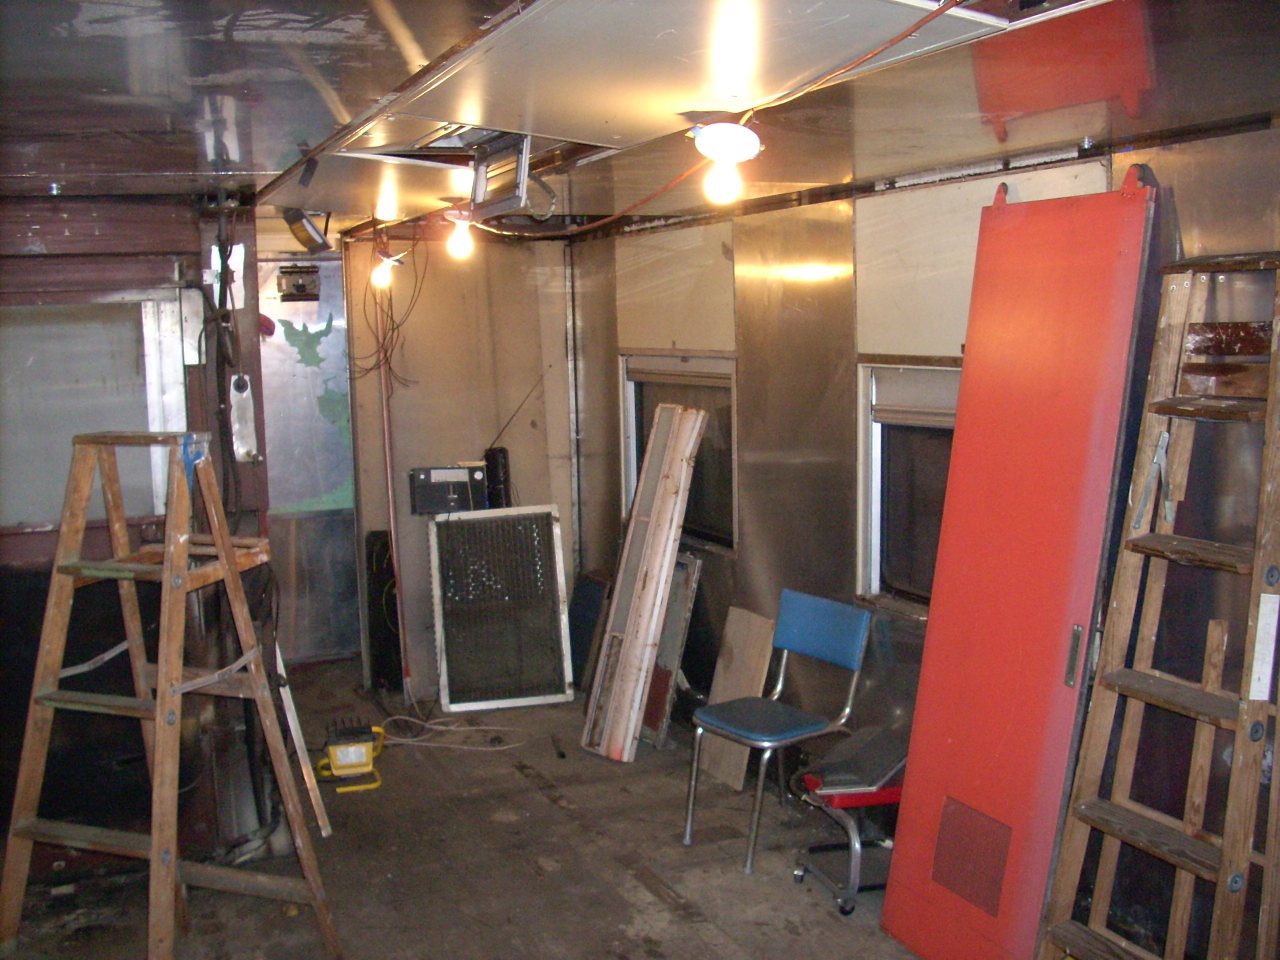 | This car's interior is being reconfigured. What excites me is the "new" plymetl - actually 2mm aluminum sheet bonded to MDO plywood sign board with contact cement. They used 3/4" for the ceiling. The side walls are plain 4mm aluminum sheet. |
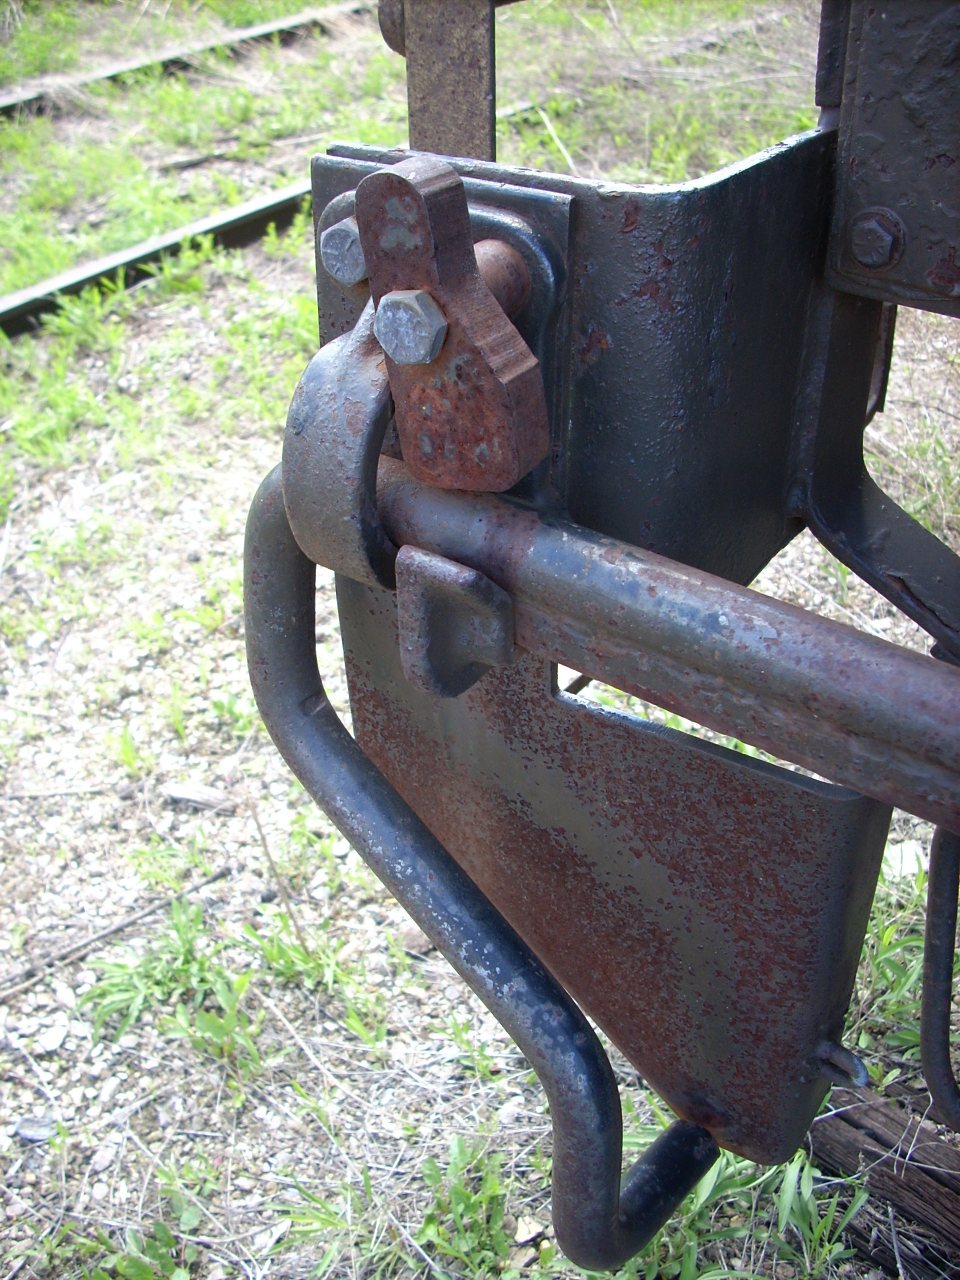 | Detail of Amtrak's solution (on a Material Handling Car) to prevent accidental uncoupling. |
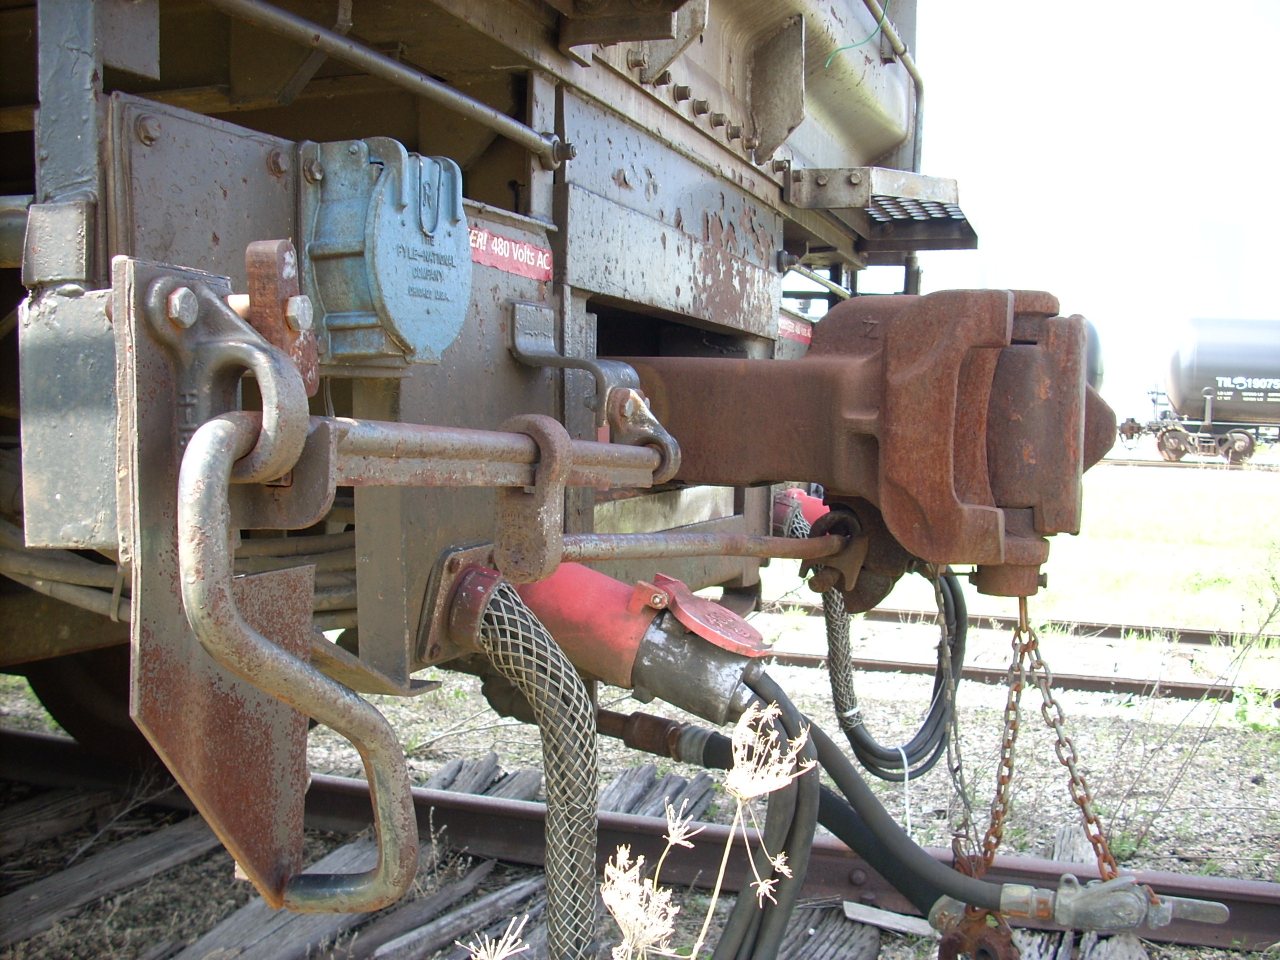 | When a streamlined car with tightlock couplers is converted to HEP, the cut lever has to be re-bent to clear the HEP connector. |
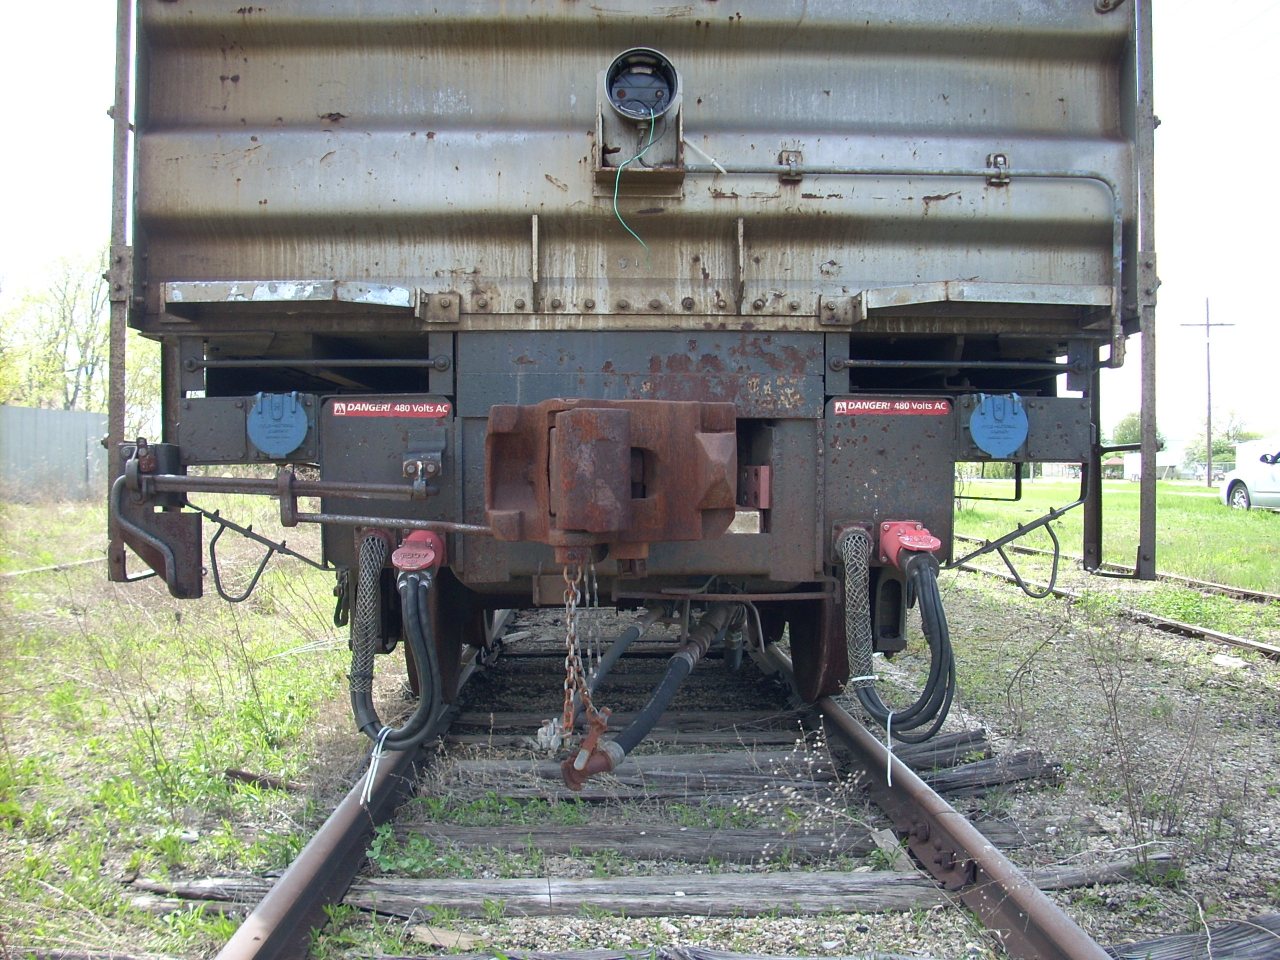 | This straight-on view of the MHC's end gives a good idea of HEP and trainline connector positioning. |
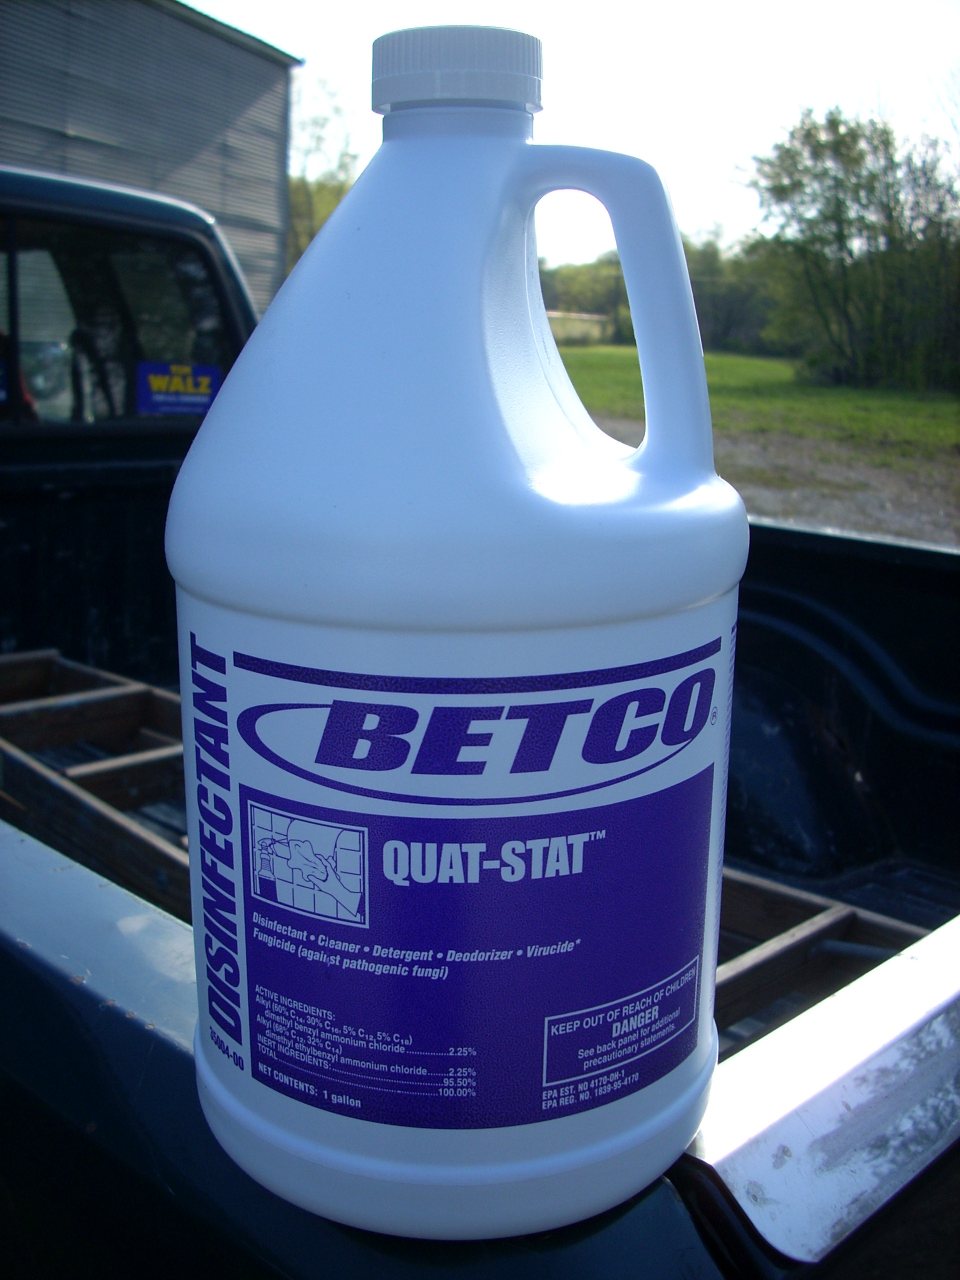 | Bob said this stuff is great for killing mold and mildew growing on walls. He purchased it at Twin City Janitor Supply. |
Thomas Jaite, who owns sleeper GN 1384 "Lewis and Clark Pass" is having some window gasket custom made, including inner gasket for converting from double-pane windows to 3/8" single-pane safety glass like I used on 1146. His e-mail address is TJ at OHRailway.
 | It seems every passenger car has hard, cracked or missing weather stripping around the doors. MTM's Larry Kytola has been experimenting with home-improvement retail weather stripping sold for use along the sides of garage doors. Here is a closeup of its application to A11's platform end door. Nice! |
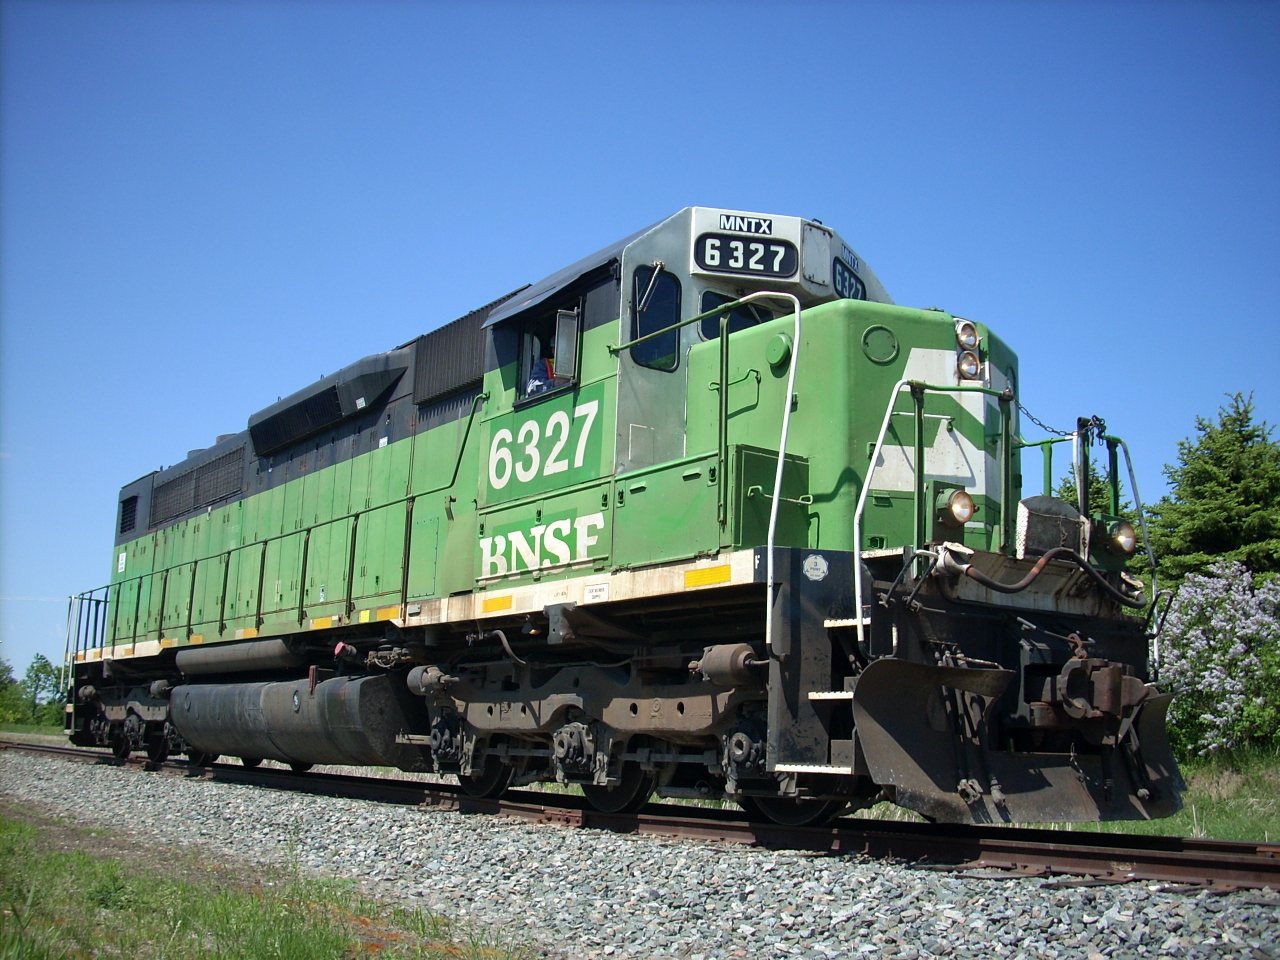 | One of the reasons May was a blur. My 'home' museum - MTM - secured the donation of BNSF 6237, originally GN 325, the last of six SDP40's purchased in May of 1966 for the Western Star and short connected trains like the International. BNSF and CP were both stellar in making sure MTM crews were able to simply "turn the key" and run light to MTM's excursion base in Osceola, WI. Check out my additions to Wikipedia's SDP40 article. |
As I've been working on 1146, there are parts I removed which won't go back on, and a few I've bought which almost fit, but didn't. What to do? So I've created a For Sale page to list the stuff. Prices are intentionally missing - they're a pain. If you are restoring a car and see something that you need, just ask. The more inspired I am by your project the less it will cost.
Lastly, I now have access to a high-volume scanner and scanned my entire Nov. 1968 GN Passenger Car Diagram Book. (8MB) It's in the "Lines East Pool" part of 1146's history page, because that's where the date fit. Note the inaccuracy of International obs cars 1195 and 1196 being shown as coaches 1305 and 1306 - that conversion never actually happened.
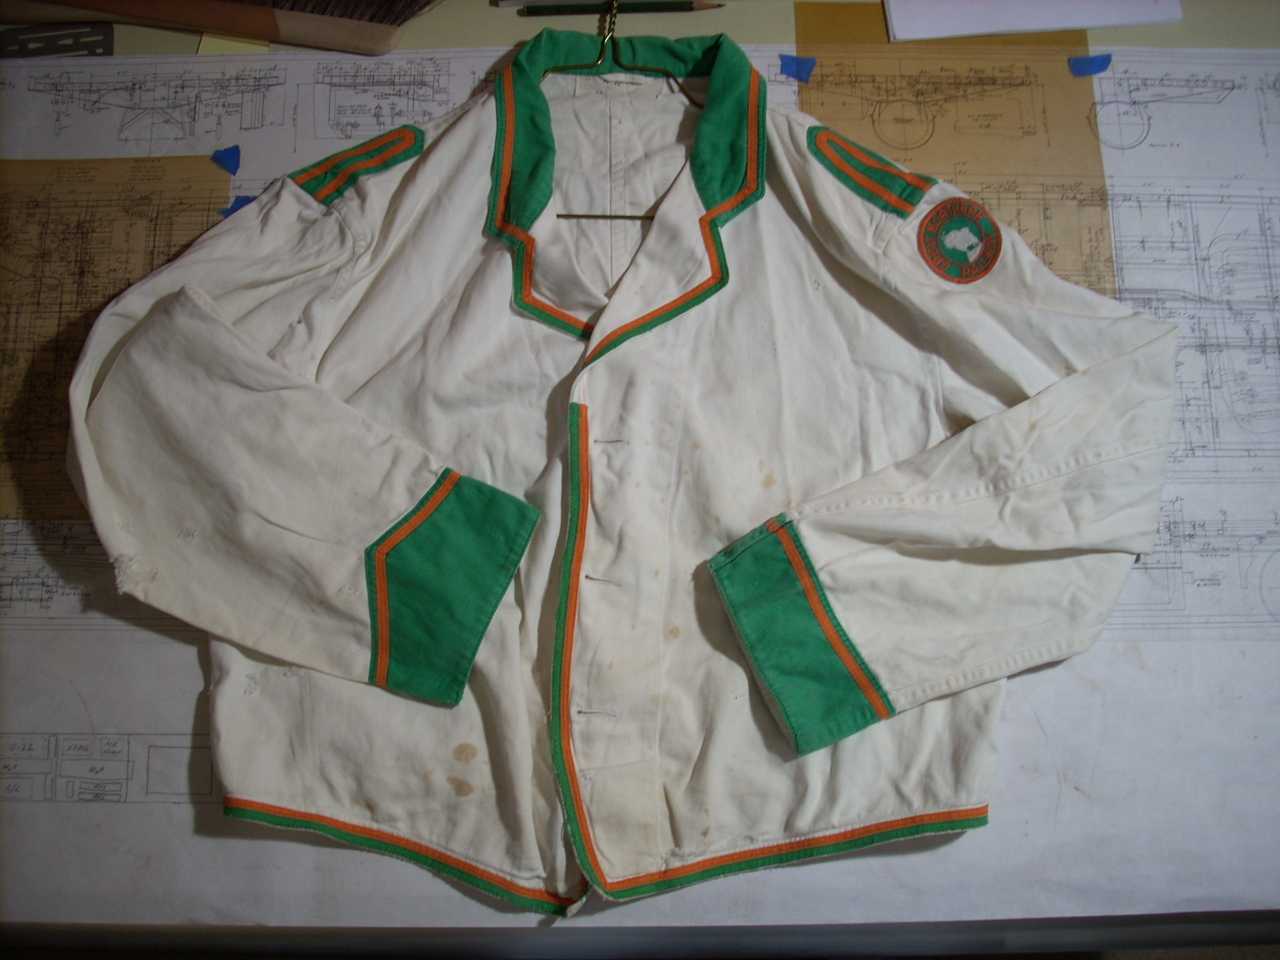 | Here's a fun e-Bay acquisition: A GN dining car waiter's jacket. I showed it to some friends who actually worked GN dining cars, and they say this would have been worn by waiter. The kitchen staff's jackets were more plain, with only the logo on the shoulder. No buttons - it's outfitted for something like cuff links. |
 | Roof shot from atop a box car. Note all the sheet metal damage below the dining room windows - it's relevant to the discussion below. |
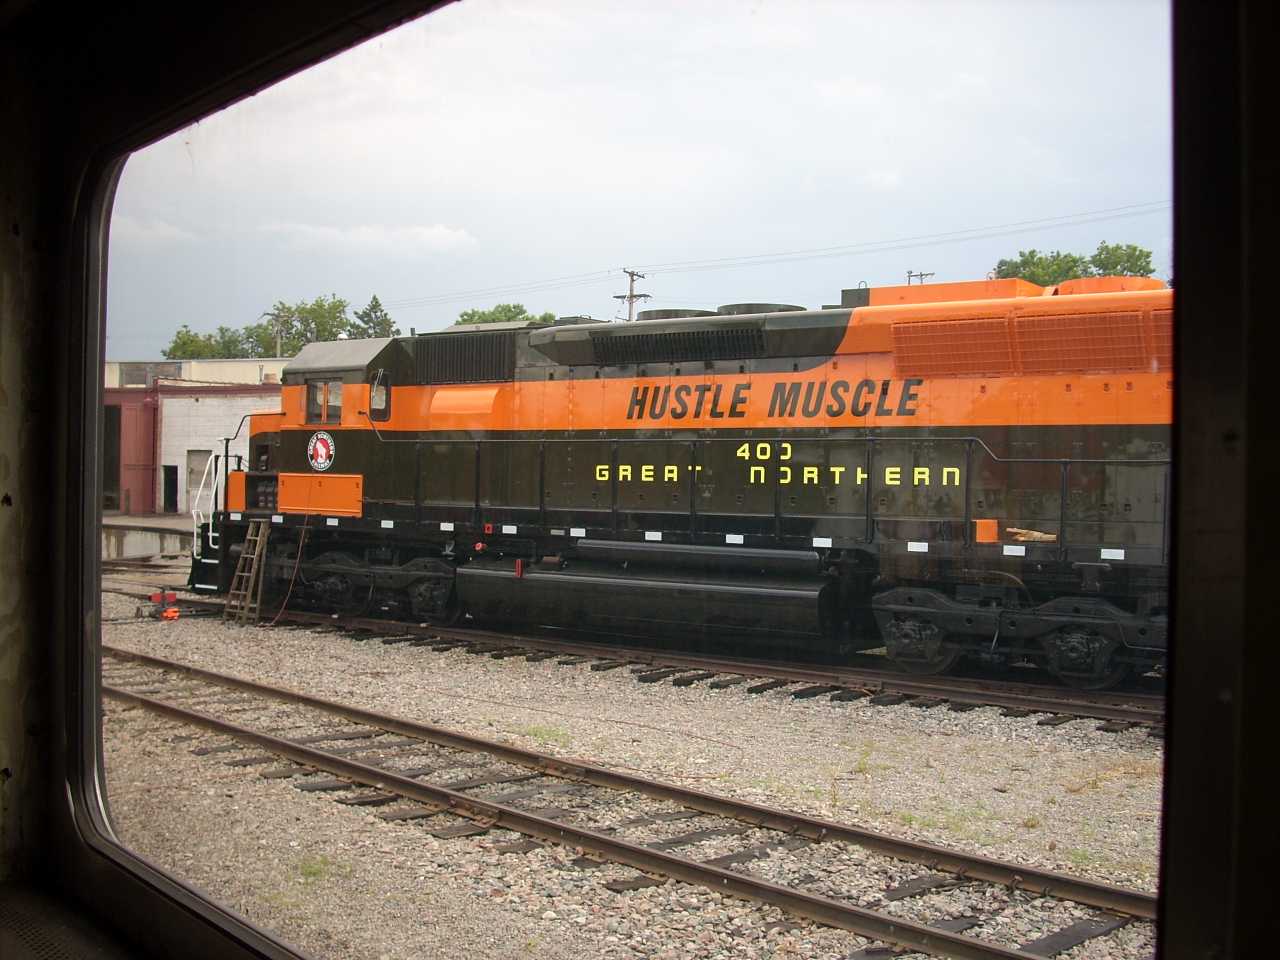
 | 1146 posed with GN Heater Car 16. Cool. The heater cars were custom-built by the GN at their Dale Street Shops a few blocks to the west in the mid/late 1960's, to supply steam for heating in the dead of winter. They gutted an F7B, installed a 12,000 gallon water tank, two Detroit three-phase gen sets, two Ingersoll-Rand air compressors, and two of the largest steam generators Vapor made. For additional redundancy, they can tap the locomotive's main reservoir air supply. I know the guy who's initials are on the electrical prints - he's the care taker of the GNRHS' SD45 "Hustle Muscle". |
 | Feelin' artsy. |
With use-it-or-lose-it vacation time, I made a last minute decision to take the week of the 4th to work on 1146. Just manual labor which wouldn't cost much. Monday June 29th I was under the car, grinding off old mounts the GN or others whacked off with a torch. (I hate hitting my head on 'em!) While grinding a sand box bracket off the side sill, there was time to contemplate. I noticed again how the exterior skin's bottom edge, which extends a half inch below the framing, drops down further in places. Odd. Rust has pushed the skin away from the side sill, but sighting down the outside of the car there isn't any real visible bend. Odd. There's also a spot where spray-on undercoating separated from the underside of the side sill. When it fell off it revealed the upper bend in the Zee channel is perforated. Urgh - that's 1/4" thick!
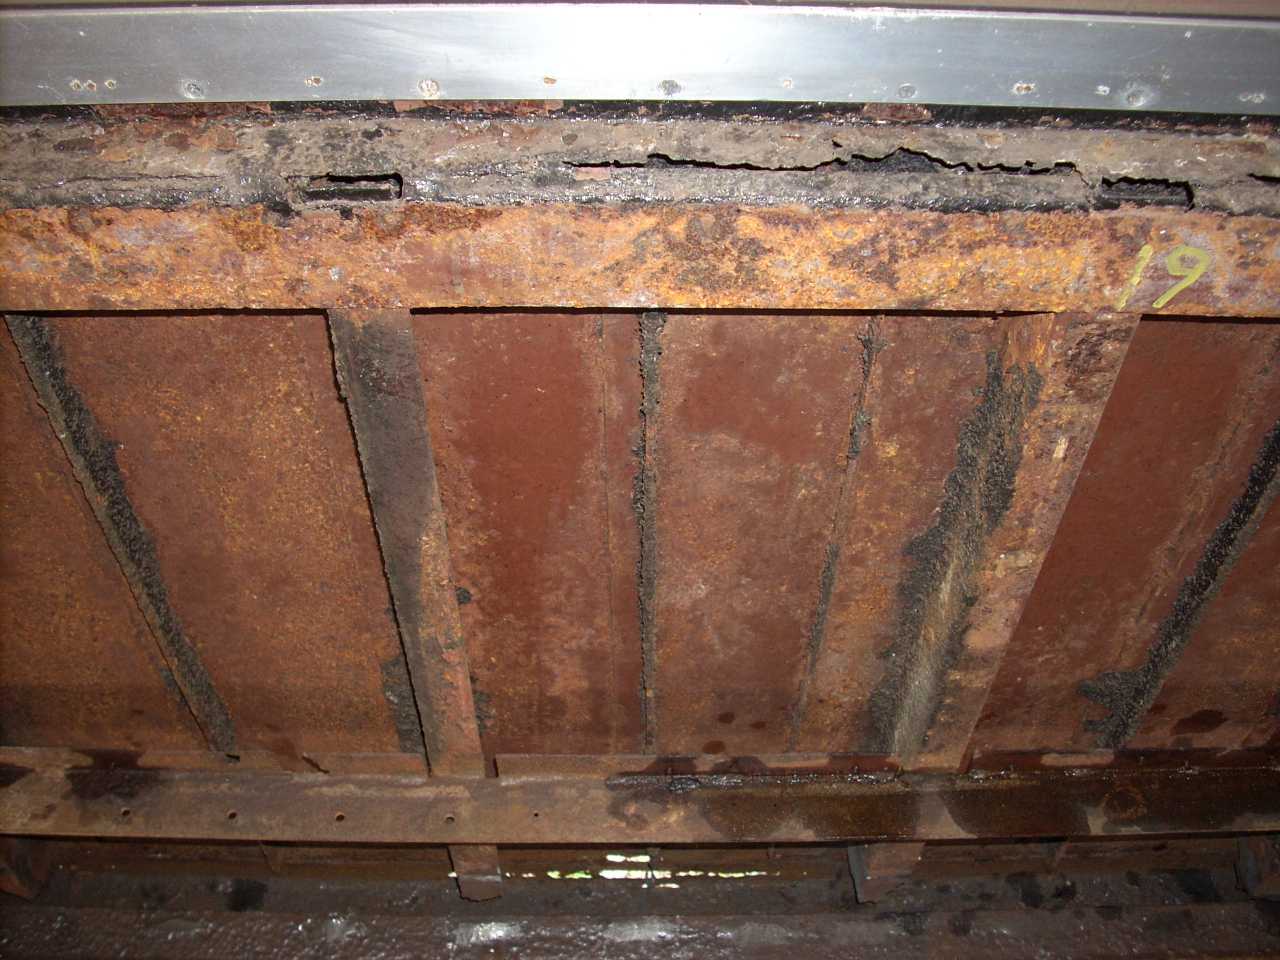
Tuesday June 30th I was inside, removing heat shields and the last of the floor. There is a floor stringer underneath which, like the rest, is perforated and must be replaced before a new floor can be installed. Once the Chanarch was peeled off the left side, I could see the perforation ran the entire length of the coach section. Originally I thought it was bad only in the restroom area.
Then I noticed the wall post at the restroom wall had rusted away to where it didn't even reach the side sill anymore. Click. Suddenly all the clues tumbled into place. It was a very Ecclesiastes moment.
What has happened to 1146 is this: Years of storage with bad window gaskets allowed rain water to run down into the walls. That water saturated the insulation, puddled in the trough formed by the L- and Z-channels that form the side sill/bottom of the wall, and flowed in where the spray-on rustproofing had separated from the steel. Eventually it perforated the side sill Z-channel, side posts, and exterior skin - to the point where there is no structural connection between wall and floor along most of the car. There is some loss of camber in the walls, but not the floor. In addition, rust between pieces has literally forced the walls outward, away from the floor. This damage all happened before I bought it.
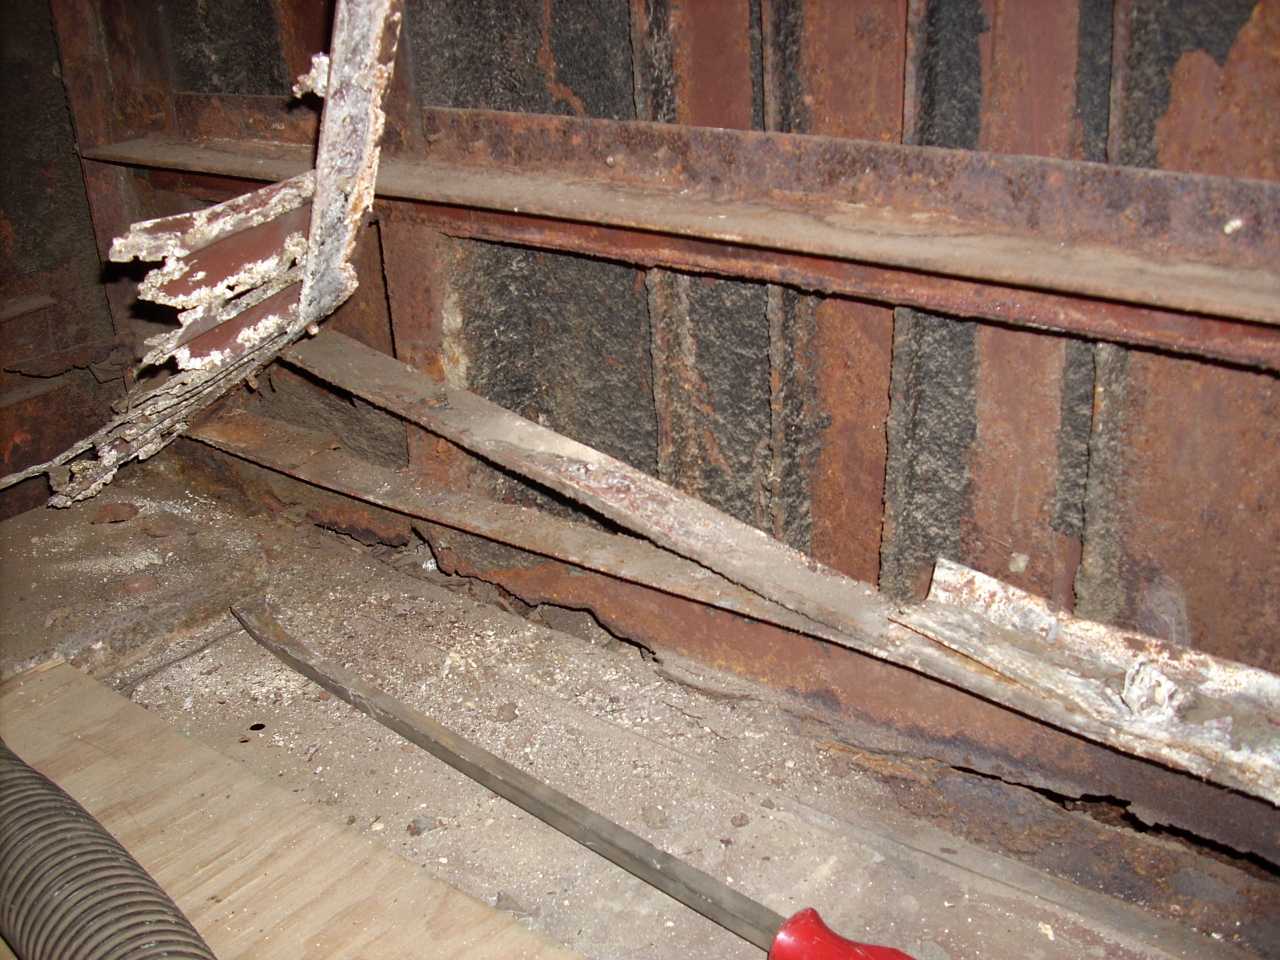 | Peeling up Chanarch in the men's room. Compare to the cross-section blueprint below - The Chanarch, galvanized L-strip base, masonite and floor stringer are all visible. The aluminum Chanarch and floor stringer are complete losses even though they were primed with red primer before installation. |
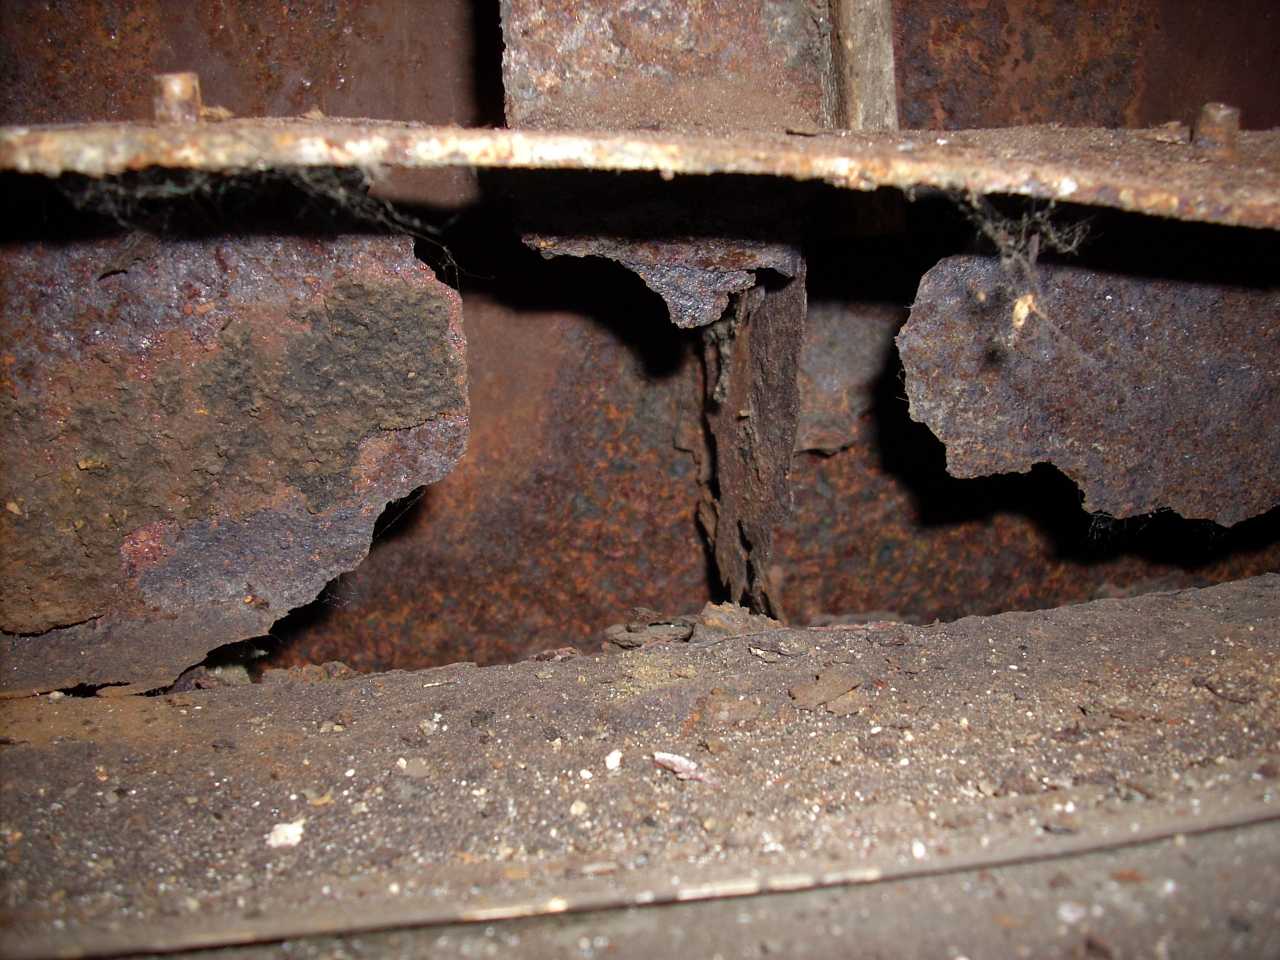 | Wall post at the partition wall between restroom and coach. Notice the ragged bottom edge is completely above the side sill! I checked several others and this is one of the worst in coach. Not visible: The side sill is filled with rust flakes up to the top of the L-channel. |
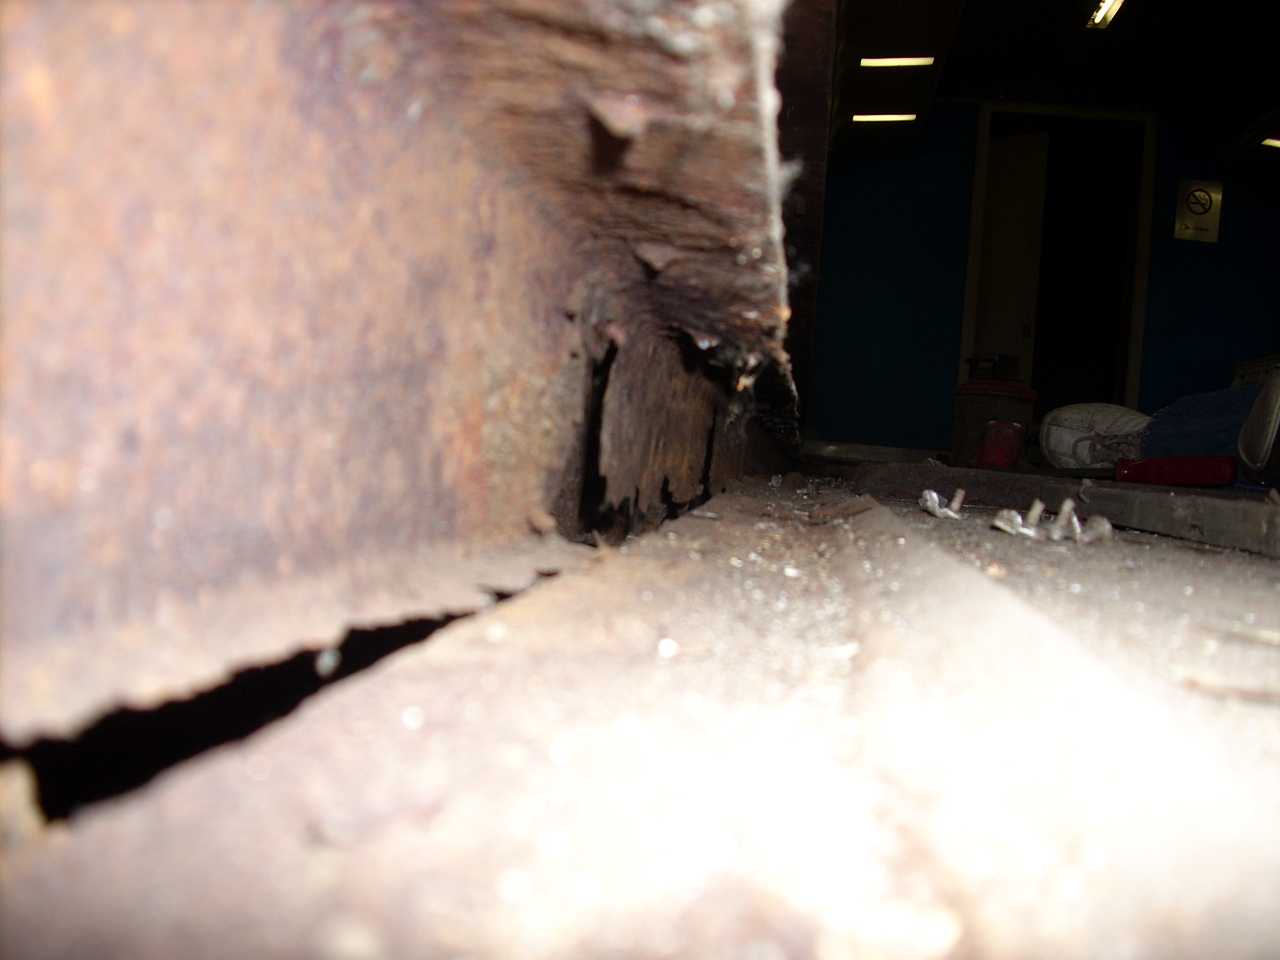 | Sighting down the inside of the floor stringer - same view as the blueprint below. The stringer is still securely welded to the wall post on its top edge, but notice the horizontal offset between its bottom edge and the top of the side sill's Z-channel. This is proof that the wall itself has been forced outward. |
 | From the ACF blueprints: The side sill cross-section. This is the joint between two major sub-assemblies, the wall and the floor. The crossbearer, floorbeam, 4" - 8.2 lb Zee, and 5" x 1/4" L.A.H.T. Gusset are part of the floor sub-assembly. The 3" Post and exterior skin (not drawn) are wall sub-assembly. The 1/2" rivets join them together. |
 | I've marked up the blueprint to illustrate the rust damage I found. The heavy red lines show where water seeped between pieces of steel, and the rust build-up has pushed them apart. The wastage is significant. Under the kitchen and linen cabinet, the Zee channel is perforated at its top bend - which was not visible until some spray-on undercoating fell off. On the opposite side, under the dining room windows where the exterior skin is visibly perforated, the bottom flange is a complete loss. The wall posts are completely wasted away at the bottom - to varying heights - which I've illustrated with thin red cross-hatch. |
 | For comparison, I've drawn Pullman's side sill construction in green. Rather than using a 4" Zee-channel, they bent a 1/8" thick sheet. Where ACF's side sill is four inches tall, Pullman's is twelve inches. So, a Pullman with the same degree of wastage as 1146 would still have rivets above floor elevation securing the walls to the floor. |
As I said, it was a very Ecclesiastes moment when the failure mode became clear. If you haven't read Ecclesiates, I highly recommend it for moments when a project seems futile. It has just the right amount of attitude. No wonder it inspired a Rock & Roll song by the Byrds in the 60's. Let me quote some of the better bits for you - it sounds bitter but I like the conclusion. (New International Version)
Ecclesiastes 2:4-6, 10-11 "I undertook great projects: I built houses for myself and planted vineyards. I made gardens and parks and planted all kinds of fruit trees in them. I made reservoirs to water groves of flourishing trees. ... I denied myself nothing my eyes desired; I refused my heart no pleasure. My heart took delight in all my work, and this was the reward for my labor. Yet when I surveyed all that my hands had done and what I had toiled to achieve, everything was meaningless, a chasing after the wind; nothing was gained under the sun."
Ecclesiastes 3:12-13 "I know that there is nothing better for men that to be happy and do good while they live. That everyone may eat and drink, and find satisfaction in all his toil - this is the gift of God."
In hindsight I should have seen this coming. Even when inspecting 1146 prior to purchase, I expected to do side sill work. Having worked on a couple of the Museum's Pullman cars, I knew to expect a lot of damage. The shock was realizing that ACF's design allows the wall to separate from the floor, and that I will have to jack the walls to re-establish their camber and pull them back together. The implication is that I might have to remove a lot more interior below the windows and do the side sills before I can put anything back together. Yikes.
One reason I didn't see it is my experience with Pullman cars - I just assumed something would still be there to tie the walls to the floor. Another reason is the stainless splash pan and spray-on rustproofing masked a lot.
Words are ringing in my ears. There is the equipment vendor who advised me to "keep an eye open for the poison pill" - the one thing that makes everything else not worth doing. There is the Amtrak car inspector who asked, somewhat incredulously, "Why this car?" Last but not least there are my friends, who openly question my sanity. (In jest, of course... right?)
As I write this, on the morning of July 1st, it seems there are only two sane choices. One is to cancel the project. "Forget it! The damage is too great, the cost is too high! Better to part it out and minimize the loss!" The other is to forge ahead - for the sake of learning from experience, seeing if I'm up to this challenge, trying to recover my investment, and to preserve this neat bit of history. If you've followed me this far, you can probably predict which one I'll choose.
Yes, I'm a stubborn German.
First off, thanks to everyone who wrote to encourage me to keep with it. You're the other reason I won't bail out! I kept at it for the first three days in July and enjoyed the work. Grinding out old welds so that the new steel will fit is slow going.
 | The museum's new plasma cutter made quick work of the last floor joist. It's a Miller Spectrum 375 X-TREME - particularly powerful for its size, portable with a shoulder strap for working from a ladder, and has interchangeable plugs for 120 volt 20 amp or 240 volt. (You have to turn the power down for 120v.) I love it. |
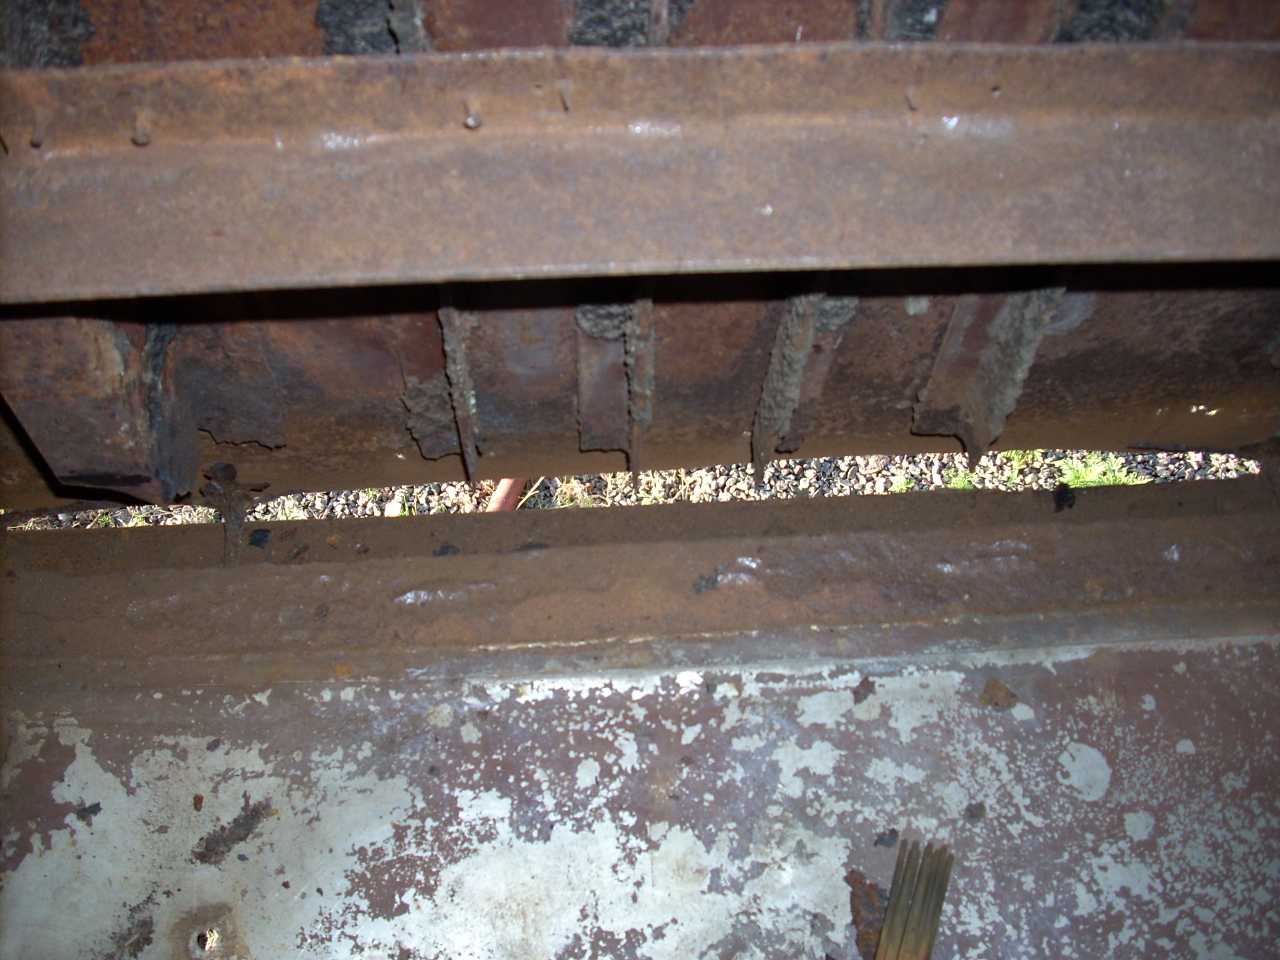 | After cleaning out all the rust - I took a wheelbarrow full of Iron Oxide to the dumpster - we can see daylight through the side sill. I've ground the floor joist off the post, but still have to do the bottom-edge welds. That little fragment sticking up below the post is all that's left of the wall's 1/4"-thick bottom L-channel. If I kick the wall, it shakes! |
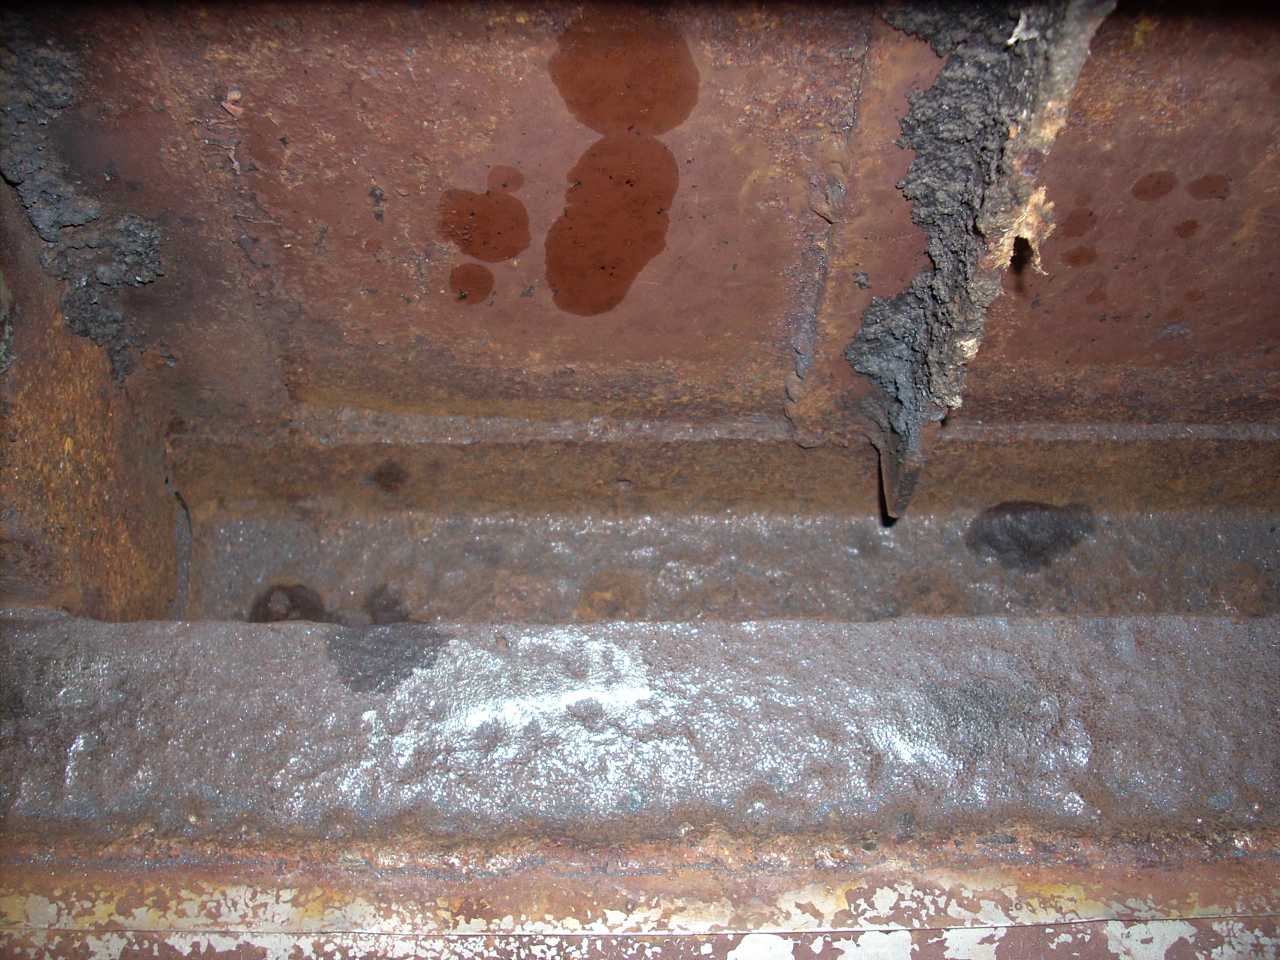 | Compare the picture above with this one. This is one of the few sections of good side sill - right below one of the windows that didn't leak. The dimpled shine of the metal is from the needle scaler. I had to work to get the rust out of the pits. The oil is penetrating oil I put on broken-off seat bolts. Lastly, the black stuff is "Ded-Nox" - the spray-on rust-proofing and sound-deadener ACF used. It contains ground cork. |
 | If an ACF Cor-Ten car has a window sill rusted out like this one, take a close look at the side sill below it. This window still leaks a little bit - the exterior sheet is all pitted - so its rusting under the Rustoleum I applied years ago. |
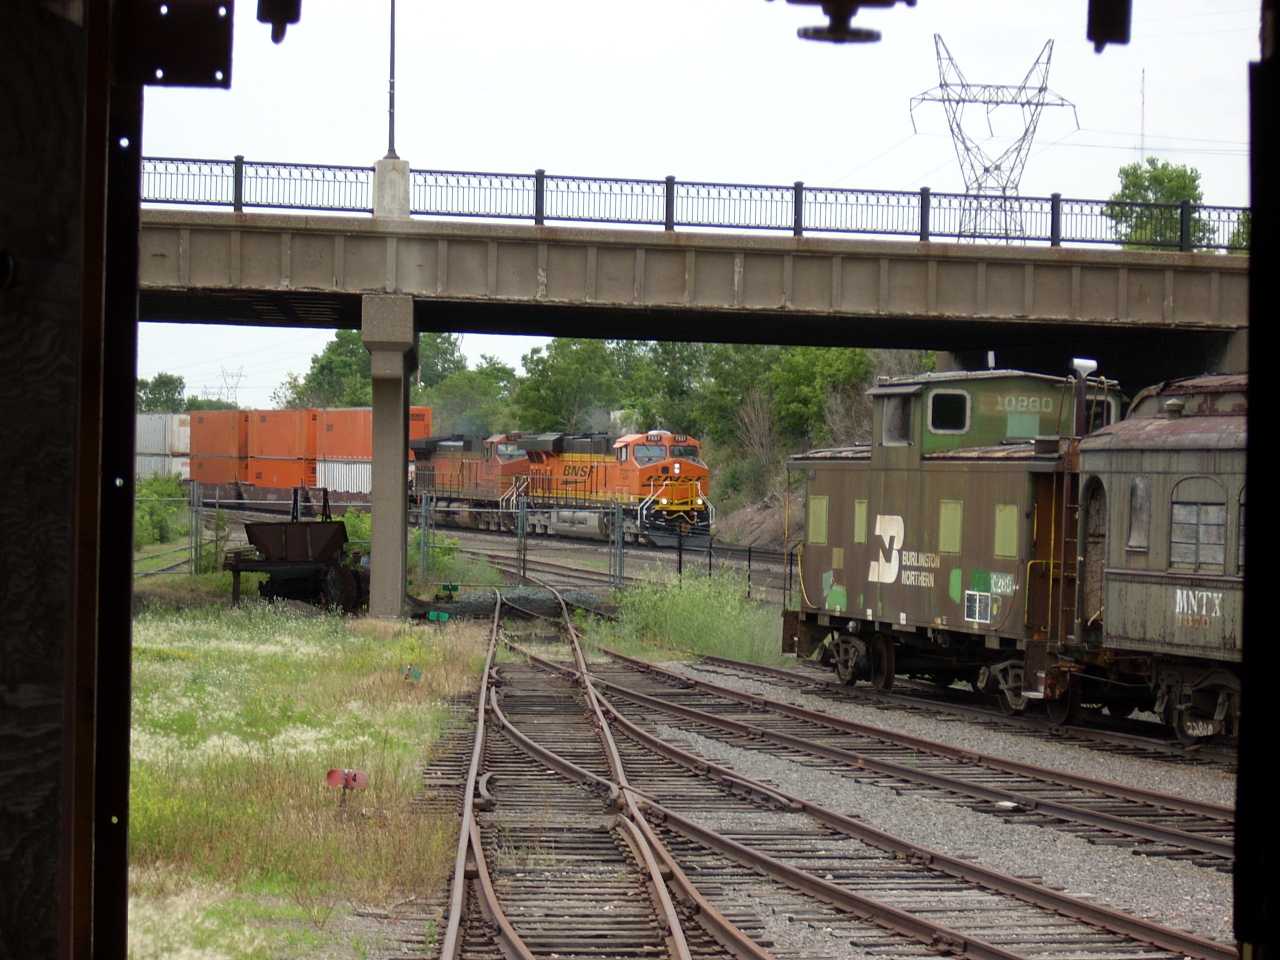 | The entertainment out 1146's end door: BNSF is replacing a bridge on the ex-NP St Paul Sub, so we had a constant parade on the ex-GN Midway Sub. This used to be a four-track main line. In the 1980's it got downsized to little more than a long siding with a bottle neck at each end. The St Paul Sub is easier to operate so it normally gets more through traffic. |
 | More entertainment outside the dining room: GNRHS' Hustle Muscle is getting new batteries for its trip to the GNRHS convention in Duluth. |
Warren Newhauser, an Illinois Railway Museum member involved in restoring Milwaukee Road Dynamometer car X-5000, has used some of the resources I posted on this site and offered some of his own. In his own words:
1. http://www.masterseriescoatings.com - this guy used to work for POR15 and then he started his own company. His primer uses Al-oxide flakes to block air and water better than POR15. It is also self-building/leveling for pitted jobs. My customer in Mpls who is an avid VW bug restorer has used both and prefers this over POR15. I have used in a little bit with good results and plan to prime/paint the car's metal roof with it.
2. http://www.seichemical.com - they make some really interesting graffiti-proof coatings, super strong/durable clear coats (anti-graffiti), rust removers, paint removers, 5 yr no-prep corrosion inhibitors when stuff is just rusting outside, etc. Warning: not cheap stuff!
I also have a little chili seasoning business to raise $$$ for the Dynamometer car and would like to send you a packet for helping me out. You can read about it at: http://www.kensrailroadchili.com. We served it on the Dyno car on a caboose train and people smelled it two cars down and came onboard for bowl!
A couple thoughts on roof repairs: We have done a LOT of metal roof repairs on our car. We are still working on after a couple of years. I would not use fiberglass. I just helped out our Coach Dept Mgr who was looking to fix a roof leak on an old C&NW coach patched with fiberglass. What we have done is to:
1)use sheet metal one gauge thinner than the roof (16 ga.). For us that is 18 gauge galv.,
2)flange it with a cheap sheet metal flanger from Harbor Freight Tools and
3)glue in with Evercoat Maxim panel bonding adhesive,
4)pulling patch close to the roof with steel pop rivets. Don't want dissimilar metals such as aluminium and steel together.
The adhesive is used for auto restoration where you can't apply heat (our car has horsehair insulation in the ceiling) due to warping a fendor or panel. It is going to be almost as strong as welding, and will expand/contract with the roof. I learned you want to flash/extend the patch ideally only 3/8" over the hole - no more or moisure could get between the layers of metal. The adhesive will be usable like bondo for feathering once it starts to set. I had to work hard to get the dried stuff off my putty knife it's that hard. You can get a calking tube of the adhesive (~$30) at an auto store along with a bag of 15 mixing nozzles (~$20). Worth every penny.
Another product we used for waterproofing the roof is from a company called www.Sanitred.com. They make a "Permaflex" urethane waterproof compound that will adhere to less than ideally prepped surfaces, which is what we had. It was designed for metal roofs. They also make a calk called "Liquid Rubber Base" which can fill gaps, spaces, etc. like caulk. We have found nothing else that will seal the roof like this stuff. It is unbelievable how well it works. It literally saved our car from incessent roof leaks. Not cheap, but worth every penny too. Our sandblasting contractor uses it all the time and recommended it. I have recommended it to Bob Lark at MRHC in Montevideo.
I think it's great that other restorationists are enjoying my rambles! (Considering that others have been doing this for much longer than I.)
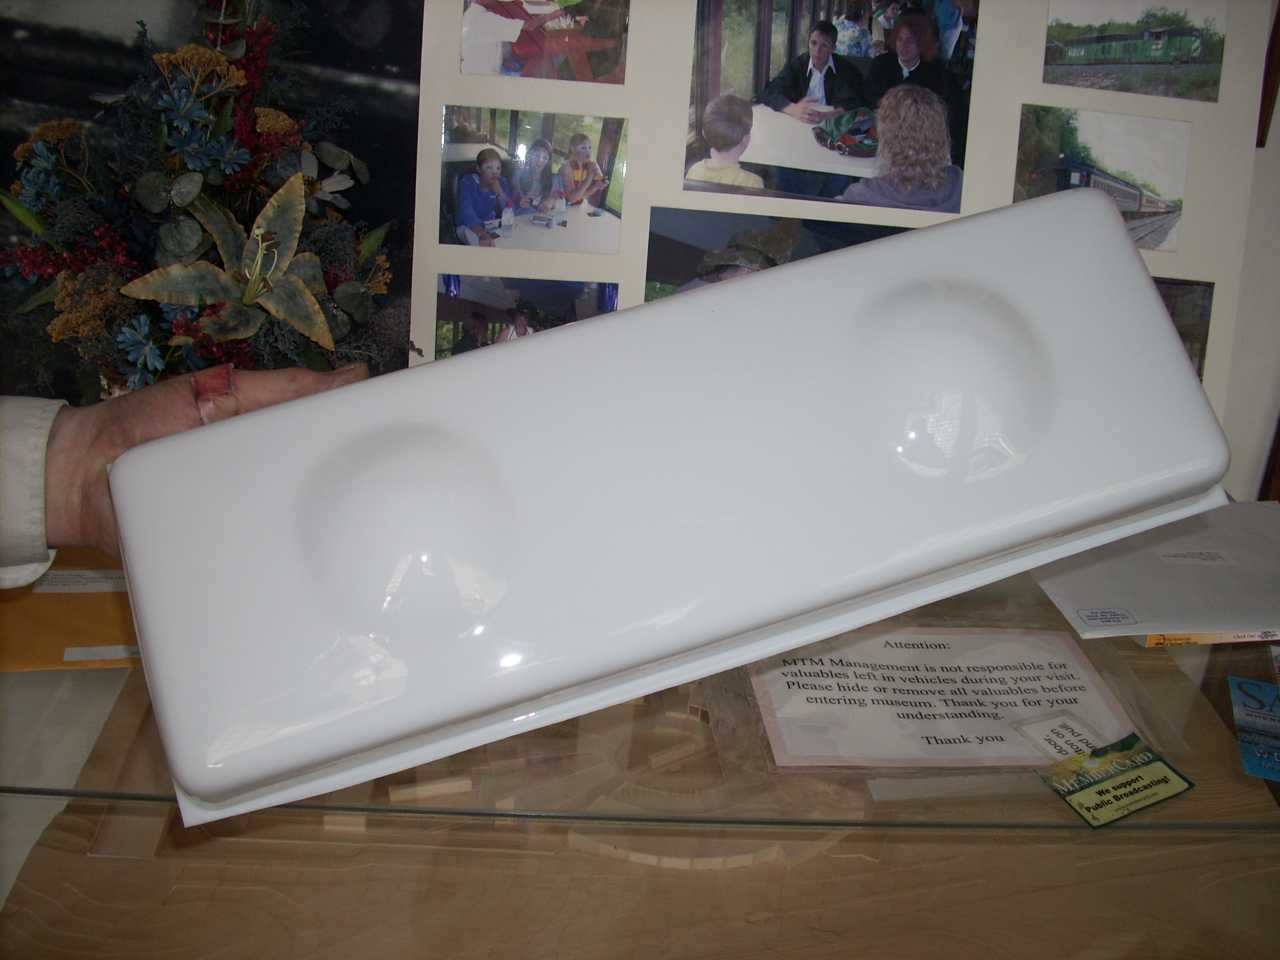 | Not 1146: An MTM volunteer's friend made a wooden mold to match the one existing plastic lens we had for A11. Alpha Plastics then vacume-formed eight lenses from the mold. We need three, wanted four, and got eight. If anyone needs some contact MTM. They ended up a tad tall because spacers for air movement had to be placed under the mold. Note the edge hasn't been cut to the final shape yet. |
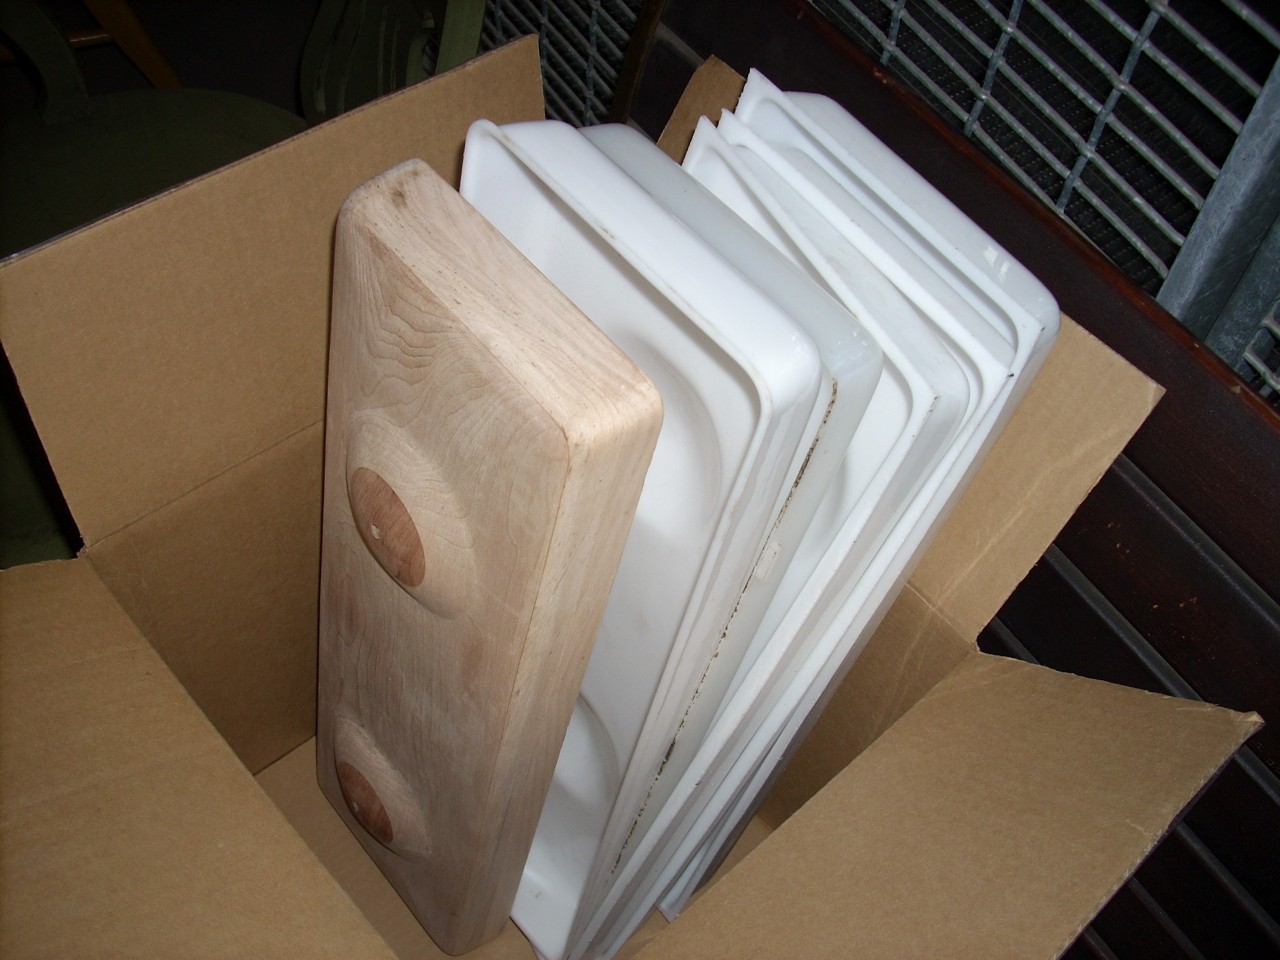 | Here's the hand-carved pattern and the four surplus lenses. |
Multiple sources tell me that Harold Weisinger, Amtrak's guy in charge of private varnish, has left Amtrak to pursue private consulting. Here's hoping they find someone who is tough (we don't need disasters which would lead to a NO PVs policy) but fair and helpful.
A fellow MTM volunteer, an HVAC engineer who has a good network, is helping me estimate restoration costs for CB&Q 598. Part of that is indentifying good materials and methods.
 | A friend/competitor of his suggested Prime Panels Inc., who manufactures thin, tough and sanitary wall panels of a variety of core and surface materials. Pictured are samples of 1/2" aluminum-clad plywood (a drop-in replacement for Plymetal!), 1/2" aluminum-clad honeycomb, and 1/4" aluminum-clad plastic. Thicknesses are within +/- .010" of the nominal dimension given. |
I mentioned how most of my Aluminum door frames and panel edge & corner nosings are rotted out at the bottom. To reproduce them would involve five to seven custom dies and then extruding less than 100 feet of each - potentially a very expensive proposition. He searched Google for "Small Run Aluminum Extrusion". The first hit was corporate directory ThomasNet, where we found Minnesota-based Exact Manufacturing, whose case history page told of very low tooling costs.
I also mentioned that whatever primer ACF applied to the aluminum interior finish has proven extremely durable. He suggested looking at aircraft primers for modern equivalents.
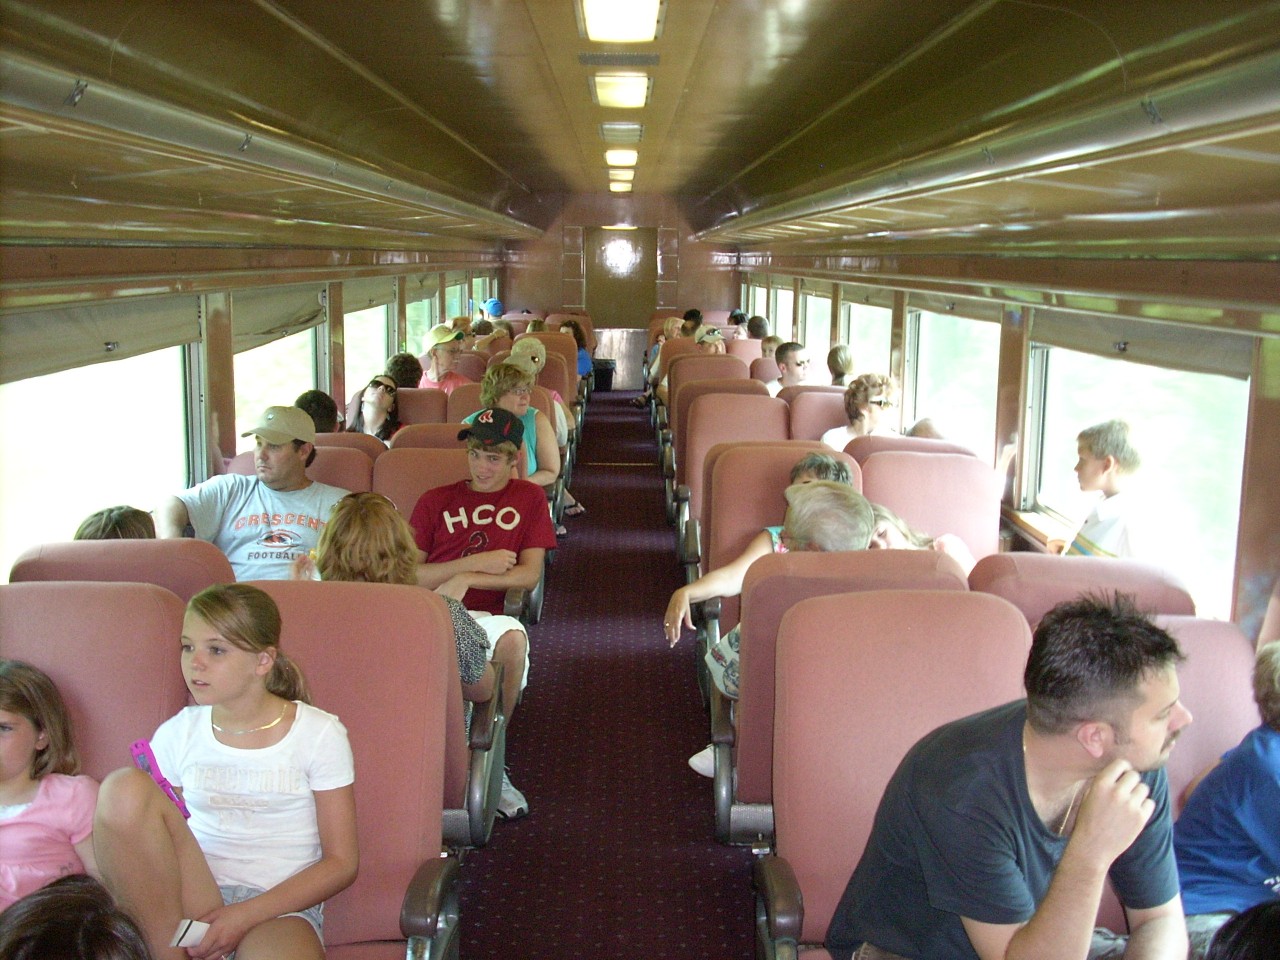 | I had the opportunity to ride the Ozark Zephyr in Branson, MO. Our ride went south - great scenery and two tunnels. Budd coach 461 caught my attention, because its luggage racks look near-identical to 1146's. Windows and seats look similar too. (Disclaimer - I don't know anyone in this photo.) |
Good news! I paid off the last of the Home Equity Line of Credit! (Bad news - the Ford and the Olds both want some attention.)
A friend pointed this out: 1146 made someone's trip journal: Jackson Street Roundhouse Visit 8/10/2009. She's about half way down, and rated two pictures because of her dual paint job.
Southern Pacific biz car Airslie is for sale on Ozark Mountain Railcar. This is the car 1146's NW Rail electrical panel was built for.
 | E-bay find: A Great Northern head rest cover. The logo and lettering are woven in - and appear correctly on both sides. The fabric is a surprisingly coarse cotton weave - almost a Denim. |
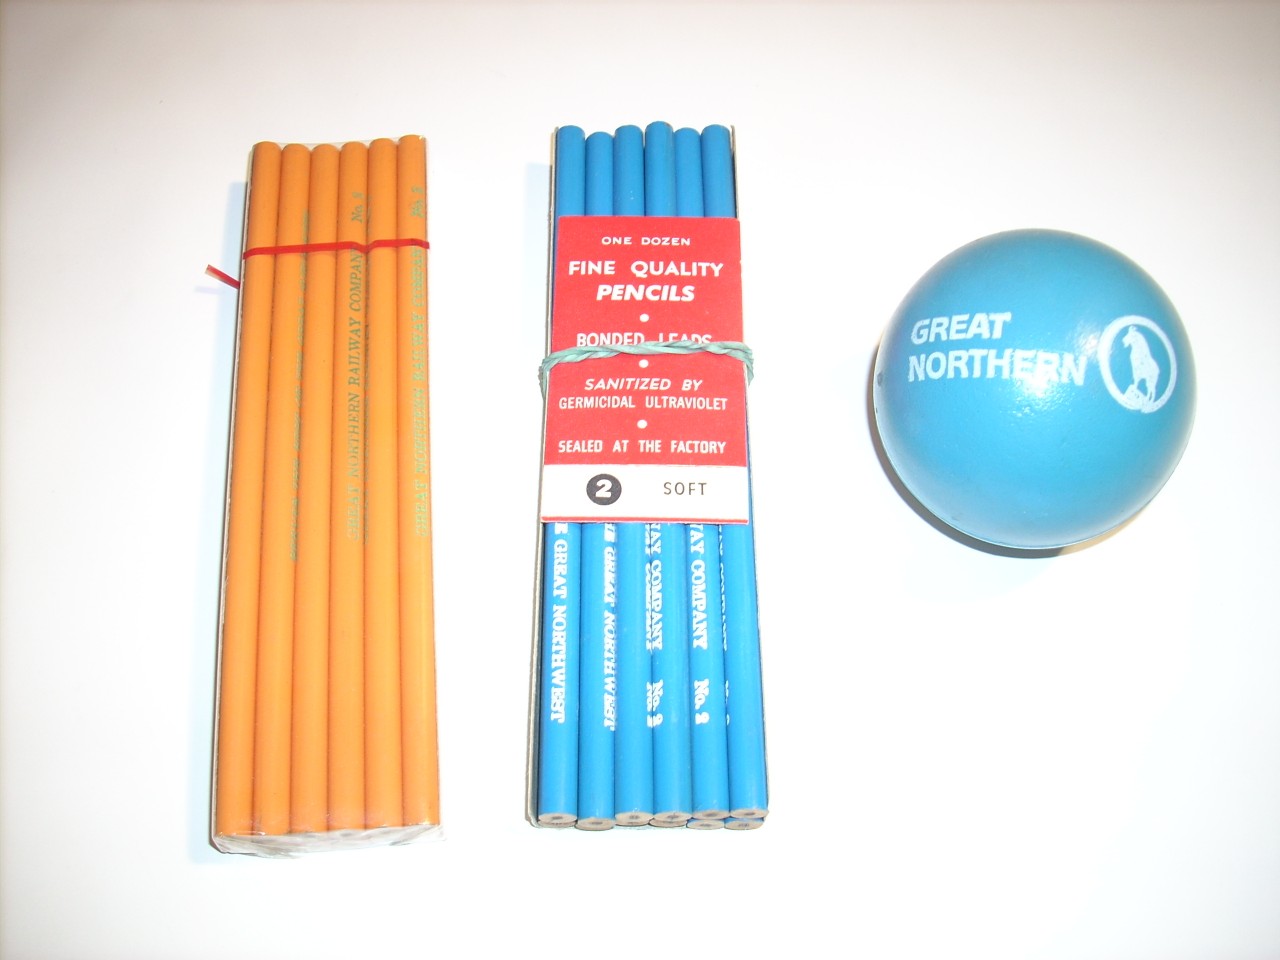 | E-bay find: GN pencils. There were also dark green with orange lettering, but I didn't win them. I speculate these would have been available for passengers, along with GN letterhead and notepads; or perhaps the waiter used them to record diner's orders. Stress balls have been around forever too, it seems. |
Purchased hardware to support the coach side walls - more to follow.
Found a 1950-vintage 3M Scotchlite manual on E-bay, complete with samples. Thought it was cool because that's about the time the GN switched from painted to Scotchlite pinstripes.
Several friends have asked, with concern, whether I got discouraged and gave up. I actually got over the side sill shock pretty quickly. The "issue" is this recession. My employer wants to fix business processes to reduce cost. In this day and age that involves us in Information Technology. At the same time IT doesn't bring in money, so they slashed our staff by 20%. I've been busy!
|
|
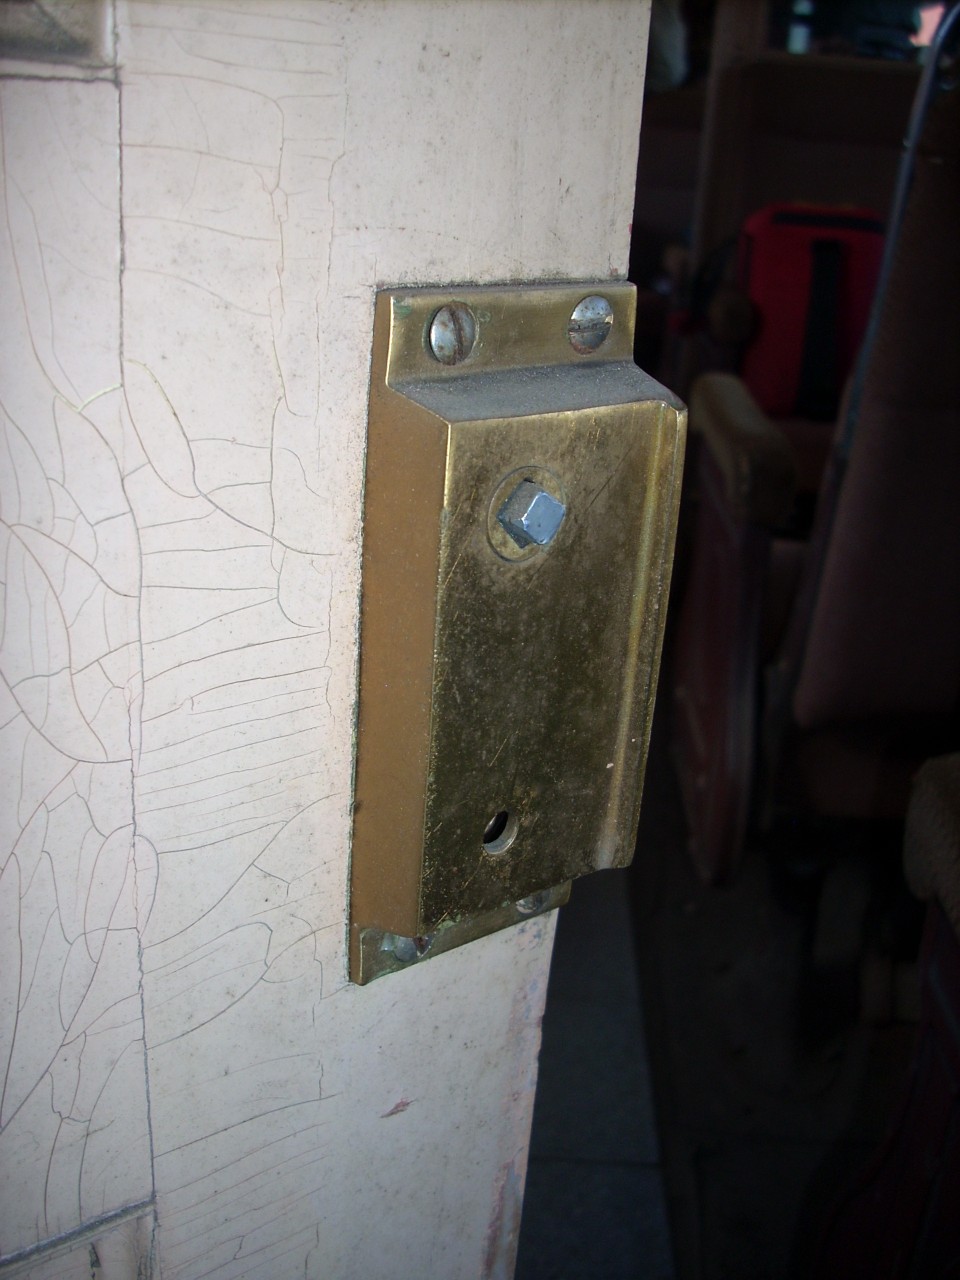
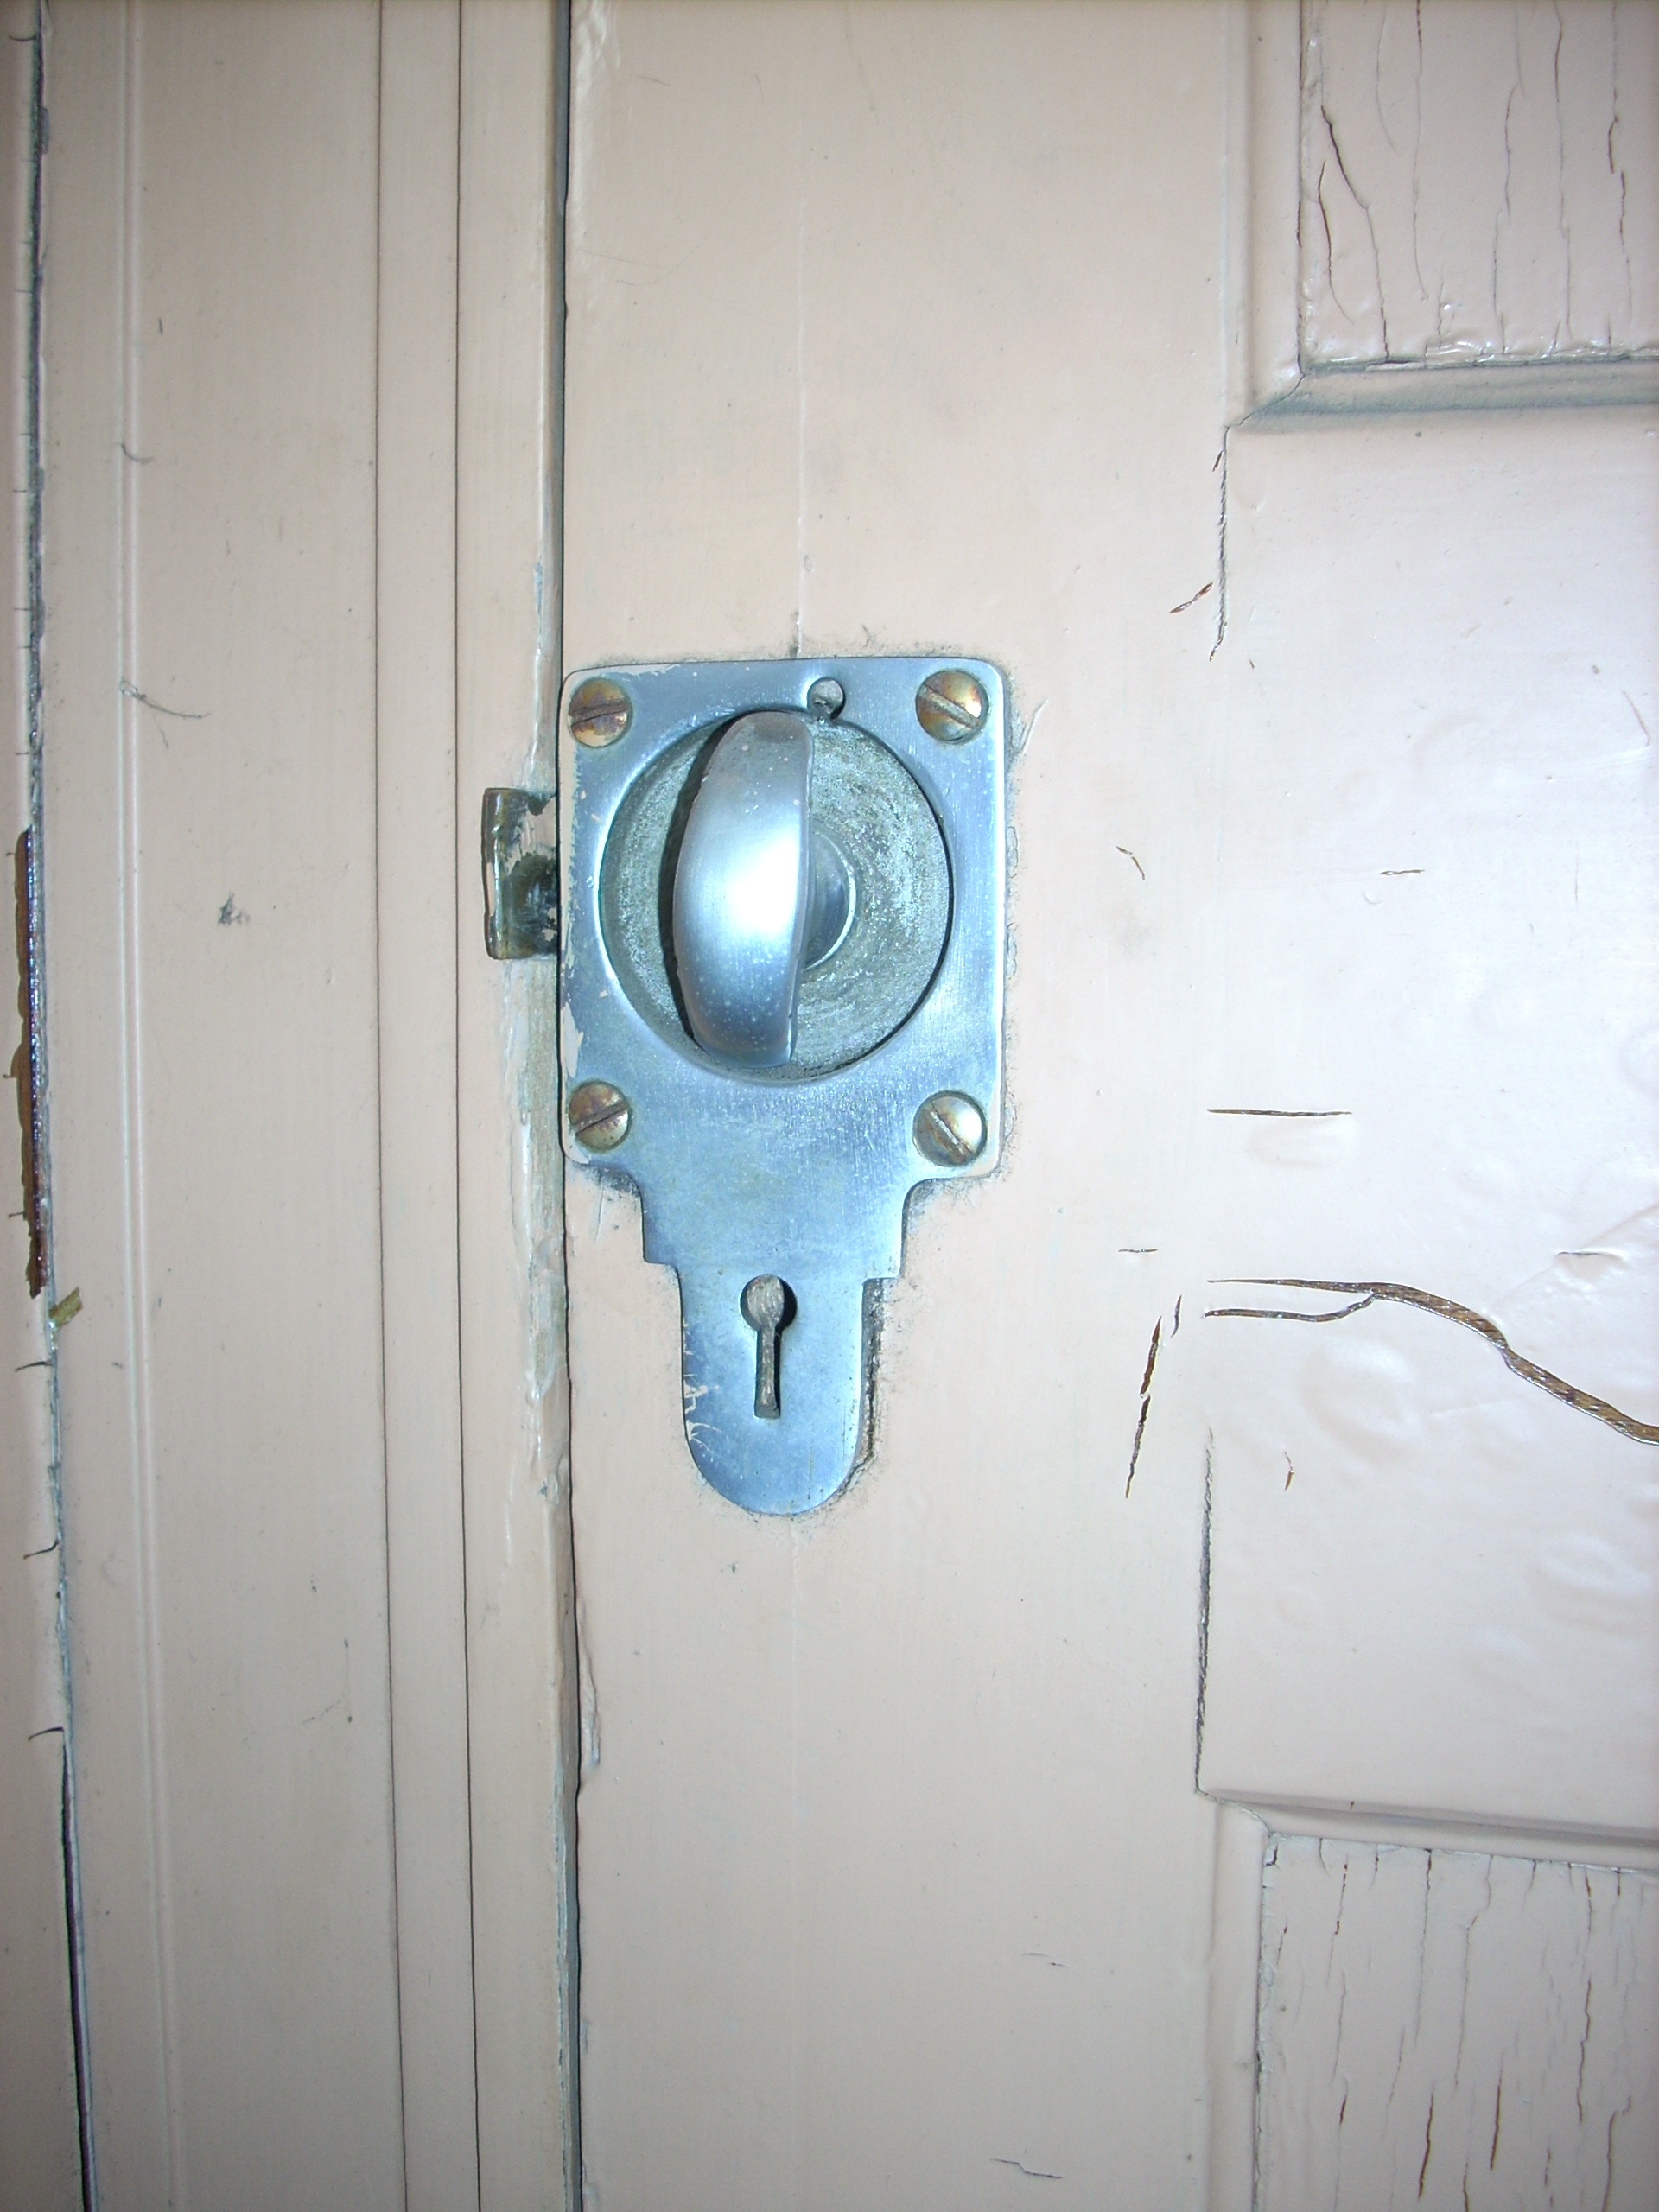
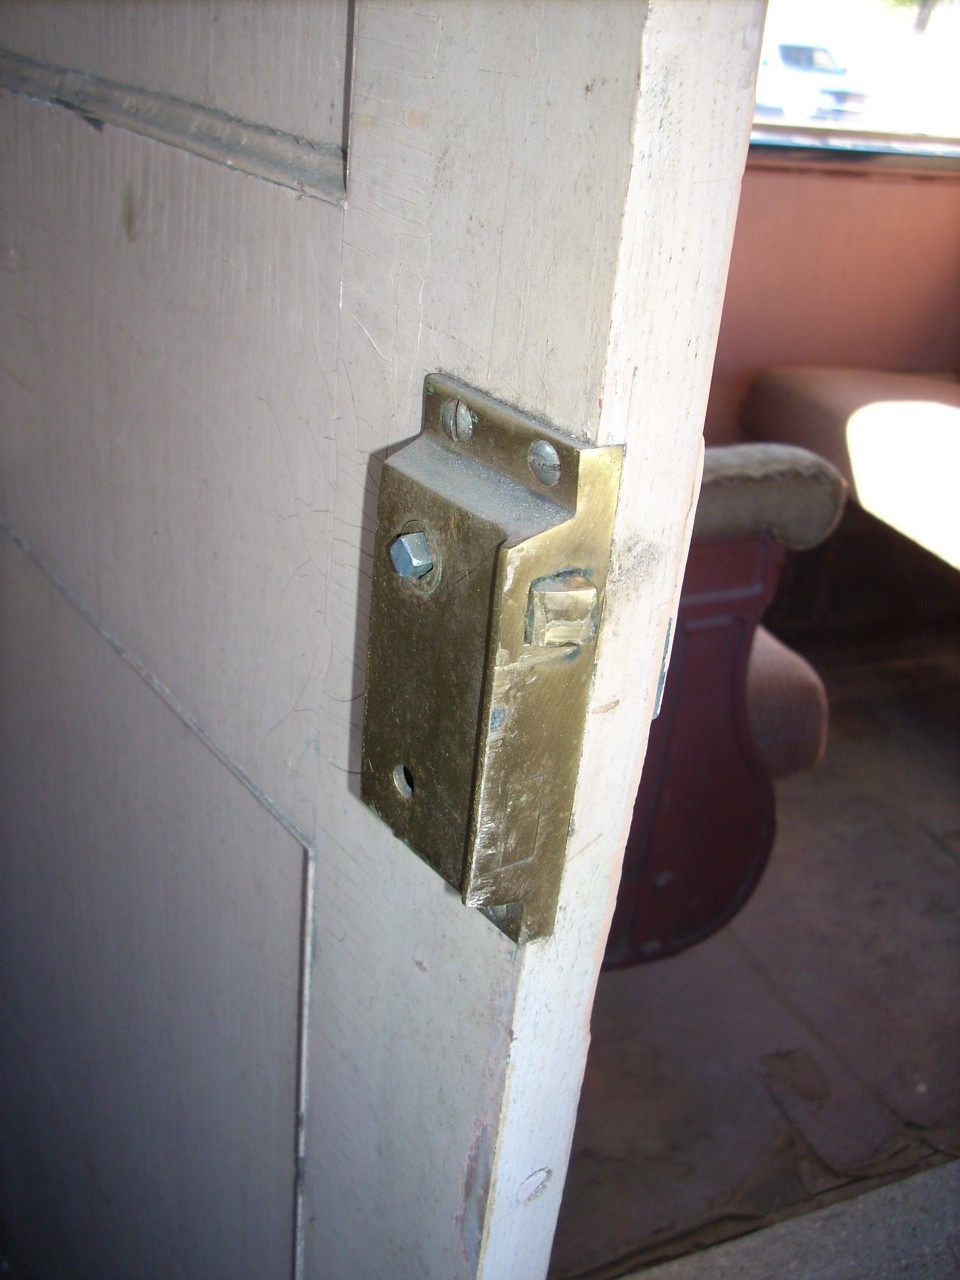
| So, I'm down in Iowa riding North Shore Interurban car 727 on the Iowa Traction, idly gazing at a closet door, when I realize the door hardware looks really familiar: It's identical to what I need for the Porter's closet in the hall. Only difference is it's right-hand, not left-handed. |
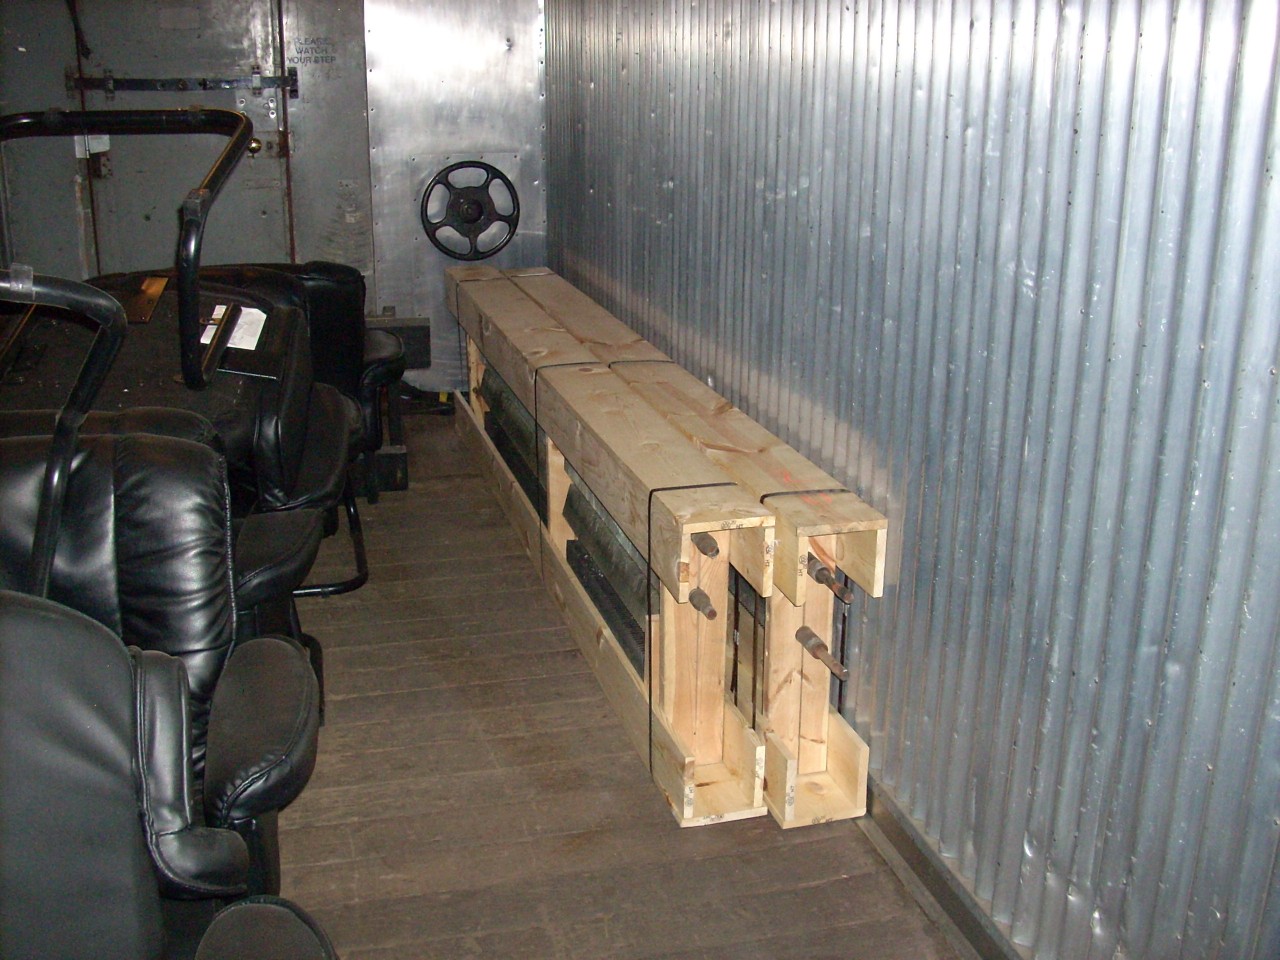 | Coach section steam heat radiation, boxed and delivered to the 4449 folks. Box details: 2x6 cored, split and screwed together to capture the pipes. 1x6's on sides and 1x8's top and bottom. Nailed with finish nails (they were handy) so I strapped them to hold everything together. Seen here in their baggage car behind 4449. |
I rode behind 4449 on it's Sunday trip to LaCrescent, and met up with a friend who's an Amtrak inspector and fellow car owner. We spent some time talking about 1146, his cars, and restoration in general. He offered some interesting opinions.
One was that electrolysis is not the major culprit in aluminum corrosion that it's made out to be - that aluminum can corrode on its own, without dissimilar metals nearby. He has a point: Except for the noble gasses, chemical reactions happen and materials change. I countered that I've most often found aluminum decay where iron and moisture are present: The bottom inches of 1146's interior door frames (the Plymetal edge was capped with a steel channel, then the decorative aluminum frame,) where steel grab irons were bolted to aluminum-sheathed cars, and where aluminum collision posts were riveted to steel end castings. Personally, I'd really like to inspect one of the aluminum & steel bi-level commuter coaches which Bombardier built for Toronto's GO Transit in the late 1970's. They apparently use a mica-based barrier tape to prevent electrolysis.
We also talked about aluminum composites (like Alclad) and aluminum's failure modes. 1146's interior door frames degenerated into a white powdery material. In the grab iron example, the aluminum became soft and spongy in a region spreading out from the steel: using a wire wheel in a grinder to clean the steel really dug into the affected aluminum, but not the surrounding good area. (He likened this to a cancer, and likes to remove the affected material, cap the good stuff with zinc chromate paint, then patch with Bondo.) In the aluminum collision post example, it got soft but almost appeared to be delaminating. The baggage car we were riding in was a UP car with 3/16" Alclad sides. We actually found some areas when steel hardware was attached, and the alluminum alloy core was more affected than the pure aluminum surface. The affected area was thicker and appeared to be delaminating.
For anyone with aluminum-sheathed cars: He noted that Alclad is notoriously difficult to weld. It will look good for a while but is prone to cracking in the weld area.
Another conversation topic was the wisdom of sandblasting Cor-Ten cars. He noted that the sandblasting causes Cor-Ten side sheets to bow outwards slightly. I've seen this too - 1146 is an example - if you sight down the side of the car it has a corrugated appearance, where the steel bows out between structural members. I'd suspected rust buildup between the structure and the skin, but his point sounds plausible: Sandblasting would work only the exterior surface, spreading it out slightly so that the exterior surface is larger than the interior surface, causing the sheet to curve.
I raised the idea of replacing an entire roof sheet, eave-to-eave and about 24" between the purlins - rather than just replacing the perforated bit at the eaves. My thinking is that it would be difficult to achieve a smooth curve at the joint. The roof sheet is quite thin, so a full sheet could be bent to fit with straps and welded to the purlins. He countered that it would be difficult or impossible to properly apply a rustproofing to the inside surface. (Sounds like a challenge, so I'm trying to think up a way to do it.)
We also talked about having aluminum extrusions reproduced. The issue we both see is the cost of having a die made: One is tempted to do a large run to amortize the cost, but that only works if there are other restorers willing to purchase the surplus. There's also the problem of storing it damage-free until a buyer is found.
A different friend encountered this same problem. He had his aluminum window shade tracks cleaned and anodized. One didn't "take" so he returned it for rework. The vendor lost it, and shrugged their shoulders about helping procure a new one. We discussed extrusion, milling from bar stock, or bending sheet. I thought a prototyping shop might be the best bet. He found an aluminum sheet supplier who also does basic cutting and forming. They estimated several weeks, but one of their guys took it as a personal challenge and had it done the same day. I haven't seen it yet but my friend is happy with it.
That same friend, who owns the aluminum car, used 3M 08505 "Fast and firm seam sealer" to seal leaks on his roof prior to painting. He reports that cracks opened up in the sealant, and rain water got into the car. That hasn't happened to me (I think...) so I'm not sure what the difference is. Perhaps aluminum has greater thermal expansion and contraction than steel. Perhaps its that I used 08300, not 08505. 3M has several similar products, some are oil-based and some water-based. Will have to do more research...
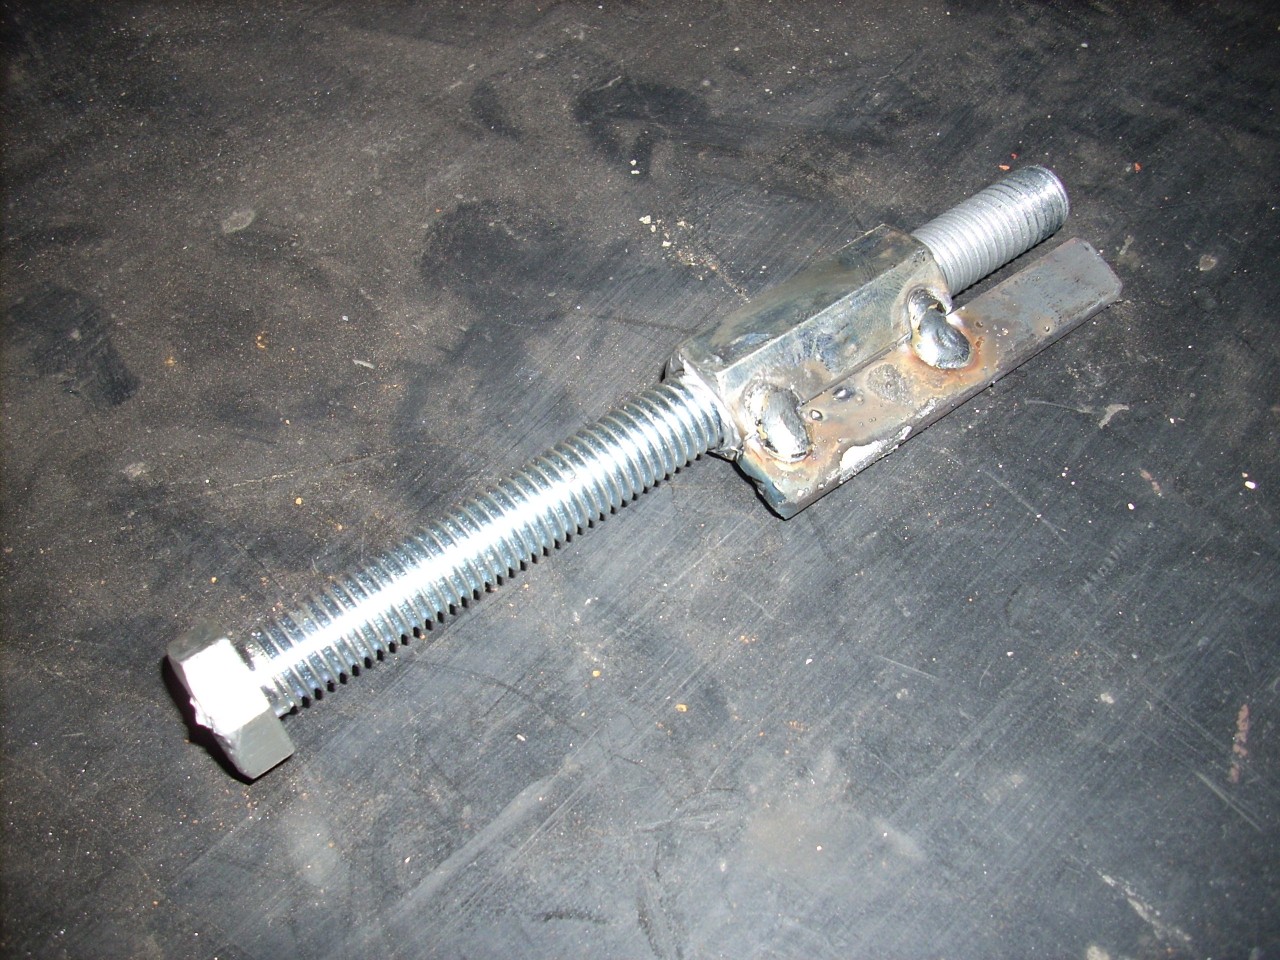 | I made up forty of these, to be tack-welded to the wall posts in the coach section where the radiators were. The bolt head will be at the bottom, touching the side sill. The idea is to be able to prevent (or correct) any sag of the walls until the side sills are repaired. |
I'm trying again with engineering services for structural repairs. This time, I've contracted with Starfire Engineering and Technologies, Inc. Their first task will be a site visit in November, to look at 1146. I want to meet their principle engineer in person and to discuss the various engineering tasks I have in mind. As a (software) engineer myself, I know how a visit to meet the people and see the issues firsthand helps me understand the issues and ask intelligent questions. Starfire proposed to work from pictures (to save me money) but I insisted.
Right now I plan to get the vestibule-end engineering done by spring and to spend next summer doing steelwork. For Starfire, this includes collision post repairs, handbrake relocation to clear Amtrak trainline recepticles, and possible modification of the end structure to incorporate them. Since I've already got the vestibule torn apart, I want to get it rebuilt before tearing into something else.
In future projects, I'll want Starfire to engineer the side sill repairs, adapt the vestibule repairs to the blind end, and possibly help with under-car weight distribution.
Mr. Spurlock from Starfire visited on the 17th. We spent about half the day looking at 1146 and discussing my plans. He took several pictures for his reference, and was very pleased to see the ACF construction blueprints and bill of materials. I also showed him the welding equipment and shop facilities which are available. We finished by pulling the blueprints he needs to support the vestibule-area engineering. At his suggestion, I'm going to get them all scanned for preservation and ease of access.
Mr. Spurlock worked for the BN engineering department in the 80's, and when they disposed of old drawings he was able to nab them. Therefore, he recorded the casting numbers on 1146's truck frames, truck bolsters, and end castings - chances are good he has the drawings. He said he also has the GN passenger car spring diagrams, which will simplify 1146's truck work once the body and mechanical work is done.
In conversation, he mentioned an ASTM spec for structural tubing which he likes: A847. It came up in the context of side sill repairs. Like Cor-Ten steel, it is a high-strength, low-alloy steel with some corrosion resistance.
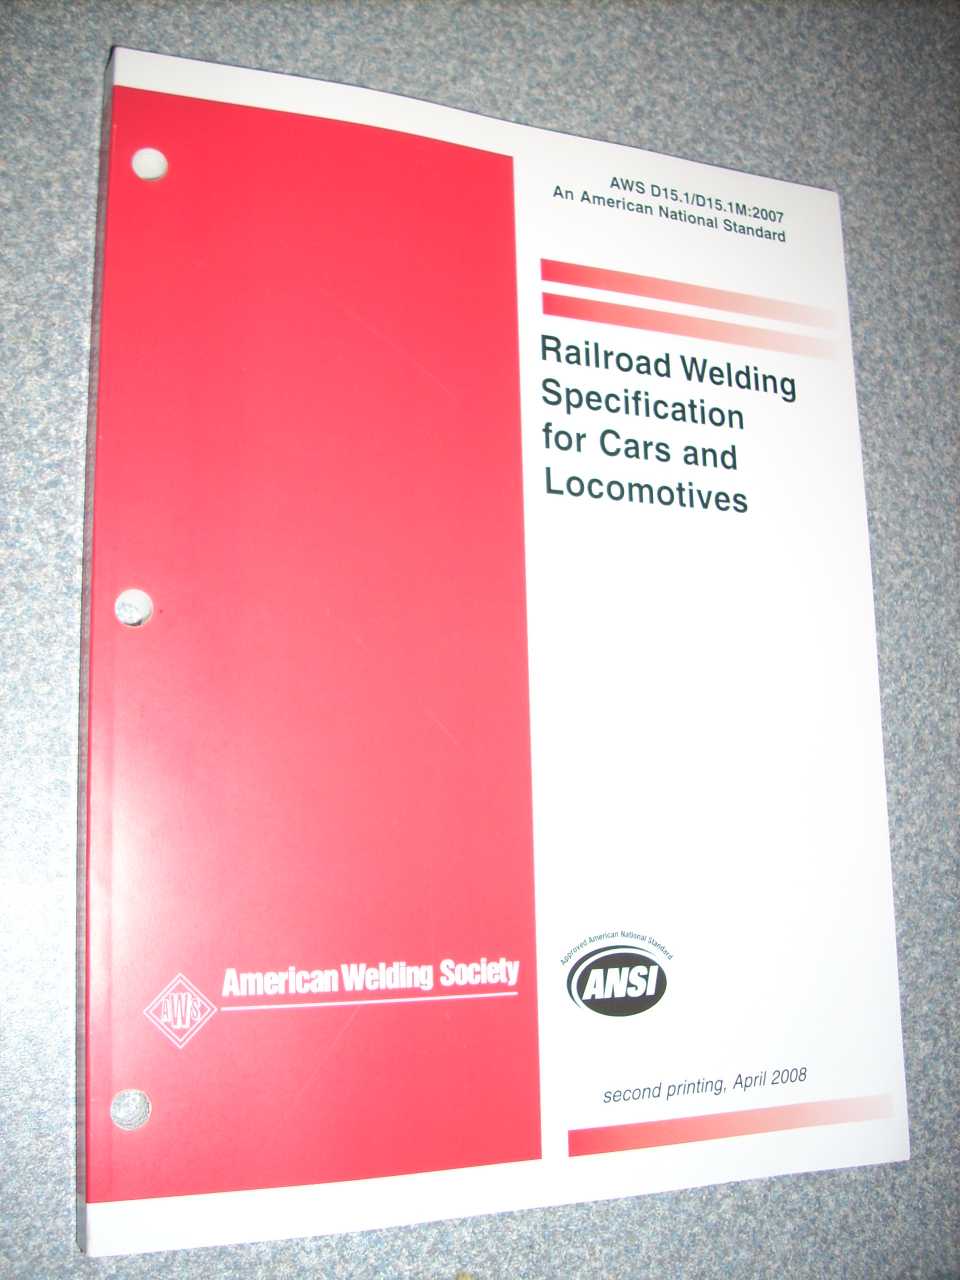 | Regarding structural welding on 1146, he said that the specifications come from the American Welding Society. Specification D1.1 is the structural welding code, used for bridges and buildings. Specification D15.1 is the railroad welding specification for cars and locomotives. (Interestingly, transit agencies use D1.1.) Both are available from the AWS' online store and I've ordered a copy of D15.1. |
This is not new news, but worth mentioning: Ozark Mountain Railcar has opened an ebay store for parts. A friend has found some parts he needed there. I like having a "virtual store room" to root through.
The following two photos are courtesy of John Ryan Photography. He's a friend of a friend who I've recently gotten to know, and a pretty darn good photographer. Used with permission.
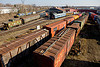 | Jackson Street Roundhouse, from the bridge. |
 | Evening approaching. |
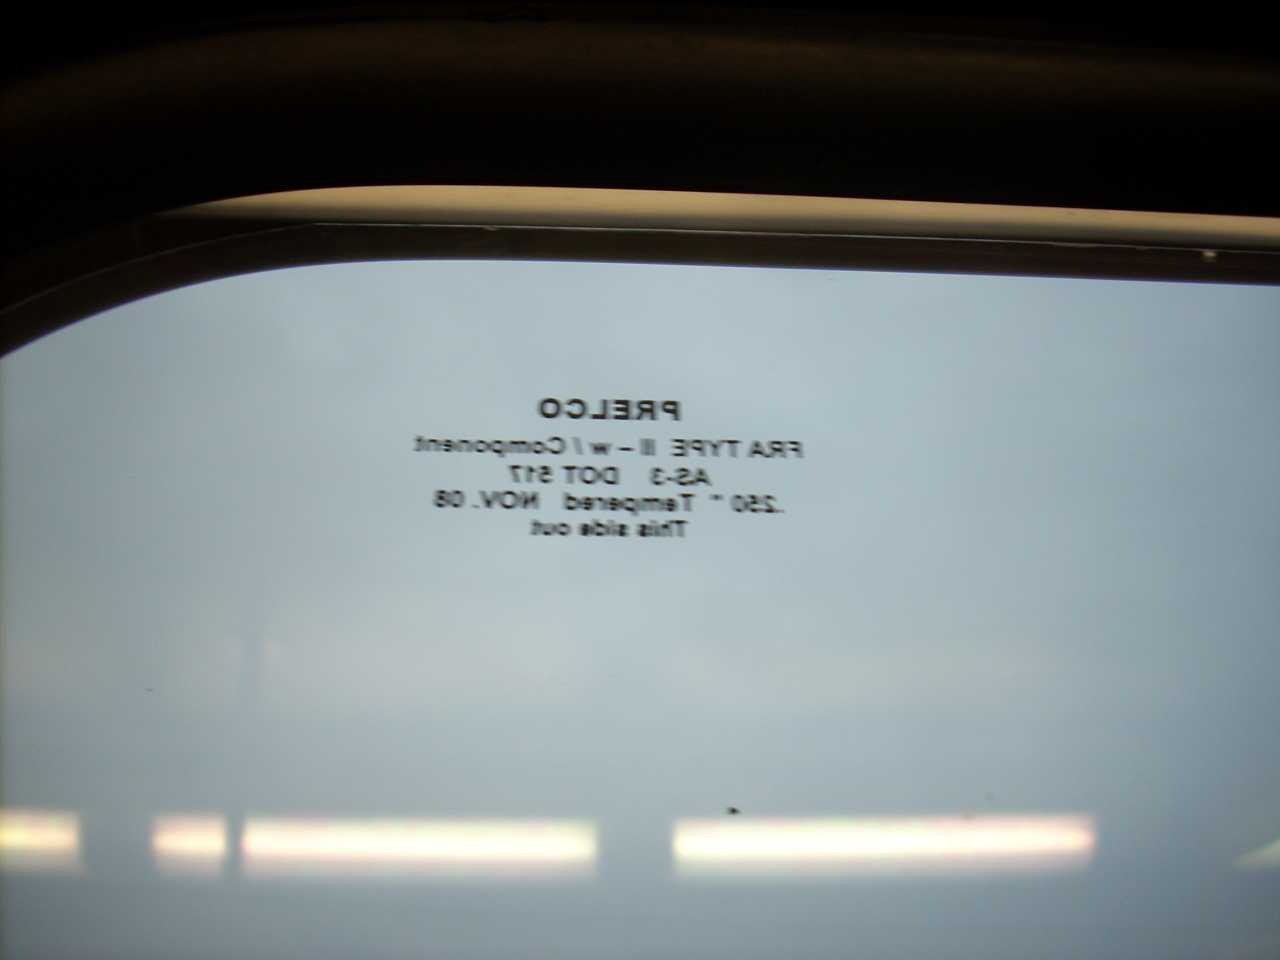 | For the first time in 100 years, the Twin Cities have commuter rail. The coaches are by Bombardier, and I was very interested that the windows are double-pane glass instead of plastic, with a stick-on plastic sheet inside to capture splinters caused by rock hits. The bug in the corner says "PRELCO | FRA TYPE II - w/Component | AS-3 DOT 517 | .250 " Tempered NOV. 08 | This side out". That would be glass manufacturer Groupe PRELCO, of Canada. Look under transporation glass-->railroad. |
Searching for something else, I discovered that the ACF Industries Archival Collection of the John W. Barriger III National Railroad Library contains a box (S6 #5,6) of correspondence and other material concerning the Great Northern's "Internationals" and "Red River" of 1950 and another box (S6 #7,8) concerning the 1951 "Empire Builder". See ACF Collection 1-14.pdf. I will have to visit some day.
A friend found truck diagrams which we believe are correct for 1146. In addition to drawings of the main castings, there are details of the wear liners for the pedestals, the correct shape of the drop-equalizer bar ends, the sprung side bearings, and the center bowl. When the day for the 40-year truck overhaul comes, these should be valuable.
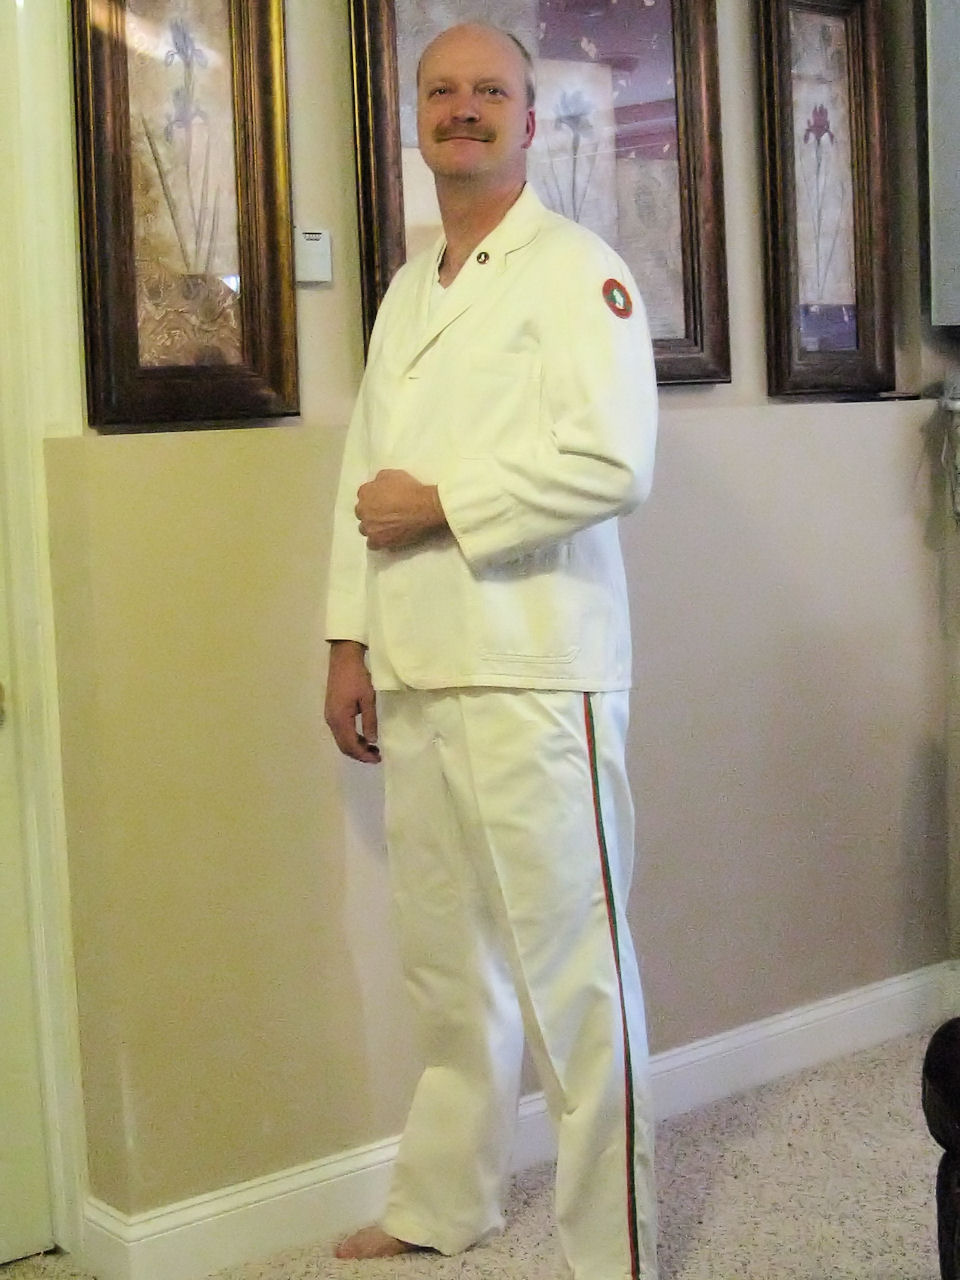
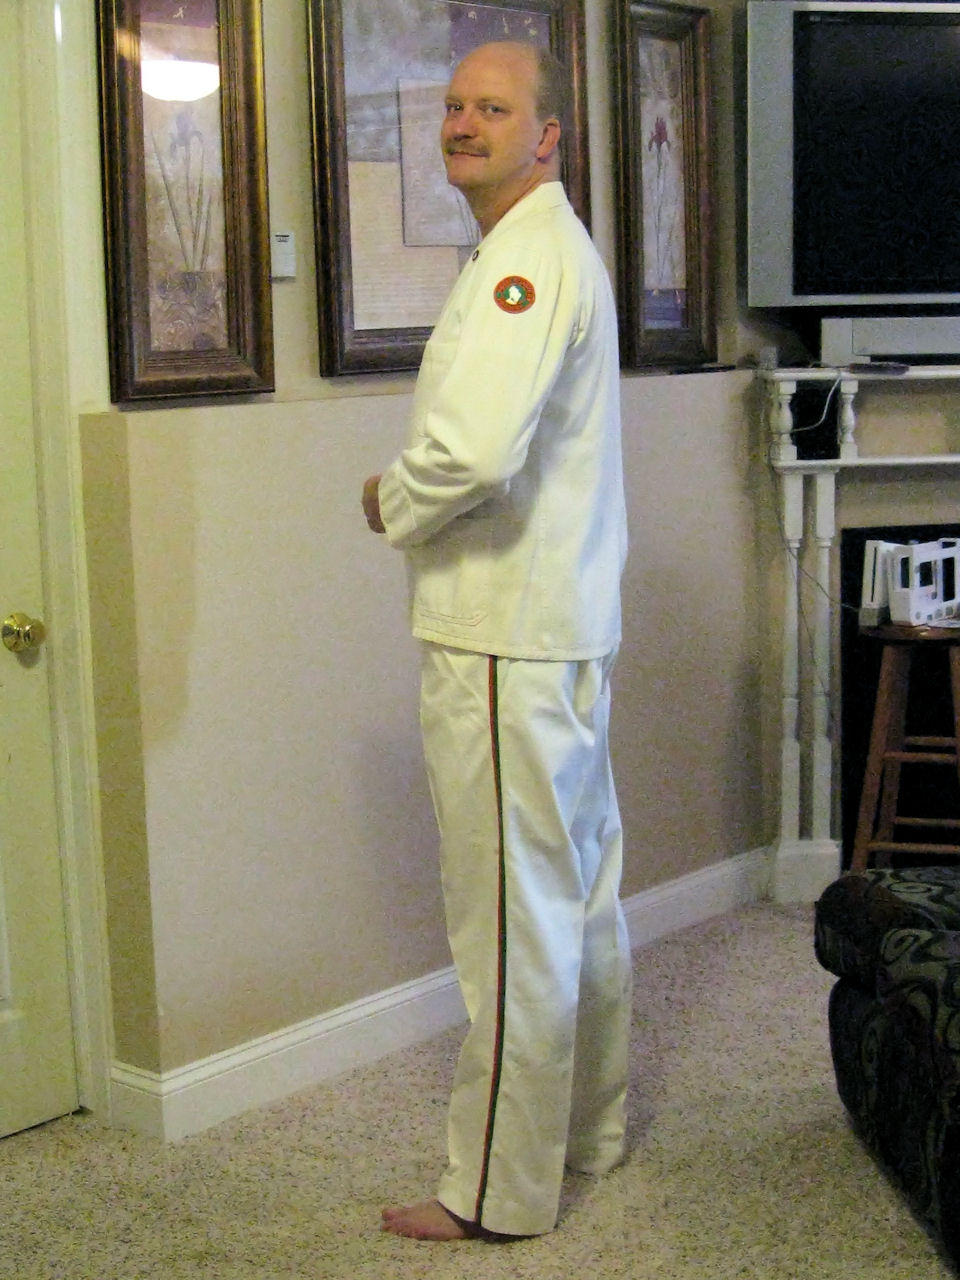
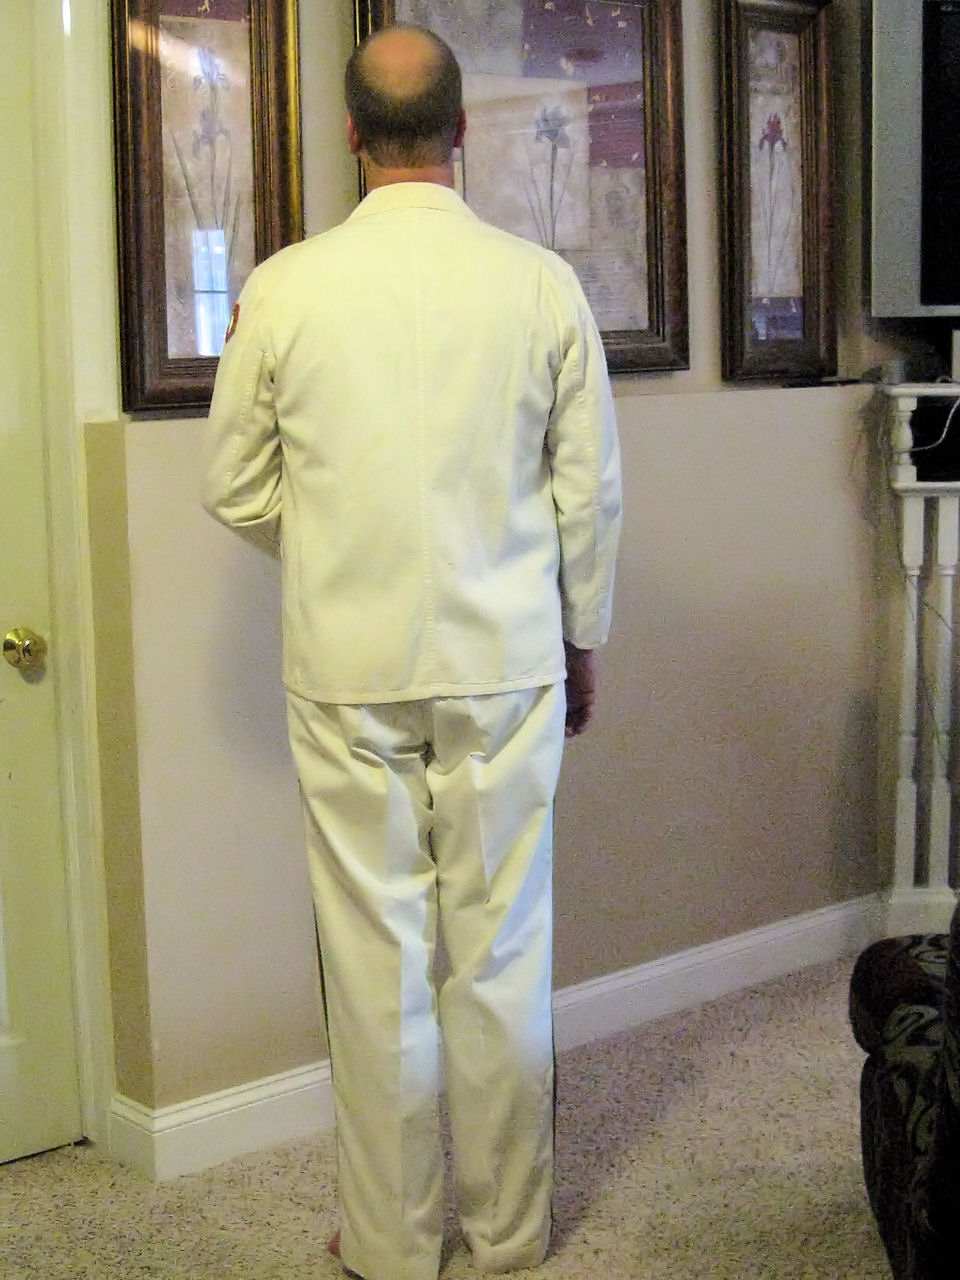
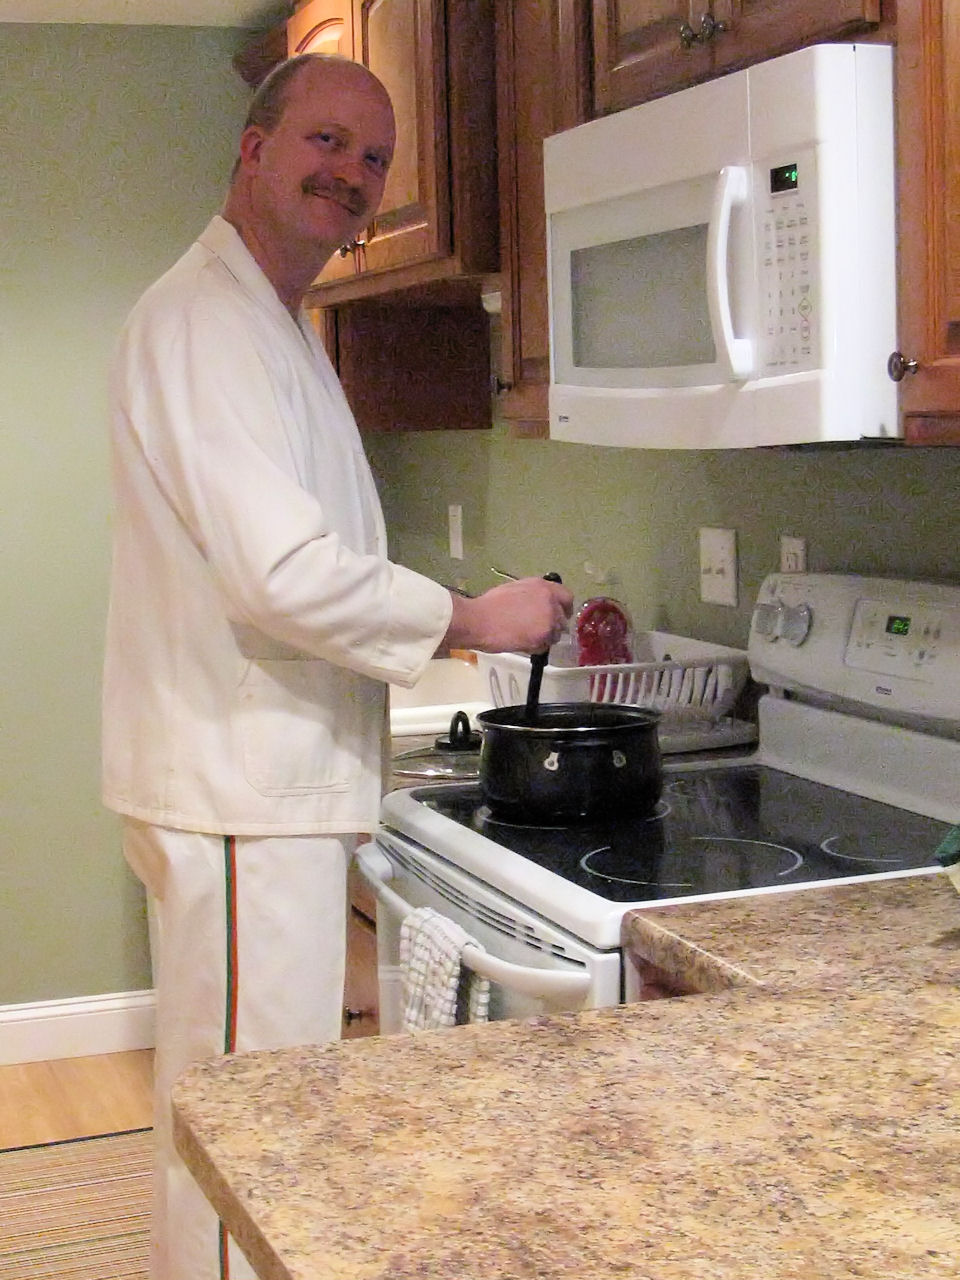
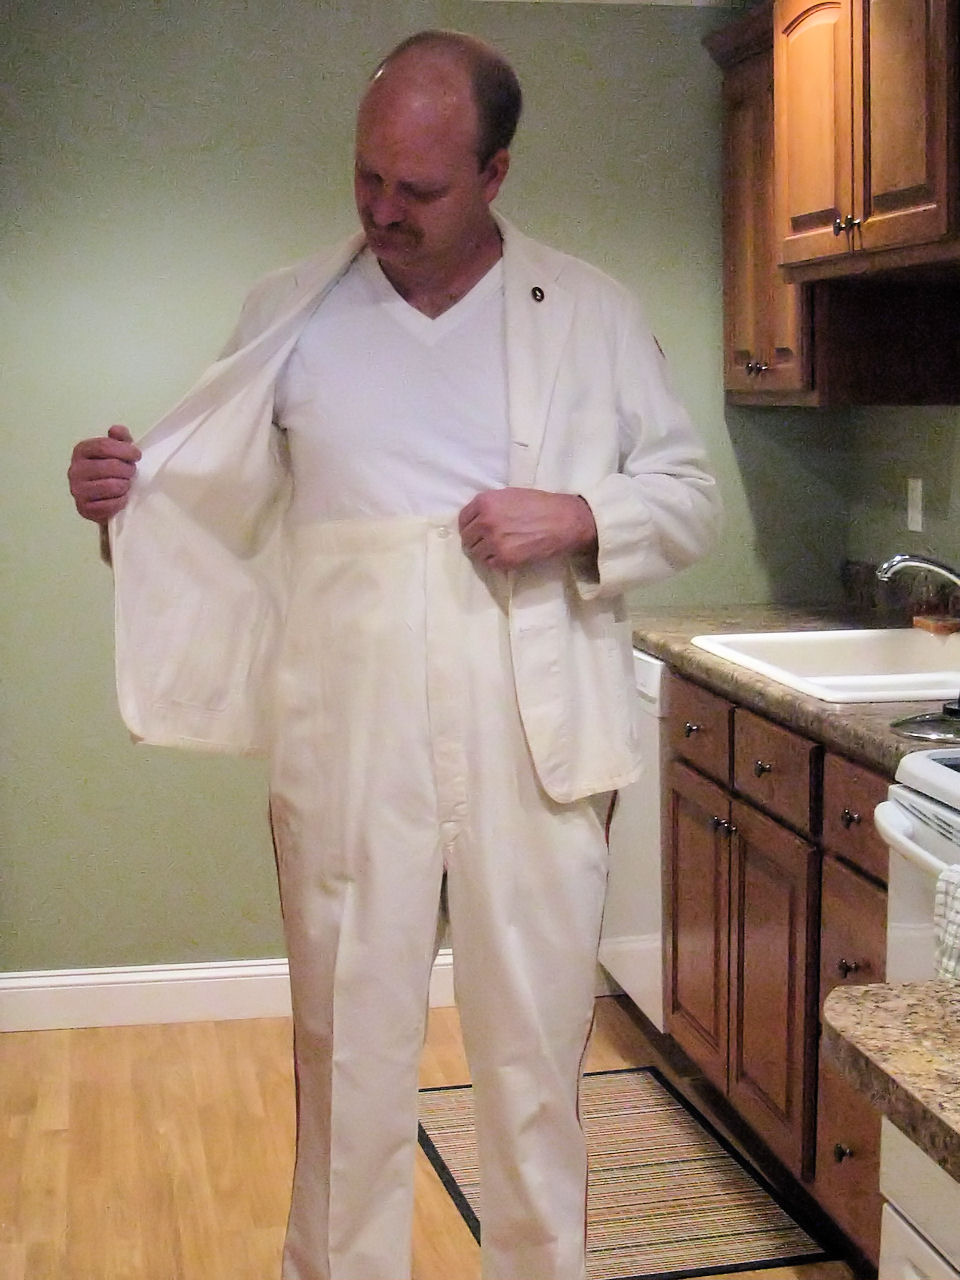
In the following, I'm modeling a GN dining car staff uniform. Friends who actually worked in GN dining cars tell me this is a cook's uniform - rather than a waiter's or steward's. (Compare with the waiter's jacket I found last June.) Looking at pictures, it seems the GN changed styles a few times. This style was probably contemporary with the Empire Builder colors. Notice the very high waist on the pants - there are buttons inside the waist for suspenders. Two pair in front, and two single in back. The jacket has no buttons - they used cufflink-style removable buttons. I should also have black or brown dress shoes and a white, cylindrical, flat-topped hat. I found this uniform on ebay a few months back.
Interesting technical note: The label of the jacket says "100% Cotton - Sanfordized". I got curious and learned it is a trademark for textile shrinkage control. Essentially, it was pre-shrunk.
 |
 |
 |
 |
 |
The APA (formerly American Plywood Association) put out this basic information on causes and prevention of wood decay. Site registration required to download. Most interesting was the deterioration zones chart - Minnesota is in zone 2 (moderate risk,) but 1146 spent a decade or more in zone 5 (severe risk) with roof leaks and leaking window gaskets. Streamlined passenger cars were commonly built with Masonite or aluminum-faced plywood walls, so fungal decay is a concern.
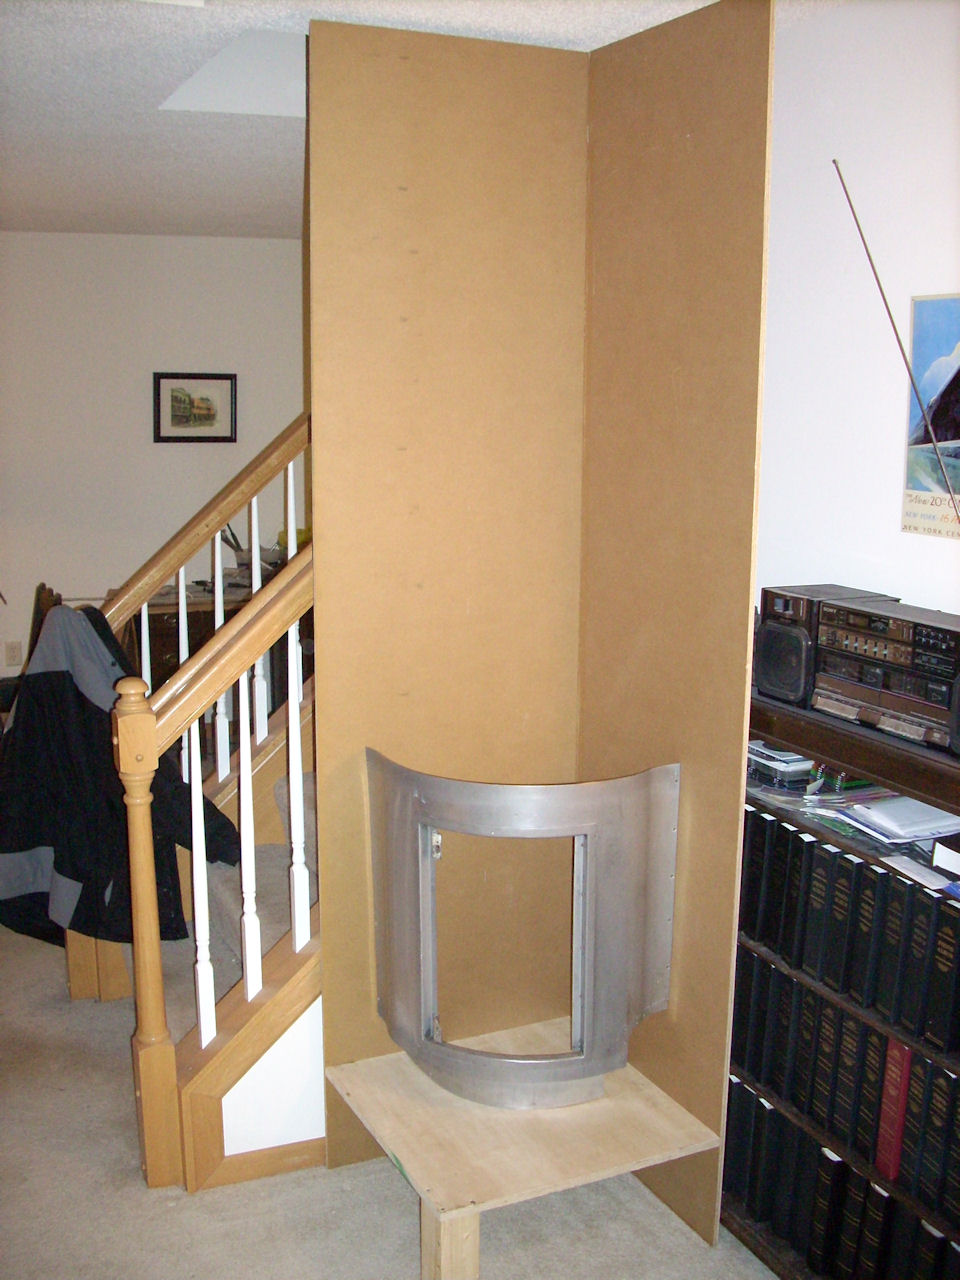 |
I dug out something I'd started back in January 2008. Right now I'm building the "floor". I'm going to saturate the 3/4" plywood "floor" with MinwaxWood Hardener - something I've used before to seal the wood against moisture. Then I'm thinking to put down 1/4" HardieBacker and to finish with glazed ceramic tile. The original was fired clay quary tile, but I believe glazed ceramic will absorb less water. I asked my Dupont sales rep about a good sandable primer-filler for the paper-faced MDO plywood, and a satin-finish topcoat, which combined would not absorb restroom moisture into the wood. He recommended Corlar 25P epoxy primer and Imron 3.5 ST paint - same as I've used on car exteriors but with slightly less shine. Other sources recommend a glossy finish in a restroom, because glossy finishes are less absorbant and easier to clean than flat finishes. If anyone wants, I'd be happy to try a different paint combination on the men's mock-up, to compare with the Corlar/Imron. |
I found a stainless grab iron in Ozark Mountain Railcar's parts department for the BR corner that is almost perfect - just 1/4" too short. I'll bend it to fit, and it will look better until I can find an exact match.